嵌入式 Connect
当用户尝试将 AdSense 与您的平台相关联时,嵌入式 Connect 可减少摩擦,并改进转化漏斗。
Embedded Connect 是一个小型 JavaScript 库,可确定给定用户的最佳起点,并引导他们完成自定义的 AdSense 注册流程,帮助他们完成所有必要步骤,以便开始投放广告。它可处理多种场景,包括确定用户是否拥有 AdSense 账号、是否已签署 AdSense 条款及条件、是否已将您的平台网站添加到其 AdSense 账号,以及网站的状态是否为“已准备就绪”。
嵌入式 Connect 与Google 管理的用户体验选项搭配使用时,还可以处理向用户显示账号和网站状态时涉及的用户体验,引导用户前往 AdSense 中的正确位置来解决任何潜在问题。
为了改善开发者体验,该库还会向您的平台发出包含用户的 AdSense 发布商 ID 的回调,此 ID 是正确设置广告投放所需的信息。
嵌入式 Connect 提供两种用户体验选项:
- Google 管理的用户体验。使用嵌入式 Connect 微件,该微件用于管理所有用户体验。该 widget 将帮助用户完成注册流程,并在 widget 中显示与其账号和网站状态相关的用户信息。此选项会在用户首次关联 AdSense 账号时触发包含 AdSense 发布商 ID 的回调。
- 自定义用户体验。使用嵌入式 Connect
adsenseEmbeddedConnect.connect(...)方法,该方法会在新窗口中触发注册流程。此选项会提供一个包含 AdSense 发布商 ID 和访问令牌的回调,该令牌可用于使用 AdSense Management API 从 AdSense 账号中提取其他信息。若选择此选项,您需要自行设计用户体验。
实现嵌入式 Connect
如需使用嵌入式 Connect,您需要按照以下步骤操作:
- 在 Google Cloud 中创建项目(或使用现有项目)
- 创建 OAuth 客户端 ID
- 配置您的 OAuth 客户端 ID,以便与嵌入式 Connect 搭配使用
- (可选)自定义 OAuth 同意屏幕
- 将嵌入式 Connect JavaScript 库添加到页面
- 实现嵌入式 Connect 代码
第 1 步:创建新的 Google Cloud 项目(或使用现有项目)
如果您已有 Google Cloud 项目,可随意使用该项目。否则,请按照以下指南设置新项目:
https://cloud.google.com/resource-manager/docs/creating-managing-projects
第 2 步:创建 OAuth 客户端 ID
Google Cloud 项目将具有可供您使用的默认 OAuth 客户端 ID。您可以依次前往 API 和服务 > 凭据,找到该凭据。
如果您想创建专用 OAuth 客户端 ID,请按以下步骤操作:
- 依次前往 API 和服务 > 凭据
- 点击页面顶部的“+ 创建凭据”,然后选择“OAuth 客户端 ID”
- 您的应用类型将为“Web 应用”
- 为您的客户端 ID 命名,然后点击“创建”
第 3 步:配置 OAuth 客户端 ID 以便与嵌入式 Connect 搭配使用
确定要用于嵌入式 Connect 集成的 OAuth 客户端 ID 后,您需要对其进行配置。
请按照以下步骤操作:
- 在“凭据”页面中,点击要配置的客户端 ID 对应的铅笔图标
- 在已获授权的 JavaScript 来源部分中,添加允许使用您的客户端 ID 发出请求的 URI。通常,您需要添加开发服务器和本地环境的 URI(例如 https://dev.example.com 和 http://localhost:5000)。您还应为生产环境添加 URI(例如 https://example.com)
(可选)第 4 步:自定义 OAuth 同意屏幕
用户可以在 OAuth 权限请求页面中授予您的客户端 ID 访问其 AdSense 数据的权限。这是 Embedded Connect 工作原理的重要组成部分。您可以自定义此屏幕,以添加平台名称、徽标等内容。请访问 OAuth 同意屏幕页面,配置您的自定义内容。点击页面顶部的“修改应用”,然后按照向导操作。
第 5 步:实现嵌入式 Connect JavaScript 库
此库包含用于发起嵌入式连接的各种方法,并为您提供检索和忘记用户的发布商 ID 所需的回调。将其实现在页面标头中。
对于 Google 管理的用户体验:
<script src="https://www.google.com/adsense/js/embedded-connect.js?load=initEmbeddedConnect&hl={language}" async defer></script>
对于自定义体验:
<script src="https://www.google.com/adsense/js/embedded-connect.js?load=initEmbeddedConnect&hl={language}&headless=true" async defer></script>
确保为传入 load 参数的 JavaScript 函数名称提供实现。当 adsenseEmbeddedConnect API 可供使用时,系统会调用该函数。
脚本标记属性
请注意,在上面的示例中,我们为脚本标记设置了几个属性。以下是每个属性的说明。
src:嵌入式 Connect API 的加载网址。该网址可能包含多个查询参数,如下所述。async:要求浏览器异步下载并执行脚本。执行完毕后,脚本会调用使用load参数指定的函数。defer:设置后,浏览器会在解析网页的同时下载嵌入的 Connect JavaScript,并会在网页解析完毕后执行该 JavaScript。
src 参数
src 属性包含启动嵌入式 Connect 所需的多个查询参数。请参阅下文,了解每个参数的用法。
load是全局 JavaScript 函数的名称,该函数将在 API 完全加载后调用。您可以为此函数选择任何名称。hl用于指定要用于所有本地化内容的语言,包括注册弹出式窗口中的文本。这是一个可选查询参数,如果不存在或 AdSense 不支持相应语言,该微件将默认使用英语(美国)。请参阅 AdSense 支持的语言。hl参数值必须遵循 BCP 47 标准,例如,对于英式英语用户,该字符串将为en-GB。headless=true表示将使用“自定义用户体验”选项(而非 Google 管理的用户体验)与嵌入式 Connect 搭配使用。
现在,您已在 Google 管理的用户体验和自定义用户体验之间做出了选择,接下来请参阅下方每种方法的代码示例。
第 6 步:实现嵌入式 Connect 代码
如上所述,用户体验有两种形式:
选择最符合您平台需求的实现选项。
Google 管理的用户体验
请按照以下步骤让 Google 呈现该 widget,以触发注册流程并向用户显示与其账号和网站状态相关的信息。
Embedded Connect 代码由两个组件组成。第一个是空的 <div>,用于指定嵌入式 Connect 应在何处呈现注册 widget。第二个是用于设置配置和管理回调的代码。
嵌入式 Connect 微件呈现的 HTML 元素
将以下 HTML 代码放在您希望嵌入式 Connect 微件呈现的页面上:
<div id="adsenseEmbeddedConnect"></div>
嵌入式 Connect 代码
接下来,在嵌入式 Connect 库下方但在 div 元素上方放置配置代码:
function initEmbeddedConnect() {
adsenseEmbeddedConnect.init({
// <div> to show the Embedded Connect widget in
'divId': 'adsenseEmbeddedConnect',
// OAuth client ID from step 2
'clientId': 'xxxxxxxxxxxxxxxxxxxx.apps.googleusercontent.com',
// Access token from the Google Identity APIs, see
// https://developers.google.com/identity/oauth2/web/guides/use-token-model
// Use the following scope when requesting the access token:
// https://www.googleapis.com/auth/adsense.readonly
'accessToken': 'xxxxxxxxxxxxxxxxxxxxxxx',
// Login hint, an optional parameter which suppresses the account
// chooser and either pre-fills the email box on the sign-in form,
// or selects the proper session (if the user is using multiple
// sign-in)
'loginHint': 'user@example.com',
// Child site (which is added to AdSense as part of the Embedded Connect flow)
// Consult with your account manager to ensure this value is set correctly for your platform
'siteUrl': 'site.example.com',
// Optional parameter, the publisher ID of the user.
// When set, the Embedded Connect widget will display the state of the user's AdSense account.
// When unset, the Embedded Connect widget will show the default state which triggers the connection flow.
'publisherId': "pub-0000000000000000",
'onConnect': function(pid) {
// Your custom code to send the publisher ID (pid) to your server for it to be saved.
// The onConnect function is called when the user has completed all the onboarding steps
},
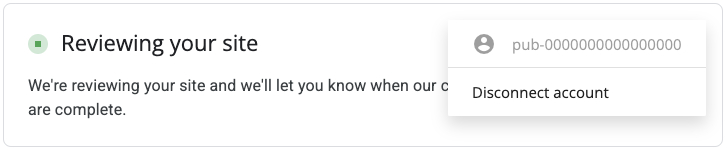
'onDisconnect': function() {
// Your custom code to forget the publisher ID.
// This onDisconnect function is called when the user has clicked the "Disconnect" button in the Embedded Connect widget
},
});
};
截屏记事
嵌入式 Connect 微件有四种主要状态:
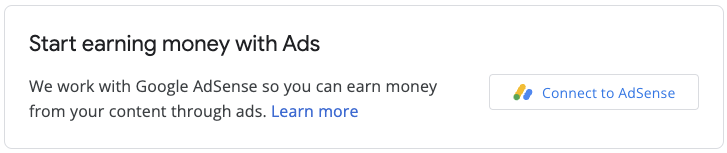
- (默认)关联到 AdSense
- 连接到 AdSense
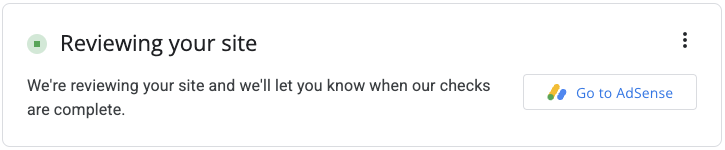
- 审核网站信息
- 系统检测到一些问题
1. (默认)关联到 AdSense
这是默认状态,当嵌入式 Connect 代码中不存在 publisherId 字段时,系统会向用户显示此状态。它会启动连接流程(弹出式窗口),并在用户成功完成该流程后触发 onConnect 回调。
2. 连接到 AdSense
当用户发起连接流程(并且弹出式窗口显示)时,系统会向用户显示此状态。关闭弹出式窗口或完成流程后,此状态会更改为其他状态之一。

3. 审核网站信息
向 AdSense 提交新网站后,系统会进行审核流程。在此期间,广告无法投放。
审核流程的重要组成部分是所有权检查,您可以通过多种方式通过此检查,包括:
- ads.txt 文件中包含子账号发布商 ID
- 子账号发布商 ID 出现在用户网站上的广告代码中
- 用户的网站上存在 google-adsense-child-account 元标记。为了取得最佳效果,请确保该链接位于用户网站的首页上。
最佳方法取决于您的网址结构和一些其他因素。请咨询您的客户经理,了解适合您平台的最佳方法。
4. 系统检测到一些问题
如果用户的账号或网站存在任何需要解决的问题,系统会向用户显示此状态。


自定义用户体验
如果您想自行管理用户体验,并使用 API 调用手动触发注册方法,请按以下步骤操作。
嵌入式 Connect JavaScript 库
如需使用“自定义用户体验”选项,您需要在 src 属性中设置 headless=true 参数。例如:
<script src="https://www.google.com/adsense/js/embedded-connect.js?load=initEmbeddedConnect&hl={language}&headless=true" async defer></script>
提供连接和断开连接按钮
adsenseEmbeddedConnect API 可供使用后(通过传递到 load 参数的 JavaScript 函数进行验证),请提供用于连接和断开与 AdSense 的连接的实现。例如,通过提供两个按钮:
<button onclick="connectAdSense()">Connect to AdSense</button>
<button onclick="disconnectAdSense()">Disconnect account</button>
根据您是否保存了用户的发布商 ID,您可以选择要显示哪个按钮。
连接代码
function connectAdSense(){
    adsenseEmbeddedConnect.connect({
        // OAuth client ID
        'clientId': 'xxxxxxxxxxxxxxxxxxxx.apps.googleusercontent.com',

        // Access token from the Google Identity APIs, see
        // https://developers.google.com/identity/oauth2/web/guides/use-token-model
        // Use the following scope when requesting the access token:
        // https://www.googleapis.com/auth/adsense.readonly
        'accessToken': 'xxxxxxxxxxxxxxxxxxxxxxx',

        // Child site (which is added to AdSense as part of the Embedded Connect flow)
        // Consult with your account manager to ensure this value is set correctly for your platform
        'siteUrl': 'site.example.com',

        'onConnect': function(response) {
            // Your custom code to send the publisher ID (response[publisherId]) to your server for it to be saved.
            // The onConnect function is called when the user has completed all the onboarding steps
            // Note that you'll additionally receive an OAuth2 access token (response[token]) which can be used with the AdSense Management API to perform other operations
        },
        'onCancel': function() {
            // This callback is called if the user closes the popup window without completing the sign-up flow
        }
    });
}
断开连接代码
function disconnectAdSense(){
    // Your custom code to forget the publisherId from your server.
}