程式設計層級:中級
時間長度:25 分鐘
專案類型:Google Chat 應用程式
目標
- 瞭解解決方案的功能。
- 瞭解 Apps Script 服務在
解決方案
- 設定環境。
- 設定指令碼。
- 執行指令碼。
認識這項解決方案
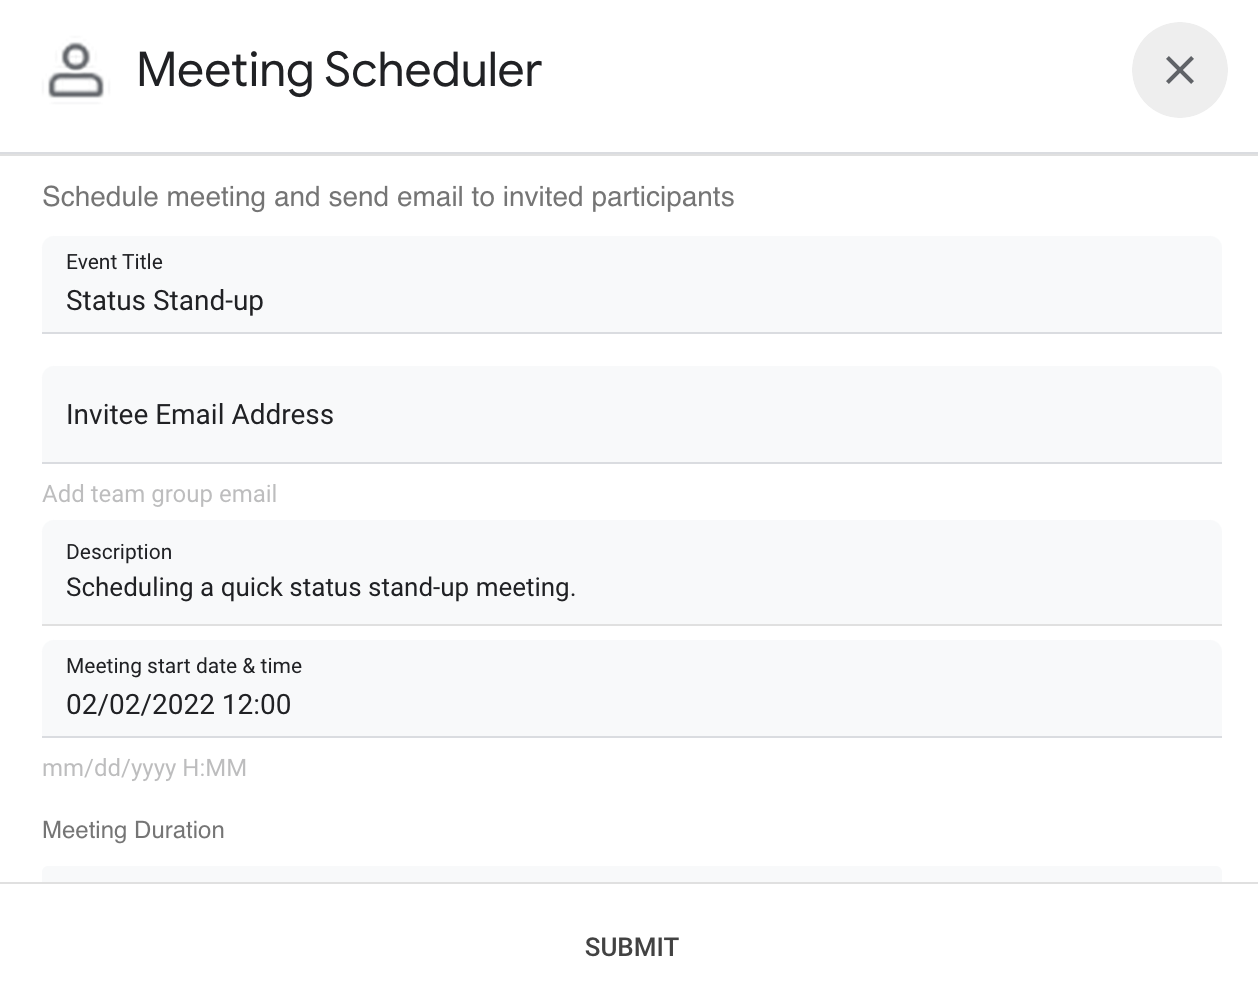
透過即時訊息 (DM) 或 Google 日曆排定會議時間
聊天室訊息。您可以設定會議的詳細資料,例如
主題、開始時間或時間長度,或是使用預設設定
安排會議時間
運作方式
Chat 應用程式指令碼會使用
斜線指令
和對話方塊
使用者的會議詳細資料並安排 Google 日曆活動。
指令碼包含預設會議設定,您可以配合
系統會按照資料類型和業務需求
將資料儲存到不同類型的儲存空間
Apps Script 服務
這項解決方案使用下列服務:
- 日曆服務:建立
日曆活動中的日曆活動。
- 基礎服務:使用
Session
類別取得
指令碼的時區Google 日曆採用這個時區的時機
安排活動。
- 公用事業服務:設定日期格式
日曆事件,並對活動 ID 進行編碼,以確保取得活動網址。
必要條件
如要使用這個範例,您必須具備下列先決條件:
- Google 帳戶 (Google Workspace 帳戶可能會
需要管理員核准)。
- 可存取網際網路的網路瀏覽器。
- Google Cloud 專案。
設定環境
在 Google Cloud 控制台中開啟 Cloud 專案
如果沒有開啟,請開啟您要使用的 Cloud 專案
定義:
- 在 Google Cloud 控制台中,前往「選取專案」頁面。
選取 Cloud 專案
- 選取要使用的 Google Cloud 專案。或者,按一下「建立專案」,然後按照畫面上的指示操作。如要建立 Google Cloud 專案,您可能需要開啟該專案的計費功能。
啟用 API
您必須先在 Google Cloud 專案中啟用這些 Google API,才能使用這些 API。
您可以在單一 Google Cloud 專案中啟用一或多個 API。
所有 Chat 擴充應用程式都需要同意畫面設定。設定中
在應用程式的 OAuth 同意畫面中,您可定義 Google 向使用者顯示的內容,以及
註冊應用程式以供日後發布。
-
在 Google Cloud 控制台中,前往「選單」圖示 menu
> API 與服務
>「OAuth 同意畫面」。
前往 OAuth 同意畫面
- 在「使用者類型」部分選取「內部」,然後按一下「建立」。
- 填寫應用程式註冊表單,然後按一下「Save and Continue」。
您現在可以略過新增範圍的步驟,然後按一下「儲存並繼續」。
日後您可以製作並使用應用程式
Google Workspace 機構,您必須將「使用者類型」變更為「外部」,
新增應用程式所需的授權範圍。
- 查看應用程式註冊摘要。如要修改資訊,請按一下「編輯」。如果應用程式
註冊看起來沒有問題,請按一下 [返回資訊主頁]。
設定指令碼
建立 Apps Script 專案
- 點選下方按鈕即可開啟透過 Google Chat 安排會議
Apps Script 專案。
開啟專案
- 按一下「總覽」圖示 info_outline。
- 在總覽頁面中,按一下「建立副本」圖示 。
複製 Cloud 專案編號
-
在 Google Cloud 控制台中,前往「選單」圖示 menu
> IAM 與管理員
>「設定」。
前往「IAM &」(身分與存取權管理) 頁面管理員設定
- 複製「Project number」欄位中的值。
設定 Apps Script 專案的 Cloud 專案
- 在複製的 Apps Script 專案中,
按一下「Project Settings」圖示 。
- 在「Google Cloud Platform (GCP) Project」(Google Cloud Platform (GCP) 專案) 下方,按一下 [變更專案]。
- 在「GCP 專案編號」中,貼上 Google Cloud 專案編號。
- 按一下「設定專案」。
建立測試部署作業
- 在複製的 Apps Script 專案中按一下「部署」
>「測試部署作業」。
- 複製「標頭部署作業 ID」供後續步驟使用,然後按一下「完成」。
- 前往 Google Cloud 控制台的「Chat API」頁面。
前往 Chat API
- 按一下「設定」。
- 使用下列資訊設定 Chat API:
- Name (名稱):
Meeting Scheduler
- 顯示圖片網址:新增網址指向圖片,且圖片大小不得小於
256x256 像素。
- 說明:
Quickly create meetings.
- 功能:勾選兩個方塊,讓使用者可以直接傳送訊息給應用程式
並新增至聊天室
- 連線設定:按一下「Apps Script」,然後輸入
主要部署作業 ID。
- 斜線指令:新增
/help
和 /schedule_Meeting
的斜線指令
步驟如下:
- 按一下「Add slash command」,然後使用下列內容進行設定
每個 ACL 都由一或多個項目組成
而這些項目包含兩項資訊
- Name (名稱):
/help
- 指令 ID:
1
- 說明:
Learn what this app does.
- 再次點選「新增斜線指令」,則使用下列內容進行設定
每個 ACL 都由一或多個項目組成
而這些項目包含兩項資訊
- Name (名稱):
/schedule_Meeting
- 指令 ID:
2
- 說明:
Schedule a meeting.
- 勾選「開啟對話方塊」方塊。
- 權限:選取「網域中的特定使用者和群組」,然後
輸入您的電子郵件地址
- 按一下「Save」(儲存),然後重新整理頁面。
- 在設定頁面的「應用程式狀態」下方設定狀態
設定為「已上線 - 提供給使用者使用」。
- 按一下 [儲存]。
執行指令碼
- 開啟 Google Chat。
- 按一下「發起即時通訊」圖示 add。
- 搜尋應用程式名稱:
Meeting Scheduler
。
- 傳送初始訊息 (例如
hello
) 以提示授權程序。
應用程式回覆後,按一下「設定」並授權應用程式。
如果 OAuth 同意畫面顯示「這個應用程式未經驗證」警告,
如要繼續,請選取「進階」圖示 >
前往 {Project Name} (不安全)。
將「/schedule_Meeting
」傳送至應用程式。
在對話方塊中新增至少一個邀請對象電子郵件地址。更新完成後,
或使用預設值。
按一下 [提交]。
如要查看會議,請按一下「開啟日曆活動」。
查看程式碼
如要查看這個解決方案的 Apps Script 程式碼,請按一下
查看原始碼如下:
查看原始碼
Dialog.gs
/**
* Copyright 2022 Google LLC
*
* Licensed under the Apache License, Version 2.0 (the "License");
* you may not use this file except in compliance with the License.
* You may obtain a copy of the License at
*
* http://www.apache.org/licenses/LICENSE-2.0
*
* Unless required by applicable law or agreed to in writing, software
* distributed under the License is distributed on an "AS IS" BASIS,
* WITHOUT WARRANTIES OR CONDITIONS OF ANY KIND, either express or implied.
* See the License for the specific language governing permissions and
* limitations under the License.
*/
/**
* Form input dialog as JSON.
* @return {object} JSON-formatted cards for the dialog.
*/
function getInputFormAsDialog_(options) {
const form = getForm_(options);
return {
'actionResponse': {
'type': 'DIALOG',
'dialogAction': {
'dialog': {
'body': form
}
}
}
};
}
/**
* Form JSON to collect inputs regarding the meeting.
* @return {object} JSON-formatted cards.
*/
function getForm_(options) {
const sections = [];
// If errors present, display additional section with validation messages.
if (options.errors && options.errors.length) {
let errors = options.errors.reduce((str, err) => `${str}• ${err}<br>`, '');
errors = `<b>Errors:</b><br><font color="#ba0000">${errors}</font>`;
const errorSection = {
'widgets': [
{
textParagraph: {
text: errors
}
}
]
}
sections.push(errorSection);
}
let formSection = {
'header': 'Schedule meeting and send email to invited participants',
'widgets': [
{
'textInput': {
'label': 'Event Title',
'type': 'SINGLE_LINE',
'name': 'subject',
'value': options.subject
}
},
{
'textInput': {
'label': 'Invitee Email Address',
'type': 'SINGLE_LINE',
'name': 'email',
'value': options.invitee,
'hintText': 'Add team group email'
}
},
{
'textInput': {
'label': 'Description',
'type': 'MULTIPLE_LINE',
'name': 'body',
'value': options.body
}
},
{
'textInput': {
'label': 'Meeting start date & time',
'type': 'SINGLE_LINE',
'name': 'date',
'value': options.startTime,
'hintText': 'mm/dd/yyyy H:MM'
}
},
{
'selectionInput': {
'type': 'DROPDOWN',
'label': 'Meeting Duration',
'name': 'duration',
'items': [
{
'text': '15 minutes',
'value': '15',
'selected': options.duration === 15
},
{
'text': '30 minutes',
'value': '30',
'selected': options.duration === 30
},
{
'text': '45 minutes',
'value': '45',
'selected': options.duration === 45
},
{
'text': '1 Hour',
'value': '60',
'selected': options.duration === 60
},
{
'text': '1.5 Hours',
'value': '90',
'selected': options.duration === 90
},
{
'text': '2 Hours',
'value': '120',
'selected': options.duration === 120
}
]
}
}
],
'collapsible': false
};
sections.push(formSection);
const card = {
'sections': sections,
'name': 'Google Chat Scheduled Meeting',
'fixedFooter': {
'primaryButton': {
'text': 'Submit',
'onClick': {
'action': {
'function': 'handleFormSubmit'
}
},
'altText': 'Submit'
}
}
};
return card;
}
/**
* Confirmation dialog after a calendar event is created successfully.
* @param {string} url The Google Calendar Event url for link button
* @return {object} JSON-formatted cards for the dialog
*/
function getConfirmationDialog_(url) {
return {
'actionResponse': {
'type': 'DIALOG',
'dialogAction': {
'dialog': {
'body': {
'sections': [
{
'widgets': [
{
'textParagraph': {
'text': 'Meeting created successfully!'
},
'horizontalAlignment': 'CENTER'
},
{
'buttonList': {
'buttons': [
{
'text': 'Open Calendar Event',
'onClick': {
'openLink': {
'url': url
}
}
}
]
},
'horizontalAlignment': 'CENTER'
}
]
}
],
'fixedFooter': {
'primaryButton': {
'text': 'OK',
'onClick': {
'action': {
'function': 'closeDialog'
}
}
}
}
}
}
}
}
}
}
貢獻者
這個範例是由 Google 在 Google Developers 專家的協助下維護。
後續步驟