작업 프로젝트는 모든 작업을 단일 컨테이너로 패키징합니다. 나
이 프로젝트를 Actions on Google에 게시하면 Google 어시스턴트가
대화형 환경을 호출할 수 있습니다
그림 1. 작업 프로젝트 구조를 통해 개인정보처리방침을 정의할 수 있습니다.
다음과 같은 하위 수준의 구성요소를 사용하여 작업 프로젝트를 빌드합니다.
설정 및 리소스는 프로젝트 메타데이터를 정의합니다.
프로젝트 아이콘 등의 리소스를
사용할 수 있습니다 Google은 이 정보를 사용하여
작업을 어시스턴트 디렉터리에 추가하여 사용자가
있습니다.
인텐트는 실행할 작업을 나타냅니다.
사용자 입력 또는 처리가 필요한 시스템 이벤트 등이 있습니다. 가장 일반적인 유형의
사용자 인텐트입니다. 이러한 인텐트를 사용하면
NLU (자연어 이해)에 의해 자연스럽게 확장되는 문구
더 많은 유사한 구문을 포함할 수 있습니다. NLU는
이러한 문구를 사용하여 어시스턴트가 사용자를 일치시키는 데 사용하는 언어 모델을 학습시킵니다.
있습니다. 대화 중 일부 사용자 입력이 인텐트의 언어와 일치하는 경우
어시스턴트 런타임이 인텐트를 작업으로 전송하여
사용자에게 응답합니다.
유형을 사용하면 사용자 입력에서 구조화된 데이터를 추출할 수 있습니다. 작성자:
학습 문구에 유형으로 주석을 지정하면 NLU에서 관련성 있고 구조화된
개방형 입력을 파싱하지 않아도 됩니다
장면은 인텐트를 처리하며 장면의 기본 로직 실행자입니다.
확인할 수 있습니다. 슬롯 채우기를 수행하고, 조건부 로직을 평가하고,
사용자에게 메시지를 표시하고, 심지어 외부 웹 서비스에 요청하여
비즈니스 로직에
더 집중할 수 있습니다 장면을 인텐트와 함께 사용하면
특정 사용자 입력 또는 시스템 이벤트를 감지하고 이에 해당하는
제공합니다.
프롬프트는 프롬프트에 사용할 정적 또는 동적 응답을 정의합니다.
사용자에게 다시 응답할 수 있습니다.
웹훅을 사용하면 웹 서비스에 추가 작업을 위임할 수 있습니다.
(예: 데이터 유효성 검사, 프롬프트 생성) 내 작업
처리와 통신합니다.
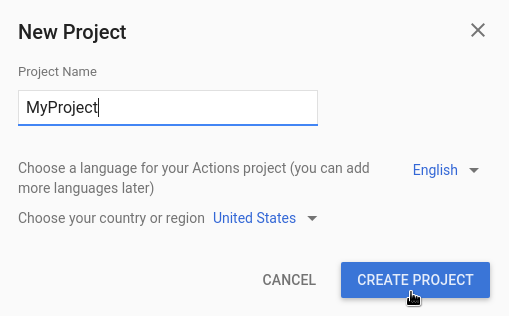
어떤 종류의 작업을 빌드하시겠습니까? 화면에서
프로젝트를 가장 잘 나타내는 카테고리를 선택하고 Next를 클릭합니다.
어떻게 빌드하시겠습니까? 화면에서 빌드 방법을 선택합니다.
Start build(빌드 시작)를 클릭합니다. 예를 들어
샘플로 확인할 수 있습니다
를 통해 개인정보처리방침을 정의할 수 있습니다.
<ph type="x-smartling-placeholder">
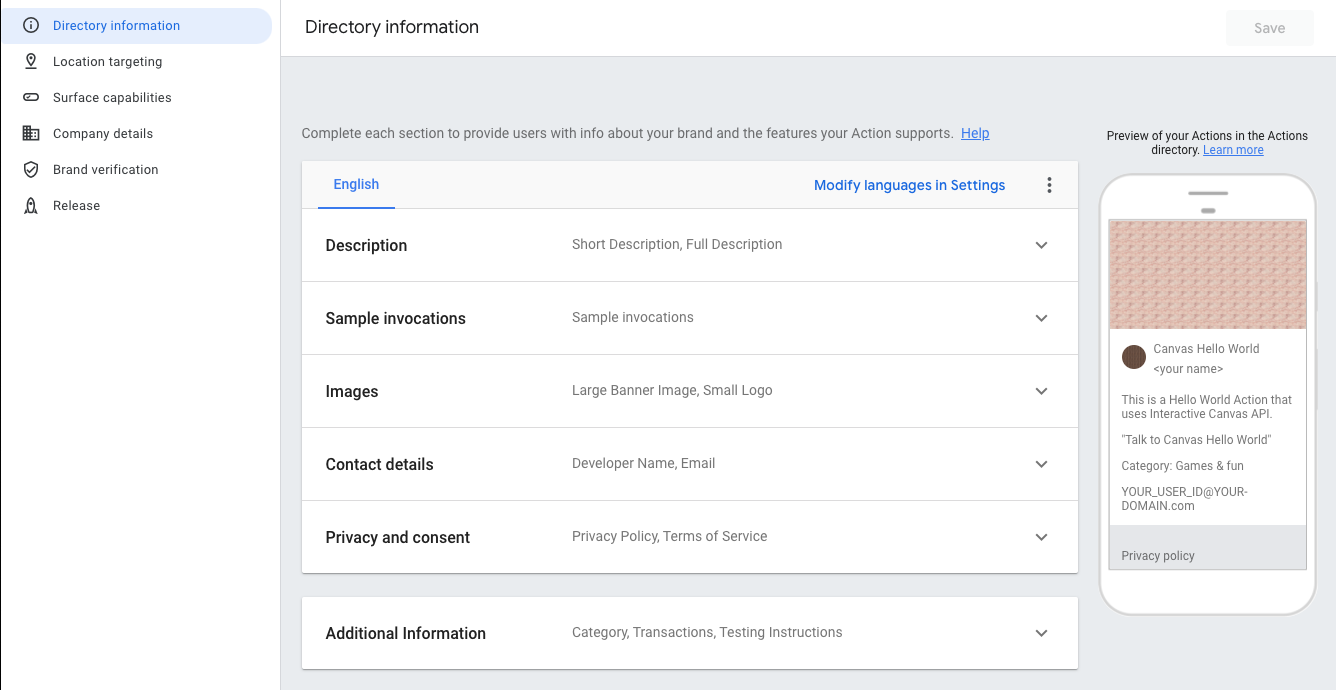
프로젝트 정보 정의
프로젝트의 설정과 리소스는
기능 및 표시 경로 지원, 지원되는 언어, 표시 이름, 설명,
로고 등을 만들 수 있습니다. 다음 표에서는 기본 설정 및 리소스를 설명합니다.
확인할 수 있습니다 Actions on Google에서는
프로젝트를 어시스턴트에 배포하고 게시하는 데 필요한 정보
디렉터리로 이동합니다.
이름
설명
디렉터리 정보
Actions on Google이
어시스턴트 디렉터리에 저장합니다 메타데이터 및 설명 포함
로고 및 배너 이미지의 이미지 리소스에 대한
정보를 확인할 수 있습니다
위치 타겟팅
작업을 사용할 수 있는 언어를 구성합니다.
노출 영역 기능
작업을 사용할 수 있는 노출 영역을 구성합니다.
회사 세부정보
회사의 연락처 정보를 지정합니다.
브랜드 인증
소유하고 있는 웹사이트 또는 Android 앱을 연결하여 추가 혜택을 누리세요.
사전 정의된 호출 이름, 웹사이트 링크 등의 추가 정보를 제공해야 합니다.
[null,null,["최종 업데이트: 2025-07-26(UTC)"],[[["\u003cp\u003eAn Actions project enables the creation of conversational experiences for Google Assistant by packaging all actions into a single container for publishing.\u003c/p\u003e\n"],["\u003cp\u003eBuilding an Actions project involves utilizing components such as intents, types, scenes, prompts, webhooks and more for defining user interactions and logic.\u003c/p\u003e\n"],["\u003cp\u003eDefining project information in the Actions console, including directory information, locales and surfaces, is crucial for publishing and deploying to the Assistant directory.\u003c/p\u003e\n"],["\u003cp\u003eThe Actions console simulator provides a comprehensive environment for testing projects with features such as debugging, device settings, and locale simulation.\u003c/p\u003e\n"]]],[],null,["# Build projects\n\nActions Builder Actions SDK \n\nAn Actions project packages all of your Actions into a single container. You\npublish this project to Actions on Google so Google Assistant knows how to discover\nand invoke your conversational experiences.\n**Figure 1**. Actions project structure\n\nYou use the following low-level components to build your Actions project:\n\n- [**Settings and resources**](#define_project_information) define project metadata\n and resources like project icons. Google uses this information to publish\n your Actions to the Assistant directory, so that users can discover and invoke\n them.\n\n- [**Intents**](../intents) represent a task to be carried out, such as some\n user input or a system event that needs processing. The most common type of\n intent you'll use are user intents. These intents let you declare training\n phrases that are naturally expanded by the NLU (natural language understanding)\n engine to include many more, similar phrases. The NLU uses the aggregation of\n these phrases to train a language model that the Assistant uses to match user\n input. During a conversation, if some user input matches the intent's language\n model, the Assistant runtime sends the intent to your Action, so that it can\n process it and respond to the user.\n\n- [**Types**](../types) let you extract structured data from user input. By\n annotating training phrases with types, the NLU can extract relevant, structured\n data for you, so you don't have to parse open-ended input.\n\n- [**Scenes**](../scenes) process intents and are the main logic executors for\n your Actions. They can do slot-filling, evaluate conditional logic, return\n prompts to the user, and even call on external web services to carry out\n business logic. In combination with intents, scenes give you a powerful way to\n detect specific user input or system events and to carry out corresponding\n logic.\n\n- [**Prompts**](../prompts) define static or dynamic responses that you use to\n respond back to users.\n\n- [**Webhooks**](../webhooks) let you delegate extra work to web services\n (fulfillment), such as validating data or generating prompts. Your Actions\n communicate with your fulfillment through a JSON-based, webhook protocol.\n\n- [**Interactive Canvas**](/assistant/interactivecanvas) lets you create rich\n and immersive experiences with web apps that utilize HTML, CSS, and JavaScript.\n\nCreate a project\n----------------\n\nYou must create a project in the Actions console before you can develop for\nGoogle Assistant. To create a project:\n\n1. Go to the [Actions console](//console.actions.google.com/).\n2. Click **New project**.\n3. Enter a name for your project and click **Create Project** .\n4. In the **What kind of Action do you want to build?** screen, select a category that best represents your project and click **Next**.\n5. In the **How do you want to build it** screen, select a way to build and click **Start building**. For example, you can start with an empty project or with a sample.\n\n| **Key Point:** If you are building for Interactive Canvas, follow these additional steps:\n|\n| 1. If you did not select the **Game** card on the **What type of Action\n| do you want to build?** screen, click **Deploy** in the top navigation. Under **Additional Information** , select the **Games \\& fun** category. Click **Save**.\n| 2. Click **Develop** in the top navigation of the Actions console.\n| 3. Click **Interactive Canvas** in the left navigation.\n| 4. Under **Does your Action use Interactive Canvas?** , select **Yes**.\n| 5. **Optional** : Enter your web app URL into the **Set your default web app URL** field. This action adds a default `Canvas` response with the URL field to your Main invocation.\n| 6. Click **Save**.\n\n\u003cbr /\u003e\n\nDefine project information\n--------------------------\n\n| **Note:** See the [Directory information](/assistant/console/directory-information) documentation for more details on how to manage project information.\n\nYour project's settings and resources define information about your project like\nfeature and surface support, supported locales, display name, description,\nlogos, and more. The following table describes the main settings and resources\nyou provide. Actions on Google uses this\ninformation to deploy and publish your project to the [Assistant\ndirectory](//assistant.google.com/explore).\n\n| Name | Description |\n|-----------------------|-------------------------------------------------------------------------------------------------------------------------------------------------------------------------------------------------------------|\n| Directory information | Provides information so that Actions on Google can publish your project to the Assistant directory. Includes metadata and desecriptions about your project and image resources for logos and banner images. |\n| Location targeting | Configures the locales that your Actions are available in. |\n| Surface capabilities | Configures the surfaces that your Actions are available on. |\n| Company details | Specifies contact information for your company. |\n| Brand verification | Connect a website or Android app that you own to gain extra benefits such as reserved invocation names and website linking within your Actions. |\n| Release | Configures different testing and production releases for your Action for testing and production. |\n| Assistant links | Let users invoke your Actions from your web properties. |\n\nTo define project information:\n\nTest projects in the simulator\n------------------------------\n\n| **Note:** See the [Actions simulator](/assistant/console/simulator) documentation for complete information about testing your projects.\n\nThe Actions console provides a simulator to preview your Actions in. The\nsimulator lets you see debug information, set device capabilities, simulate\nlocale, and more.\n**Figure 3.** The main areas of the simulator: (1) user input, (2) device view, (3) options and settings, and (4) conversation log.\n\nTo test a project:"]]