Dự án Actions sẽ gộp tất cả Hành động của bạn vào một vùng chứa duy nhất. Bạn xuất bản dự án này lên Actions on Google để Trợ lý Google biết cách khám phá và gọi ra trải nghiệm trò chuyện của bạn.

Bạn sẽ sử dụng các thành phần cấp thấp sau đây để xây dựng dự án Actions:
Phần Cài đặt và tài nguyên xác định siêu dữ liệu của dự án và các tài nguyên như biểu tượng dự án. Google sử dụng thông tin này để xuất bản Hành động của bạn sang thư mục Trợ lý để người dùng có thể khám phá và gọi chúng.
Ý định thể hiện một nhiệm vụ cần thực hiện, chẳng hạn như một số hoạt động đầu vào của người dùng hoặc một sự kiện của hệ thống cần xử lý. Loại phổ biến nhất ý định bạn sẽ sử dụng là ý định của người dùng. Các ý định này cho phép bạn khai báo hoạt động huấn luyện cụm từ được mở rộng tự nhiên bằng NLU (hiểu ngôn ngữ tự nhiên) để thêm nhiều cụm từ tương tự khác. NLU sử dụng thông tin tổng hợp của các cụm từ này để huấn luyện một mô hình ngôn ngữ mà Trợ lý sử dụng để khớp với người dùng đầu vào. Trong một cuộc trò chuyện, nếu một số hoạt động đầu vào của người dùng khớp với ngôn ngữ của ý định mô hình, môi trường thời gian chạy của Trợ lý sẽ gửi ý định đến Hành động của bạn để Trợ lý có thể sẽ xử lý dữ liệu đó và phản hồi người dùng.
Loại cho phép bạn trích xuất dữ liệu có cấu trúc từ hoạt động đầu vào của người dùng. Theo khi chú thích các cụm từ huấn luyện bằng loại, NLU có thể trích xuất các cụm từ có cấu trúc, có liên quan cho bạn, vì vậy bạn không phải phân tích cú pháp đầu vào mở.
Scenes xử lý ý định và là người thực thi logic chính cho Hành động của bạn. Chúng có thể lấp đầy chỗ trống, đánh giá logic có điều kiện, trả về lời nhắc cho người dùng và thậm chí là gọi điện đến các dịch vụ web bên ngoài để thực hiện logic kinh doanh. Cùng với ý định, các cảnh sẽ mang đến cho bạn một cách hiệu quả để phát hiện hoạt động đầu vào cụ thể của người dùng hoặc các sự kiện của hệ thống và thực hiện các sự kiện tương ứng logic.
Lời nhắc xác định phản hồi tĩnh hoặc động mà bạn sử dụng để trả lời người dùng.
Webhook cho phép bạn uỷ quyền thêm công việc cho các dịch vụ web (phương thức thực hiện), chẳng hạn như xác thực dữ liệu hoặc tạo câu lệnh. Hành động của bạn giao tiếp với phương thức thực hiện của bạn thông qua một giao thức webhook dựa trên JSON.
Canvas tương tác giúp bạn tạo quảng cáo và trải nghiệm phong phú với các ứng dụng web sử dụng HTML, CSS và JavaScript.
Tạo một dự án
Bạn phải tạo một dự án trong bảng điều khiển Actions trước khi có thể phát triển cho Trợ lý Google. Cách tạo dự án:
- Chuyển đến Bảng điều khiển Actions.
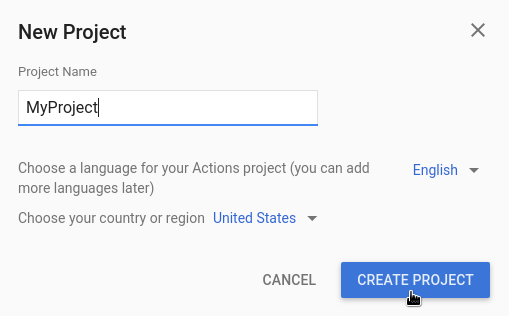
- Nhấp vào Dự án mới.
- Nhập tên cho dự án của bạn rồi nhấp vào Create Project (Tạo dự án).
- Trong màn hình Bạn muốn tạo loại hành động nào?, hãy chọn một danh mục thể hiện tốt nhất dự án của bạn, rồi nhấp vào Tiếp theo.
- Trong màn hình Bạn muốn tạo ứng dụng như thế nào, hãy chọn cách tạo và nhấp vào Bắt đầu xây dựng. Ví dụ: bạn có thể bắt đầu bằng một nhãn trống dự án hoặc với một mẫu.
Xác định thông tin dự án
Các chế độ cài đặt và tài nguyên của dự án xác định thông tin về dự án của bạn như hỗ trợ về tính năng và nền tảng, ngôn ngữ được hỗ trợ, tên hiển thị, nội dung mô tả, biểu trưng và nhiều nội dung khác. Bảng sau đây mô tả các chế độ cài đặt và tài nguyên chính mà bạn cung cấp. Actions on Google sử dụng thuộc tính này thông tin để triển khai và xuất bản dự án lên Trợ lý thư mục.
| Tên | Mô tả |
|---|---|
| Thông tin trong thư mục | Cung cấp thông tin để Actions on Google có thể xuất bản dự án vào thư mục Trợ lý. Bao gồm siêu dữ liệu và nội dung mô tả chi tiết về tài nguyên dự án và hình ảnh cho biểu trưng và ảnh biểu ngữ. |
| Nhắm mục tiêu theo vị trí | Định cấu hình ngôn ngữ mà Hành động của bạn sử dụng. |
| Khả năng của nền tảng | Định cấu hình các nền tảng hiển thị Hành động của bạn. |
| Thông tin chi tiết về công ty | Nêu rõ thông tin liên hệ của công ty. |
| Xác minh thương hiệu | Kết nối một trang web hoặc ứng dụng Android mà bạn sở hữu để nhận thêm lợi ích chẳng hạn như tên lời gọi dành riêng và liên kết trang web trong Hành động. |
| Bản phát hành | Thiết lập các bản phát hành thử nghiệm và phát hành công khai cho Hành động của bạn để thử nghiệm và sản xuất. |
| Đường liên kết đến Trợ lý | Cho phép người dùng gọi Hành động từ các thuộc tính web của bạn. |
Cách xác định thông tin dự án:
Kiểm thử dự án trong trình mô phỏng
Bảng điều khiển Actions cung cấp một trình mô phỏng để xem trước Actions của bạn. Chiến lược phát hành đĩa đơn trình mô phỏng cho phép bạn xem thông tin gỡ lỗi, thiết lập khả năng của thiết bị, mô phỏng ngôn ngữ, v.v.
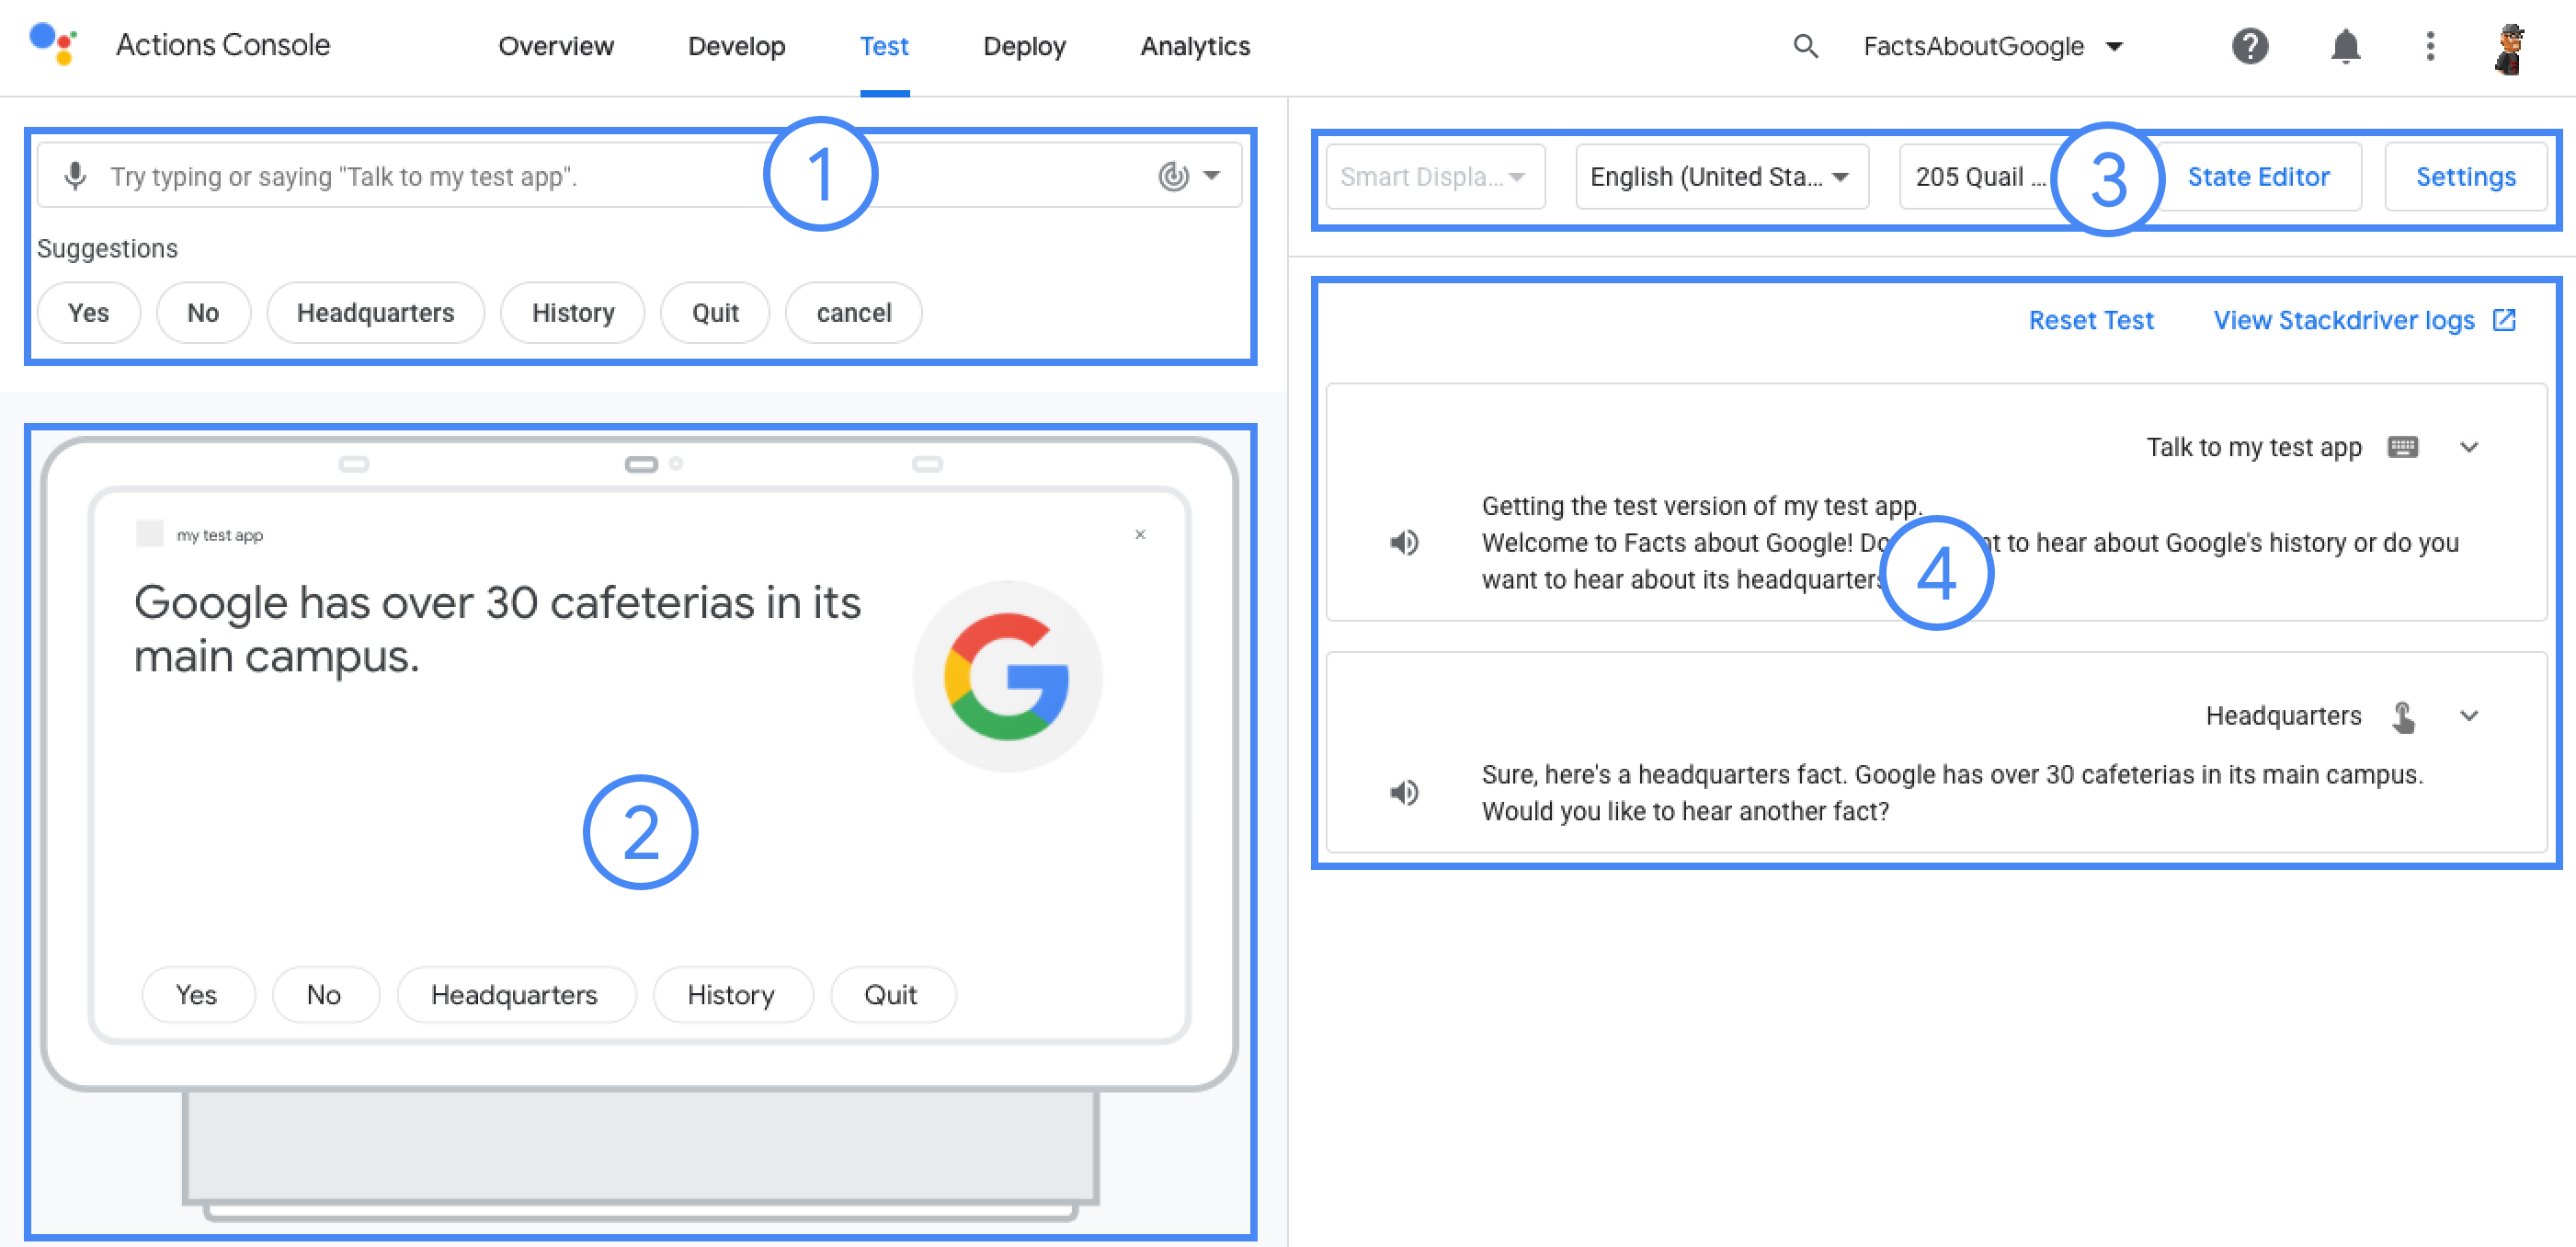
Cách kiểm thử một dự án: