Оптимизируйте свои подборки
Сохраняйте и классифицируйте контент в соответствии со своими настройками.
В этом руководстве вы узнаете, как настроить среду для создания действий с использованием Actions SDK и Actions Builder. Вы будете выполнять следующие задачи:
Установите Node.js: вам понадобится эта среда выполнения, чтобы использовать нашу библиотеку выполнения Node.js.
Установите интерфейс командной строки Firebase: этот инструмент командной строки позволяет разрабатывать и развертывать зависимости Firebase, такие как веб-приложения для Interactive Canvas , на хостинге Firebase.
Установите инструмент командной строки gactions. При разработке с помощью Actions SDK вы используете этот инструмент для создания, управления и развертывания пакета действий для вашего действия.
Создайте проект «Действия».Проект «Действия» — это логический контейнер для ваших диалоговых действий. Прежде чем приступить к сборке, вам необходимо создать его в консоли действий.
Инициализация и развертывание примера. В этом простом примере показано, как приступить к созданию действий на основе Interactive Canvas.
После завершения этого краткого руководства вы сможете синхронизировать проект Actions между локальной средой разработки и веб-интерфейсом Actions Builder.
Установите Node.js и интерфейс командной строки Firebase.
Загрузите и установите Node.js в соответствии с документацией Node.js, чтобы использовать нашу библиотеку выполнения. Установка Node.js также позволяет вам установить интерфейс командной строки Firebase с помощью npm , а затем локально запускать реализацию диалогового выполнения.
Установите и настройте Firebase CLI согласно документации Firebase. Интерфейс командной строки Firebase позволяет развернуть веб-приложение Interactive Canvas на хостинге Firebase и, при необходимости, вручную развернуть выполнение в Cloud Functions для Firebase.
Установите инструмент командной строки gactions.
Установите инструмент интерфейса командной строки (CLI) gactions, загрузив установочный пакет, распаковав его и настроив путь выполнения.
Чтобы установить и настроить действия, выполните следующие действия:
Загрузите соответствующий пакет для вашей операционной системы:
Извлеките пакет в выбранное вами место и добавьте двоичный файл в переменную PATH вашей среды. Альтернативно, извлеките пакет в место, которое уже находится в вашей переменной PATH (например, /usr/local/bin ).
В Linux и Mac при необходимости включите разрешения на выполнение:
chmod +x PATH_TO/gactions
Выполните следующую команду для аутентификации CLI. Эта команда запускает процесс аутентификации и требует наличия веб-браузера:
gactions login
Когда поток завершен, CLI автоматически проверяет подлинность.
Создать и настроить проект
Прежде чем вы сможете использовать инструмент командной строки gactions, вы должны создать проект в консоли действий и предоставить gactions доступ к проекту. Чтобы создать и настроить проект, выполните следующие действия:
Нажмите «Новый проект» , введите имя проекта и нажмите «Создать проект» .
Выберите категорию и нажмите «Далее» .
Выберите «Пустой проект» и нажмите « Начать сборку» .
Включите API действий в консоли Google Cloud, следуя инструкциям в разделе Включение и отключение API . Это позволяет действиям взаимодействовать с вашим проектом.
Получить образец hello world
В интерактивном примере hello world показано, как создать простой проект Actions с помощью одного Action на базе Interactive Canvas.
Создайте пустой каталог и инициализируйте образец Interactive Canvas в этом каталоге. Например, следующий код инициализирует образец в каталоге interactive-canvas-sample/ , который используется в качестве примера в этом документе:
Откройте файл interactive-canvas-sample/sdk/settings/settings.yaml и измените значение поля projectId на идентификатор вашего проекта.
Развертывание и тестирование образца
После настройки примера вы можете развернуть веб-приложение Interactive Canvas и проект Actions. В результате этого процесса создается черновая версия вашего проекта Actions, которую вы можете развернуть в симуляторе Actions для предварительного просмотра и тестирования:
В каталоге interactive-canvas-sample/ выполните следующую команду, чтобы развернуть веб-приложение Interactive Canvas (содержимое каталога public/ ).
Вы можете просмотреть обработанную версию веб-приложения по URL-адресу, возвращаемому интерфейсом командной строки Firebase в браузере: https:// PROJECT_ID .web.app .
Откройте файл interactive-canvas-sample/sdk/webhooks/ActionsOnGoogleFulfillment/index.js и измените значение переменной CANVAS_URL на URL-адрес веб-приложения вашего проекта.
const CANVAS_URL = 'https://PROJECT_ID.web.app';
В каталоге interactive-canvas-sample/sdk/ выполните следующую команду, чтобы отправить локальную версию вашего проекта Actions на консоль в качестве черновой версии:
gactions push
В каталоге interactive-canvas-sample/sdk/ выполните следующую команду, чтобы протестировать проект Actions в симуляторе:
gactions deploy preview
Откройте ссылку, которую возвращает инструмент командной строки, чтобы перейти к симулятору.
В симуляторе введите «Поговорить с образцом интерактивного холста», чтобы запустить действие. Вы должны увидеть вращающийся треугольник, созданный веб-приложением, развернутым по адресу https:// PROJECT_ID .web.app
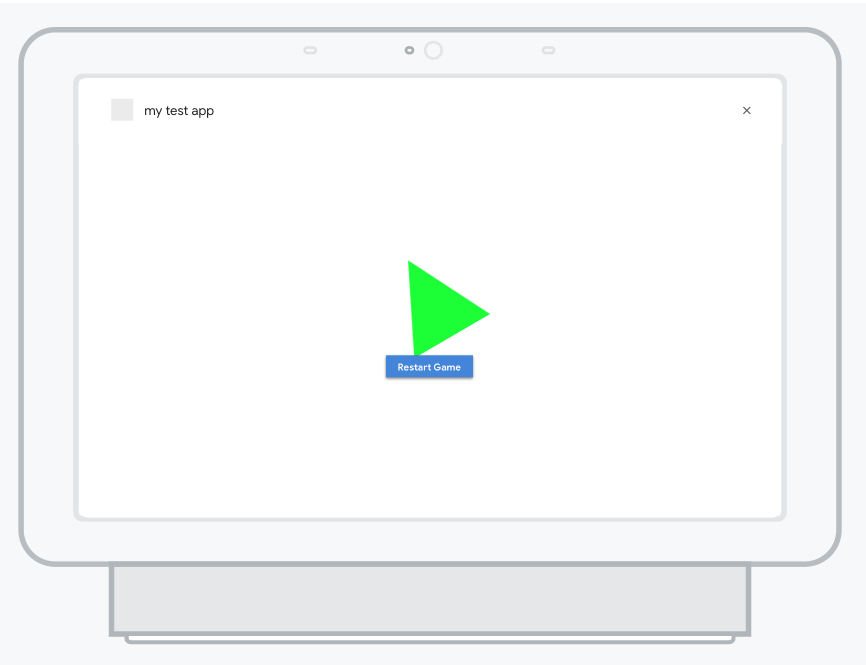
Рисунок 1 . Симулятор предварительного просмотра проекта Actions
[null,null,["Последнее обновление: 2025-07-25 UTC."],[[["\u003cp\u003eThis guide helps you set up your environment for building Google Actions using the Actions SDK and Actions Builder.\u003c/p\u003e\n"],["\u003cp\u003eYou'll install necessary tools like Node.js, Firebase CLI, and the \u003ccode\u003egactions\u003c/code\u003e command-line tool.\u003c/p\u003e\n"],["\u003cp\u003eThe guide includes steps to create an Actions project, initialize a sample, and deploy it for testing in the Actions simulator.\u003c/p\u003e\n"],["\u003cp\u003eYou'll learn to deploy the Interactive Canvas web app to Firebase Hosting and push your local Actions project to the console.\u003c/p\u003e\n"],["\u003cp\u003eAfter completing the setup, you can preview and test your Action in the Actions simulator by invoking it with a specific phrase.\u003c/p\u003e\n"]]],["To set up for building Actions, install Node.js and the Firebase CLI for fulfillment and web app deployment. Install the `gactions` CLI by downloading and configuring the appropriate package, then authenticate using `gactions login`. In the Actions console, create a new project, enable the Actions API, and use `gactions init` to set up the Interactive Canvas sample. Deploy the web app with `firebase deploy`, update the `CANVAS_URL` and push the Action using `gactions push`. Finally, preview and test the action in the simulator using `gactions deploy preview`.\n"],null,["# Actions SDK and Builder quick start guide\n\nThis guide walks you through setting up your environment to build Actions using\nboth the Actions SDK and Actions Builder. You'll carry out the following tasks:\n\n- **Install Node.js:** You need this runtime environment to use our Node.js fulfillment library.\n- **Install the Firebase CLI:** This command-line tool lets you develop and deploy Firebase dependencies, such as web apps for [Interactive Canvas](/assistant/interactivecanvas), to Firebase Hosting.\n- **Install the gactions command-line tool:** When developing with the Actions SDK, you use this tool to create, manage, and deploy the Action package for your Action.\n- **Create an Actions project:** An [Actions project](/assistant/conversational/build/projects) is the logical container for your Conversational Actions. You have to create one in the Actions console before you can start building.\n- **Initialize and deploy a sample:** This simple sample shows you how to get started building Actions powered by Interactive Canvas.\n\nOnce you complete this quick start, you can sync your Actions project between\nyour local development environment and the web experience of Actions Builder.\n\nInstall Node.js and the Firebase CLI\n------------------------------------\n\nDownload and install [Node.js](https://nodejs.org/) according to the Node.js\ndocumentation to use our fulfillment library. Your installation of Node.js also\nallows you to install the Firebase CLI with [npm](https://www.npmjs.com/), and later, to run your\nconversational fulfillment implementation locally.\n\nInstall and set up the [Firebase CLI](https://firebase.google.com/docs/cli#setup_update_cli) according\nto the Firebase documentation. The Firebase CLI lets you deploy an Interactive\nCanvas web app to Firebase Hosting and, if necessary, manually deploy\nfulfillment to Cloud Functions for Firebase.\n\nInstall the gactions command-line tool\n--------------------------------------\n\nInstall the gactions command line interface (CLI) tool by downloading an\ninstallation package, unpacking it, and configuring your execution path.\n\nTo install and configure gactions, follow these steps:\n\n1. Download the appropriate package for your operating system:\n\n | Platform | Package | Checksum |\n |----------|----------------------------------------------------------------------------------|---------------------------------------------------------------------------------------|\n | Windows | [Download](https://dl.google.com/gactions/v3/release/gactions-sdk_windows.zip) | [SHA256](https://dl.google.com/gactions/v3/release/gactions-sdk_windows.zip.sha256) |\n | Linux | [Download](https://dl.google.com/gactions/v3/release/gactions-sdk_linux.tar.gz) | [SHA256](https://dl.google.com/gactions/v3/release/gactions-sdk_linux.tar.gz.sha256) |\n | Mac OS | [Download](https://dl.google.com/gactions/v3/release/gactions-sdk_darwin.tar.gz) | [SHA256](https://dl.google.com/gactions/v3/release/gactions-sdk_darwin.tar.gz.sha256) |\n\n2. Extract the package to a location of your choice and add the binary to your\n environment's `PATH` variable. Alternatively, extract the package to a\n location that's already in your `PATH` variable (for example, `/usr/local/bin`).\n\n3. On Linux and Mac, enable execute permissions if necessary:\n\n ```scdoc\n chmod +x PATH_TO/gactions\n ```\n4. Run the following command to authenticate the CLI. This command\n starts an authentication flow and requires a web browser:\n\n ```text\n gactions login\n ```\n\n When the flow is complete, the CLI automatically authenticates.\n\nCreate and set up a project\n---------------------------\n\n| **Note:** Actions project creation is not supported in the gactions CLI.\n\nBefore you can use the gactions command-line tool, you must create a project in\nthe Actions console and give gactions access to the project. To create and set\nup a project, do the following:\n\n1. Go to the [Actions console](https://console.actions.google.com).\n2. Click **New project** , enter a project name, and click **Create project**.\n3. Select a category and click **Next**.\n4. Select **Blank project** and click **Start building**.\n5. Enable the **Actions API** in the Google Cloud console by following the instructions in [Enable and disable\n APIs](https://support.google.com/googleapi/answer/6158841). This allows gactions to interact with your project.\n\nGet the hello world sample\n--------------------------\n\nThe hello world interactive sample shows you how to build a simple Actions\nproject with a single Action powered by Interactive Canvas.\n\n1. Create an empty directory and initialize the Interactive Canvas sample in\n that directory. For example, the following code initializes the sample in an\n `interactive-canvas-sample/` directory, which is used as an example\n throughout this document:\n\n gactions init interactive-canvas --dest interactive-canvas-sample\n cd interactive-canvas-sample\n\n2. Open the `interactive-canvas-sample/sdk/settings/settings.yaml` file and\n change the value of the `projectId` field to your project's ID.\n\n | **Note:** To get your project's ID, first open your project in the Actions console and click the more *more_vert* icon. Then, select **Project settings** and copy the string in the **Project ID** field.\n\nDeploy and test the sample\n--------------------------\n\nAfter you set up the sample, you can deploy the Interactive Canvas web app and\nyour Actions project. This process creates a draft version of your Actions\nproject that you can deploy to the Actions simulator for previewing and testing:\n\n1. From the `interactive-canvas-sample/` directory, run the following command\n to deploy the Interactive Canvas web app (the contents of the `public/`\n directory).\n\n firebase deploy --project \u003cvar translate=\"no\"\u003ePROJECT_ID\u003c/var\u003e --only hosting\n\n You can see a rendered version of the web app at the URL returned by the\n Firebase CLI in a browser:\n `https://`\u003cvar translate=\"no\"\u003ePROJECT_ID\u003c/var\u003e`.web.app`.\n2. Open the `interactive-canvas-sample/sdk/webhooks/ActionsOnGoogleFulfillment/index.js` file and\n change the value of the `CANVAS_URL` variable to your project's web app URL.\n\n const CANVAS_URL = 'https://\u003cvar translate=\"no\"\u003ePROJECT_ID\u003c/var\u003e.web.app';\n\n3. From the `interactive-canvas-sample/sdk/` directory, run the following\n command to push the local version of your Actions project to the console as a\n draft version:\n\n gactions push\n\n | **Note:** You'll see some warnings related to not having some project settings and resources defined. You can safely ignore them or now.\n4. From the `interactive-canvas-sample/sdk/` directory, run the following\n command to test your Actions project in the simulator:\n\n gactions deploy preview\n\n | **Note:** If you are using a new project, you need to enable the [Cloud Functions\n | API](https://console.cloud.google.com/apis/library/cloudfunctions.googleapis.com) and associate a billing account with your project in Google Cloud. You can enable the Cloud Functions API by visiting the [Cloud Console](https://console.cloud.google.com/billing).\n5. Open the link that the command-line tool returns to go to the simulator.\n\n6. In the simulator, enter *\"Talk to Interactive canvas sample\"* to start the Action. You\n should see a spinning triangle powered by the web app deployed at\n `https://`\u003cvar translate=\"no\"\u003ePROJECT_ID\u003c/var\u003e`.web.app`\n\n **Figure 1**. The simulator previewing the Actions project"]]