
이 가이드에서는 Google Chat 앱에서 메시지를 보낼 수 있는 다양한 방법을 설명합니다.
- 사용자 상호작용에 응답하여 실시간으로 문자 메시지 및 카드 메시지를 전송합니다.
Message리소스에서create메서드를 호출하여 텍스트 및 카드 메시지를 비동기식으로 전송합니다.- 메시지 대화목록을 시작하거나 메시지에 답장합니다.
- 메시지를 보내고 이름을 지정합니다.
Message 리소스는 Google Chat의 텍스트 또는 카드 메시지를 나타냅니다. 상응하는 메서드를 호출하여 Google Chat API에서 메시지를 create, get, update 또는 delete할 수 있습니다. 문자 및 카드 메시지에 관한 자세한 내용은 Google Chat 메시지 개요를 참고하세요.
최대 메시지 크기 (텍스트 또는 카드 포함)는 32,000바이트입니다. 메시지가 이 크기를 초과하면 채팅 앱에서 메시지를 여러 개 보낼 수 있습니다.
텍스트 또는 카드 메시지를 비동기식으로 보내기 위해 Google Chat API의 Message 리소스에서 create 메서드를 호출하는 대신 Google Chat 앱은 메시지를 만들어 사용자 상호작용에 실시간으로 응답할 수도 있습니다. 사용자 상호작용에 대한 응답에는 인증이 필요하지 않으며 대화형 대화상자, 링크 미리보기 등 다른 유형의 메시지를 지원합니다. 자세한 내용은 Google Chat 앱과의 상호작용 수신 및 응답을 참고하세요.
기본 요건
Node.js
- Google Chat에 액세스할 수 있는 Google Workspace 계정
- Google Chat API가 사용 설정 및 구성된 Google Cloud 프로젝트 단계는 Google Chat 앱 빌드를 참고하세요.
- 채팅 앱이 비동기 메시지를 보낼 수 있도록 구성된 승인 실시간으로 메시지를 보내는 데는 승인 구성이 필요하지 않습니다.
Python
- Google Chat에 액세스할 수 있는 Google Workspace 계정
- Python 3.6 이상
- pip 패키지 관리 도구
최신 Python용 Google 클라이언트 라이브러리입니다. 이를 설치하거나 업데이트하려면 명령줄 인터페이스에서 다음 명령어를 실행합니다.
pip3 install --upgrade google-api-python-client google-auth- Google Chat API가 사용 설정 및 구성된 Google Cloud 프로젝트 단계는 Google Chat 앱 빌드를 참고하세요.
채팅 앱이 비동기 메시지를 보낼 수 있도록 구성된 승인 실시간으로 메시지를 보내는 데는 승인 구성이 필요하지 않습니다.
Apps Script
- Google Chat에 액세스할 수 있는 Google Workspace 계정
- 게시된 채팅 앱입니다. 채팅 앱을 빌드하려면 이 quickstart을 따르세요.
- 채팅 앱이 비동기 메시지를 보낼 수 있도록 구성된 승인 실시간으로 메시지를 보내는 데는 승인 구성이 필요하지 않습니다.
문자 메시지 보내기
이 섹션에서는 다음 두 가지 방법으로 문자 메시지를 보내는 방법을 설명합니다.
- 사용자 상호작용에 응답하여 실시간으로 문자 메시지를 전송합니다.
- Google Chat API를 비동기식으로 호출하여 문자 메시지를 보냅니다.
실시간으로 문자 메시지 보내기
이 예에서는 채팅 앱이 스페이스에 추가될 때마다 문자 메시지를 만들고 전송합니다. 온보딩 사용자를 위한 권장사항을 알아보려면 유용한 온보딩으로 사용자 및 스페이스 시작하기를 참고하세요.
사용자가 채팅 앱을 스페이스에 추가할 때 문자 메시지를 보내려면 채팅 앱이 ADDED_TO_SPACE
상호작용 이벤트에 응답합니다. ADDED_TO_SPACE 상호작용 이벤트에 SMS로 응답하려면 다음 코드를 사용하세요.
Node.js
/**
 * Sends an onboarding message when the Chat app is added to a space.
 *
 * @param {Object} event The event object from Chat API.
 * @return {Object} Response from the Chat app. An onboarding message that
 * introduces the app and helps people get started with it.
 */
exports.onMessage = function onMessage(req, res) {
  if (req.method === 'GET' || !req.body.message) {
    res.send(
      'Hello! This function is meant to be used in a Google Chat space.');
  }

  // Send an onboarding message when added to a Chat space
  if (req.body.type === 'ADDED_TO_SPACE') {
    res.json({
      'text': 'Hi, Cymbal at your service. I help you manage your calendar
      from Google Chat. Take a look at your schedule today by typing
      `/checkCalendar`, or schedule a meeting with `/scheduleMeeting`. To
      learn what else I can do, type `/help`.'
    });
  }
};
Apps Script
/**
 * Sends an onboarding message when the Chat app is added to a space.
 *
 * @param {Object} event The event object from Chat API.
 * @return {Object} Response from the Chat app. An onboarding message that
 * introduces the app and helps people get started with it.
 */
function onAddToSpace(event) {

  return {
    'text': 'Hi, Cymbal at your service. I help you manage your calendar
    from Google Chat. Take a look at your schedule today by typing
    `/checkCalendar`, or schedule a meeting with `/scheduleMeeting`. To learn
    what else I can do, type `/help`.'
  }
}
코드 샘플은 다음 텍스트 메시지를 반환합니다.

비동기식으로 문자 메시지 보내기
다음 섹션에서는 앱 인증 및 사용자 인증을 사용하여 SMS를 비동기식으로 보내는 방법을 설명합니다.
문자 메시지를 보내려면 요청에 다음을 전달합니다.
- 앱 인증을 사용하여
chat.bot승인 범위를 지정합니다. 사용자 인증을 사용하여chat.messages.create승인 범위를 지정합니다. Message리소스에서create메서드를 호출합니다.
앱 인증이 포함된 문자 메시지 보내기
앱 인증을 사용하여 SMS를 보내는 방법은 다음과 같습니다.
Python
- 작업 디렉터리에서 이름이
chat_create_text_message_app.py인 파일을 만듭니다. chat_create_text_message_app.py에 다음 코드를 포함합니다.from apiclient.discovery import build from google.oauth2 import service_account # Specify required scopes. SCOPES = ['https://www.googleapis.com/auth/chat.bot'] # Specify service account details. CREDENTIALS = service_account.Credentials.from_service_account_file( 'credentials.json', scopes=SCOPES) # Build the URI and authenticate with the service account. chat = build('chat', 'v1', credentials=CREDENTIALS) # Create a Chat message. result = chat.spaces().messages().create( # The space to create the message in. # # Replace SPACE with a space name. # Obtain the space name from the spaces resource of Chat API, # or from a space's URL. parent='spaces/SPACE', # The message to create. body={'text': 'Hello, world!'} ).execute() print(result)코드에서
SPACE을 스페이스 이름으로 바꿉니다. 이 이름은 Chat API의spaces.list()메서드 또는 스페이스의 URL에서 가져올 수 있습니다.작업 디렉터리에서 샘플을 빌드하고 실행합니다.
python3 chat_create_text_message_app.py
Chat API는 전송된 메시지를 자세히 설명하는 Message 인스턴스를 반환합니다.
사용자 인증이 포함된 문자 메시지 보내기
사용자 인증이 포함된 문자 메시지를 보내는 방법은 다음과 같습니다.
Python
- 작업 디렉터리에서 이름이
chat_create_text_message_user.py인 파일을 만듭니다. chat_create_text_message_user.py에 다음 코드를 포함합니다.import os.path from google.auth.transport.requests import Request from google.oauth2.credentials import Credentials from google_auth_oauthlib.flow import InstalledAppFlow from googleapiclient.discovery import build from googleapiclient.errors import HttpError # Define your app's authorization scopes. # When modifying these scopes, delete the file token.json, if it exists. SCOPES = ["https://www.googleapis.com/auth/chat.messages.create"] def main(): ''' Authenticates with Chat API via user credentials, then creates a text message in a Chat space. ''' # Start with no credentials. creds = None # Authenticate with Google Workspace # and get user authorization. flow = InstalledAppFlow.from_client_secrets_file( 'client_secrets.json', SCOPES) creds = flow.run_local_server() # Build a service endpoint for Chat API. chat = build('chat', 'v1', credentials=creds) # Use the service endpoint to call Chat API. result = chat.spaces().messages().create( # The space to create the message in. # # Replace SPACE with a space name. # Obtain the space name from the spaces resource of Chat API, # or from a space's URL. parent='spaces/SPACE', # The message to create. body={'text': 'Hello, world!'} ).execute() # Prints details about the created membership. print(result) if __name__ == '__main__': main()코드에서
SPACE을 스페이스 이름으로 바꿉니다. 이 이름은 Chat API의spaces.list()메서드 또는 스페이스의 URL에서 가져올 수 있습니다.작업 디렉터리에서 샘플을 빌드하고 실행합니다.
python3 chat_create_text_message_user.py
Chat API는 전송된 메시지를 자세히 설명하는 Message 인스턴스를 반환합니다.
카드 메시지 보내기
이 섹션에서는 다음 두 가지 방법으로 카드 메시지를 보내는 방법을 설명합니다.
- 사용자 상호작용에 응답하여 실시간으로 카드 메시지를 전송합니다.
- Google Chat API를 비동기식으로 호출하여 카드 메시지를 보냅니다.
실시간으로 카드 메시지 보내기
채팅 앱은 카드 메시지를 만들어 사용자가 채팅 앱에 메시지를 보내거나 채팅 앱을 스페이스에 추가하는 경우와 같은 사용자 상호작용에 응답할 수 있습니다. 사용자 상호작용에 응답하는 방법에 관한 자세한 내용은 Chat 앱 상호작용 이벤트 수신 및 응답을 참고하세요.
이 예에서는 사용자가 채팅 앱에 메시지를 보내고 채팅 앱은 사용자의 이름과 아바타 이미지가 표시된 카드 메시지를 전송하여 응답합니다.

비동기식으로 카드 메시지 전송
카드 메시지를 보내려면 요청에 다음을 전달합니다.
- 앱 인증을 사용하여
chat.bot승인 범위를 지정합니다. 사용자 인증으로 카드 메시지를 보낼 수 없습니다. Message리소스에서create메서드를 호출합니다.
다음은 카드 메시지의 예입니다.
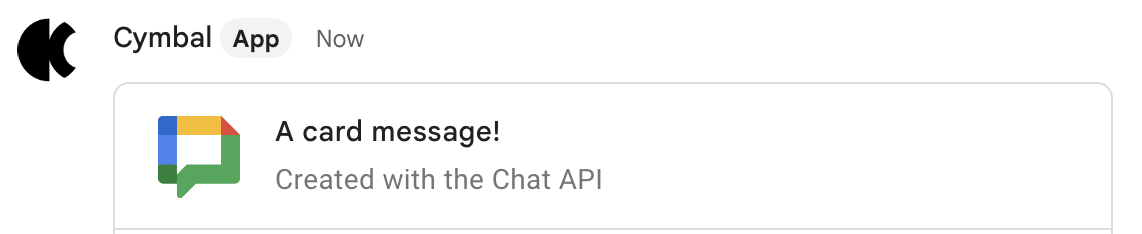
앱 인증으로 카드 메시지를 보내는 방법은 다음과 같습니다.
Python
- 작업 디렉터리에서 이름이
chat_create_card_message.py인 파일을 만듭니다. chat_create_card_message.py에 다음 코드를 포함합니다.from apiclient.discovery import build from google.oauth2 import service_account # Specify required scopes. SCOPES = ['https://www.googleapis.com/auth/chat.bot'] # Specify service account details. CREDENTIALS = service_account.Credentials.from_service_account_file( 'credentials.json', scopes=SCOPES) # Build the URI and authenticate with the service account. chat = build('chat', 'v1', credentials=CREDENTIALS) # Create a Chat message. result = chat.spaces().messages().create( # The space to create the message in. # # Replace SPACE with a space name. # Obtain the space name from the spaces resource of Chat API, # or from a space's URL. parent='spaces/SPACE', # The message to create. body= { 'cardsV2': [{ 'cardId': 'createCardMessage', 'card': { 'header': { 'title': 'A card message!', 'subtitle': 'Created with the Chat API', 'imageUrl': 'https://developers.google.com/chat/images/chat-product-icon.png', 'imageType': 'CIRCLE' }, 'sections': [ { 'widgets': [ { 'buttonList': { 'buttons': [ { 'text': 'Read the docs!', 'onClick': { 'openLink': { 'url': 'https://developers.google.com/chat' } } } ] } } ] } ] } }] } ).execute() print(result)코드에서
SPACE을 스페이스 이름으로 바꿉니다. 이 이름은 Chat API의spaces.list메서드 또는 스페이스의 URL에서 가져올 수 있습니다.작업 디렉터리에서 샘플을 빌드하고 실행합니다.
python3 chat_create_card_message.py
메시지 대화목록 시작 또는 답장
메시지 스레드를 시작하려면 메시지를 보내고 thread.name를 비워둡니다. Google Chat에서 스레드를 만들 때 이 대화목록을 채웁니다. 선택적으로 스레드 이름을 맞춤설정하려면 thread.threadKey 필드를 지정합니다.
메시지 대화목록에 답장하려면 스레드의 threadKey 또는 name 필드를 지정하는 메시지를 전송합니다. 사람이나 다른 채팅 앱에서 스레드를 만든 경우 thread.name 필드를 사용해야 합니다.
일치하는 스레드가 없으면 messageReplyOption 필드를 설정하여 메시지를 새 스레드를 시작할지 아니면 게시하지 못할지 지정할 수 있습니다.
messageReplyOption가 설정된 경우 thread.name 또는 thread.threadKey도 설정해야 합니다.
threadKey 필드가 nameOfThread로 정의된 스레드를 사용하여 스레드를 시작하거나 응답하는 방법은 다음과 같습니다.
Python
- 작업 디렉터리에서 이름이
chat_create_message_thread.py인 파일을 만듭니다. chat_create_message_thread.py에 다음 코드를 포함합니다.from apiclient.discovery import build from google.oauth2 import service_account # Specify required scopes. SCOPES = ['https://www.googleapis.com/auth/chat.bot'] # Specify service account details. CREDENTIALS = service_account.Credentials.from_service_account_file( 'credentials.json', scopes=SCOPES) # Build the URI and authenticate with the service account. chat = build('chat', 'v1', credentials=CREDENTIALS) # Create a Chat message. result = chat.spaces().messages().create( # The space to create the message in. # # Replace SPACE with a space name. # Obtain the space name from the spaces resource of Chat API, # or from a space's URL. parent='spaces/SPACE', # Whether to start a thread or reply to an existing one. # # Required when threading is enabled in a space unless starting a # thread. Ignored in other space types. Threading is enabled when # space.spaceThreadingState is THREADED_MESSAGES. # # REPLY_MESSAGE_FALLBACK_TO_NEW_THREAD replies to an existing thread # if one exists, otherwise it starts a new one. messageReplyOption='REPLY_MESSAGE_FALLBACK_TO_NEW_THREAD', # The message body. body={ # The message to create. 'text': 'Start or reply to another message in a thread!', # The thread to start or reply to. 'thread': { 'threadKey': 'nameOfThread' } } ).execute() print(result)코드에서
SPACE을 스페이스 이름으로 바꿉니다. 이 이름은 Chat API의spaces.list메서드 또는 스페이스의 URL에서 가져올 수 있습니다.작업 디렉터리에서 샘플을 빌드하고 실행합니다.
python3 chat_create_message_thread.py
Chat API는 전송된 메시지를 자세히 설명하는 Message 인스턴스를 반환합니다.
메시지 이름 지정
이 섹션에서는 메시지의 커스텀 ID를 설정하여 메시지 이름을 지정하는 방법을 설명합니다. 커스텀 ID를 사용하여 메시지를 가져오거나 업데이트하거나 삭제할 수 있습니다. 커스텀 ID를 사용하면 메시지의 리소스 이름 (name 필드에 표시됨)에서 시스템이 할당한 ID를 저장하지 않고도 메시지를 지정할 수 있습니다. 메시지를 만들 때 응답 본문에 리소스 이름이 생성됩니다.
예를 들어 get() 메서드를 사용하여 메시지를 검색하려면 리소스 이름을 사용하여 검색할 메시지를 지정합니다. 리소스 이름은 spaces/{space}/messages/{message} 형식으로 지정됩니다. 여기서 {message}는 시스템에서 할당한 ID를 나타냅니다. 메시지 이름을 지정한 경우 {message} 값을 커스텀 ID로 바꿀 수 있습니다.
메시지 이름을 지정하려면 메시지를 만들 때 messageId 필드에 커스텀 ID를 지정합니다. messageId 필드는 Message 리소스의 clientAssignedMessageId 필드 값을 설정합니다.
메시지를 만들 때만 메시지 이름을 지정할 수 있습니다. 기존 메시지의 커스텀 ID의 이름을 지정하거나 수정할 수 없습니다. 맞춤 ID는 다음 요구사항을 충족해야 합니다.
client-(으)로 시작합니다. 예를 들어client-custom-name는 유효한 맞춤 ID이지만custom-name는 그렇지 않습니다.- 최대 63자(영문 기준)와 소문자, 숫자, 하이픈만 포함할 수 있습니다.
- 스페이스 내에서 고유합니다. 채팅 앱은 서로 다른 메시지에 동일한 커스텀 ID를 사용할 수 없습니다.
맞춤 ID를 포함하여 메시지를 보내는 방법은 다음과 같습니다.
Python
- 작업 디렉터리에서 이름이
chat_create_named_message.py인 파일을 만듭니다. chat_create_named_message.py에 다음 코드를 포함합니다.from apiclient.discovery import build from google.oauth2 import service_account # Specify required scopes. SCOPES = ['https://www.googleapis.com/auth/chat.bot'] # Specify service account details. CREDENTIALS = service_account.Credentials.from_service_account_file( 'credentials.json', scopes=SCOPES) # Build the URI and authenticate with the service account. chat = build('chat', 'v1', credentials=CREDENTIALS) # Create a Chat message with a custom name. result = chat.spaces().messages().create( # The space to create the message in. # # Replace SPACE with a space name. # Obtain the space name from the spaces resource of Chat API, # or from a space's URL. parent='spaces/SPACE', # Custom name for the message used to facilitate later operations. messageId='client-NAME', # The message to create. body={'text': 'Hello, world!'} ).execute() print(result)코드에서 다음을 바꿉니다.
SPACE: 메시지를 게시할 스페이스의 ID로, Chat API의spaces.list메서드 또는 스페이스 URL에서 가져올 수 있습니다.NAME: 메시지의 커스텀 이름입니다.
작업 디렉터리에서 샘플을 빌드하고 실행합니다.
python3 chat_create_named_message.py
Chat API는 Message 인스턴스를 반환합니다.
메시지 하단에 대화형 위젯 추가
원하는 경우 액세서리 위젯으로 메시지를 추가할 수 있습니다. 액세서리 위젯은 메시지의 텍스트 또는 카드 다음에 표시됩니다. 이러한 위젯을 사용하여 다음을 비롯한 다양한 방법으로 사용자에게 메시지와 상호작용하라는 메시지를 표시할 수 있습니다.
- 메시지의 정확성 또는 만족도를 평가합니다.
- 메시지 또는 채팅 앱 관련 문제를 신고합니다.
- 문서 등 관련 콘텐츠의 링크를 엽니다.
- 특정 기간 동안 채팅 앱에서 유사한 메시지를 닫거나 다시 알림
액세서리 위젯을 추가하려면 메시지에 accessoryWidgets[] 객체를 포함하고 포함하려는 AccessoryWidgets를 하나 이상 지정합니다. 스페이스의 모든 사용자가 메시지를 볼 수 있어야 합니다. 비공개 메시지에는 액세서리 위젯을 추가할 수 없습니다.
다음 이미지는 사용자가 채팅 앱 사용 환경을 평가할 수 있도록 액세서리 위젯이 포함된 문자 메시지를 추가하는 채팅 앱을 보여줍니다.
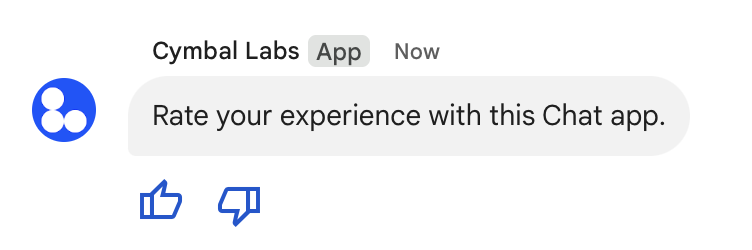
다음 코드 샘플은 이 메시지의 JSON을 보여줍니다. 사용자가 버튼 중 하나를 클릭하면 상호작용을 통해 평점을 처리하는 해당 함수 (예: doUpvote)가 트리거됩니다.
 "text": "Rate your experience with this Chat app.",
 "accessoryWidgets": [
   {
     "buttonList": {
       "buttons": [
         {
           "icon": {
             "material_icon": {
               "name": "thumb_up"
             }
           },
           "color": {
             "red": 0,
             "blue": 255,
             "green": 0
           },
           "onClick": {
             "action": {
               "function": "doUpvote",
             }
           }
         },
         {
           "icon": {
             "material_icon": {
               "name": "thumb_down"
             }
           },
           "color": {
             "red": 0,
             "blue": 255,
             "green": 0
           },
           "onClick": {
             "action": {
               "function": "doDownvote",
             }
           }
         }
       ]
     }
   }
 ]
비공개 메시지 보내기
채팅 앱은 문자 메시지 및 카드 메시지를 비공개로 전송하여 스페이스에 있는 한 명의 사용자에게만 메시지가 표시되도록 할 수 있습니다. 비공개로 메시지를 보내려면 메시지에 privateMessageViewer 필드를 지정합니다. 채팅 앱에서만 비공개 메시지를 보낼 수 있습니다. 비공개 메시지를 비동기식으로 보내려면 앱 인증을 사용해야 합니다.
자세한 내용은 Google Chat 사용자에게 비공개 메시지 보내기를 참고하세요.
문제 해결
Google Chat 앱 또는 카드에서 오류를 반환하면 Chat 인터페이스에 '문제 발생' 또는 '요청을 처리할 수 없습니다'라는 메시지가 표시됩니다. 채팅 UI에는 오류 메시지가 표시되지 않지만 채팅 앱 또는 카드에서 예기치 않은 결과가 발생하는 경우가 있습니다. 예를 들어 카드 메시지가 표시되지 않을 수 있습니다.
Chat UI에 오류 메시지가 표시되지 않더라도 채팅 앱에 대한 오류 기록이 사용 설정되어 있을 때 오류를 수정하는 데 도움이 되는 자세한 오류 메시지와 로그 데이터가 제공됩니다. 오류를 확인, 디버깅, 수정하는 데 도움이 필요하면 Google Chat 오류 문제 해결 및 수정하기를 참고하세요.
관련 주제
- 메일의 서식을 지정합니다.
- 메시지 세부정보 보기
- 스페이스에서 메시지 나열하기
- 메시지를 업데이트합니다.
- 메시지 삭제하기
- Google Chat 메시지에서 사용자 식별하기
- 수신 웹훅을 사용하여 Google Chat에 메시지 보내기