1. 簡介
上次更新時間:2020 年 9 月 11 日
建構項目
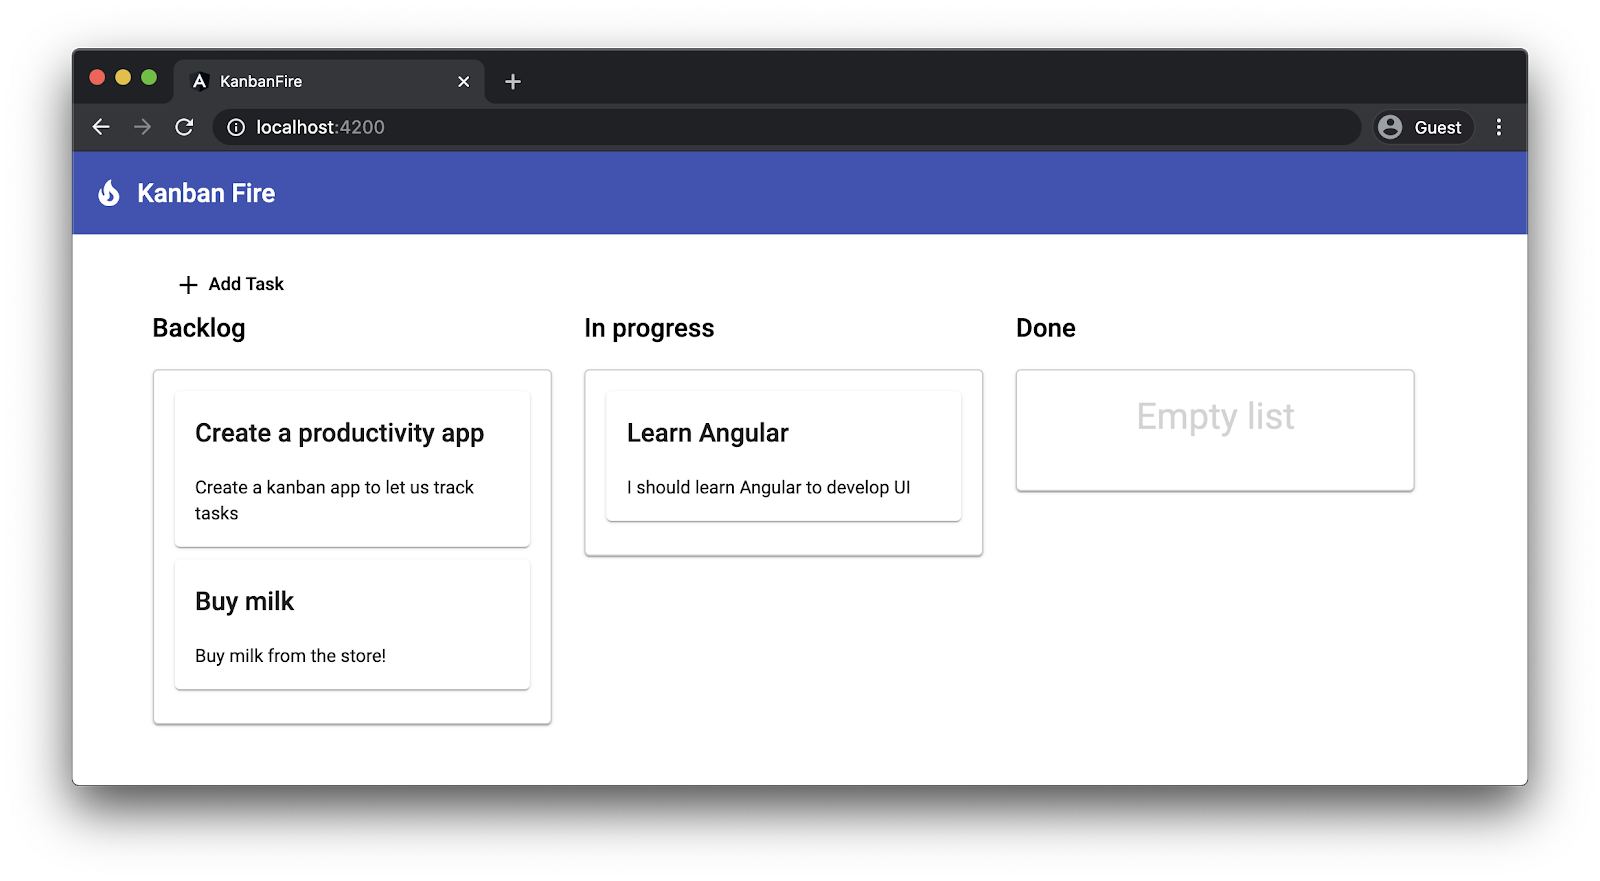
在本程式碼研究室中,我們將使用 Angular 和 Firebase 建構網路看板!最終的應用程式會包含三種工作類別:待處理、進行中和已完成。我們將能建立及刪除工作,並透過拖曳操作,將工作從一個類別移至另一個類別。
我們將使用 Angular 開發使用者介面,並以 Firestore 做為持續性儲存空間。在程式碼研究室的最後,我們會使用 Angular CLI 將應用程式部署至 Firebase Hosting。
課程內容
- 如何使用 Angular Material 和 CDK。
- 如何將 Firebase 整合新增至 Angular 應用程式。
- 如何將永久資料保留在 Firestore 中。
- 瞭解如何使用 Angular CLI,透過單一指令將應用程式部署至 Firebase 託管。
軟硬體需求
本程式碼研究室假設您擁有 Google 帳戶,並對 Angular 和 Angular CLI 有基本瞭解。
立即開始!
2. 建立新專案
首先,請建立新的 Angular 工作區:
ng new kanban-fire
? Would you like to add Angular routing? No
? Which stylesheet format would you like to use? CSS
這個步驟可能需要幾分鐘才能完成。Angular CLI 會建立專案結構並安裝所有依附元件。安裝程序完成後,請前往 kanban-fire 目錄,然後啟動 Angular CLI 的開發伺服器:
ng serve
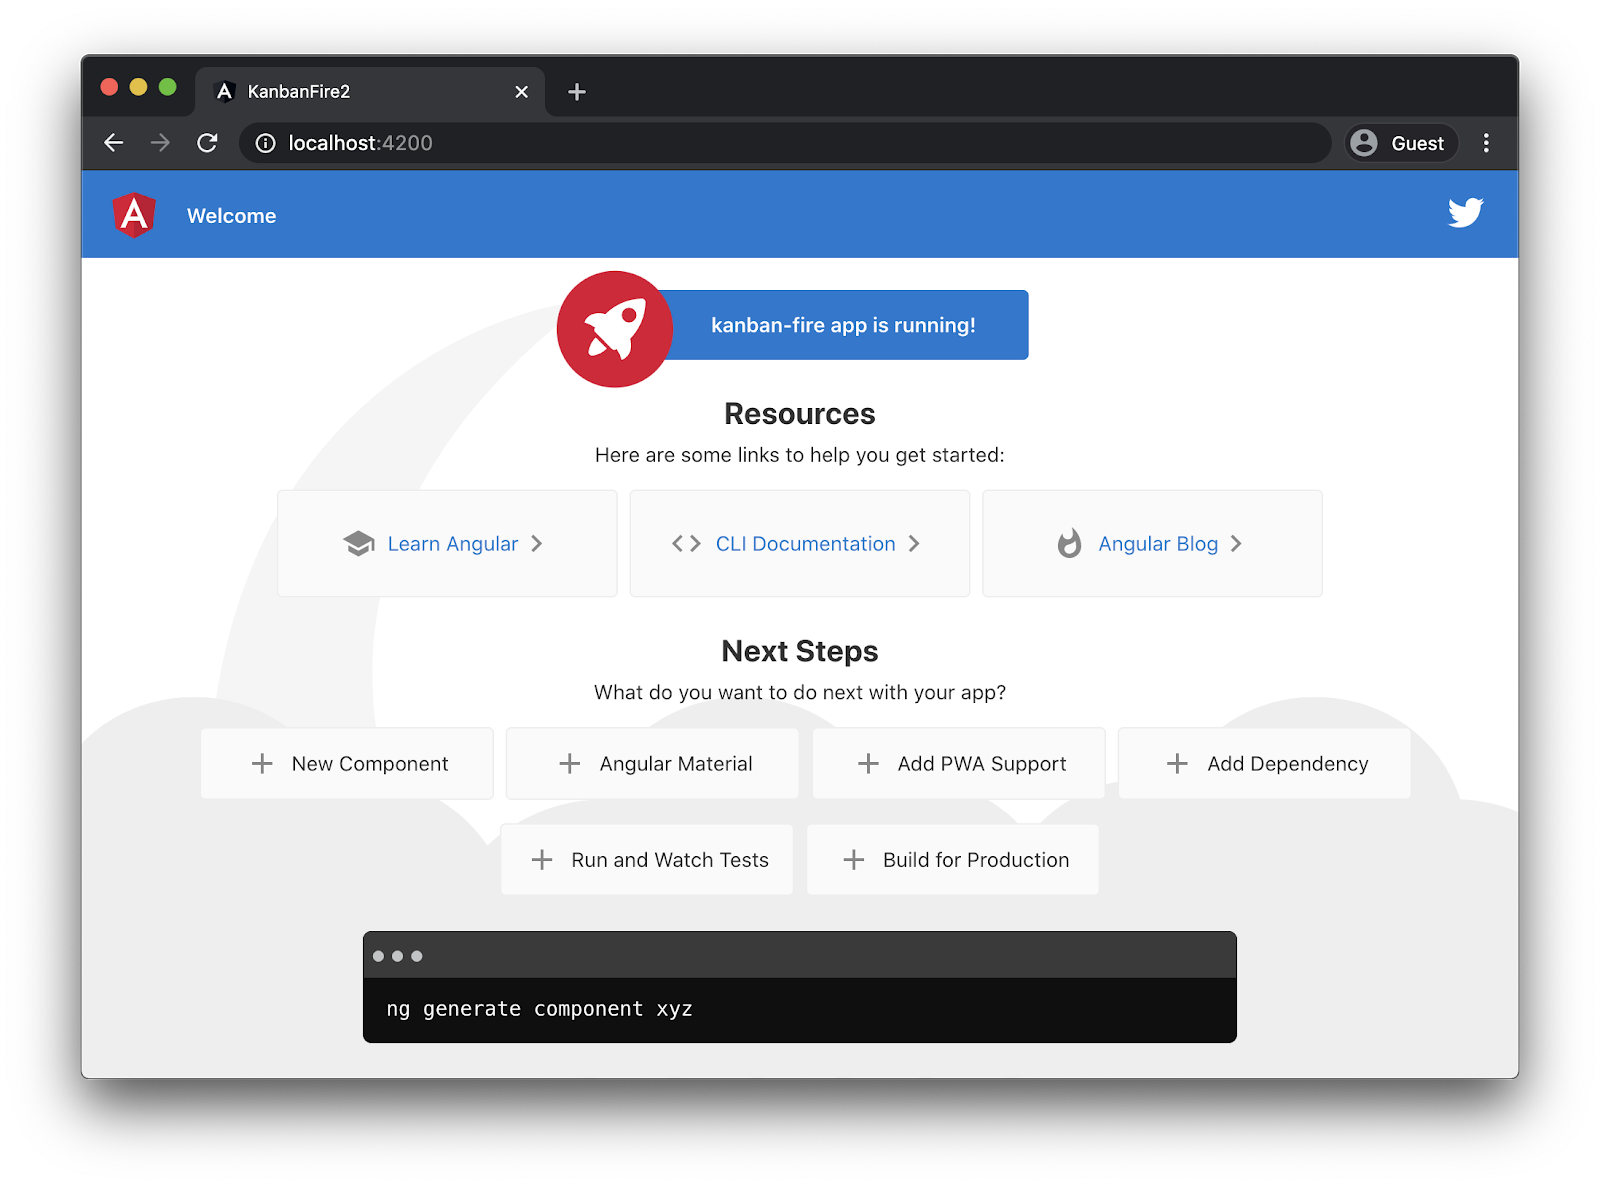
開啟 http://localhost:4200,您應該會看到類似以下的輸出內容:
在編輯器中開啟 src/app/app.component.html,並刪除所有內容。返回 http://localhost:4200 時,應該會看到空白頁面。
3. 新增 Material 和 CDK
Angular 隨附實作符合 Material Design 規範的使用者介面元件,這些元件是 @angular/material 套件的一部分。@angular/material 的其中一個依附元件是元件開發套件 (CDK)。CDK 提供原始項目,例如無障礙公用程式、拖曳和疊加。我們以 @angular/cdk 套件的形式發布 CDK。
如要為應用程式執行作業新增素材:
ng add @angular/material
這個指令會詢問您是否要使用全域 Material 字體樣式、是否要設定 Angular Material 的瀏覽器動畫,以及要選擇的主題。選取「Indigo/Pink」,即可獲得與本程式碼研究室相同的結果,並回答最後兩個問題「是」。
ng add 指令會安裝 @angular/material 及其依附元件,並在 AppModule 中匯入 BrowserAnimationsModule。在下一個步驟中,我們就可以開始使用這個模組提供的元件!
首先,在 AppComponent 中新增工具列和圖示。開啟 app.component.html 並新增下列標記:
src/app/app.component.html
<mat-toolbar color="primary">
  <mat-icon>local_fire_department</mat-icon>
  <span>Kanban Fire</span>
</mat-toolbar>
我們在這裡使用 Material Design 主題的主要顏色新增工具列,並在工具列內使用「Kanban Fire」標籤旁的 local_fire_depeartment 圖示。如果現在查看控制台,會發現 Angular 擲回了幾個錯誤。如要修正這些問題,請務必將下列匯入項目新增至 AppModule:
src/app/app.module.ts
...
import { MatToolbarModule } from '@angular/material/toolbar';
import { MatIconModule } from '@angular/material/icon';

@NgModule({
  declarations: [
    AppComponent
  ],
  imports: [
    ...
    MatToolbarModule,
    MatIconModule
  ],
  providers: [],
  bootstrap: [AppComponent]
})
export class AppModule { }
由於我們使用 Angular Material 工具列和圖示,因此需要在 AppModule 中匯入對應的模組。
畫面上現在應該會顯示以下內容:
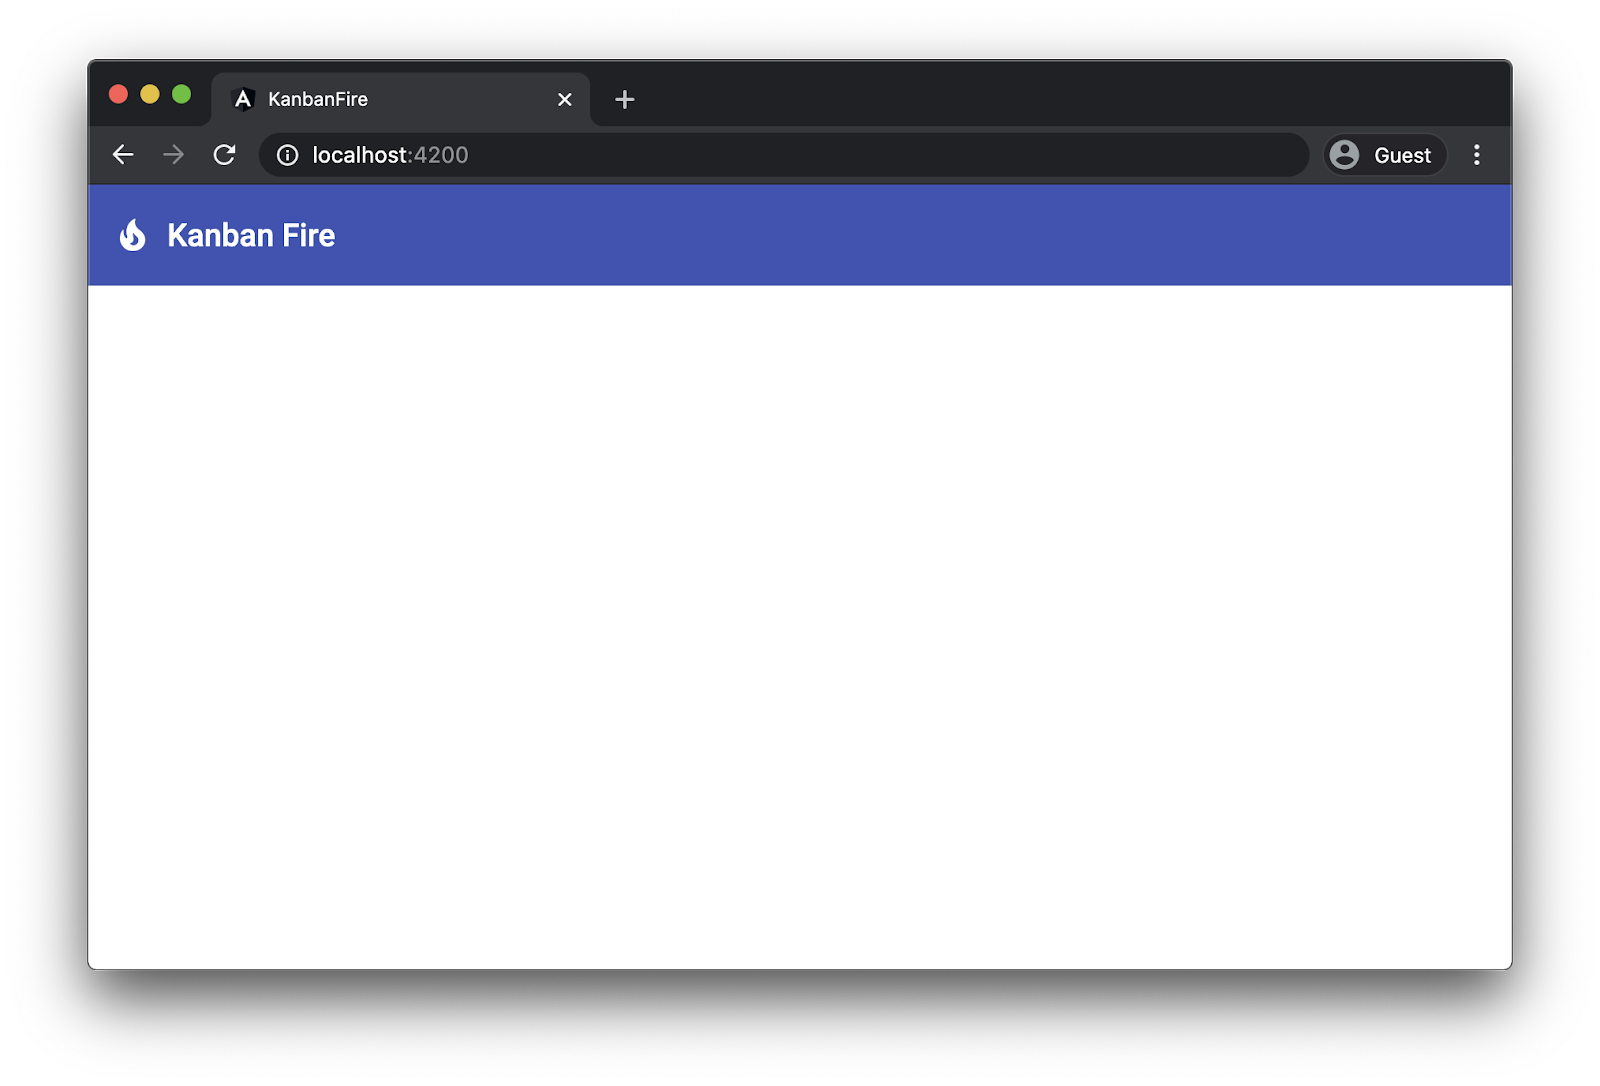
只用了 4 行 HTML 和兩項匯入內容,效果還不錯!
4. 以視覺化方式呈現工作
接下來,我們要建立一個元件,用於顯示看板中的工作。
前往 src/app 目錄,然後執行下列 CLI 指令:
ng generate component task
這項指令會產生 TaskComponent,並將其宣告新增至 AppModule。在 task 目錄中,建立名為 task.ts 的檔案。我們會使用這個檔案定義看板中工作的介面。每項工作都會有選用的 id、title 和 description 欄位,全部都是字串類型:
src/app/task/task.ts
export interface Task {
  id?: string;
  title: string;
  description: string;
}
現在來更新 task.component.ts。我們希望 TaskComponent 接受 Task 類型的物件做為輸入內容,並能夠發出「edit」輸出內容:
src/app/task/task.component.ts
import { Component, Input, Output, EventEmitter } from '@angular/core';
import { Task } from './task';

@Component({
  selector: 'app-task',
  templateUrl: './task.component.html',
  styleUrls: ['./task.component.css']
})
export class TaskComponent {
  @Input() task: Task | null = null;
  @Output() edit = new EventEmitter<Task>();
}
編輯「TaskComponent」的範本!開啟 task.component.html,並將內容替換為下列 HTML:
src/app/task/task.component.html
<mat-card class="item" *ngIf="task" (dblclick)="edit.emit(task)">
  <h2>{{ task.title }}</h2>
  <p>
    {{ task.description }}
  </p>
</mat-card>
請注意,我們現在會在控制台中收到錯誤訊息:
'mat-card' is not a known element:
1. If 'mat-card' is an Angular component, then verify that it is part of this module.
2. If 'mat-card' is a Web Component then add 'CUSTOM_ELEMENTS_SCHEMA' to the '@NgModule.schemas' of this component to suppress this message.ng
在上述範本中,我們使用 @angular/material 的 mat-card 元件,但尚未在應用程式中匯入對應的模組。如要修正上述錯誤,我們需要在 AppModule 中匯入 MatCardModule:
src/app/app.module.ts
...
import { MatCardModule } from '@angular/material/card';

@NgModule({
  declarations: [
    AppComponent
  ],
  imports: [
    ...
    MatCardModule
  ],
  providers: [],
  bootstrap: [AppComponent]
})
export class AppModule { }
接下來,我們將在 AppComponent 中建立幾項工作,並使用 TaskComponent 將這些工作視覺化!
在 AppComponent 中定義名為 todo 的陣列,並在其中新增兩項工作:
src/app/app.component.ts
...
import { Task } from './task/task';

@Component(...)
export class AppComponent {
  todo: Task[] = [
    {
      title: 'Buy milk',
      description: 'Go to the store and buy milk'
    },
    {
      title: 'Create a Kanban app',
      description: 'Using Firebase and Angular create a Kanban app!'
    }
  ];
}
現在,請在 app.component.html 底部新增下列 *ngFor 指令:
src/app/app.component.html
<app-task *ngFor="let task of todo" [task]="task"></app-task>
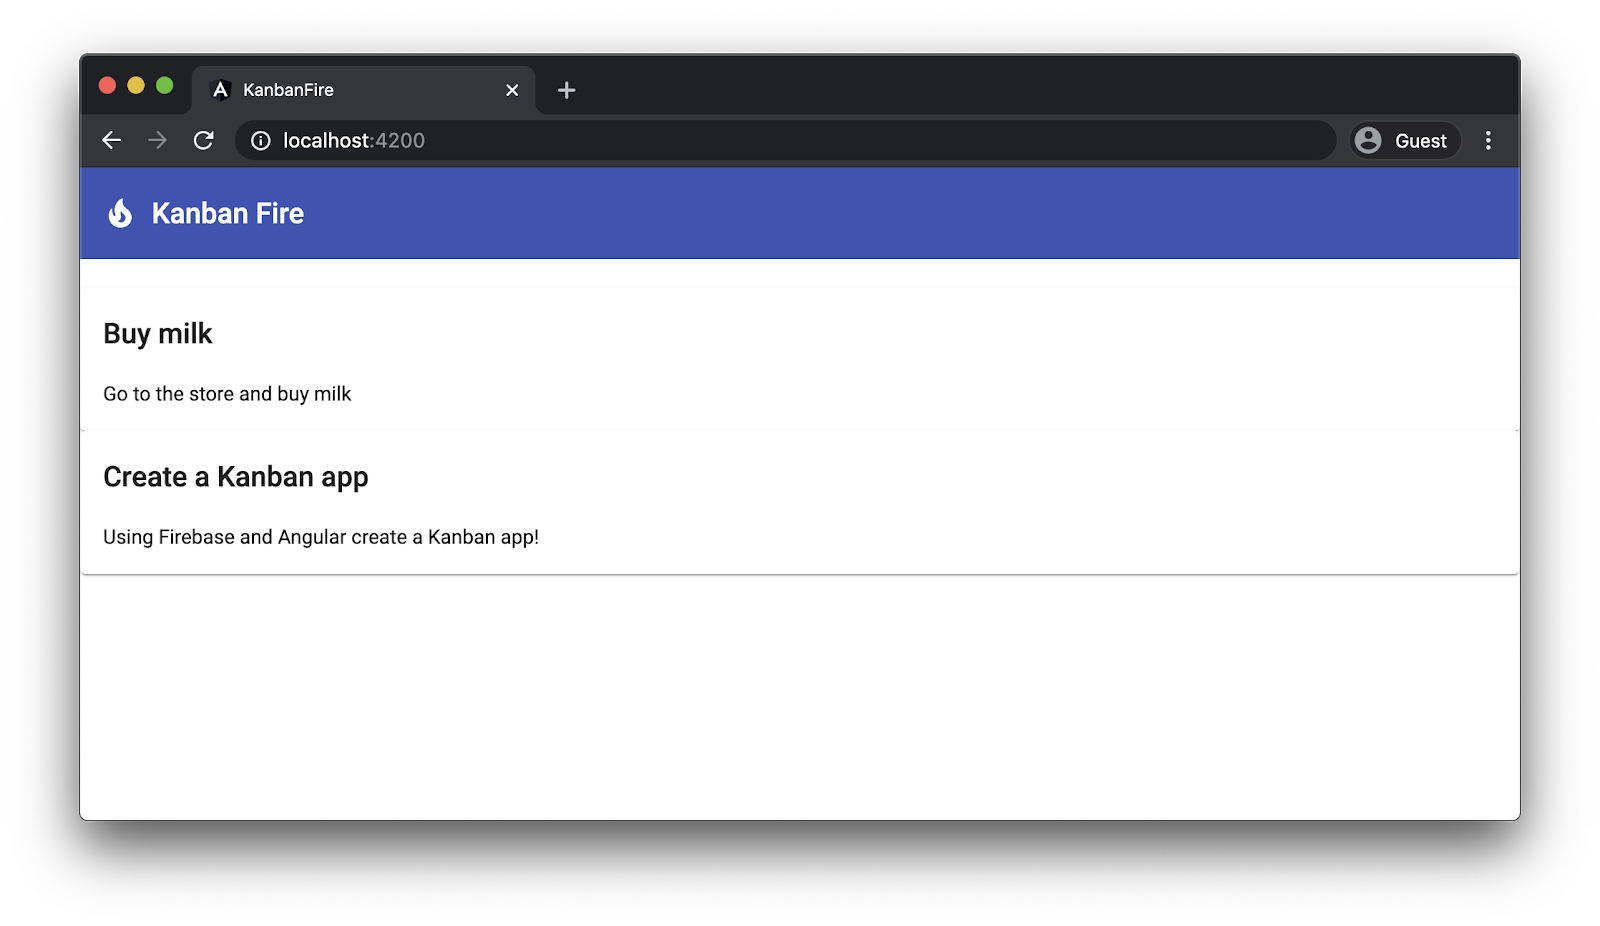
開啟瀏覽器時,您應該會看到下列內容:
5. 實作工作拖曳功能
現在可以開始有趣的部分了!讓我們為工作可能處於的三種不同狀態建立三個泳道,並使用 Angular CDK 實作拖曳功能。
在 app.component.html 中,移除頂端的 *ngFor 指令,並將 app-task 元件替換為:
src/app/app.component.html
<div class="content-wrapper">
  <div class="container-wrapper">
    <div class="container">
      <h2>Backlog</h2>

      <mat-card
        cdkDropList
        id="todo"
        #todoList="cdkDropList"
        [cdkDropListData]="todo"
        [cdkDropListConnectedTo]="[doneList, inProgressList]"
        (cdkDropListDropped)="drop($event)"
        class="list">
        <p class="empty-label" *ngIf="todo.length === 0">Empty list</p>
        <app-task (edit)="editTask('todo', $event)" *ngFor="let task of todo" cdkDrag [task]="task"></app-task>
      </mat-card>
    </div>

    <div class="container">
      <h2>In progress</h2>

      <mat-card
        cdkDropList
        id="inProgress"
        #inProgressList="cdkDropList"
        [cdkDropListData]="inProgress"
        [cdkDropListConnectedTo]="[todoList, doneList]"
        (cdkDropListDropped)="drop($event)"
        class="list">
        <p class="empty-label" *ngIf="inProgress.length === 0">Empty list</p>
        <app-task (edit)="editTask('inProgress', $event)" *ngFor="let task of inProgress" cdkDrag [task]="task"></app-task>
      </mat-card>
    </div>

    <div class="container">
      <h2>Done</h2>

      <mat-card
        cdkDropList
        id="done"
        #doneList="cdkDropList"
        [cdkDropListData]="done"
        [cdkDropListConnectedTo]="[todoList, inProgressList]"
        (cdkDropListDropped)="drop($event)"
        class="list">
        <p class="empty-label" *ngIf="done.length === 0">Empty list</p>
        <app-task (edit)="editTask('done', $event)" *ngFor="let task of done" cdkDrag [task]="task"></app-task>
      </mat-card>
    </div>
  </div>
</div>
這裡有很多內容。現在就來逐步瞭解這個程式碼片段的各個部分。這是範本的頂層結構:
src/app/app.component.html
...
<div class="container-wrapper">
  <div class="container">
    <h2>Backlog</h2>
    ...
  </div>

  <div class="container">
    <h2>In progress</h2>
    ...
  </div>

  <div class="container">
    <h2>Done</h2>
    ...
  </div>
</div>
在這裡,我們建立 div,將所有三個泳道包裝起來,類別名稱為「container-wrapper」。每個泳道都有類別名稱「container」,以及 h2 標記內的標題。
現在來看看第一個泳道的結構:
src/app/app.component.html
...
    <div class="container">
      <h2>Backlog</h2>

      <mat-card
        cdkDropList
        id="todo"
        #todoList="cdkDropList"
        [cdkDropListData]="todo"
        [cdkDropListConnectedTo]="[doneList, inProgressList]"
        (cdkDropListDropped)="drop($event)"
        class="list"
      >
        <p class="empty-label" *ngIf="todo.length === 0">Empty list</p>
        <app-task (edit)="editTask('todo', $event)" *ngFor="let task of todo" cdkDrag [task]="task"></app-task>
      </mat-card>
    </div>
...
首先,我們將泳道定義為 mat-card,並使用 cdkDropList 指令。我們使用 mat-card 是因為這個元件提供的樣式。稍後,我們將使用 cdkDropList 在元素內放置工作。我們也設定了下列兩項輸入:
cdkDropListData- 下拉式清單的輸入內容,可讓我們指定資料陣列cdkDropListConnectedTo- 參照目前cdkDropList連線的其他cdkDropList。設定這項輸入內容時,我們會指定可將項目放入的其他清單
此外,我們也想使用 cdkDropListDropped 輸出內容處理放置事件。cdkDropList 發出這項輸出內容後,我們將叫用 AppComponent 內宣告的 drop 方法,並將目前事件做為引數傳遞。
請注意,我們也指定了 id 做為這個容器的 ID,以及 class 名稱,方便我們設定樣式。現在來看看 mat-card 的內容子項。我們有以下兩個元素:
- 段落,用於在
todo清單中沒有項目時顯示「空白清單」文字 app-task元件。請注意,我們在這裡處理的是原本宣告的edit輸出內容,方法是使用清單名稱和$event物件呼叫editTask方法。這有助於我們從正確的清單中取代編輯過的工作。接著,我們按照上述做法疊代todo清單,並傳遞task輸入內容。不過,這次我們也會新增cdkDrag指令。讓個別工作可供拖曳。
如要讓所有項目正常運作,我們需要更新 app.module.ts,並匯入 DragDropModule:
src/app/app.module.ts
...
import { DragDropModule } from '@angular/cdk/drag-drop';

@NgModule({
  declarations: [
    AppComponent
  ],
  imports: [
    ...
    DragDropModule
  ],
  providers: [],
  bootstrap: [AppComponent]
})
export class AppModule { }
我們也需要宣告 inProgress 和 done 陣列,以及 editTask 和 drop 方法:
src/app/app.component.ts
...
import { CdkDragDrop, transferArrayItem } from '@angular/cdk/drag-drop';

@Component(...)
export class AppComponent {
  todo: Task[] = [...];
  inProgress: Task[] = [];
  done: Task[] = [];

  editTask(list: string, task: Task): void {}

  drop(event: CdkDragDrop<Task[]>): void {
    if (event.previousContainer === event.container) {
      return;
    }
    if (!event.container.data || !event.previousContainer.data) {
      return;
    }
    transferArrayItem(
      event.previousContainer.data,
      event.container.data,
      event.previousIndex,
      event.currentIndex
    );
  }
}
請注意,在 drop 方法中,我們會先檢查要放置的清單是否與工作來源清單相同。如果是這樣,我們會立即退款。否則,我們會將目前的工作轉移至目標泳道。
結果應為:
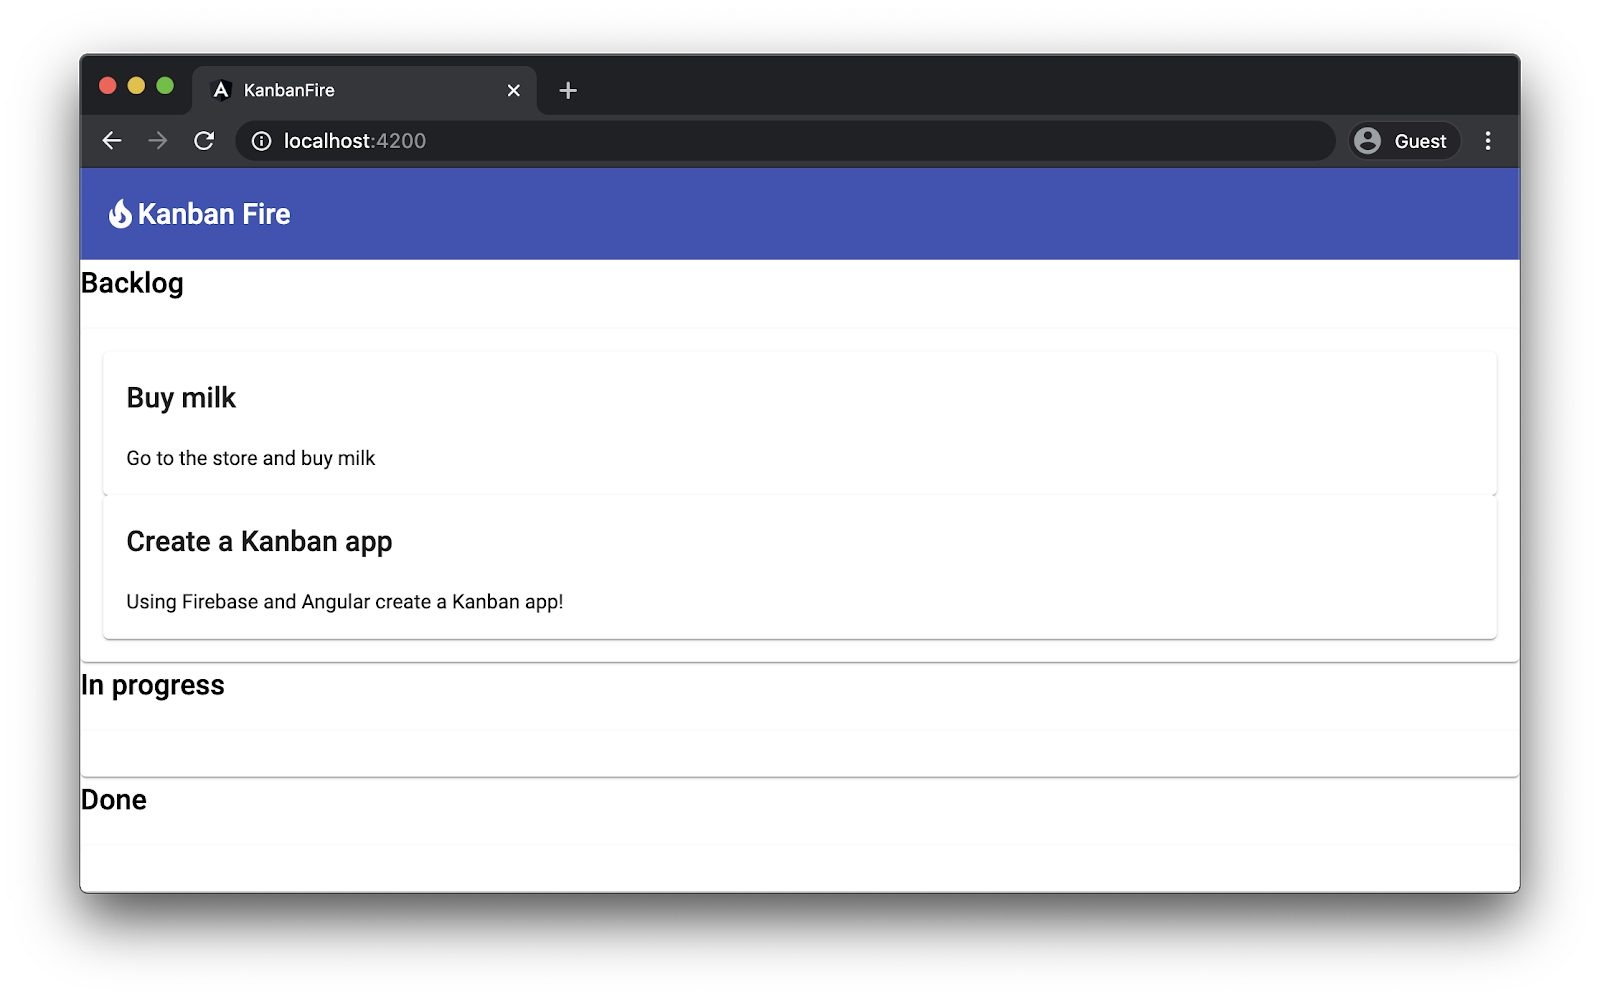
此時,您應該已可在這兩個清單之間轉移項目!
6. 建立新工作
現在,我們來實作建立新工作的功能。為此,請更新 AppComponent 的範本:
src/app/app.component.html
<mat-toolbar color="primary">
...
</mat-toolbar>

<div class="content-wrapper">
  <button (click)="newTask()" mat-button>
    <mat-icon>add</mat-icon> Add Task
  </button>

  <div class="container-wrapper">
    <div class="container">
      ...
    </div>
</div>
我們會在 container-wrapper 周圍建立頂層 div 元素,並新增按鈕,其中包含「新增工作」標籤旁的「add」材質圖示。我們需要額外的包裝函式,將按鈕放在泳道清單頂端,之後會使用彈性方塊將兩者並列。由於這個按鈕使用 Material 按鈕元件,因此我們需要在 AppModule 中匯入對應的模組:
src/app/app.module.ts
...
import { MatButtonModule } from '@angular/material/button';

@NgModule({
  declarations: [
    AppComponent
  ],
  imports: [
    ...
    MatButtonModule
  ],
  providers: [],
  bootstrap: [AppComponent]
})
export class AppModule { }
現在,我們來實作在 AppComponent 中新增工作的函式。我們將使用 Material 對話方塊。對話方塊中會有一個表單,內含兩個欄位:標題和說明。使用者點選「Add Task」按鈕時,我們會開啟對話方塊;使用者提交表單時,我們會將新建立的工作新增至 todo 清單。
讓我們看看 AppComponent 中這項功能的高階實作方式:
src/app/app.component.ts
...
import { MatDialog } from '@angular/material/dialog';

@Component(...)
export class AppComponent {
  ...

  constructor(private dialog: MatDialog) {}

  newTask(): void {
    const dialogRef = this.dialog.open(TaskDialogComponent, {
      width: '270px',
      data: {
        task: {},
      },
    });
    dialogRef
      .afterClosed()
      .subscribe((result: TaskDialogResult|undefined) => {
        if (!result) {
          return;
        }
        this.todo.push(result.task);
      });
  }
}
我們在建構函式中宣告要插入的 MatDialog 類別。在 newTask 中,我們:
- 使用我們稍後會定義的
TaskDialogComponent開啟新對話方塊。 - 指定對話方塊的寬度為
270px. - 將空白工作做為資料傳遞至對話方塊。在
TaskDialogComponent中,我們將能夠取得這個資料物件的參照。 - 我們訂閱關閉事件,並將
result物件中的工作新增至todo陣列。
為確保這項功能正常運作,我們首先需要在 AppModule 中匯入 MatDialogModule:
src/app/app.module.ts
...
import { MatDialogModule } from '@angular/material/dialog';

@NgModule({
  declarations: [
    AppComponent
  ],
  imports: [
    ...
    MatDialogModule
  ],
  providers: [],
  bootstrap: [AppComponent]
})
export class AppModule { }
現在來建立 TaskDialogComponent。前往 src/app 目錄並執行:
ng generate component task-dialog
如要實作這項功能,請先開啟 src/app/task-dialog/task-dialog.component.html,然後將內容替換為:
src/app/task-dialog/task-dialog.component.html
<mat-form-field>
  <mat-label>Title</mat-label>
  <input matInput cdkFocusInitial [(ngModel)]="data.task.title" />
</mat-form-field>

<mat-form-field>
  <mat-label>Description</mat-label>
  <textarea matInput [(ngModel)]="data.task.description"></textarea>
</mat-form-field>

<div mat-dialog-actions>
  <button mat-button [mat-dialog-close]="{ task: data.task }">OK</button>
  <button mat-button (click)="cancel()">Cancel</button>
</div>
在上述範本中,我們為 title 和 description 建立含有兩個欄位的表單。我們使用 cdkFocusInput 指令,在使用者開啟對話方塊時,自動將焦點放在 title 輸入內容上。
請注意,在範本中,我們會參照元件的 data 屬性。這會是我們在 AppComponent 中傳遞至 dialog 的 open 方法的相同 data。當使用者變更對應欄位的內容時,如要更新工作名稱和說明,請使用 ngModel 進行雙向資料繫結。
使用者點選「確定」按鈕後,系統會自動傳回結果 { task: data.task },也就是我們使用上述範本中的表單欄位變動的任務。
現在,我們來實作元件的控制器:
src/app/task-dialog/task-dialog.component.ts
import { Component, Inject } from '@angular/core';
import { MAT_DIALOG_DATA, MatDialogRef } from '@angular/material/dialog';
import { Task } from '../task/task';

@Component({
  selector: 'app-task-dialog',
  templateUrl: './task-dialog.component.html',
  styleUrls: ['./task-dialog.component.css'],
})
export class TaskDialogComponent {
  private backupTask: Partial<Task> = { ...this.data.task };

  constructor(
    public dialogRef: MatDialogRef<TaskDialogComponent>,
    @Inject(MAT_DIALOG_DATA) public data: TaskDialogData
  ) {}

  cancel(): void {
    this.data.task.title = this.backupTask.title;
    this.data.task.description = this.backupTask.description;
    this.dialogRef.close(this.data);
  }
}
在 TaskDialogComponent 中,我們會插入對話方塊的參照,以便關閉對話方塊,並插入與 MAT_DIALOG_DATA 權杖相關聯的供應商值。這是我們在上述 AppComponent 中傳遞至 open 方法的資料物件。我們也會宣告私有屬性 backupTask,這是我們連同資料物件傳遞的工作副本。
使用者按下取消按鈕時,我們會還原 this.data.task 可能已變更的屬性,並關閉對話方塊,將 this.data 做為結果傳遞。
我們參考了兩種型別,但尚未宣告 - TaskDialogData 和 TaskDialogResult。在 src/app/task-dialog/task-dialog.component.ts 中,將下列宣告新增至檔案底部:
src/app/task-dialog/task-dialog.component.ts
...
export interface TaskDialogData {
  task: Partial<Task>;
  enableDelete: boolean;
}

export interface TaskDialogResult {
  task: Task;
  delete?: boolean;
}
在功能準備就緒前,我們最後需要做的事是在 AppModule 中匯入幾個模組!
src/app/app.module.ts
...
import { MatInputModule } from '@angular/material/input';
import { FormsModule } from '@angular/forms';

@NgModule({
  declarations: [
    AppComponent
  ],
  imports: [
    ...
    MatInputModule,
    FormsModule
  ],
  providers: [],
  bootstrap: [AppComponent]
})
export class AppModule { }
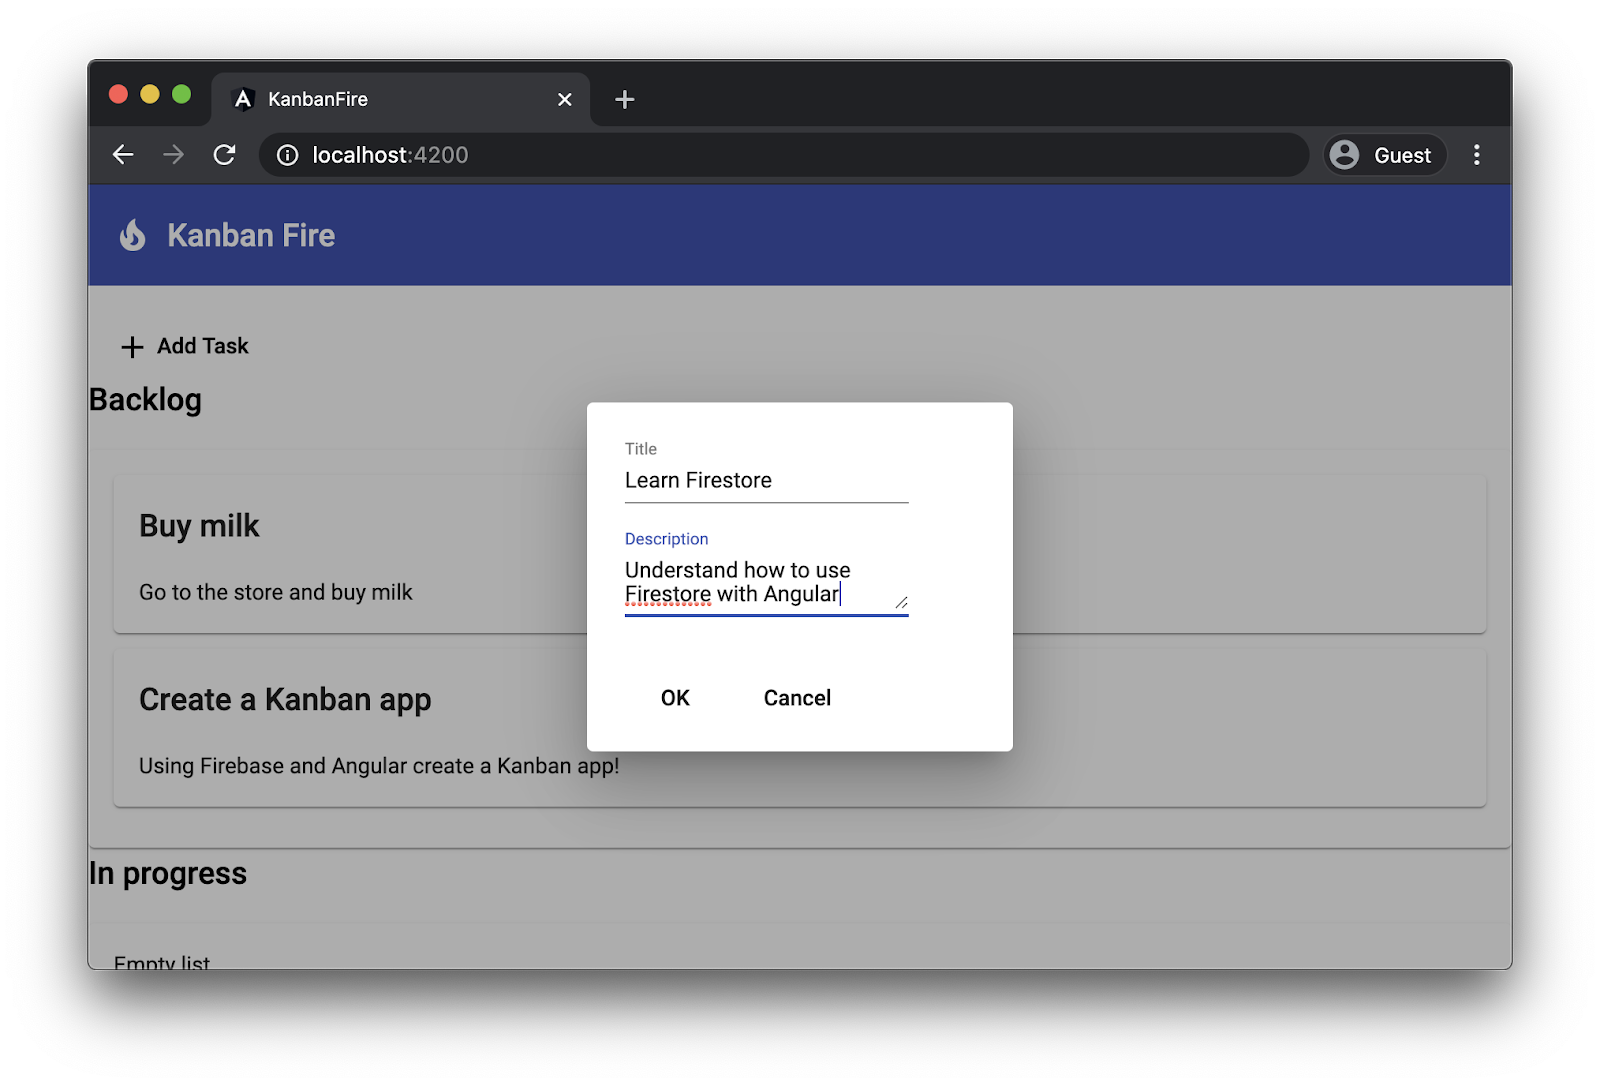
現在點選「Add Task」按鈕時,您應該會看到下列使用者介面:
7. 改善應用程式的樣式
為了讓應用程式更具視覺吸引力,我們會稍微調整樣式,改善版面配置。我們希望將泳道並排顯示。我們也希望稍微調整「新增工作」按鈕和空白清單標籤。
開啟 src/app/app.component.css,並在底部新增下列樣式:
src/app/app.component.css
mat-toolbar {
  margin-bottom: 20px;
}

mat-toolbar > span {
  margin-left: 10px;
}

.content-wrapper {
  max-width: 1400px;
  margin: auto;
}

.container-wrapper {
  display: flex;
  justify-content: space-around;
}

.container {
  width: 400px;
  margin: 0 25px 25px 0;
}

.list {
  border: solid 1px #ccc;
  min-height: 60px;
  border-radius: 4px;
}

app-new-task {
  margin-bottom: 30px;
}

.empty-label {
  font-size: 2em;
  padding-top: 10px;
  text-align: center;
  opacity: 0.2;
}
在上方的程式碼片段中,我們調整了工具列及其標籤的版面配置。我們也會將內容寬度設為 1400px,邊界設為 auto,確保內容水平對齊。接著,我們使用彈性方塊將泳道並排,最後調整工作和空白清單的顯示方式。
應用程式重新載入後,您應該會看到下列使用者介面:
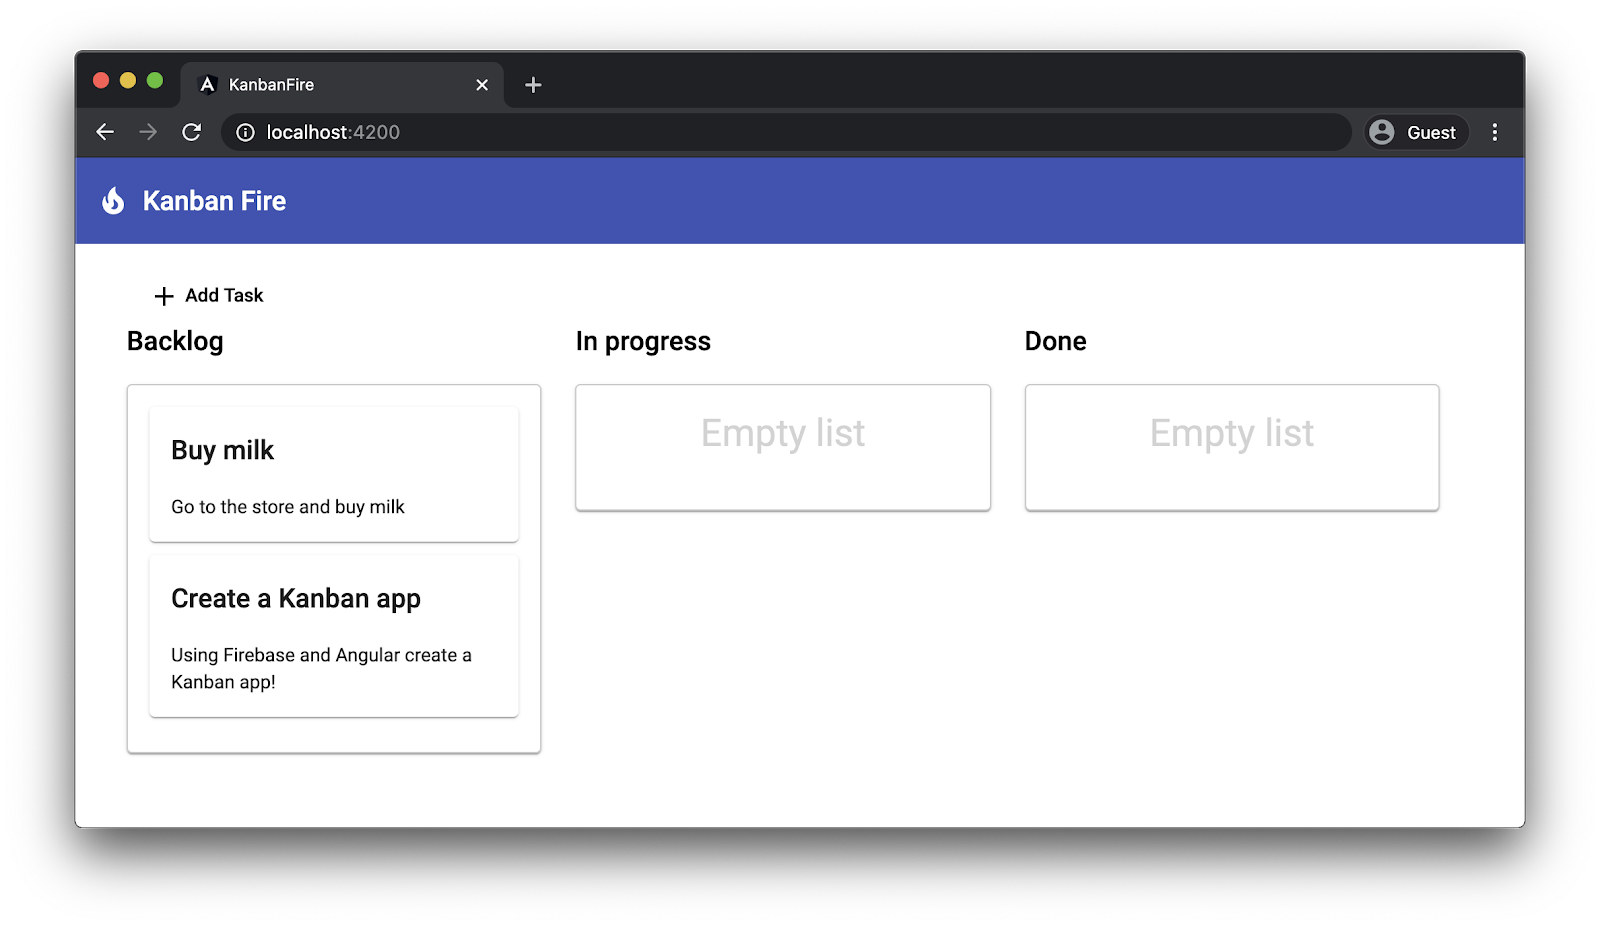
雖然我們大幅改善了應用程式的樣式,但移動工作時仍會遇到惱人的問題:
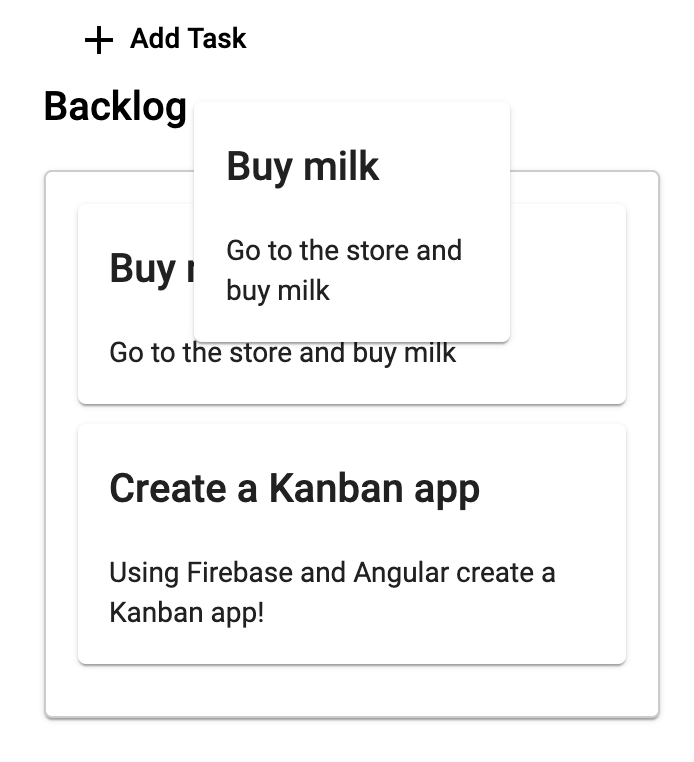
開始拖曳「買牛奶」工作時,我們會看到同一項工作的兩張資訊卡,一張是我們正在拖曳的資訊卡,另一張則位於泳道中。Angular CDK 提供 CSS 類別名稱,可用於修正這個問題。
在 src/app/app.component.css 底部新增下列樣式覆寫:
src/app/app.component.css
.cdk-drag-animating {
  transition: transform 250ms;
}

.cdk-drag-placeholder {
  opacity: 0;
}
拖曳元素時,Angular CDK 的拖曳功能會複製元素,並插入要放置原始元素的位置。為確保這個元素不會顯示,我們在 cdk-drag-placeholder 類別中設定了不透明度屬性,CDK 會將這個類別新增至預留位置。
此外,當我們放置元素時,CDK 會新增 cdk-drag-animating 類別。如要顯示平滑動畫,而不是直接對齊元素,請定義持續時間為 250ms 的轉場效果。
我們也想稍微調整工作樣式。在 task.component.css 中,將主機元素的顯示畫面設為 block,並設定一些邊界:
src/app/task/task.component.css
:host {
  display: block;
}

.item {
  margin-bottom: 10px;
  cursor: pointer;
}
8. 編輯及刪除現有工作
如要編輯及移除現有工作,我們將重複使用已實作的大部分功能!使用者按兩下工作時,我們會開啟 TaskDialogComponent,並在表單中填入工作的 title 和 description。
我們也會在 TaskDialogComponent 中新增刪除按鈕。使用者點選後,我們會傳遞刪除指令,最終會傳遞至 AppComponent。
我們需要在 TaskDialogComponent 的範本中進行的唯一變更如下:
src/app/task-dialog/task-dialog.component.html
<mat-form-field>
 ...
</mat-form-field>

<div mat-dialog-actions>
  ...
  <button
    *ngIf="data.enableDelete"
    mat-fab
    color="primary"
    aria-label="Delete"
    [mat-dialog-close]="{ task: data.task, delete: true }">
    <mat-icon>delete</mat-icon>
  </button>
</div>
這個按鈕會顯示刪除素材圖示。使用者點選後,系統會關閉對話方塊,並將物件常值 { task: data.task, delete: true } 做為結果傳遞。另請注意,我們使用 mat-fab 將按鈕設為圓形,並將顏色設為主要顏色,且只會在對話方塊資料啟用刪除功能時顯示按鈕。
編輯和刪除功能的其餘實作項目位於 AppComponent。將其 editTask 方法替換為下列內容:
src/app/app.component.ts
@Component({ ... })
export class AppComponent {
  ...
  editTask(list: 'done' | 'todo' | 'inProgress', task: Task): void {
    const dialogRef = this.dialog.open(TaskDialogComponent, {
      width: '270px',
      data: {
        task,
        enableDelete: true,
      },
    });
    dialogRef.afterClosed().subscribe((result: TaskDialogResult|undefined) => {
      if (!result) {
        return;
      }
      const dataList = this[list];
      const taskIndex = dataList.indexOf(task);
      if (result.delete) {
        dataList.splice(taskIndex, 1);
      } else {
        dataList[taskIndex] = task;
      }
    });
  }
  ...
}
讓我們看看 editTask 方法的引數:
- 類型
'done' | 'todo' | 'inProgress',的清單,這是字串常值聯集型別,值對應至與個別泳道相關聯的屬性。 - 要編輯的目前工作。
在方法的主體中,我們首先會開啟 TaskDialogComponent 的例項。我們傳遞物件常值做為 data,指定要編輯的工作,並將 enableDelete 屬性設為 true,啟用表單中的編輯按鈕。
當我們從對話方塊取得結果時,會處理以下兩種情況:
- 當
delete旗標設為true(即使用者按下刪除按鈕時),我們會從對應清單中移除工作。 - 或者,我們只要將指定索引上的工作,替換為從對話方塊結果取得的工作即可。
9. 建立新的 Firebase 專案
現在,讓我們建立新的 Firebase 專案!
- 前往 Firebase 控制台。
- 建立名為「KanbanFire」的新專案。
10. 將 Firebase 新增至專案
在本節中,我們將專案與 Firebase 整合!Firebase 團隊提供 @angular/fire 套件,可整合這兩項技術。如要為應用程式新增 Firebase 支援,請開啟工作區的根目錄並執行下列指令:
ng add @angular/fire
這項指令會安裝 @angular/fire 套件,並詢問幾個問題。終端機中應該會顯示如下內容:

同時,安裝程序會開啟瀏覽器視窗,讓您使用 Firebase 帳戶進行驗證。最後,系統會要求您選擇 Firebase 專案,並在磁碟上建立一些檔案。
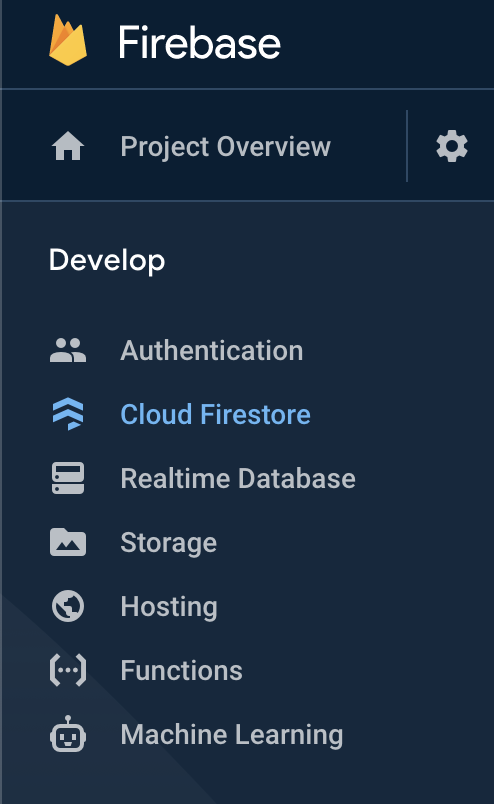
接著,我們需要建立 Firestore 資料庫!在「Cloud Firestore」下方,按一下「建立資料庫」。
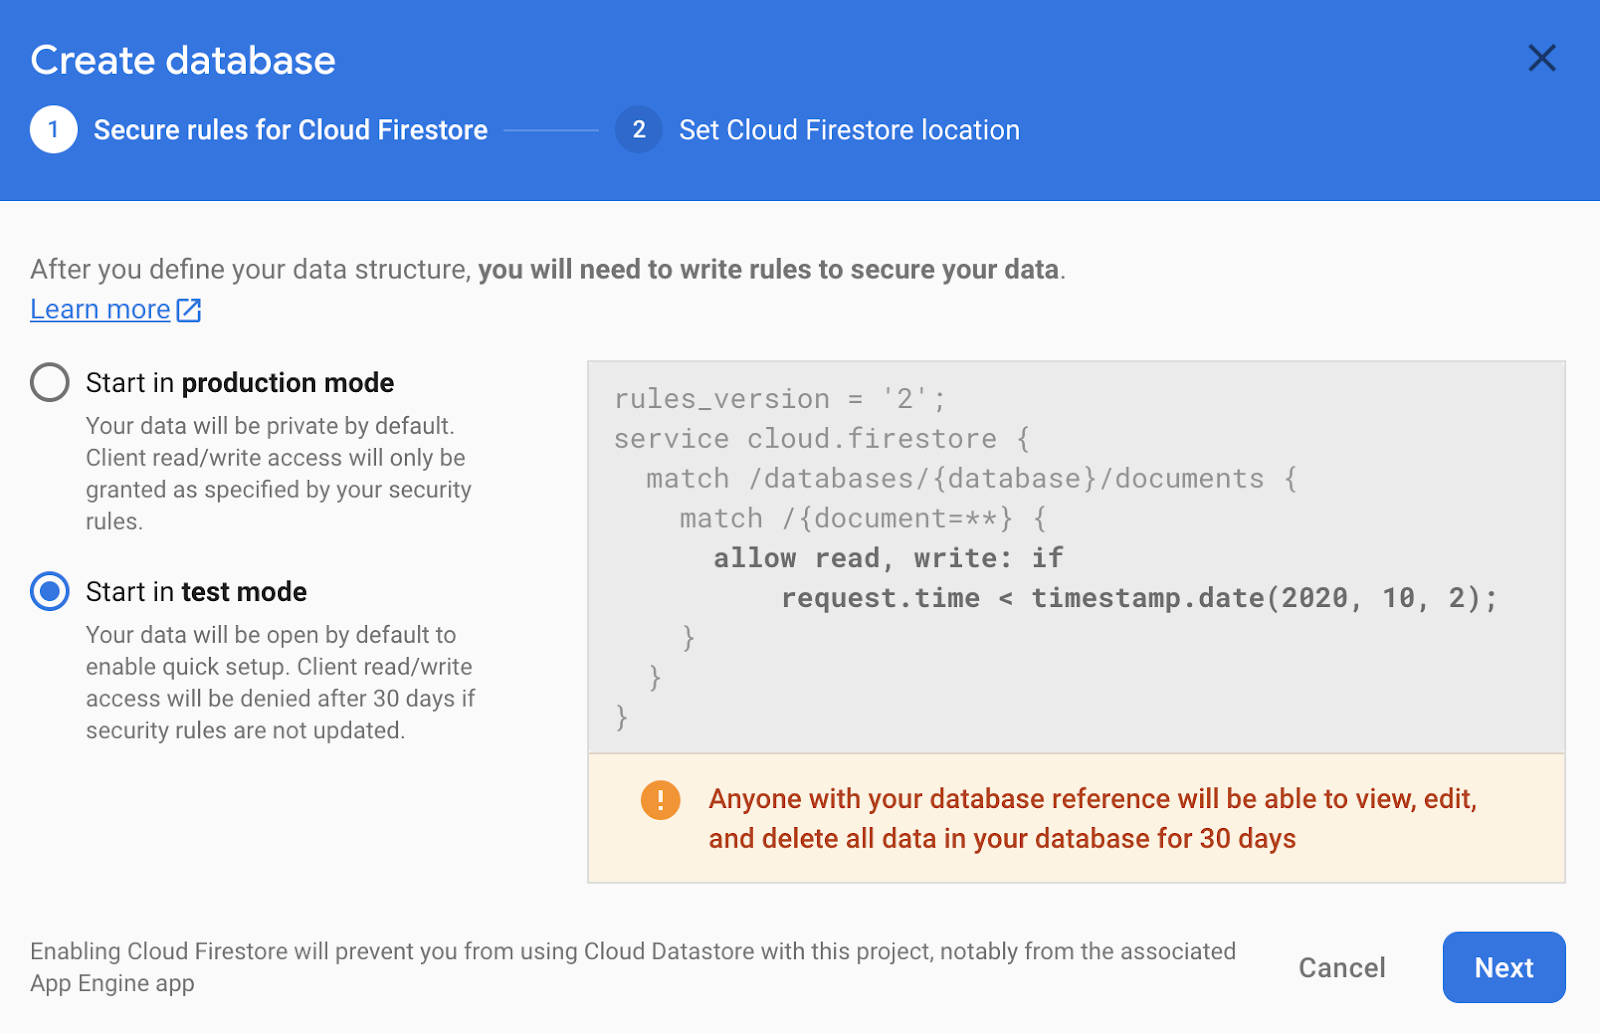
接著,請以測試模式建立資料庫:
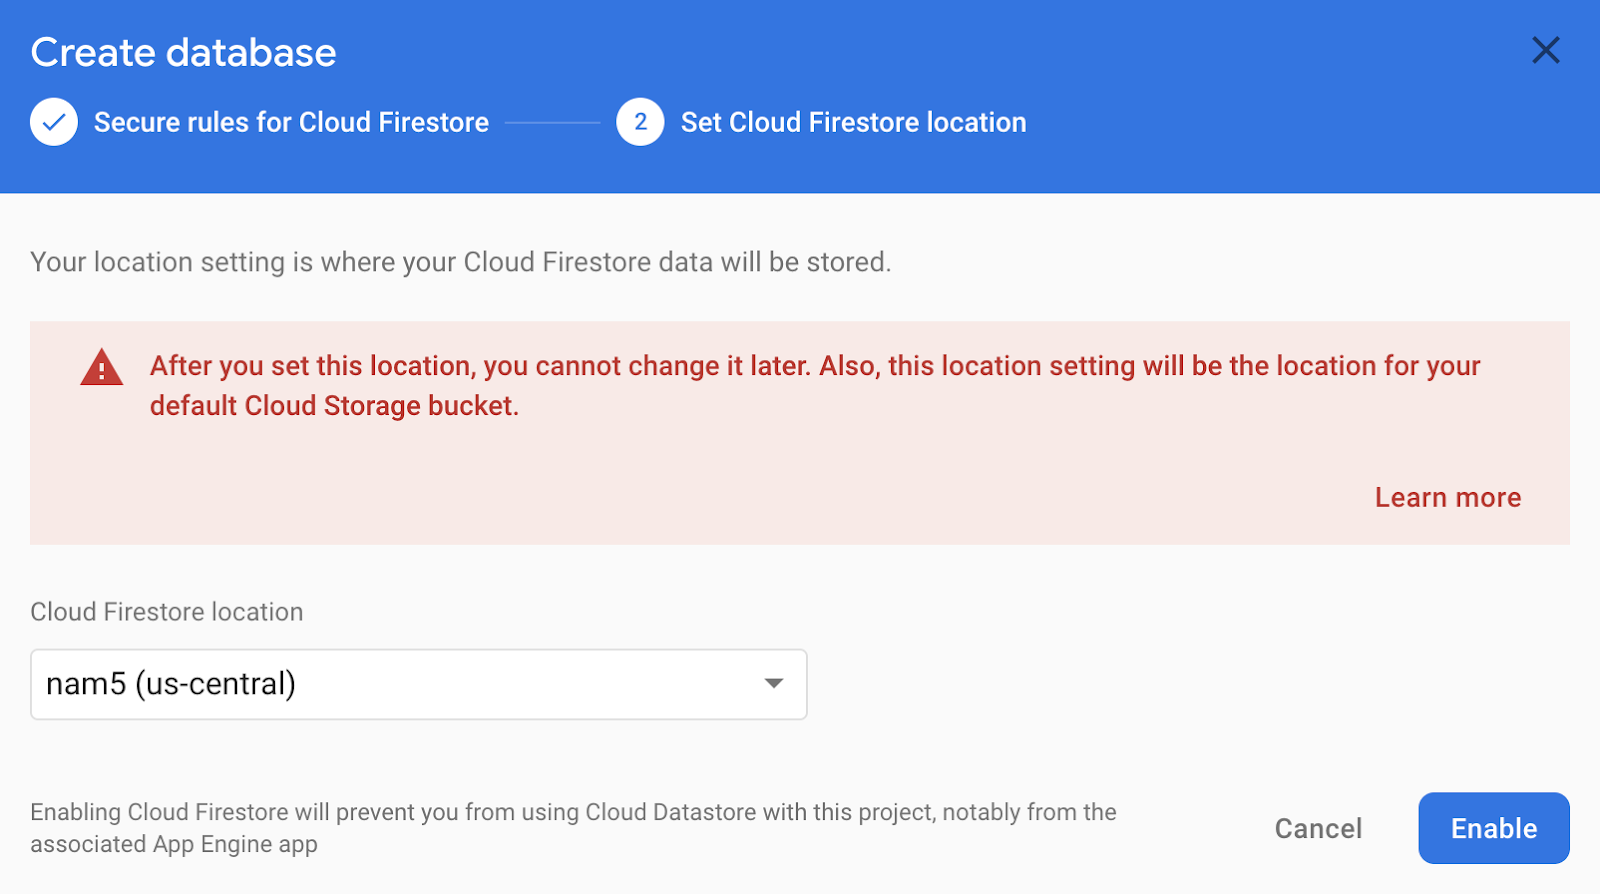
最後,選取區域:
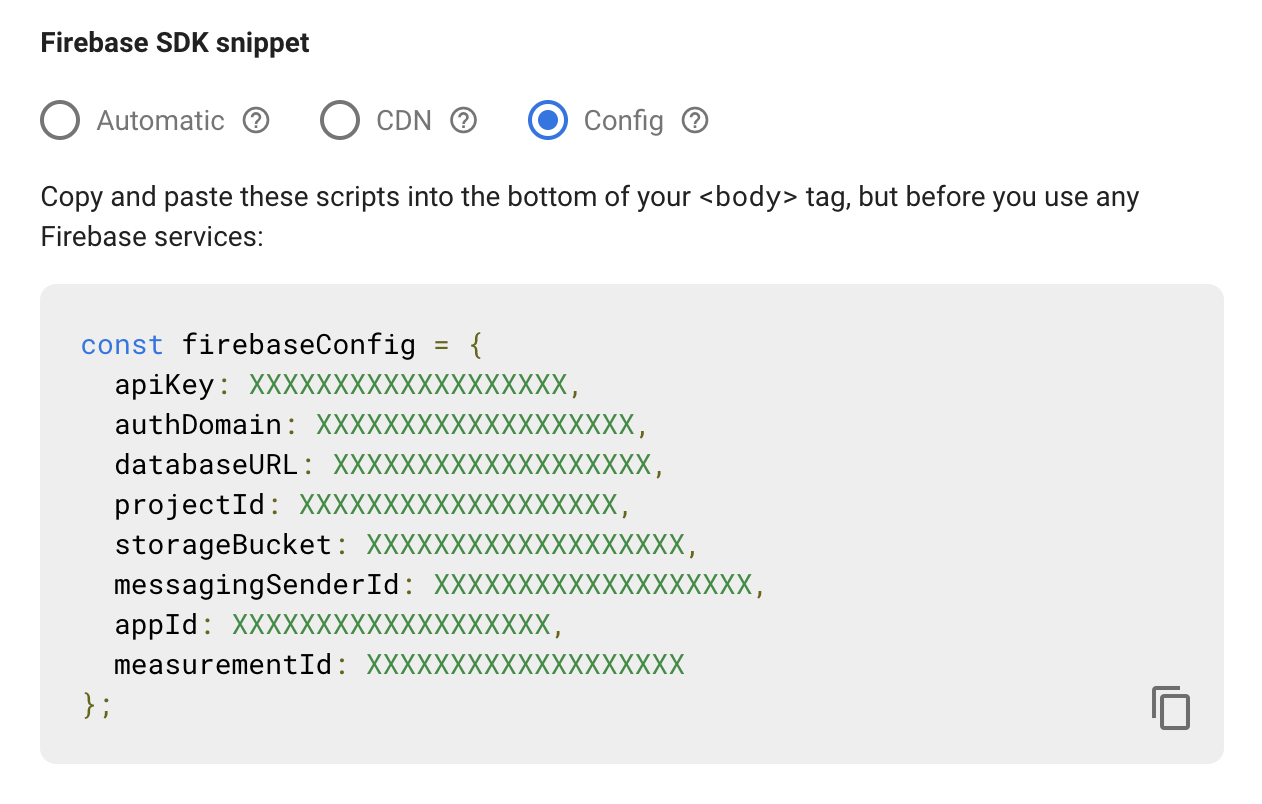
現在只剩下將 Firebase 設定新增至環境中。您可以在 Firebase 控制台中找到專案設定。
- 按一下「專案總覽」旁的齒輪圖示。
- 選擇「專案設定」。

在「您的應用程式」下方,選取「網頁應用程式」:

接著,請註冊應用程式並務必啟用「Firebase Hosting」:
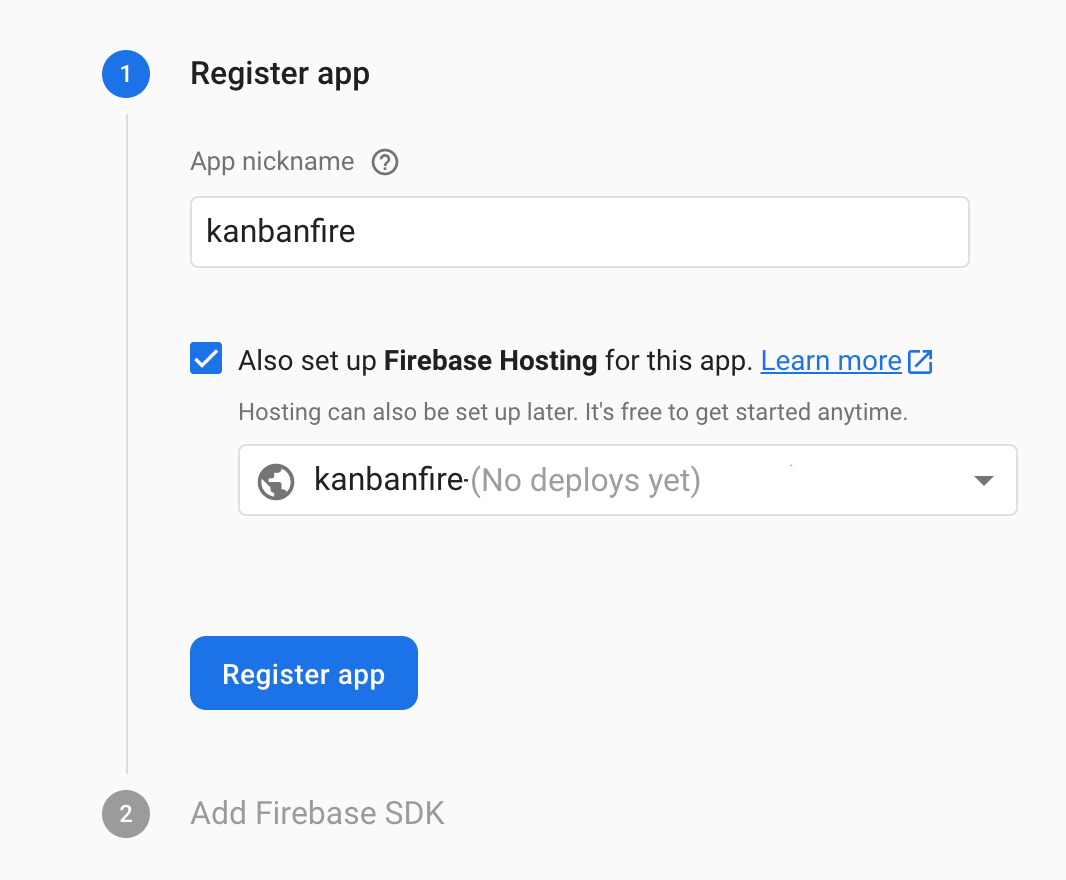
按一下「註冊應用程式」後,即可將設定複製到 src/environments/environment.ts:
最後,您的設定檔應如下所示:
src/environments/environment.ts
export const environment = {
  production: false,
  firebase: {
    apiKey: '<your-key>',
    authDomain: '<your-project-authdomain>',
    databaseURL: '<your-database-URL>',
    projectId: '<your-project-id>',
    storageBucket: '<your-storage-bucket>',
    messagingSenderId: '<your-messaging-sender-id>'
  }
};
11. 將資料移至 Firestore
我們已設定 Firebase SDK,現在請使用 @angular/fire 將資料移至 Firestore!首先,請在 AppModule 中匯入所需模組:
src/app/app.module.ts
...
import { environment } from 'src/environments/environment';
import { AngularFireModule } from '@angular/fire';
import { AngularFirestoreModule } from '@angular/fire/firestore';

@NgModule({
  declarations: [AppComponent, TaskDialogComponent, TaskComponent],
  imports: [
    ...
    AngularFireModule.initializeApp(environment.firebase),
    AngularFirestoreModule
  ],
  providers: [],
  bootstrap: [AppComponent],
})
export class AppModule {}
由於我們會使用 Firestore,因此需要在 AppComponent 的建構函式中插入 AngularFirestore:
src/app/app.component.ts
...
import { AngularFirestore } from '@angular/fire/firestore';

@Component({...})
export class AppComponent {
  ...
  constructor(private dialog: MatDialog, private store: AngularFirestore) {}
  ...
}
接著,我們更新初始化泳道陣列的方式:
src/app/app.component.ts
...

@Component({...})
export class AppComponent {
  todo = this.store.collection('todo').valueChanges({ idField: 'id' }) as Observable<Task[]>;
  inProgress = this.store.collection('inProgress').valueChanges({ idField: 'id' }) as Observable<Task[]>;
  done = this.store.collection('done').valueChanges({ idField: 'id' }) as Observable<Task[]>;
  ...
}
在這裡,我們使用 AngularFirestore 直接從資料庫取得集合的內容。請注意,valueChanges 會傳回 可觀測物件,而非陣列,而且我們也指定這個集合中文件的 ID 欄位應命名為 id,與 Task 介面中使用的名稱相符。valueChanges 傳回的可觀察物件會在每次變更時發出工作集合。
由於我們使用的是可觀測值而非陣列,因此需要更新新增、移除及編輯工作的方式,以及在泳道之間移動工作的功能。我們不會變動記憶體內陣列,而是使用 Firebase SDK 更新資料庫中的資料。
首先,我們來看看重新排序的樣子。將 src/app/app.component.ts 中的 drop 方法替換為:
src/app/app.component.ts
drop(event: CdkDragDrop<Task[]>): void {
  if (event.previousContainer === event.container) {
    return;
  }
  const item = event.previousContainer.data[event.previousIndex];
  this.store.firestore.runTransaction(() => {
    const promise = Promise.all([
      this.store.collection(event.previousContainer.id).doc(item.id).delete(),
      this.store.collection(event.container.id).add(item),
    ]);
    return promise;
  });
  transferArrayItem(
    event.previousContainer.data,
    event.container.data,
    event.previousIndex,
    event.currentIndex
  );
}
在上方的程式碼片段中,新程式碼會醒目顯示。如要將工作從目前的泳道移至目標泳道,請先從第一個集合中移除工作,然後新增至第二個集合。由於我們執行兩項作業,但希望看起來像一項作業 (也就是讓作業不可分割),因此我們會在 Firestore 交易中執行這些作業。
接著,我們來更新 editTask 方法,改用 Firestore!在關閉對話方塊處理常式中,我們需要變更下列程式碼行:
src/app/app.component.ts
...
dialogRef.afterClosed().subscribe((result: TaskDialogResult|undefined) => {
  if (!result) {
    return;
  }
  if (result.delete) {
    this.store.collection(list).doc(task.id).delete();
  } else {
    this.store.collection(list).doc(task.id).update(task);
  }
});
...
我們使用 Firestore SDK 存取與所操作工作相應的目標文件,並刪除或更新該文件。
最後,我們需要更新建立新工作的方法。將 this.todo.push('task') 替換為:this.store.collection('todo').add(result.task)。
請注意,現在集合不是陣列,而是可觀測值。如要顯示這些資料,我們需要更新 AppComponent 的範本。只要將所有 todo、inProgress 和 done 屬性的存取權分別替換為 todo | async、inProgress | async 和 done | async 即可。
非同步管道會自動訂閱與集合相關聯的可觀測物件。當可觀測項發出新值時,Angular 會自動執行變更偵測,並處理發出的陣列。
舉例來說,我們來看看 todo 泳道中需要進行哪些變更:
src/app/app.component.html
<mat-card
  cdkDropList
  id="todo"
  #todoList="cdkDropList"
  [cdkDropListData]="todo | async"
  [cdkDropListConnectedTo]="[doneList, inProgressList]"
  (cdkDropListDropped)="drop($event)"
  class="list">
  <p class="empty-label" *ngIf="(todo | async)?.length === 0">Empty list</p>
  <app-task (edit)="editTask('todo', $event)" *ngFor="let task of todo | async" cdkDrag [task]="task"></app-task>
</mat-card>
將資料傳遞至 cdkDropList 指令時,我們會套用非同步管道。*ngIf 指令內也是如此,但請注意,存取 length 屬性時,我們也會使用選用鏈結 (在 Angular 中也稱為安全導覽運算子),確保 todo | async 不是 null 或 undefined 時,不會發生執行階段錯誤。
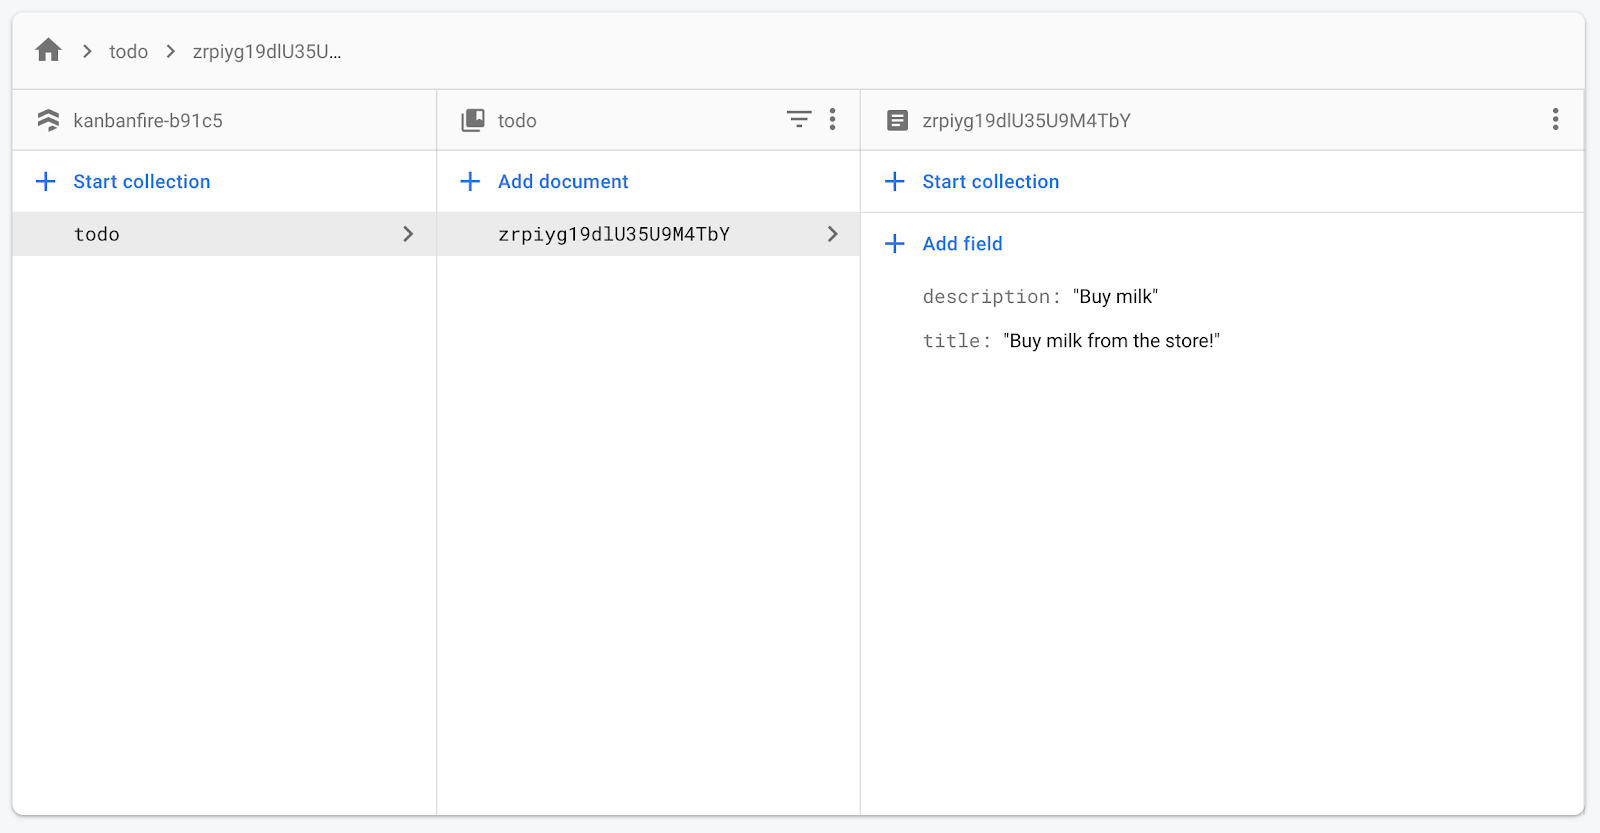
現在在使用者介面中建立新工作並開啟 Firestore 時,畫面應如下所示:
12. 改善樂觀更新
我們目前正在應用程式中執行樂觀更新。我們在 Firestore 中有可靠的資料來源,但同時也有工作副本;當與集合相關聯的任何可觀測項目發出信號時,我們會取得工作陣列。當使用者動作會改變狀態時,我們會先更新本機值,然後將變更傳播至 Firestore。
將工作從一個泳道移至另一個泳道時,我們會叫用 transferArrayItem,,該函式會對代表每個泳道中工作的陣列本機執行個體進行操作。Firebase SDK 會將這些陣列視為不可變動,也就是說,Angular 下次執行變更偵測時,我們會取得這些陣列的新例項,這會在我們轉移工作前,算繪先前的狀態。
同時,我們會觸發 Firestore 更新,Firebase SDK 也會觸發更新並提供正確的值,因此使用者介面會在幾毫秒內恢復正確狀態。這樣一來,我們剛轉移的工作就會從第一個清單跳到下一個清單。請參閱下方的 GIF:
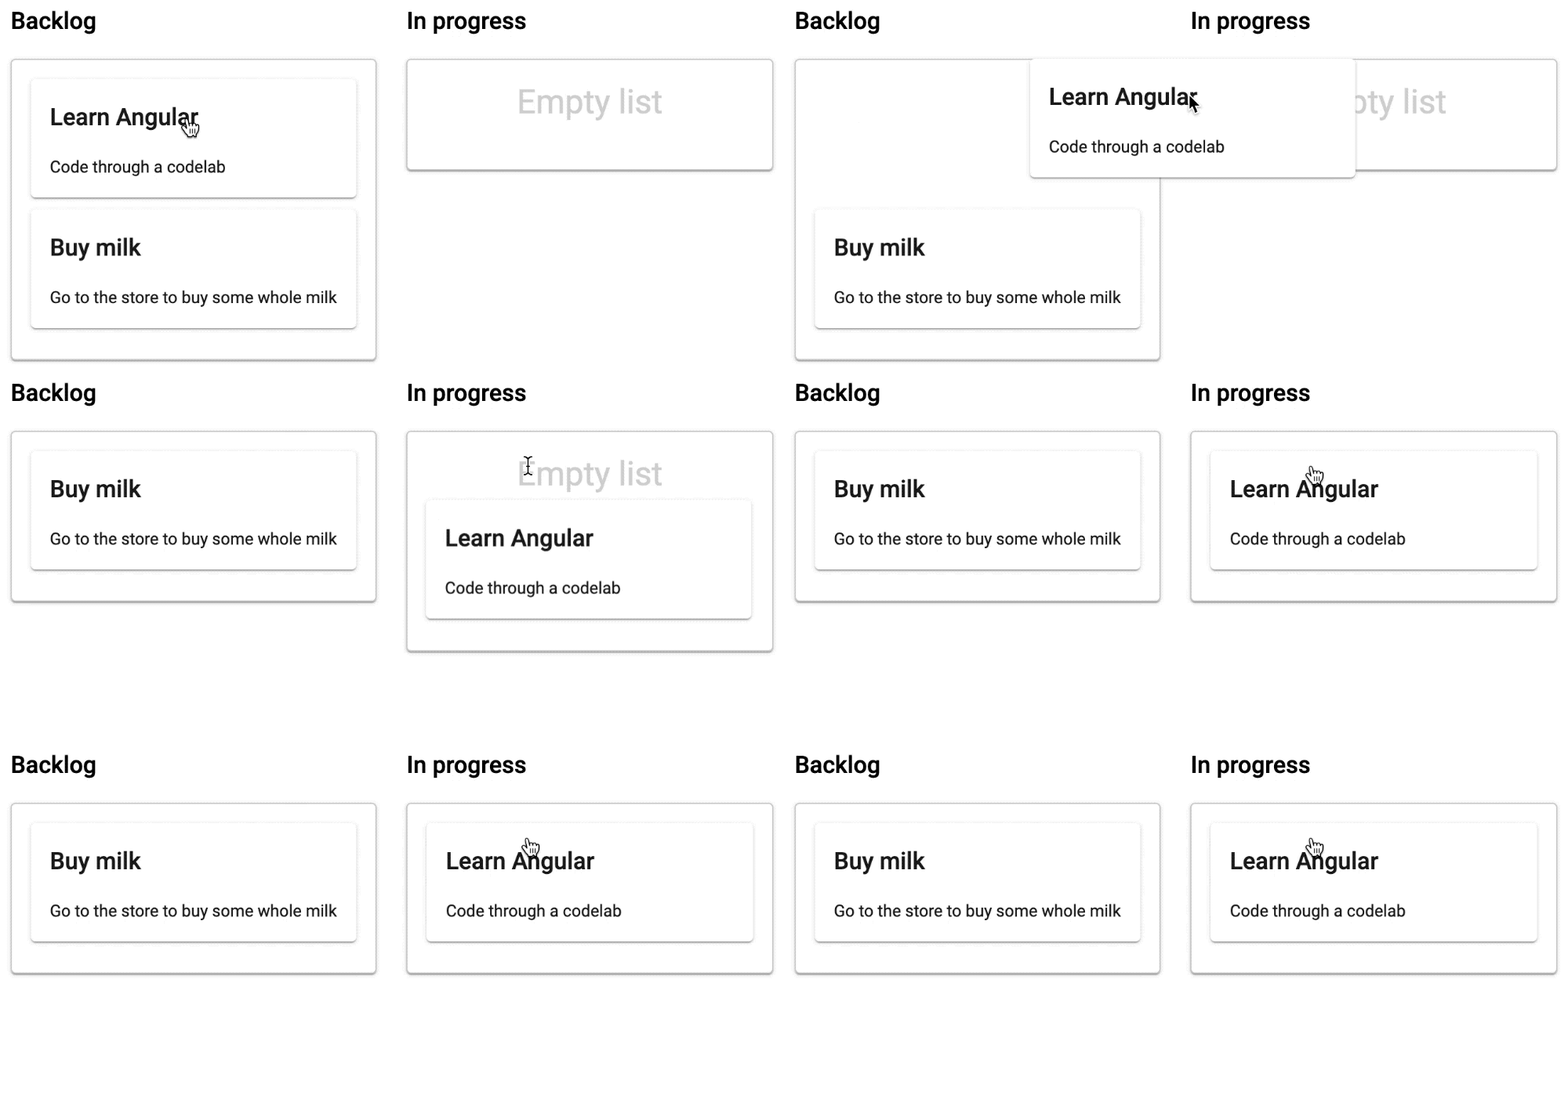
解決這個問題的正確方法因應用程式而異,但無論如何,我們都需要確保在資料更新前維持一致的狀態。
我們可以利用 BehaviorSubject,包裝從 valueChanges 收到的原始觀察器。在幕後,BehaviorSubject 會保留可變動的陣列,持續更新 transferArrayItem。
如要修正問題,只要更新 AppComponent 即可:
src/app/app.component.ts
...
import { AngularFirestore, AngularFirestoreCollection } from '@angular/fire/firestore';
import { BehaviorSubject } from 'rxjs';


const getObservable = (collection: AngularFirestoreCollection<Task>) => {
  const subject = new BehaviorSubject<Task[]>([]);
  collection.valueChanges({ idField: 'id' }).subscribe((val: Task[]) => {
    subject.next(val);
  });
  return subject;
};

@Component(...)
export class AppComponent {
  todo = getObservable(this.store.collection('todo')) as Observable<Task[]>;
  inProgress = getObservable(this.store.collection('inProgress')) as Observable<Task[]>;
  done = getObservable(this.store.collection('done')) as Observable<Task[]>;
...
}
在上述程式碼片段中,我們所做的只是建立 BehaviorSubject,每當與集合相關聯的可觀測項目變更時,就會發出值。
一切運作正常,因為 BehaviorSubject 會在變更偵測呼叫中重複使用陣列,而且只會在從 Firestore 取得新值時更新。
13. 部署應用程式
如要部署應用程式,只要執行下列指令即可:
ng deploy
這項指令會執行下列作業:
- 使用正式版設定建構應用程式,並套用編譯時間最佳化。
- 將應用程式部署至 Firebase 託管。
- 輸出網址,方便您預覽結果。
14. 恭喜
恭喜,您已成功使用 Angular 和 Firebase 建構看板!
您建立的使用者介面有三欄,分別代表不同工作的狀態。您使用 Angular CDK 實作了跨欄拖曳工作的功能。然後使用 Angular Material 建立表單,用於建立新工作及編輯現有工作。接著,您瞭解如何使用 @angular/fire,並將所有應用程式狀態移至 Firestore。最後,您已將應用程式部署至 Firebase 託管。
後續步驟
請注意,我們是使用測試設定部署應用程式。將應用程式部署至正式版前,請務必設定正確的權限。如要瞭解如何操作,請參閱這篇文章。
目前,我們不會保留特定泳道中個別工作的順序。如要實作這項功能,您可以在工作文件中使用順序欄位,並根據該欄位排序。
此外,我們只為單一使用者建構看板,也就是說,任何開啟應用程式的人都會看到同一個看板。如要為應用程式的不同使用者實作個別看板,您必須變更資料庫結構。如要瞭解 Firestore 的最佳做法,請參閱這篇文章。


