
1. ก่อนเริ่มต้น
ในโค้ดแล็บนี้ คุณจะได้เรียนรู้วิธีเรียกใช้การอนุมานการจัดประเภทรูปภาพจากเว็บไซต์โดยใช้ TensorFlow Serving กับ REST และ gRPC
ข้อกำหนดเบื้องต้น
- ความรู้พื้นฐานเกี่ยวกับการพัฒนาเว็บ เช่น HTML และ JavaScript
- ความรู้พื้นฐานเกี่ยวกับแมชชีนเลิร์นนิงด้วย TensorFlow เช่น การฝึกและการติดตั้งใช้งาน
- ความรู้พื้นฐานเกี่ยวกับเทอร์มินัลและ Docker
สิ่งที่คุณจะได้เรียนรู้
- วิธีค้นหาโมเดลการจัดประเภทรูปภาพที่ฝึกไว้ล่วงหน้าใน TensorFlow Hub
- วิธีสร้างเว็บไซต์แบบง่ายๆ และทำการคาดการณ์ด้วยโมเดลการจัดประเภทรูปภาพที่ดาวน์โหลดผ่าน TensorFlow Serving (REST และ gRPC)
- วิธีแสดงผลการตรวจจับใน UI
สิ่งที่คุณต้องมี
- Docker
- Google Chrome
- Web Server for Chrome
- Node.js และ NPM
- Bash
- คอมไพเลอร์บัฟเฟอร์โปรโตคอล (จำเป็นเฉพาะในกรณีที่คุณต้องการสร้าง Stub gRPC ใหม่ด้วยตนเอง)
- ปลั๊กอินเครื่องมือสร้างโค้ด gRPC-Web (จำเป็นเฉพาะในกรณีที่คุณต้องการสร้าง Stub ของ gRPC ใหม่ด้วยตนเอง)
2. ตั้งค่า
วิธีดาวน์โหลดโค้ดสำหรับ Codelab นี้
- ไปที่ที่เก็บ GitHub นี้
- คลิกโค้ด > ดาวน์โหลด ZIP เพื่อดาวน์โหลดโค้ดทั้งหมดสำหรับ Codelab นี้

- แตกไฟล์ ZIP ที่ดาวน์โหลดเพื่อคลายโฟลเดอร์รูท
codelabsที่มีทรัพยากรทั้งหมดที่คุณต้องการ
สำหรับโค้ดแล็บนี้ คุณจะต้องใช้เฉพาะไฟล์ในไดเรกทอรีย่อย TFServing/ImageClassificationWeb ในที่เก็บ ซึ่งมี 2 โฟลเดอร์ ได้แก่
- โฟลเดอร์
starterมีโค้ดเริ่มต้นที่คุณจะใช้ต่อยอดสำหรับโค้ดแล็บนี้ - โฟลเดอร์
finishedมีโค้ดที่เสร็จสมบูรณ์สำหรับแอปตัวอย่างที่เสร็จแล้ว
3. ติดตั้งการอ้างอิง
วิธีติดตั้งการอ้างอิง
- ในเทอร์มินัล ให้ไปที่โฟลเดอร์
starterแล้วติดตั้งแพ็กเกจ NPM ที่จำเป็น
npm install
4. เรียกใช้เว็บไซต์เริ่มต้น
ใช้ Web Server for Chrome เพื่อโหลดไฟล์ TFServing/ImageClassificationWeb/starter/dist/index.html โดยทำดังนี้
- ป้อน
Chrome://apps/ในแถบที่อยู่ของ Chrome แล้วค้นหา Web Server for Chrome ในรายการแอป - เปิด Web Server for Chrome แล้วเลือกโฟลเดอร์
TFServing/ImageClassificationWeb/starter/dist/ - คลิกปุ่มเปิด/ปิดเว็บเซิร์ฟเวอร์เพื่อเปิดใช้ แล้วไปที่ http://localhost:8887/ ในเบราว์เซอร์

เรียกใช้และสำรวจเว็บไซต์
ตอนนี้คุณควรเห็นเว็บไซต์ UI นั้นค่อนข้างตรงไปตรงมา โดยมีรูปภาพแมวที่คุณต้องการจัดประเภท และผู้ใช้สามารถส่งข้อมูลไปยังแบ็กเอนด์ด้วย REST หรือ gRPC แบ็กเอนด์จะทำการจัดหมวดหมู่รูปภาพในรูปภาพและส่งผลการจัดหมวดหมู่กลับไปยังเว็บไซต์ ซึ่งจะแสดงผลลัพธ์

หากคลิกจัดประเภท จะไม่มีอะไรเกิดขึ้นเนื่องจากยังสื่อสารกับแบ็กเอนด์ไม่ได้
5. ติดตั้งใช้งานโมเดลการจัดประเภทรูปภาพด้วย TensorFlow Serving
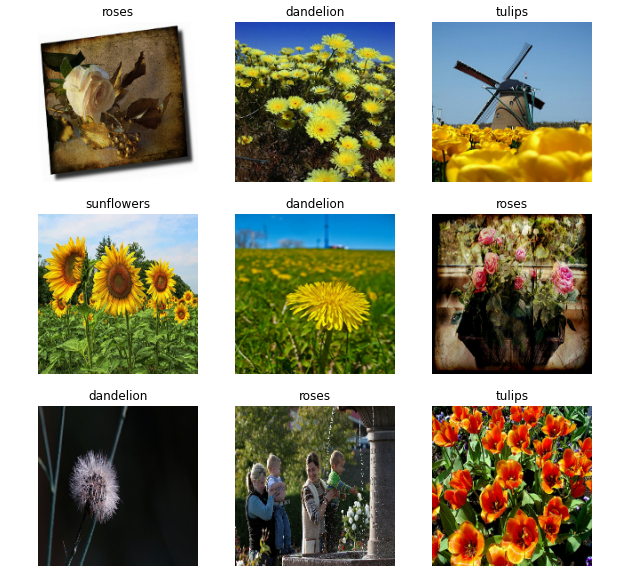
การจัดประเภทรูปภาพเป็นงาน ML ที่พบได้บ่อยมาก ซึ่งจะจัดประเภทรูปภาพลงในหมวดหมู่ที่กำหนดไว้ล่วงหน้าตามเนื้อหาหลักของรูปภาพ ตัวอย่างการจัดประเภทดอกไม้
TensorFlow Hub มีโมเดลการจัดประเภทรูปภาพที่ฝึกไว้ล่วงหน้าอยู่หลายรายการ คุณใช้โมเดล Inception v3 ที่ได้รับความนิยมสำหรับ Codelab นี้
วิธีติดตั้งใช้งานโมเดลการแยกประเภทรูปภาพด้วย TensorFlow Serving
- ดาวน์โหลดไฟล์โมเดล Inception v3
- คลายการบีบอัดไฟล์
.tar.gzที่ดาวน์โหลดด้วยเครื่องมือคลายการบีบอัด เช่น 7-Zip - สร้าง
inception_v3โฟลเดอร์ แล้วสร้าง123โฟลเดอร์ย่อยภายใน - วางโฟลเดอร์
variablesและไฟล์saved_model.pbที่แยกออกมาไว้ในโฟลเดอร์ย่อย123
คุณอ้างอิงโฟลเดอร์ inception_v3 เป็นโฟลเดอร์ SavedModel ได้ 123 เป็นตัวอย่างหมายเลขเวอร์ชัน หากต้องการ คุณเลือกหมายเลขอื่นได้
โครงสร้างโฟลเดอร์ควรมีลักษณะดังรูปภาพนี้

เริ่ม TensorFlow Serving
- ในเทอร์มินัล ให้เริ่ม TensorFlow Serving ด้วย Docker แต่แทนที่
PATH/TO/SAVEDMODELด้วยเส้นทางแบบสัมบูรณ์ของโฟลเดอร์inception_v3ในคอมพิวเตอร์
docker pull tensorflow/serving

docker run -it --rm -p 8500:8500 -p 8501:8501 -v "PATH/TO/SAVEDMODEL:/models/inception" -e MODEL_NAME=inception tensorflow/serving
Docker จะดาวน์โหลดอิมเมจ TensorFlow Serving โดยอัตโนมัติก่อน ซึ่งจะใช้เวลา 1 นาที หลังจากนั้น TensorFlow Serving ควรจะเริ่มทำงาน โดยบันทึกควรมีลักษณะดังข้อมูลโค้ดต่อไปนี้
2022-02-25 06:01:12.513231: I external/org_tensorflow/tensorflow/cc/saved_model/loader.cc:206] Restoring SavedModel bundle.
2022-02-25 06:01:12.585012: I external/org_tensorflow/tensorflow/core/platform/profile_utils/cpu_utils.cc:114] CPU Frequency: 3000000000 Hz
2022-02-25 06:01:13.395083: I external/org_tensorflow/tensorflow/cc/saved_model/loader.cc:190] Running initialization op on SavedModel bundle at path: /models/inception/123
2022-02-25 06:01:13.837562: I external/org_tensorflow/tensorflow/cc/saved_model/loader.cc:277] SavedModel load for tags { serve }; Status: success: OK. Took 1928700 microseconds.
2022-02-25 06:01:13.877848: I tensorflow_serving/servables/tensorflow/saved_model_warmup_util.cc:59] No warmup data file found at /models/inception/123/assets.extra/tf_serving_warmup_requests
2022-02-25 06:01:13.929844: I tensorflow_serving/core/loader_harness.cc:87] Successfully loaded servable version {name: inception version: 123}
2022-02-25 06:01:13.985848: I tensorflow_serving/model_servers/server_core.cc:486] Finished adding/updating models
2022-02-25 06:01:13.985987: I tensorflow_serving/model_servers/server.cc:367] Profiler service is enabled
2022-02-25 06:01:13.988994: I tensorflow_serving/model_servers/server.cc:393] Running gRPC ModelServer at 0.0.0.0:8500 ...
[warn] getaddrinfo: address family for nodename not supported
2022-02-25 06:01:14.033872: I tensorflow_serving/model_servers/server.cc:414] Exporting HTTP/REST API at:localhost:8501 ...
[evhttp_server.cc : 245] NET_LOG: Entering the event loop ...
6. ตั้งค่าพร็อกซี Envoy
ปัจจุบัน TensorFlow Serving ไม่ได้ตั้งค่าส่วนหัว Access-Control-Allow-Origin ดังนั้นเบราว์เซอร์จึงบล็อกคำขอจาก JavaScript ส่วนหน้าไปยัง TensorFlow Serving ด้วยเหตุผลด้านความปลอดภัย หากต้องการหลีกเลี่ยงปัญหานี้ คุณต้องใช้พร็อกซี เช่น Envoy เพื่อส่งต่อคำขอจาก JavaScript ไปยังแบ็กเอนด์ TensorFlow Serving
เริ่ม Envoy
- ในเทอร์มินัล ให้ดาวน์โหลดอิมเมจ Envoy และเริ่ม Envoy ด้วย Docker แต่ให้แทนที่ตัวยึดตำแหน่ง
PATH/TO/ENVOY-CUSTOM.YAMLด้วยเส้นทางแบบสัมบูรณ์ของไฟล์envoy-custom.yamlในโฟลเดอร์starter
docker pull envoyproxy/envoy-dev:fd3e8370ddb7a96634c192d1461516e6de1d1797

docker run --add-host host.docker.internal:host-gateway --rm -it -p 9901:9901 -p 8000:8000 -p 8080:8080 -v PATH/TO/ENVOY-CUSTOM.YAML:/envoy-custom.yaml envoyproxy/envoy-dev:fd3e8370ddb7a96634c192d1461516e6de1d1797 -c /envoy-custom.yaml
Docker จะดาวน์โหลดอิมเมจ Envoy โดยอัตโนมัติก่อน หลังจากนั้น Envoy ควรเริ่มทำงาน โดยบันทึกควรมีลักษณะดังข้อมูลโค้ดต่อไปนี้
[2022-03-02 07:51:48.563][1][info][main] [source/server/server.cc:436]   response trailer map: 152 bytes: grpc-message,grpc-status
[2022-03-02 07:51:48.681][1][info][main] [source/server/server.cc:772] runtime: {}
[2022-03-02 07:51:48.682][1][info][admin] [source/server/admin/admin.cc:134] admin address: 0.0.0.0:9901
[2022-03-02 07:51:48.683][1][info][config] [source/server/configuration_impl.cc:127] loading tracing configuration
[2022-03-02 07:51:48.683][1][info][config] [source/server/configuration_impl.cc:87] loading 0 static secret(s)
[2022-03-02 07:51:48.683][1][info][config] [source/server/configuration_impl.cc:93] loading 2 cluster(s)
[2022-03-02 07:51:48.687][1][info][config] [source/server/configuration_impl.cc:97] loading 2 listener(s)
[2022-03-02 07:51:48.694][1][info][config] [source/server/configuration_impl.cc:109] loading stats configuration
[2022-03-02 07:51:48.696][1][info][main] [source/server/server.cc:868] starting main dispatch loop
[2022-03-02 07:51:48.881][1][info][runtime] [source/common/runtime/runtime_impl.cc:446] RTDS has finished initialization
[2022-03-02 07:51:48.881][1][info][upstream] [source/common/upstream/cluster_manager_impl.cc:207] cm init: all clusters initialized
[2022-03-02 07:51:48.881][1][info][main] [source/server/server.cc:849] all clusters initialized. initializing init manager
[2022-03-02 07:51:48.881][1][info][config] [source/server/listener_manager_impl.cc:784] all dependencies initialized. starting workers
[2022-03-02 07:51:48.902][1][warning][main] [source/server/server.cc:747] there is no configured limit to the number of allowed active connections. Set a limit via the runtime key overload.global_downstream_max_connections
7. เชื่อมต่อเว็บไซต์กับ TensorFlow ผ่าน REST
ตอนนี้แบ็กเอนด์พร้อมแล้ว คุณจึงส่งคำขอของไคลเอ็นต์ไปยัง TensorFlow Serving เพื่อจัดประเภทรูปภาพได้ คุณส่งคำขอไปยัง TensorFlow Serving ได้ 2 วิธีดังนี้
- REST
- gRPC
ส่งคำขอและรับการตอบกลับผ่าน REST
การส่งและรับคำขอผ่าน REST ทำได้ง่ายๆ ใน 3 ขั้นตอนดังนี้
- สร้างคำขอ REST
- ส่งคำขอ REST ไปยัง TensorFlow Serving
- ดึงผลลัพธ์ที่คาดการณ์จากการตอบกลับ REST และแสดงผลลัพธ์
คุณจะทำตามขั้นตอนเหล่านี้ได้ในไฟล์ src/index.js
สร้างคำขอ REST
ขณะนี้ฟังก์ชัน classify_img() ไม่ได้ส่งคำขอ REST ไปยัง TensorFlow Serving คุณต้องใช้กิ่ง REST นี้เพื่อสร้างคำขอ REST ก่อน
if (radioButtons[0].checked) {
    console.log('Using REST');
    // TODO: Add code to send a REST request to TensorFlow Serving.

}
TensorFlow Serving คาดหวังคำขอ POST ที่มีเทนเซอร์รูปภาพสำหรับโมเดล Inception v3 ที่คุณใช้ ดังนั้นคุณจึงต้องแยกค่า RGB จากแต่ละพิกเซลของรูปภาพลงในอาร์เรย์ แล้วห่ออาร์เรย์ใน JSON ซึ่งเป็นเพย์โหลดของคำขอ
- เพิ่มโค้ดนี้ลงในสาขา REST
//Create the REST request.
let imgTensor = new Array();
let pixelArray = new Array();
context.drawImage(img, 0, 0);
for(let i=0; i<inputImgHeight; i++) {
    pixelArray[i] = new Array();
    for (let j=0; j<inputImgWidth; j++) {
        pixelArray[i][j] = new Array();
        pixelArray[i][j].push(context.getImageData(i, j, 1, 1).data[0]/255);
        pixelArray[i][j].push(context.getImageData(i, j, 1, 1).data[1]/255);
        pixelArray[i][j].push(context.getImageData(i, j, 1, 1).data[2]/255);
    }
}
imgTensor.push(pixelArray);

const RESTURL = 'http://localhost:8000/v1/models/inception:predict';
let xhr = new XMLHttpRequest();
xhr.open('POST', RESTURL);
xhr.setRequestHeader('Content-Type', 'application/json;charset=utf-8;');
let data = JSON.stringify({
    instances: imgTensor
});
xhr.onload = () => {

}
xhr.onerror = () => {
    console.log('REST request error');
}
ส่งคำขอ REST ไปยัง TensorFlow Serving
ตอนนี้คุณส่งคำขอได้แล้ว
- เพิ่มโค้ดนี้ต่อจากโค้ดด้านบนในสาขา REST
// Send the REST request.
xhr.send(data);
ประมวลผลการตอบกลับ REST จาก TensorFlow Serving
โมเดล Inception v3 จะแสดงผลอาร์เรย์ของความน่าจะเป็นที่รูปภาพอยู่ในหมวดหมู่ที่กำหนดไว้ล่วงหน้า เมื่อคาดการณ์สำเร็จแล้ว คุณควรแสดงหมวดหมู่ที่มีแนวโน้มมากที่สุดใน UI
คุณใช้ onload() Listener เพื่อจัดการการตอบกลับ
xhr.onload = () => {

}
- เพิ่มโค้ดนี้ลงในเครื่องมือฟัง
onload()
// Process the REST response.
const response = JSON.parse(xhr.responseText);
const maxIndex = argmax(response['predictions'][0])
document.getElementById('category').textContent = 'Predicted category: ' + maxIndex;
ตอนนี้ Listener จะดึงความน่าจะเป็นที่คาดการณ์ไว้จากคำตอบ ระบุหมวดหมู่ของออบเจ็กต์ที่มีความเป็นไปได้มากที่สุด และแสดงผลลัพธ์ใน UI
เรียกใช้
- ในเทอร์มินัล ให้ไปที่โฟลเดอร์
starterแล้วใช้ webpack เพื่อรวมไฟล์ JavaScript ทั้งหมดไว้ในไฟล์เดียวที่คุณฝังในไฟล์dist/index.htmlได้
npm install -g npx
npm install --save-dev webpack
npx webpack
- รีเฟรช http://localhost:8887/ ในเบราว์เซอร์ แล้วคลิก REST > Classify
เว็บไซต์แสดง 286 เป็นหมวดหมู่ที่คาดการณ์ ซึ่งเชื่อมโยงกับป้ายกำกับ Egyptian Cat ในชุดข้อมูล ImageNet

8. เชื่อมต่อเว็บไซต์กับ TensorFlow Serving ผ่าน gRPC
นอกจาก REST แล้ว TensorFlow Serving ยังรองรับ gRPC ด้วย

gRPC เป็นเฟรมเวิร์กการเรียกกระบวนการระยะไกล (RPC) ที่ทันสมัย โอเพนซอร์ส และมีประสิทธิภาพสูง ซึ่งสามารถทำงานได้ในทุกสภาพแวดล้อม โดยจะเชื่อมต่อบริการในและทั่วทั้งศูนย์ข้อมูลได้อย่างมีประสิทธิภาพ พร้อมรองรับการเสียบปลั๊กสำหรับ Load Balancing, การติดตาม, การตรวจสอบสถานะ และการตรวจสอบสิทธิ์ เราพบว่าในทางปฏิบัติ gRPC มีประสิทธิภาพมากกว่า REST
ส่งคำขอและรับการตอบกลับด้วย gRPC
โดยมี 4 ขั้นตอนง่ายๆ ดังนี้
- ไม่บังคับ: สร้างโค้ดสตับไคลเอ็นต์ gRPC
- สร้างคำขอ gRPC
- ส่งคำขอ gRPC ไปยัง TensorFlow Serving
- ดึงผลลัพธ์ที่คาดการณ์จากคำตอบ gRPC แล้วแสดงใน UI
คุณทำตามขั้นตอนเหล่านี้ในไฟล์ src/index.js
ไม่บังคับ: สร้างโค้ดสตับไคลเอ็นต์ gRPC
หากต้องการใช้ gRPC กับ TensorFlow Serving คุณต้องทำตามเวิร์กโฟลว์ gRPC ดูรายละเอียดเพิ่มเติมได้ในเอกสารประกอบของ gRPC

TensorFlow Serving และ TensorFlow จะกำหนด.protoไฟล์ให้คุณ ตั้งแต่ TensorFlow และ TensorFlow Serving 2.8 เป็นต้นไป .protoไฟล์ต่อไปนี้คือไฟล์ที่จำเป็น
tensorflow/core/example/example.proto
tensorflow/core/example/feature.proto
tensorflow/core/protobuf/struct.proto
tensorflow/core/protobuf/saved_object_graph.proto
tensorflow/core/protobuf/saver.proto
tensorflow/core/protobuf/trackable_object_graph.proto
tensorflow/core/protobuf/meta_graph.proto
tensorflow/core/framework/node_def.proto
tensorflow/core/framework/attr_value.proto
tensorflow/core/framework/function.proto
tensorflow/core/framework/types.proto
tensorflow/core/framework/tensor_shape.proto
tensorflow/core/framework/full_type.proto
tensorflow/core/framework/versions.proto
tensorflow/core/framework/op_def.proto
tensorflow/core/framework/graph.proto
tensorflow/core/framework/tensor.proto
tensorflow/core/framework/resource_handle.proto
tensorflow/core/framework/variable.proto

tensorflow_serving/apis/inference.proto
tensorflow_serving/apis/classification.proto
tensorflow_serving/apis/predict.proto
tensorflow_serving/apis/regression.proto
tensorflow_serving/apis/get_model_metadata.proto
tensorflow_serving/apis/input.proto
tensorflow_serving/apis/prediction_service.proto
tensorflow_serving/apis/model.proto
- ในเทอร์มินัล ให้ไปที่โฟลเดอร์
starter/src/proto/แล้วสร้าง Stub ดังนี้
bash generate_grpc_stub_js.sh
สร้างคำขอ gRPC
คุณสร้างคำขอ gRPC ในสาขา gRPC. ได้เช่นเดียวกับคำขอ REST
if (connectionMode[picker.selectedRow(inComponent: 0)] == "REST") {

}
else {
    print("Using gRPC")
    // TODO: Add code to send a gRPC request to TensorFlow Serving.

}
- เพิ่มโค้ดนี้ลงในสาขา gRPC
// Create the gRPC request.
const PredictModule = require('./proto/generated/tensorflow_serving/apis/predict_pb.js');
const PredictionServiceClientModule = require('./proto/generated/tensorflow_serving/apis/prediction_service_grpc_web_pb.js');
const ModelModule = require('./proto/generated/tensorflow_serving/apis/model_pb.js');
const TensorModule = require('./proto/generated/tensorflow/core/framework/tensor_pb.js');

const GPRCURL = 'http://localhost:8080';
const stub = new PredictionServiceClientModule.PredictionServiceClient(GPRCURL);

const modelSpec = new ModelModule.ModelSpec();
modelSpec.setName('inception');

const tensorProto = new TensorModule.TensorProto();
const tensorShapeProto = new TensorModule.TensorShapeProto();

const batchDim = (new TensorModule.TensorShapeProto.Dim()).setSize(1);
const heightDim = (new TensorModule.TensorShapeProto.Dim()).setSize(inputImgHeight);
const widthDim = (new TensorModule.TensorShapeProto.Dim()).setSize(inputImgWidth);
const channelDim = (new TensorModule.TensorShapeProto.Dim()).setSize(3);

tensorShapeProto.setDimList([batchDim, heightDim, widthDim, channelDim]);

tensorProto.setDtype(proto.tensorflow.DataType.DT_FLOAT);
tensorProto.setTensorShape(tensorShapeProto);
context.drawImage(img, 0, 0);
for(let i=0; i<inputImgHeight; i++) {
    for (let j=0; j<inputImgWidth; j++) {
        tensorProto.addFloatVal(context.getImageData(i, j, 1, 1).data[0]/255);
        tensorProto.addFloatVal(context.getImageData(i, j, 1, 1).data[1]/255);
        tensorProto.addFloatVal(context.getImageData(i, j, 1, 1).data[2]/255);
    }
}

const predictionServiceRequest = new PredictModule.PredictRequest();
predictionServiceRequest.setModelSpec(modelSpec);
predictionServiceRequest.getInputsMap().set('inputs', tensorProto);
ส่งคำขอ gRPC ไปยัง TensorFlow Serving
ตอนนี้คุณส่งคำขอได้แล้ว
- เพิ่มโค้ดนี้ทันทีหลังจากโค้ดในสาขา gRPC ในข้อมูลโค้ดก่อนหน้า
// Send the gRPC request.
stub.predict(predictionServiceRequest, {}, function(err, response) {
    // TODO: Add code to process the response.
});
ประมวลผลการตอบกลับ gRPC จาก TensorFlow Serving
สุดท้าย ให้ใช้ฟังก์ชัน Callback ด้านบนเพื่อจัดการการตอบกลับ
- เพิ่มโค้ดนี้ลงในเนื้อหาฟังก์ชันในข้อมูลโค้ดก่อนหน้า
// Process the gRPC response.
if (err) {
    console.log(err.code);
    console.log(err.message);
}
else {
    const maxIndex = argmax(response.getOutputsMap().get('logits').getFloatValList());
    document.getElementById('category').textContent = 'Predicted category: ' + maxIndex;
}
ตอนนี้ Listener จะดึงความน่าจะเป็นที่คาดการณ์ไว้จากคำตอบ ระบุหมวดหมู่ของออบเจ็กต์ที่มีความเป็นไปได้มากที่สุด และแสดงผลลัพธ์ใน UI
เรียกใช้
- ในเทอร์มินัล ให้ใช้ webpack เพื่อรวมไฟล์ JavaScript ทั้งหมดเป็นไฟล์เดียวที่คุณฝังในไฟล์
index.htmlได้
npx webpack
- รีเฟรช http://localhost:8887/ ในเบราว์เซอร์
- คลิก gRPC > จัดประเภท
เว็บไซต์จะแสดงหมวดหมู่ที่คาดการณ์ของ 286 ซึ่งแมปกับป้ายกำกับ Egyptian Cat ในชุดข้อมูล ImageNet
9. ขอแสดงความยินดี
คุณใช้ TensorFlow Serving เพื่อเพิ่มความสามารถในการจัดประเภทรูปภาพลงในเว็บไซต์