
1. 소개
Google Chat 앱은 서비스 및 리소스를 Google Chat에서 바로 사용하므로 사용자가 대화를 유지하면서 정보를 얻고 신속하게 조치를 취할 수 있습니다.
이 Codelab에서는 Node.js 및 Cloud Functions를 사용하여 폴 앱을 빌드 및 배포하는 방법을 알아봅니다.

학습할 내용
- Cloud Shell 사용
- Cloud Functions에 배포
- 슬래시 명령어 및 대화상자를 통해 사용자 입력 받기
- 양방향 카드 만들기
2. 설정 및 요구사항
Google Cloud 프로젝트를 만든 후에 채팅 앱이 사용할 API 및 서비스를 사용 설정합니다.
기본 요건
Google Chat 앱을 개발하려면 Google Chat에 액세스할 수 있는 Google Workspace 계정이 필요합니다. Google Workspace 계정이 아직 없는 경우, 이 Codelab을 진행하기 전에 계정을 만들어 로그인하세요.
자습형 환경 설정
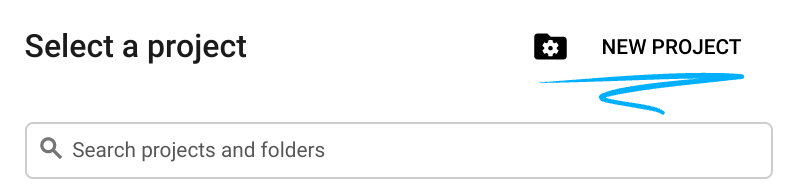
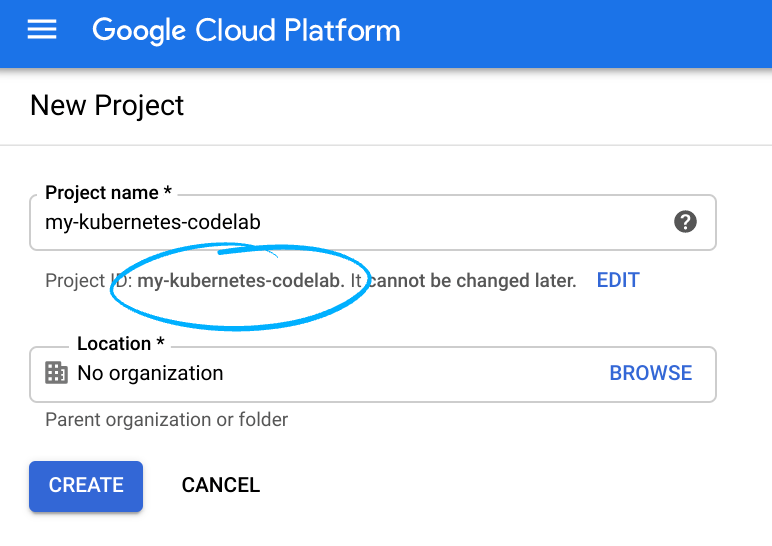
- Google Cloud 콘솔을 열고 프로젝트를 만듭니다.
프로젝트 ID는 Google Cloud 프로젝트 전체에서 고유한 이름이어야 합니다(위의 이름은 이미 사용되었으므로 사용하면 안 됩니다). 이 이름은 나중에 Codelab에서PROJECT_ID로 참조됩니다.

- 다음으로, Google Cloud 리소스를 사용하기 위해 Cloud 콘솔에서 결제를 사용 설정하세요.
이 Codelab 실행에는 많은 비용이 들지 않습니다. 이 튜토리얼을 완료한 이후에 비용이 청구되지 않도록 이 Codelab 끝부분에서 리소스 삭제 방법을 알려주는 '삭제' 섹션에 있는 안내를 따르세요. Google Cloud 새 사용자에게는 미화 $300 상당의 무료 체험판 프로그램에 참여할 수 있는 자격이 부여됩니다.
Google Cloud Shell
Google Cloud의 경우 노트북에서 원격으로 조작할 수 있지만 이 Codelab에서는 Google Cloud에서 실행되는 명령줄 환경인 Google Cloud Shell을 사용하겠습니다.
Cloud Shell 활성화
- Cloud 콘솔에서 Cloud Shell 활성화
를 클릭합니다.
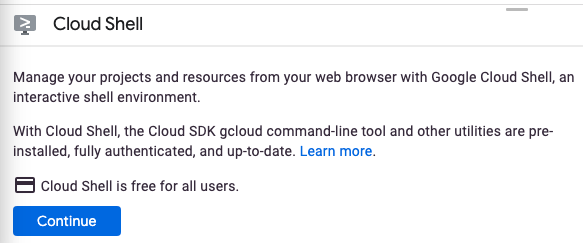
사용자가 Cloud Shell을 처음 사용하는 경우 구체적인 환영 메시지가 표시됩니다. 환영 메시지를 확인했으면 계속을 클릭하세요. 환영 메시지는 다시 표시되지 않습니다. 환영 메시지는 다음과 같습니다.
Cloud Shell을 프로비저닝하고 연결하는 데 몇 분 정도 소요됩니다. 연결되면 Cloud Shell 터미널을 확인할 수 있습니다.
이 가상 머신은 필요한 개발 도구가 모두 포함되어 로드됩니다. 영구적인 5GB 홈 디렉터리를 제공하고 Google Cloud에서 실행되므로 네트워크 성능과 인증이 크게 개선됩니다. 이 Codelab의 모든 작업은 브라우저나 Chromebook에서 수행할 수 있습니다. Cloud Shell에 연결되면 인증이 완료되었고 프로젝트가 해당 프로젝트 ID로 이미 설정된 것을 확인할 수 있습니다. - Cloud Shell에서 다음 명령어를 실행하여 인증되었는지 확인합니다.
gcloud auth list
명령어 출력Credentialed Accounts ACTIVE ACCOUNT * <my_account>@<my_domain.com>
$ gcloud config set account <ACCOUNT>


- 올바른 프로젝트를 선택했는지 확인합니다. Cloud Shell에서 다음을 실행합니다.
gcloud config list project
[core]
project = <PROJECT_ID>
gcloud config set project <PROJECT_ID>
Updated property [core/project].
이 Codelab을 완료하면서 명령줄 작업을 사용하고 파일을 수정하게 됩니다. 파일 수정은 Cloud Shell의 기본 코드 편집기인 Cloud Shell 편집기에서 작업할 수 있습니다. 이 편집기는 Cloud Shell 툴바 오른쪽에 있는 편집기 열기를 클릭하여 열 수 있습니다. 많이 사용되는 Vim 및 Emacs 등의 편집기도 Cloud Shell에서 사용할 수 있습니다.
3. Cloud Functions, Cloud Build, Google Chat API 사용 설정
Cloud Shell에서 이러한 API 및 서비스를 사용 설정합니다.
gcloud services enable \
  cloudfunctions \
  cloudbuild.googleapis.com \
  chat.googleapis.com
이 작업을 완료하는 데 몇 분 정도 걸릴 수 있습니다.
완료되면 다음과 유사한 성공 메시지가 표시됩니다.
Operation "operations/acf.cc11852d-40af-47ad-9d59-477a12847c9e" finished successfully.
4. 초기 채팅 앱 만들기
프로젝트 초기화
시작을 위해 간단한 "Hello World" 앱을 만들어 배포하겠습니다. 채팅 앱은 HTTP 요청에 JSON 페이로드로 응답하는 웹 서비스입니다. 이 앱에서는 Node.js 및 Cloud Functions를 사용하겠습니다.
Cloud Shell에서 poll-app이라는 새 디렉터리를 만들어 해당 디렉터리로 이동합니다.
mkdir ~/poll-app
cd ~/poll-app
이 Codelab의 나머지 작업과 만들 파일 모두는 이 디렉터리에 있게 됩니다.
Node.js 프로젝트를 초기화합니다.
npm init
NPM에서 이름 및 버전과 같은 프로젝트 구성에 관한 몇 가지 질문을 합니다. 각 질문에서 ENTER를 눌러 기본 값을 수락합니다. 기본 시작 지점은 index.js라는 파일로, 이제 만들겠습니다.
채팅 앱 백엔드 만들기
앱 만들기를 시작하겠습니다. 다음 내용으로 index.js라는 파일을 만듭니다.
/**
 * App entry point.
 */
exports.app = async (req, res) => {
  if (!(req.method === 'POST' && req.body)) {
      res.status(400).send('')
  }
  const event = req.body;
  let reply = {};
  if (event.type === 'MESSAGE') {
    reply = {
        text: `Hello ${event.user.displayName}`
    };
  }
  res.json(reply)
}
이 앱은 많은 작업을 수행하지는 않지만 괜찮습니다. 나중에 더 많은 기능을 추가하겠습니다.
앱 배포
'Hello World' 앱을 배포하기 위해 Cloud 함수를 배포하고, Google Cloud 콘솔에서 채팅 앱을 구성하고, 앱에 테스트 메시지를 전송하여 배포를 검증하겠습니다.
Cloud 함수 배포
'Hello World' 앱의 Cloud 함수를 배포하기 위해 다음 명령어를 입력합니다.
gcloud functions deploy app --trigger-http --security-level=secure-always --allow-unauthenticated --runtime nodejs14
완료되면 다음과 같은 결과가 나타납니다.
availableMemoryMb: 256
buildId: 993b2ca9-2719-40af-86e4-42c8e4563a4b
buildName: projects/595241540133/locations/us-central1/builds/993b2ca9-2719-40af-86e4-42c8e4563a4b
entryPoint: app
httpsTrigger:
  securityLevel: SECURE_ALWAYS
  url: https://us-central1-poll-app-codelab.cloudfunctions.net/app
ingressSettings: ALLOW_ALL
labels:
  deployment-tool: cli-gcloud
name: projects/poll-app-codelab/locations/us-central1/functions/app
runtime: nodejs14
serviceAccountEmail: poll-app-codelab@appspot.gserviceaccount.com
sourceUploadUrl: https://storage.googleapis.com/gcf-upload-us-central1-66a01777-67f0-46d7-a941-079c24414822/94057943-2b7c-4b4c-9a21-bb3acffc84c6.zip
status: ACTIVE
timeout: 60s
updateTime: '2021-09-17T19:30:33.694Z'
versionId: '1'
httpsTrigger.url 속성에서 배포된 함수의 URL을 기록해 두세요. 다음 단계에서 이 URL을 사용합니다.
앱 구성
앱을 구성하기 위해 Cloud 콘솔의 Chat 구성 페이지로 이동합니다.
- 이 채팅 앱을 Workspace 부가기능으로 빌드를 선택 해제하고 사용 중지를 클릭하여 확인합니다.
- 앱 이름에 'PollCodelab'을 입력합니다.
- 아바타 URL에
https://raw.githubusercontent.com/google/material-design-icons/master/png/social/poll/materialicons/24dp/2x/baseline_poll_black_24dp.png를 입력합니다. - 설명에 'Poll app for codelab'을 입력합니다.
- 기능에서 1:1 메시지 수신 및 스페이스 및 그룹 대화 참여를 선택합니다.
- 연결 설정에서 HTTP 엔드포인트 URL을 선택하고 이 URL을 Cloud 함수에 붙여넣습니다 (이전 섹션의
httpsTrigger.url속성). - 권한에서 내 도메인의 특정 사용자 및 그룹을 선택하고 사용자 이메일 주소를 입력합니다.
- 저장을 클릭합니다.
이제 앱에서 메시지를 보낼 준비가 되었습니다.
앱 테스트
다음으로 넘어가기 전에 앱을 Google Chat의 스페이스에 추가하여 앱이 작동하는지 확인합니다.
- Google Chat으로 이동합니다.
- Chat 옆에 + > 앱 찾기를 클릭합니다.
- 검색에 'PollCodelab'을 입력합니다.
- Chat을 클릭합니다.
- 앱에 메시지를 보내기 위해 'Hello'를 입력하고 Enter 키를 누릅니다.
앱에서 간략한 인사 메시지로 응답합니다.
이제 기본 스켈레톤이 준비되었으므로 더 유용한 앱으로 바꿔 보겠습니다!
5. 폴 기능 빌드
앱 작동 방식에 대한 간략한 개요
앱은 두 가지 주요 부분으로 구성됩니다.
- 폴 구성을 위한 대화상자를 표시하는 슬래시 명령어
- 투표 및 보기 결과를 위한 양방향 카드
앱은 또한 폴 구성 및 결과를 저장하기 위해 상태를 일부 저장해야 합니다. 이는 Firestore 또는 모든 데이터베이스를 통해 작업할 수 있습니다. 또는 상태를 앱 메시지 자체에 저장할 수도 있습니다. 이 앱은 팀의 간단한 비공식 폴이 목적이므로 이 사용 사례에서는 상태를 앱 메시지에 저장하는 것으로 충분합니다.
앱의 데이터 모델(Typescript로 표현)은 다음과 같습니다.
interface Poll {
  /* Question/topic of poll */
  topic: string;
  /** User that submitted the poll */
  author: {
    /** Unique resource name of user */
    name: string;
    /** Display name */
    displayName: string;
  };
  /** Available choices to present to users */
  choices: string[];
  /** Map of user ids to the index of their selected choice */
  votes: { [key: string]: number };
}
상태에는 주제나 질문 및 선택 목록 이외에도 작성자의 ID 및 이름과 기록된 투표가 포함됩니다. 사용자가 여러 번 투표하는 것을 방지하기 위해 투표는 투표자 선택의 색인과 사용자 ID의 매핑으로 저장됩니다.
물론 다양한 접근 방식이 있지만 이 방법이 스페이스에서 빠른 투표를 실행하기 위한 좋은 출발점을 제공합니다.
폴 구성 명령어 구현
사용자가 폴을 시작하고 구성할 수 있도록 대화상자를 여는 슬래시 명령어를 설정합니다. 이는 다음과 같은 다단계 프로세스입니다.
- 폴을 시작하는 슬래시 명령어를 등록합니다.
- 폴을 설정하는 대화상자를 만듭니다.
- 앱에서 슬래시 명령어를 인식하고 처리하도록 만듭니다.
- 폴에서 간편하게 투표하도록 도와주는 양방향 카드를 만듭니다.
- 앱에서 폴을 실행하게 하는 코드를 구현합니다.
- Cloud 함수를 다시 배포합니다.
슬래시 명령어 등록
슬래시 명령어를 등록하기 위해 콘솔의 Chat 구성 페이지로 돌아갑니다(API 및 서비스 > 대시보드 > Hangouts Chat API > 구성).
- 슬래시 명령어에서 새 슬래시 명령어 추가를 클릭합니다.
- 이름에 '/poll'을 입력합니다.
- 명령어 ID에 '1'을 입력합니다.
- 설명에 'Start a poll'을 입력합니다.
- 대화상자 열기를 선택합니다.
- 완료를 클릭합니다.
- 저장을 클릭합니다.
이제 앱에서 /poll 명령어를 인식하고 이 명령어가 대화상자를 엽니다. 다음으로, 대화상자를 구성하겠습니다.
대화상자의 구성 양식 만들기
슬래시 명령어는 대화상자를 열어 폴 주제 및 가능한 선택 항목을 구성합니다. 다음 콘텐츠로 config-form.js라는 새 파일을 만듭니다.
/** Upper bounds on number of choices to present. */
const MAX_NUM_OF_OPTIONS = 5;

/**
 * Build widget with instructions on how to use form.
 *
 * @returns {object} card widget
 */
function helpText() {
  return {
    textParagraph: {
      text: 'Enter the poll topic and up to 5 choices in the poll. Blank options will be omitted.',
    },
  };
}

/**
 * Build the text input for a choice.
 *
 * @param {number} index - Index to identify the choice
 * @param {string|undefined} value - Initial value to render (optional)
 * @returns {object} card widget
 */
function optionInput(index, value) {
  return {
    textInput: {
      label: `Option ${index + 1}`,
      type: 'SINGLE_LINE',
      name: `option${index}`,
      value: value || '',
    },
  };
}

/**
 * Build the text input for the poll topic.
 *
 * @param {string|undefined} topic - Initial value to render (optional)
 * @returns {object} card widget
 */
function topicInput(topic) {
  return {
    textInput: {
      label: 'Topic',
      type: 'MULTIPLE_LINE',
      name: 'topic',
      value: topic || '',
    },
  };
}

/**
 * Build the buttons/actions for the form.
 *
 * @returns {object} card widget
 */
function buttons() {
  return {
    buttonList: {
      buttons: [
        {
          text: 'Submit',
          onClick: {
            action: {
              function: 'start_poll',
            },
          },
        },
      ],
    },
  };
}

/**
 * Build the configuration form.
 *
 * @param {object} options - Initial state to render with form
 * @param {string|undefined} options.topic - Topic of poll (optional)
 * @param {string[]|undefined} options.choices - Text of choices to display to users (optional)
 * @returns {object} card
 */
function buildConfigurationForm(options) {
  const widgets = [];
  widgets.push(helpText());
  widgets.push(topicInput(options.topic));
  for (let i = 0; i < MAX_NUM_OF_OPTIONS; ++i) {
    const choice = options?.choices?.[i];
    widgets.push(optionInput(i, choice));
  }
  widgets.push(buttons());

  // Assemble the card
  return {
    sections: [
      {
        widgets,
      },
    ],
  };
}

exports.MAX_NUM_OF_OPTIONS = MAX_NUM_OF_OPTIONS;
exports.buildConfigurationForm = buildConfigurationForm;
이 코드는 사용자가 폴을 설정할 수 있게 하는 대화상자 양식을 생성합니다. 또한 질문에 포함할 수 있는 선택 항목의 최대 개수 상수를 내보냅니다. 이는 매개변수로 전달된 모든 상태를 사용하여 UI 마크업 빌드를 스테이트리스(Stateless) 함수로 격리하는 좋은 사례입니다. 재사용이 용이하며, 이 카드는 나중에 다른 컨텍스트로 렌더링됩니다.
이는 또한 카드를 더 작은 단위 또는 구성요소로 분해합니다. 요구되는 사항은 아니지만 이 기법은 복잡한 인터페이스를 빌드할 때 더 읽기 쉽고 유지보수가 더 용이할 수 있으므로 권장사항입니다.
빌드가 완성된 JSON 샘플은 카드 빌더 도구에서 확인할 수 있습니다.
슬래시 명령어 처리
슬래시 명령어는 앱에 전송되면 MESSAGE 이벤트로 나타납니다. index.js를 업데이트하여 MESSAGE 이벤트를 통해 슬래시 명령어의 정보를 확인하고 대화상자로 응답합니다. 다음으로 index.js를 대체합니다.
const { buildConfigurationForm, MAX_NUM_OF_OPTIONS } = require('./config-form');

/**
 * App entry point.
 */
exports.app = async (req, res) => {
  if (!(req.method === 'POST' && req.body)) {
      res.status(400).send('')
  }
  const event = req.body;
  let reply = {};
  // Dispatch slash and action events
  if (event.type === 'MESSAGE') {
    const message = event.message;
    if (message.slashCommand?.commandId === '1') {
      reply = showConfigurationForm(event);
    }
  } else if (event.type === 'CARD_CLICKED') {
    if (event.action?.actionMethodName === 'start_poll') {
      reply = await startPoll(event);
    }
  }
  res.json(reply);
}

/**
 * Handles the slash command to display the config form.
 *
 * @param {object} event - chat event
 * @returns {object} Response to send back to Chat
 */
function showConfigurationForm(event) {
  // Seed the topic with any text after the slash command
  const topic = event.message?.argumentText?.trim();
  const dialog = buildConfigurationForm({
    topic,
    choices: [],
  });
  return {
    actionResponse: {
      type: 'DIALOG',
      dialogAction: {
        dialog: {
          body: dialog,
        },
      },
    },
  };
}

/**
 * Handle the custom start_poll action.
 *
 * @param {object} event - chat event
 * @returns {object} Response to send back to Chat
 */
function startPoll(event) {
  // Not fully implemented yet -- just close the dialog
  return {
    actionResponse: {
      type: 'DIALOG',
      dialogAction: {
        actionStatus: {
          statusCode: 'OK',
          userFacingMessage: 'Poll started.',
        },
      },
    },
  }
}
이제 앱은 /poll 명령어가 호출되면 대화상자를 표시합니다. Cloud Shell에서 Cloud 함수를 다시 배포하여 상호작용을 테스트하세요.
gcloud functions deploy app --trigger-http --security-level=secure-always
Cloud 함수를 배포한 후 /poll 명령어로 앱에 메시지를 보내어 슬래시 명령어와 대화상자를 테스트합니다. 대화상자는 커스텀 액션 start_poll을 통해 CARD_CLICKED 이벤트를 보냅니다. 이벤트는 startPoll 메서드를 호출하는 업데이트된 시작 시점에 처리됩니다. 지금은 startPoll 메서드가 스텁 처리되어 바로 대화상자를 닫습니다. 다음 섹션에서는 투표 기능을 구현하고 모든 부분을 함께 연결합니다.
투표 카드 구현
앱 투표 부분의 구현은 사용자가 투표하는 인터페이스를 제공하는 양방향 카드를 정의하는 것으로 시작합니다.
투표 인터페이스 구현
다음 콘텐츠로 vote-card.js라는 파일을 만듭니다.
/**
 * Creates a small progress bar to show percent of votes for an option. Since
 * width is limited, the percentage is scaled to 20 steps (5% increments).
 *
 * @param {number} voteCount - Number of votes for this option
 * @param {number} totalVotes - Total votes cast in the poll
 * @returns {string} Text snippet with bar and vote totals
 */
function progressBarText(voteCount, totalVotes) {
  if (voteCount === 0 || totalVotes === 0) {
    return '';
  }

  // For progress bar, calculate share of votes and scale it
  const percentage = (voteCount * 100) / totalVotes;
  const progress = Math.round((percentage / 100) * 20);
  return '▀'.repeat(progress);
}

/**
 * Builds a line in the card for a single choice, including
 * the current totals and voting action.
 *
 * @param {number} index - Index to identify the choice
 * @param {string|undefined} value - Text of the choice
 * @param {number} voteCount - Current number of votes cast for this item
 * @param {number} totalVotes - Total votes cast in poll
 * @param {string} state - Serialized state to send in events
 * @returns {object} card widget
 */
function choice(index, text, voteCount, totalVotes, state) {
  const progressBar = progressBarText(voteCount, totalVotes);
  return {
    keyValue: {
      bottomLabel: `${progressBar} ${voteCount}`,
      content: text,
      button: {
        textButton: {
          text: 'vote',
          onClick: {
            action: {
              actionMethodName: 'vote',
              parameters: [
                {
                  key: 'state',
                  value: state,
                },
                {
                  key: 'index',
                  value: index.toString(10),
                },
              ],
            },
          },
        },
      },
    },
  };
}

/**
 * Builds the card header including the question and author details.
 *
 * @param {string} topic - Topic of the poll
 * @param {string} author - Display name of user that created the poll
 * @returns {object} card widget
 */
function header(topic, author) {
  return {
    title: topic,
    subtitle: `Posted by ${author}`,
    imageUrl:
      'https://raw.githubusercontent.com/google/material-design-icons/master/png/social/poll/materialicons/24dp/2x/baseline_poll_black_24dp.png',
    imageStyle: 'AVATAR',
  };
}

/**
 * Builds the configuration form.
 *
 * @param {object} poll - Current state of poll
 * @param {object} poll.author - User that submitted the poll
 * @param {string} poll.topic - Topic of poll
 * @param {string[]} poll.choices - Text of choices to display to users
 * @param {object} poll.votes - Map of cast votes keyed by user ids
 * @returns {object} card
 */
function buildVoteCard(poll) {
  const widgets = [];
  const state = JSON.stringify(poll);
  const totalVotes = Object.keys(poll.votes).length;

  for (let i = 0; i < poll.choices.length; ++i) {
    // Count votes for this choice
    const votes = Object.values(poll.votes).reduce((sum, vote) => {
      if (vote === i) {
        return sum + 1;
      }
      return sum;
    }, 0);
    widgets.push(choice(i, poll.choices[i], votes, totalVotes, state));
  }

  return {
    header: header(poll.topic, poll.author.displayName),
    sections: [
      {
        widgets,
      },
    ],
  };
}

exports.buildVoteCard = buildVoteCard;
구현의 접근 방식은 대화상자 구현과 비슷하지만 양방향 카드의 마크업은 대화상자와 조금 다릅니다. 이전과 동일하게 생성된 JSON 샘플을 카드 빌더 도구에서 확인할 수 있습니다.
투표 작업 구현
투표 카드에는 각 선택 사항의 버튼이 포함됩니다. 폴의 직렬화된 상태와 함께 해당 선택 사항의 색인이 버튼에 연결됩니다. 앱은 버튼에 매개변수로 첨부된 모든 데이터와 함께 vote 작업이 포함된 CARD_CLICKED를 수신합니다.
다음으로 index.js를 업데이트합니다.
const { buildConfigurationForm, MAX_NUM_OF_OPTIONS } = require('./config-form');
const { buildVoteCard } = require('./vote-card');

/**
 * App entry point.
 */
exports.app = async (req, res) => {
  if (!(req.method === 'POST' && req.body)) {
      res.status(400).send('')
  }
  const event = req.body;
  let reply = {};
  // Dispatch slash and action events
  if (event.type === 'MESSAGE') {
    const message = event.message;
    if (message.slashCommand?.commandId === '1') {
      reply = showConfigurationForm(event);
    }
  } else if (event.type === 'CARD_CLICKED') {
    if (event.action?.actionMethodName === 'start_poll') {
      reply = await startPoll(event);
    } else if (event.action?.actionMethodName === 'vote') {
        reply = recordVote(event);
    }
  }
  res.json(reply);
}

/**
 * Handles the slash command to display the config form.
 *
 * @param {object} event - chat event
 * @returns {object} Response to send back to Chat
 */
function showConfigurationForm(event) {
  // Seed the topic with any text after the slash command
  const topic = event.message?.argumentText?.trim();
  const dialog = buildConfigurationForm({
    topic,
    choices: [],
  });
  return {
    actionResponse: {
      type: 'DIALOG',
      dialogAction: {
        dialog: {
          body: dialog,
        },
      },
    },
  };
}

/**
 * Handle the custom start_poll action.
 *
 * @param {object} event - chat event
 * @returns {object} Response to send back to Chat
 */
function startPoll(event) {
  // Not fully implemented yet -- just close the dialog
  return {
    actionResponse: {
      type: 'DIALOG',
      dialogAction: {
        actionStatus: {
          statusCode: 'OK',
          userFacingMessage: 'Poll started.',
        },
      },
    },
  }
}

/**
 * Handle the custom vote action. Updates the state to record
 * the user's vote then rerenders the card.
 *
 * @param {object} event - chat event
 * @returns {object} Response to send back to Chat
 */
function recordVote(event) {
  const parameters = event.common?.parameters;

  const choice = parseInt(parameters['index']);
  const userId = event.user.name;
  const state = JSON.parse(parameters['state']);

  // Add or update the user's selected option
  state.votes[userId] = choice;

  const card = buildVoteCard(state);
  return {
    thread: event.message.thread,
    actionResponse: {
      type: 'UPDATE_MESSAGE',
    },
    cards: [card],
  }
}
recordVote 메서드는 저장된 상태를 파싱하여 사용자의 투표로 업데이트한 후 카드를 렌더링합니다. 폴 결과는 카드가 업데이트될 때마다 직렬화 및 저장됩니다.
조각 연결
앱이 곧 완료됩니다. 투표와 함께 슬래시 명령어를 구현하였으므로 이제 startPoll 메서드를 완료하는 것만 남았습니다.
하지만 문제가 하나 있습니다.
폴 구성이 제출되면 앱은 두 가지 작업을 수행해야 합니다.
- 대화상자 닫기
- 투표 카드로 스페이스에 새 메시지 게시
불행히도 HTTP 요청에 대한 직접 응답은 하나만 수행할 수 있으며, 응답은 첫 번째 작업을 수행해야 합니다. 카드를 게시하기 위해 앱은 Chap API를 사용하여 새 메시지를 비동기식으로 만들어야 합니다.
클라이언트 라이브러리 추가
다음 명령어를 실행하여 Node.js에 Google API 클라이언트를 포함하도록 앱의 종속 항목을 업데이트합니다.
npm install --save googleapis
폴 시작
index.js를 아래 최종 버전으로 업데이트합니다.
const { buildConfigurationForm, MAX_NUM_OF_OPTIONS } = require('./config-form');
const { buildVoteCard } = require('./vote-card');
const {google} = require('googleapis');

/**
 * App entry point.
 */
exports.app = async (req, res) => {
  if (!(req.method === 'POST' && req.body)) {
      res.status(400).send('')
  }
  const event = req.body;
  let reply = {};
  // Dispatch slash and action events
  if (event.type === 'MESSAGE') {
    const message = event.message;
    if (message.slashCommand?.commandId === '1') {
      reply = showConfigurationForm(event);
    }
  } else if (event.type === 'CARD_CLICKED') {
    if (event.action?.actionMethodName === 'start_poll') {
      reply = await startPoll(event);
    } else if (event.action?.actionMethodName === 'vote') {
        reply = recordVote(event);
    }
  }
  res.json(reply);
}

/**
 * Handles the slash command to display the config form.
 *
 * @param {object} event - chat event
 * @returns {object} Response to send back to Chat
 */
function showConfigurationForm(event) {
  // Seed the topic with any text after the slash command
  const topic = event.message?.argumentText?.trim();
  const dialog = buildConfigurationForm({
    topic,
    choices: [],
  });
  return {
    actionResponse: {
      type: 'DIALOG',
      dialogAction: {
        dialog: {
          body: dialog,
        },
      },
    },
  };
}

/**
 * Handle the custom start_poll action.
 *
 * @param {object} event - chat event
 * @returns {object} Response to send back to Chat
 */
async function startPoll(event) {
  // Get the form values
  const formValues = event.common?.formInputs;
  const topic = formValues?.['topic']?.stringInputs.value[0]?.trim();
  const choices = [];
  for (let i = 0; i < MAX_NUM_OF_OPTIONS; ++i) {
    const choice = formValues?.[`option${i}`]?.stringInputs.value[0]?.trim();
    if (choice) {
      choices.push(choice);
    }
  }

  if (!topic || choices.length === 0) {
    // Incomplete form submitted, rerender
    const dialog = buildConfigurationForm({
      topic,
      choices,
    });
    return {
      actionResponse: {
        type: 'DIALOG',
        dialogAction: {
          dialog: {
            body: dialog,
          },
        },
      },
    };
  }

  // Valid configuration, build the voting card to display
  // in the space
  const pollCard = buildVoteCard({
    topic: topic,
    author: event.user,
    choices: choices,
    votes: {},
  });
  const message = {
    cards: [pollCard],
  };
  const request = {
    parent: event.space.name,
    requestBody: message,
  };
  // Use default credentials (service account)
  const credentials = new google.auth.GoogleAuth({
    scopes: ['https://www.googleapis.com/auth/chat.bot'],
  });
  const chatApi = google.chat({
    version: 'v1',
    auth: credentials,
  });
  await chatApi.spaces.messages.create(request);

  // Close dialog
  return {
    actionResponse: {
      type: 'DIALOG',
      dialogAction: {
        actionStatus: {
          statusCode: 'OK',
          userFacingMessage: 'Poll started.',
        },
      },
    },
  };
}

/**
 * Handle the custom vote action. Updates the state to record
 * the user's vote then rerenders the card.
 *
 * @param {object} event - chat event
 * @returns {object} Response to send back to Chat
 */
function recordVote(event) {
  const parameters = event.common?.parameters;

  const choice = parseInt(parameters['index']);
  const userId = event.user.name;
  const state = JSON.parse(parameters['state']);

  // Add or update the user's selected option
  state.votes[userId] = choice;

  const card = buildVoteCard(state);
  return {
    thread: event.message.thread,
    actionResponse: {
      type: 'UPDATE_MESSAGE',
    },
    cards: [card],
  }
}
함수를 다시 배포합니다.
gcloud functions deploy app --trigger-http --security-level=secure-always
이제 앱을 완전하게 실행해 볼 수 있습니다. /poll 명령어를 호출하면 질문과 몇 가지 선택 사항이 제시됩니다. 제출하면 폴 카드가 나타납니다.
투표를 전송하고 결과를 확인해 보세요.
당연히 스스로 폴링하는 것은 유용하지 않으므로 몇몇 친구 또는 동료를 초대하여 시도해 보시기 바랍니다.
6. 축하합니다
수고하셨습니다. Cloud Functions를 사용하여 Google Chat 앱을 성공적으로 빌드하고 배포했습니다. 이 Codelab에서 앱 빌딩에 관한 여러 핵심 개념을 다루었지만 여전히 살펴볼 사항들이 많이 있습니다. 아래 리소스를 확인해보고 추가 비용이 청구되지 않도록 프로젝트를 삭제하시기 바랍니다.
추가 활동
Chat 플랫폼과 이 앱에 대해 더 자세히 살펴보길 원하는 경우 다음과 같이 스스로 해볼 수 있는 몇 가지 사항들이 있습니다.
- 앱을 멘션(@)하면 어떻게 되나요? 동작을 개선하도록 앱을 업데이트해 보세요.
- 카드에서 폴 상태를 직렬화하는 것은 작은 스페이스에서는 문제없지만 제한이 있습니다. 더 나은 옵션으로 전환을 시도해 보세요.
- 작성자가 폴을 수정하거나 새로운 투표를 중지하길 원하는 경우에는 어떻게 해야 할까요? 이러한 기능은 어떻게 구현할까요?
- 앱 엔드포인트는 아직 보호되지 않습니다. 요청이 Google Chat을 통해서만 오도록 몇 가지 승인 절차를 추가해 보세요.
위 내용은 앱을 개선하는 몇 가지 방법에 불과합니다. 즐기면서 여러분의 상상력을 펼쳐보세요.
삭제
이 튜토리얼에서 사용한 리소스 비용이 Google Cloud Platform 계정에 청구되지 않도록 하는 방법은 다음과 같습니다.
- Cloud 콘솔에서 리소스 관리 페이지로 이동합니다. 왼쪽 상단에서 메뉴
 > IAM 및 관리자 > 리소스 관리를 클릭합니다.
- 프로젝트 목록에서 해당 프로젝트를 선택한 후 삭제를 클릭합니다.
- 대화상자에서 프로젝트 ID를 입력한 후 종료를 클릭하여 프로젝트를 삭제합니다.
자세히 알아보기
채팅 앱 개발에 관한 자세한 내용은 다음을 참조하세요.
Google Cloud 콘솔에서 개발하는 방법에 관한 자세한 내용은 다음을 참조하세요.