
1. مقدمة
تتيح تطبيقات Google Chat إمكانية الوصول إلى خدماتك ومواردك مباشرةً في Google Chat، ما يتيح للمستخدمين الحصول على المعلومات واتّخاذ إجراءات سريعة بدون مغادرة المحادثة.
في هذا الدرس التطبيقي حول الترميز، ستتعلّم كيفية إنشاء تطبيق استطلاع ونشره باستخدام Node.js وCloud Functions.

أهداف الدورة التعليمية
- استخدام Cloud Shell
- النشر على Cloud Functions
- الحصول على إدخالات المستخدمين باستخدام الأوامر التي تبدأ بشرطة مائلة ومربّعات الحوار
- إنشاء بطاقات تفاعلية
2. الإعداد والمتطلبات
إنشاء مشروع على Google Cloud، ثم تفعيل واجهات برمجة التطبيقات والخدمات التي سيستخدمها تطبيق Chat
المتطلبات الأساسية
يتطلّب تطوير تطبيق Google Chat توفُّر حساب على Google Workspace مع إمكانية الوصول إلى Google Chat. إذا لم يكن لديك حساب على Google Workspace، أنشئ حسابًا وسجِّل الدخول إليه قبل المتابعة في هذا الدرس العملي.
إعداد البيئة بالوتيرة التي تناسبك
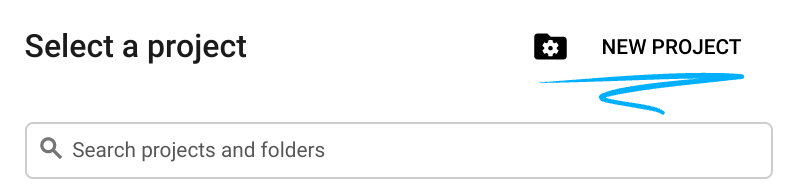
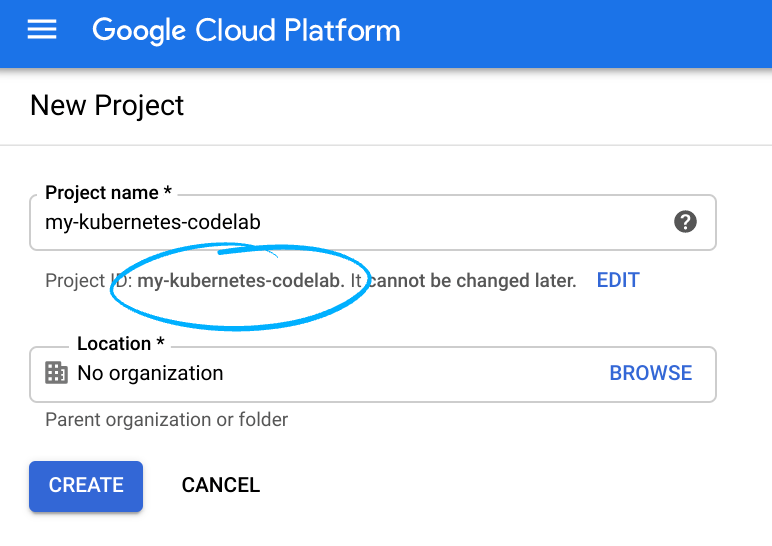
- افتح Google Cloud Console وأنشئ مشروعًا.
تذكَّر معرّف المشروع، وهو اسم فريد في جميع مشاريع Google Cloud (الاسم أعلاه مستخدَم حاليًا ولن يكون متاحًا لك، نأسف لذلك). سيتم الإشارة إليه لاحقًا في هذا الدرس العملي باسمPROJECT_ID.

- بعد ذلك، لاستخدام موارد Google Cloud، عليك تفعيل الفوترة في Cloud Console.
لن تكلفك تجربة هذا الدرس البرمجي الكثير من المال، إن وُجدت تكلفة على الإطلاق. احرص على اتّباع أي تعليمات في قسم "التنظيف" في نهاية الدرس العملي الذي ينصحك بكيفية إيقاف الموارد حتى لا يتم تحصيل رسوم منك بعد هذا الدرس التعليمي. يمكن للمستخدمين الجدد في Google Cloud الاستفادة من برنامج الفترة التجريبية المجانية بقيمة 300 دولار أمريكي.
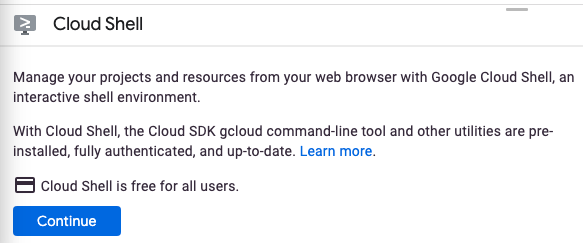
Google Cloud Shell
على الرغم من إمكانية تشغيل Google Cloud عن بُعد من الكمبيوتر المحمول، سنستخدم في هذا الدرس العملي Google Cloud Shell، وهي بيئة سطر أوامر تعمل في Google Cloud.
تفعيل Cloud Shell
- من Cloud Console، انقر على تفعيل Cloud Shell
.
عند فتح Cloud Shell لأول مرة، ستظهر لك رسالة ترحيب وصفية. إذا ظهرت لك رسالة الترحيب، انقر على متابعة. لن تظهر رسالة الترحيب مرة أخرى. إليك رسالة الترحيب:
لن يستغرق توفير Cloud Shell والاتصال به سوى بضع لحظات. بعد الاتصال، يظهر لك Terminal في Cloud Shell:
يتم تحميل هذا الجهاز الافتراضي بجميع أدوات التطوير التي تحتاج إليها. توفّر هذه الخدمة دليلًا منزليًا ثابتًا بسعة 5 غيغابايت وتعمل في Google Cloud، ما يؤدي إلى تحسين أداء الشبكة والمصادقة بشكل كبير. يمكنك إكمال جميع الخطوات في هذا الدرس العملي باستخدام متصفّح أو جهاز Chromebook.بعد الاتصال بـ Cloud Shell، من المفترض أن تلاحظ أنّه تم إثبات هويتك وأنّ المشروع تم ضبطه مسبقًا على رقم تعريف مشروعك. - نفِّذ الأمر التالي في Cloud Shell للتأكّد من إكمال عملية المصادقة:
gcloud auth list
ناتج الأمرCredentialed Accounts ACTIVE ACCOUNT * <my_account>@<my_domain.com>
$ gcloud config set account <ACCOUNT>


- تأكَّد من اختيار المشروع الصحيح. في Cloud Shell، نفِّذ الأمر التالي:
gcloud config list project
[core]
project = <PROJECT_ID>
gcloud config set project <PROJECT_ID>
Updated property [core/project].
أثناء إكمال هذا الدرس البرمجي، ستستخدم عمليات سطر الأوامر وتعدّل الملفات. لتعديل الملفات، يمكنك استخدام محرِّر الرموز البرمجية المضمّن في Cloud Shell، وهو محرِّر Cloud Shell، من خلال النقر على فتح المحرِّر على يسار شريط أدوات Cloud Shell. تتوفّر أيضًا أدوات التحرير الشائعة، مثل Vim وEmacs، في Cloud Shell.
3- تفعيل واجهات برمجة التطبيقات Cloud Functions وCloud Build وGoogle Chat
من Cloud Shell، فعِّل واجهات برمجة التطبيقات والخدمات التالية:
gcloud services enable \
  cloudfunctions \
  cloudbuild.googleapis.com \
  chat.googleapis.com
قد يستغرق إكمال هذه العملية بضع لحظات.
بعد اكتمال العملية، ستظهر رسالة نجاح مشابهة لما يلي:
Operation "operations/acf.cc11852d-40af-47ad-9d59-477a12847c9e" finished successfully.
4. إنشاء تطبيق Chat الأوّلي
تهيئة المشروع
للبدء، عليك إنشاء تطبيق بسيط "Hello world" ونشره. تطبيقات Chat هي خدمات ويب تستجيب لطلبات https وتعرض حمولة JSON. بالنسبة إلى هذا التطبيق، ستستخدم Node.js وCloud Functions.
في Cloud Shell، أنشئ دليلاً جديدًا باسم poll-app وانتقِل إليه:
mkdir ~/poll-app
cd ~/poll-app
ستكون جميع الأعمال المتبقية في الدرس التطبيقي والملفات التي ستنشئها في هذا الدليل.
ابدأ مشروع Node.js:
npm init
يطرح NPM عدة أسئلة حول إعدادات المشروع، مثل الاسم والإصدار. لكل سؤال، اضغط على ENTER لقبول القيم التلقائية. نقطة الدخول التلقائية هي ملف باسم index.js، وسننشئه في الخطوة التالية.
إنشاء الخلفية لتطبيق Chat
حان الوقت لبدء إنشاء التطبيق. أنشِئ ملفًا باسم index.js يتضمّن المحتوى التالي:
/**
 * App entry point.
 */
exports.app = async (req, res) => {
  if (!(req.method === 'POST' && req.body)) {
      res.status(400).send('')
  }
  const event = req.body;
  let reply = {};
  if (event.type === 'MESSAGE') {
    reply = {
        text: `Hello ${event.user.displayName}`
    };
  }
  res.json(reply)
}
لن يتمكّن التطبيق من تنفيذ الكثير من الإجراءات بعد، ولكن لا بأس بذلك. ستضيف المزيد من الوظائف لاحقًا.
نشر التطبيق
لنشر تطبيق "Hello world"، عليك نشر Cloud Function، وإعداد تطبيق Chat في Google Cloud Console، وإرسال رسالة اختبار إلى التطبيق للتحقّق من عملية النشر.
نشر Cloud Function
لنشر Cloud Function لتطبيق "Hello world"، أدخِل الأمر التالي:
gcloud functions deploy app --trigger-http --security-level=secure-always --allow-unauthenticated --runtime nodejs14
عند الانتهاء، يجب أن تبدو المخرجات على النحو التالي:
availableMemoryMb: 256
buildId: 993b2ca9-2719-40af-86e4-42c8e4563a4b
buildName: projects/595241540133/locations/us-central1/builds/993b2ca9-2719-40af-86e4-42c8e4563a4b
entryPoint: app
httpsTrigger:
  securityLevel: SECURE_ALWAYS
  url: https://us-central1-poll-app-codelab.cloudfunctions.net/app
ingressSettings: ALLOW_ALL
labels:
  deployment-tool: cli-gcloud
name: projects/poll-app-codelab/locations/us-central1/functions/app
runtime: nodejs14
serviceAccountEmail: poll-app-codelab@appspot.gserviceaccount.com
sourceUploadUrl: https://storage.googleapis.com/gcf-upload-us-central1-66a01777-67f0-46d7-a941-079c24414822/94057943-2b7c-4b4c-9a21-bb3acffc84c6.zip
status: ACTIVE
timeout: 60s
updateTime: '2021-09-17T19:30:33.694Z'
versionId: '1'
دوِّن عنوان URL للدالة التي تم نشرها في السمة httpsTrigger.url. ستستخدم هذا الرمز في الخطوة التالية.
إعداد التطبيق
لضبط إعدادات التطبيق، انتقِل إلى صفحة إعدادات المحادثة في Cloud Console.
- أزِل العلامة من المربّع إنشاء تطبيق Chat هذا كإضافة في Workspace، ثم انقر على إيقاف للتأكيد.
- في اسم التطبيق، أدخِل "PollCodelab".
- في عنوان URL للأفاتار، أدخِل
https://raw.githubusercontent.com/google/material-design-icons/master/png/social/poll/materialicons/24dp/2x/baseline_poll_black_24dp.png. - في الوصف، أدخِل "تطبيق استطلاع لدرس برمجة".
- ضمن الوظائف، اختَر تلقّي رسائل من شخص واحد والانضمام إلى المساحات والمحادثات الجماعية.
- ضمن إعدادات الاتصال، اختَر عنوان URL لنقطة نهاية HTTP والصِق عنوان URL الخاص بـ Cloud Function (السمة
httpsTrigger.urlمن القسم الأخير). - ضمن الأذونات، اختَر أشخاص ومجموعات معيّنة في نطاقك وأدخِل عنوان بريدك الإلكتروني.
- انقر على حفظ.
أصبح التطبيق جاهزًا الآن لإرسال الرسائل.
اختبار التطبيق
قبل المتابعة، تأكَّد من أنّ التطبيق يعمل عن طريق إضافته إلى مساحة في Google Chat.
- انتقِل إلى Google Chat.
- بجانب Chat، انقر على + > البحث عن تطبيقات.
- أدخِل "PollCodelab" في البحث.
- انقر على محادثة.
- لإرسال رسالة إلى التطبيق، اكتب "Hello" واضغط على Enter.
يجب أن يردّ التطبيق برسالة ترحيبية موجزة.
بعد أن أصبح لدينا هيكل أساسي، حان الوقت لتحويله إلى شيء أكثر فائدة.
5- إنشاء ميزات الاستطلاع
نظرة عامة سريعة على طريقة عمل التطبيق
يتألف التطبيق من جزأين رئيسيين:
- أمر يبدأ بشرطة مائلة ويعرض مربّع حوار لإعداد الاستطلاع
- بطاقة تفاعلية للتصويت والاطّلاع على النتائج
يحتاج التطبيق أيضًا إلى بعض البيانات لتخزين إعدادات الاستطلاع ونتائجه. ويمكن إجراء ذلك باستخدام Firestore أو أي قاعدة بيانات، أو يمكن تخزين الحالة في رسائل التطبيق نفسها. بما أنّ هذا التطبيق مخصّص لإجراء استطلاعات رأي سريعة وغير رسمية لفريق، فإنّ تخزين الحالة في رسائل التطبيق يناسب حالة الاستخدام هذه.
نموذج البيانات للتطبيق (المعبّر عنه في Typescript) هو:
interface Poll {
  /* Question/topic of poll */
  topic: string;
  /** User that submitted the poll */
  author: {
    /** Unique resource name of user */
    name: string;
    /** Display name */
    displayName: string;
  };
  /** Available choices to present to users */
  choices: string[];
  /** Map of user ids to the index of their selected choice */
  votes: { [key: string]: number };
}
بالإضافة إلى الموضوع أو السؤال وقائمة الخيارات، تتضمّن الحالة معرّف المؤلف واسمه بالإضافة إلى الأصوات المسجّلة. لمنع المستخدمين من التصويت عدة مرات، يتم تخزين الأصوات كخريطة لمعرّفات المستخدمين إلى فهرس الخيار الذي تم تحديده.
بالطبع، هناك العديد من الطرق المختلفة، ولكنّ هذه الطريقة توفّر نقطة بداية جيدة لإجراء استطلاعات سريعة في مساحة.
تنفيذ أمر إعداد الاستطلاع
للسماح للمستخدمين ببدء استطلاعات الرأي وضبطها، يمكنك إعداد أمر شرطة مائلة يفتح مربّع حوار. تتضمّن هذه العملية عدة خطوات:
- تسجيل الأمر الذي يبدأ بشرطة مائلة والذي يبدأ استطلاعًا
- أنشئ مربّع الحوار الذي يضبط إعدادات الاستطلاع.
- اسمح للتطبيق بالتعرّف على الأمر الذي يبدأ بشرطة مائلة والتعامل معه.
- إنشاء بطاقات تفاعلية تسهّل التصويت في الاستطلاع
- تنفيذ الرمز الذي يتيح للتطبيق إجراء استطلاعات
- أعِد نشر دالة السحابة الإلكترونية.
تسجيل الأمر الذي يبدأ بشرطة مائلة
لتسجيل أمر شرطة مائلة، ارجع إلى صفحة إعدادات Chat في وحدة التحكّم (واجهات برمجة التطبيقات والخدمات > لوحة البيانات > Hangouts Chat API > الإعدادات).
- ضمن أوامر تبدأ بشرطة مائلة، انقر على إضافة أمر جديد يبدأ بشرطة مائلة.
- في الاسم، أدخِل "/poll".
- في معرّف الأمر، أدخِل "1".
- في الوصف، أدخِل "بدء استطلاع".
- انقر على يفتح مربّع حوار.
- انقر على تم.
- انقر على حفظ.
يتعرّف التطبيق الآن على الأمر /poll ويفتح مربّع حوار. بعد ذلك، لنضبط مربّع الحوار.
إنشاء نموذج الإعداد كحوار
يفتح الأمر الذي يبدأ بشرطة مائلة مربّع حوار لضبط موضوع الاستطلاع والخيارات المتاحة. أنشئ ملفًا جديدًا باسم config-form.js يتضمّن المحتوى التالي:
/** Upper bounds on number of choices to present. */
const MAX_NUM_OF_OPTIONS = 5;

/**
 * Build widget with instructions on how to use form.
 *
 * @returns {object} card widget
 */
function helpText() {
  return {
    textParagraph: {
      text: 'Enter the poll topic and up to 5 choices in the poll. Blank options will be omitted.',
    },
  };
}

/**
 * Build the text input for a choice.
 *
 * @param {number} index - Index to identify the choice
 * @param {string|undefined} value - Initial value to render (optional)
 * @returns {object} card widget
 */
function optionInput(index, value) {
  return {
    textInput: {
      label: `Option ${index + 1}`,
      type: 'SINGLE_LINE',
      name: `option${index}`,
      value: value || '',
    },
  };
}

/**
 * Build the text input for the poll topic.
 *
 * @param {string|undefined} topic - Initial value to render (optional)
 * @returns {object} card widget
 */
function topicInput(topic) {
  return {
    textInput: {
      label: 'Topic',
      type: 'MULTIPLE_LINE',
      name: 'topic',
      value: topic || '',
    },
  };
}

/**
 * Build the buttons/actions for the form.
 *
 * @returns {object} card widget
 */
function buttons() {
  return {
    buttonList: {
      buttons: [
        {
          text: 'Submit',
          onClick: {
            action: {
              function: 'start_poll',
            },
          },
        },
      ],
    },
  };
}

/**
 * Build the configuration form.
 *
 * @param {object} options - Initial state to render with form
 * @param {string|undefined} options.topic - Topic of poll (optional)
 * @param {string[]|undefined} options.choices - Text of choices to display to users (optional)
 * @returns {object} card
 */
function buildConfigurationForm(options) {
  const widgets = [];
  widgets.push(helpText());
  widgets.push(topicInput(options.topic));
  for (let i = 0; i < MAX_NUM_OF_OPTIONS; ++i) {
    const choice = options?.choices?.[i];
    widgets.push(optionInput(i, choice));
  }
  widgets.push(buttons());

  // Assemble the card
  return {
    sections: [
      {
        widgets,
      },
    ],
  };
}

exports.MAX_NUM_OF_OPTIONS = MAX_NUM_OF_OPTIONS;
exports.buildConfigurationForm = buildConfigurationForm;
ينشئ هذا الرمز نموذج مربّع الحوار الذي يتيح للمستخدم إعداد الاستطلاع. ويصدّر أيضًا قيمة ثابتة للحدّ الأقصى لعدد الخيارات التي يمكن أن يتضمّنها السؤال. من الممارسات الجيدة عزل إنشاء ترميز واجهة المستخدِم في دوال بدون حالة مع تمرير أي حالة كمعلَمات. ويسهّل ذلك إعادة الاستخدام، وسيتم عرض هذه البطاقة لاحقًا في سياقات مختلفة.
تؤدي عملية التنفيذ هذه أيضًا إلى تقسيم البطاقة إلى وحدات أو مكونات أصغر. مع أنّ هذه التقنية ليست مطلوبة، إلّا أنّها تُعدّ من أفضل الممارسات لأنّها تكون عادةً أسهل في القراءة والصيانة عند إنشاء واجهات معقّدة.
للاطّلاع على نموذج لملف JSON الكامل الذي يتم إنشاؤه، يمكنك عرضه في أداة إنشاء البطاقات.
التعامل مع الأمر الذي يبدأ بشرطة مائلة
تظهر أوامر الشرطة المائلة كأحداث MESSAGE عند إرسالها إلى التطبيق. عدِّل index.js للتحقّق من وجود أمر شرطة مائلة من خلال حدث MESSAGE والردّ عليه باستخدام مربّع حوار. استبدِل index.js بما يلي:
const { buildConfigurationForm, MAX_NUM_OF_OPTIONS } = require('./config-form');

/**
 * App entry point.
 */
exports.app = async (req, res) => {
  if (!(req.method === 'POST' && req.body)) {
      res.status(400).send('')
  }
  const event = req.body;
  let reply = {};
  // Dispatch slash and action events
  if (event.type === 'MESSAGE') {
    const message = event.message;
    if (message.slashCommand?.commandId === '1') {
      reply = showConfigurationForm(event);
    }
  } else if (event.type === 'CARD_CLICKED') {
    if (event.action?.actionMethodName === 'start_poll') {
      reply = await startPoll(event);
    }
  }
  res.json(reply);
}

/**
 * Handles the slash command to display the config form.
 *
 * @param {object} event - chat event
 * @returns {object} Response to send back to Chat
 */
function showConfigurationForm(event) {
  // Seed the topic with any text after the slash command
  const topic = event.message?.argumentText?.trim();
  const dialog = buildConfigurationForm({
    topic,
    choices: [],
  });
  return {
    actionResponse: {
      type: 'DIALOG',
      dialogAction: {
        dialog: {
          body: dialog,
        },
      },
    },
  };
}

/**
 * Handle the custom start_poll action.
 *
 * @param {object} event - chat event
 * @returns {object} Response to send back to Chat
 */
function startPoll(event) {
  // Not fully implemented yet -- just close the dialog
  return {
    actionResponse: {
      type: 'DIALOG',
      dialogAction: {
        actionStatus: {
          statusCode: 'OK',
          userFacingMessage: 'Poll started.',
        },
      },
    },
  }
}
سيعرض التطبيق الآن مربّع حوار عند استدعاء الأمر /poll. اختبِر التفاعل من خلال إعادة نشر Cloud Function من Cloud Shell.
gcloud functions deploy app --trigger-http --security-level=secure-always
بعد نشر Cloud Function، أرسِل رسالة إلى التطبيق باستخدام الأمر /poll لاختبار الأمر الذي يبدأ بشرطة مائلة ومربّع الحوار. يرسل مربّع الحوار الحدث CARD_CLICKED مع الإجراء المخصّص start_poll. يتم التعامل مع الحدث في نقطة الدخول المعدَّلة حيث يتم استدعاء طريقة startPoll. في الوقت الحالي، تم إيقاف طريقة startPoll مؤقتًا لإغلاق مربّع الحوار فقط. في القسم التالي، ستنفّذ وظيفة التصويت وتربط جميع الأجزاء ببعضها.
تنفيذ بطاقة التصويت
لتنفيذ جزء التصويت في التطبيق، ابدأ بتحديد البطاقة التفاعلية التي توفّر واجهة للمستخدمين للتصويت.
تنفيذ واجهة التصويت
أنشئ ملفًا باسم vote-card.js يتضمّن المحتوى التالي:
/**
 * Creates a small progress bar to show percent of votes for an option. Since
 * width is limited, the percentage is scaled to 20 steps (5% increments).
 *
 * @param {number} voteCount - Number of votes for this option
 * @param {number} totalVotes - Total votes cast in the poll
 * @returns {string} Text snippet with bar and vote totals
 */
function progressBarText(voteCount, totalVotes) {
  if (voteCount === 0 || totalVotes === 0) {
    return '';
  }

  // For progress bar, calculate share of votes and scale it
  const percentage = (voteCount * 100) / totalVotes;
  const progress = Math.round((percentage / 100) * 20);
  return '▀'.repeat(progress);
}

/**
 * Builds a line in the card for a single choice, including
 * the current totals and voting action.
 *
 * @param {number} index - Index to identify the choice
 * @param {string|undefined} value - Text of the choice
 * @param {number} voteCount - Current number of votes cast for this item
 * @param {number} totalVotes - Total votes cast in poll
 * @param {string} state - Serialized state to send in events
 * @returns {object} card widget
 */
function choice(index, text, voteCount, totalVotes, state) {
  const progressBar = progressBarText(voteCount, totalVotes);
  return {
    keyValue: {
      bottomLabel: `${progressBar} ${voteCount}`,
      content: text,
      button: {
        textButton: {
          text: 'vote',
          onClick: {
            action: {
              actionMethodName: 'vote',
              parameters: [
                {
                  key: 'state',
                  value: state,
                },
                {
                  key: 'index',
                  value: index.toString(10),
                },
              ],
            },
          },
        },
      },
    },
  };
}

/**
 * Builds the card header including the question and author details.
 *
 * @param {string} topic - Topic of the poll
 * @param {string} author - Display name of user that created the poll
 * @returns {object} card widget
 */
function header(topic, author) {
  return {
    title: topic,
    subtitle: `Posted by ${author}`,
    imageUrl:
      'https://raw.githubusercontent.com/google/material-design-icons/master/png/social/poll/materialicons/24dp/2x/baseline_poll_black_24dp.png',
    imageStyle: 'AVATAR',
  };
}

/**
 * Builds the configuration form.
 *
 * @param {object} poll - Current state of poll
 * @param {object} poll.author - User that submitted the poll
 * @param {string} poll.topic - Topic of poll
 * @param {string[]} poll.choices - Text of choices to display to users
 * @param {object} poll.votes - Map of cast votes keyed by user ids
 * @returns {object} card
 */
function buildVoteCard(poll) {
  const widgets = [];
  const state = JSON.stringify(poll);
  const totalVotes = Object.keys(poll.votes).length;

  for (let i = 0; i < poll.choices.length; ++i) {
    // Count votes for this choice
    const votes = Object.values(poll.votes).reduce((sum, vote) => {
      if (vote === i) {
        return sum + 1;
      }
      return sum;
    }, 0);
    widgets.push(choice(i, poll.choices[i], votes, totalVotes, state));
  }

  return {
    header: header(poll.topic, poll.author.displayName),
    sections: [
      {
        widgets,
      },
    ],
  };
}

exports.buildVoteCard = buildVoteCard;
تتشابه عملية التنفيذ مع النهج المتّبع في مربّع الحوار، على الرغم من أنّ ترميز البطاقات التفاعلية يختلف قليلاً عن مربّعات الحوار. كما كان من قبل، يمكنك الاطّلاع على عيّنة من ملف JSON الذي تم إنشاؤه في أداة إنشاء البطاقات.
تنفيذ إجراء التصويت
تتضمّن بطاقة التصويت زرًا لكل خيار. يتم إرفاق فهرس هذا الخيار بالزر، بالإضافة إلى الحالة المتسلسلة للاستطلاع. يتلقّى التطبيق CARD_CLICKED مع الإجراء vote بالإضافة إلى أي بيانات مرفقة بالزر كمعلّمات.
تعديل index.js باستخدام:
const { buildConfigurationForm, MAX_NUM_OF_OPTIONS } = require('./config-form');
const { buildVoteCard } = require('./vote-card');

/**
 * App entry point.
 */
exports.app = async (req, res) => {
  if (!(req.method === 'POST' && req.body)) {
      res.status(400).send('')
  }
  const event = req.body;
  let reply = {};
  // Dispatch slash and action events
  if (event.type === 'MESSAGE') {
    const message = event.message;
    if (message.slashCommand?.commandId === '1') {
      reply = showConfigurationForm(event);
    }
  } else if (event.type === 'CARD_CLICKED') {
    if (event.action?.actionMethodName === 'start_poll') {
      reply = await startPoll(event);
    } else if (event.action?.actionMethodName === 'vote') {
        reply = recordVote(event);
    }
  }
  res.json(reply);
}

/**
 * Handles the slash command to display the config form.
 *
 * @param {object} event - chat event
 * @returns {object} Response to send back to Chat
 */
function showConfigurationForm(event) {
  // Seed the topic with any text after the slash command
  const topic = event.message?.argumentText?.trim();
  const dialog = buildConfigurationForm({
    topic,
    choices: [],
  });
  return {
    actionResponse: {
      type: 'DIALOG',
      dialogAction: {
        dialog: {
          body: dialog,
        },
      },
    },
  };
}

/**
 * Handle the custom start_poll action.
 *
 * @param {object} event - chat event
 * @returns {object} Response to send back to Chat
 */
function startPoll(event) {
  // Not fully implemented yet -- just close the dialog
  return {
    actionResponse: {
      type: 'DIALOG',
      dialogAction: {
        actionStatus: {
          statusCode: 'OK',
          userFacingMessage: 'Poll started.',
        },
      },
    },
  }
}

/**
 * Handle the custom vote action. Updates the state to record
 * the user's vote then rerenders the card.
 *
 * @param {object} event - chat event
 * @returns {object} Response to send back to Chat
 */
function recordVote(event) {
  const parameters = event.common?.parameters;

  const choice = parseInt(parameters['index']);
  const userId = event.user.name;
  const state = JSON.parse(parameters['state']);

  // Add or update the user's selected option
  state.votes[userId] = choice;

  const card = buildVoteCard(state);
  return {
    thread: event.message.thread,
    actionResponse: {
      type: 'UPDATE_MESSAGE',
    },
    cards: [card],
  }
}
تعمل طريقة recordVote على تحليل الحالة المخزّنة وتعديلها وفقًا لتصويت المستخدم، ثم إعادة عرض البطاقة. يتم تسلسل نتائج الاستطلاع وتخزينها مع البطاقة في كل مرة يتم فيها تعديلها.
ربط الأجزاء
أوشك التطبيق على الانتهاء. بعد تنفيذ أمر الشرطة المائلة مع التصويت، ما عليك سوى إكمال طريقة startPoll.
ولكن هناك شرط.
عند إرسال إعدادات الاستطلاع، يجب أن ينفّذ التطبيق إجراءَين:
- إغلاق مربّع الحوار
- انشر رسالة جديدة في المساحة تتضمّن بطاقة التصويت.
للأسف، لا يمكن للرد المباشر على طلب HTTP تنفيذ سوى إجراء واحد، ويجب أن يكون الأول. لنشر بطاقة التصويت، يجب أن يستخدم التطبيق Chat API لإنشاء رسالة جديدة بشكل غير متزامن.
إضافة مكتبة البرامج
نفِّذ الأمر التالي لتعديل تبعيات التطبيق لتضمين برنامج Google API client لنظام التشغيل Node.js.
npm install --save googleapis
بدء الاستطلاع
يُرجى تحديث index.js إلى الإصدار النهائي أدناه:
const { buildConfigurationForm, MAX_NUM_OF_OPTIONS } = require('./config-form');
const { buildVoteCard } = require('./vote-card');
const {google} = require('googleapis');

/**
 * App entry point.
 */
exports.app = async (req, res) => {
  if (!(req.method === 'POST' && req.body)) {
      res.status(400).send('')
  }
  const event = req.body;
  let reply = {};
  // Dispatch slash and action events
  if (event.type === 'MESSAGE') {
    const message = event.message;
    if (message.slashCommand?.commandId === '1') {
      reply = showConfigurationForm(event);
    }
  } else if (event.type === 'CARD_CLICKED') {
    if (event.action?.actionMethodName === 'start_poll') {
      reply = await startPoll(event);
    } else if (event.action?.actionMethodName === 'vote') {
        reply = recordVote(event);
    }
  }
  res.json(reply);
}

/**
 * Handles the slash command to display the config form.
 *
 * @param {object} event - chat event
 * @returns {object} Response to send back to Chat
 */
function showConfigurationForm(event) {
  // Seed the topic with any text after the slash command
  const topic = event.message?.argumentText?.trim();
  const dialog = buildConfigurationForm({
    topic,
    choices: [],
  });
  return {
    actionResponse: {
      type: 'DIALOG',
      dialogAction: {
        dialog: {
          body: dialog,
        },
      },
    },
  };
}

/**
 * Handle the custom start_poll action.
 *
 * @param {object} event - chat event
 * @returns {object} Response to send back to Chat
 */
async function startPoll(event) {
  // Get the form values
  const formValues = event.common?.formInputs;
  const topic = formValues?.['topic']?.stringInputs.value[0]?.trim();
  const choices = [];
  for (let i = 0; i < MAX_NUM_OF_OPTIONS; ++i) {
    const choice = formValues?.[`option${i}`]?.stringInputs.value[0]?.trim();
    if (choice) {
      choices.push(choice);
    }
  }

  if (!topic || choices.length === 0) {
    // Incomplete form submitted, rerender
    const dialog = buildConfigurationForm({
      topic,
      choices,
    });
    return {
      actionResponse: {
        type: 'DIALOG',
        dialogAction: {
          dialog: {
            body: dialog,
          },
        },
      },
    };
  }

  // Valid configuration, build the voting card to display
  // in the space
  const pollCard = buildVoteCard({
    topic: topic,
    author: event.user,
    choices: choices,
    votes: {},
  });
  const message = {
    cards: [pollCard],
  };
  const request = {
    parent: event.space.name,
    requestBody: message,
  };
  // Use default credentials (service account)
  const credentials = new google.auth.GoogleAuth({
    scopes: ['https://www.googleapis.com/auth/chat.bot'],
  });
  const chatApi = google.chat({
    version: 'v1',
    auth: credentials,
  });
  await chatApi.spaces.messages.create(request);

  // Close dialog
  return {
    actionResponse: {
      type: 'DIALOG',
      dialogAction: {
        actionStatus: {
          statusCode: 'OK',
          userFacingMessage: 'Poll started.',
        },
      },
    },
  };
}

/**
 * Handle the custom vote action. Updates the state to record
 * the user's vote then rerenders the card.
 *
 * @param {object} event - chat event
 * @returns {object} Response to send back to Chat
 */
function recordVote(event) {
  const parameters = event.common?.parameters;

  const choice = parseInt(parameters['index']);
  const userId = event.user.name;
  const state = JSON.parse(parameters['state']);

  // Add or update the user's selected option
  state.votes[userId] = choice;

  const card = buildVoteCard(state);
  return {
    thread: event.message.thread,
    actionResponse: {
      type: 'UPDATE_MESSAGE',
    },
    cards: [card],
  }
}
أعِد نشر الدالة:
gcloud functions deploy app --trigger-http --security-level=secure-always
من المفترض أن تتمكّن الآن من استخدام التطبيق بالكامل. جرِّب استدعاء الأمر /poll وطرح سؤال وتقديم بعض الخيارات. بعد الإرسال، ستظهر بطاقة الاستطلاع.
صوِّت وشاهِد النتيجة.
بالطبع، لن يكون إجراء استطلاع لنفسك مفيدًا، لذا ننصحك بدعوة بعض الأصدقاء أو زملاء العمل لتجربته.
6. تهانينا
تهانينا! لقد أنشأت تطبيق Google Chat ونشرته بنجاح باستخدام Cloud Functions. على الرغم من أنّ الدرس التطبيقي حول الترميز قد غطّى العديد من المفاهيم الأساسية لإنشاء تطبيق، إلا أنّه لا يزال هناك الكثير من المعلومات التي يمكنك استكشافها. راجِع المراجع أدناه ولا تنسَ تنظيف مشروعك لتجنُّب الرسوم الإضافية.
أنشطة إضافية
إذا أردت استكشاف منصة Chat وهذا التطبيق بشكل أكثر تفصيلاً، إليك بعض الإجراءات التي يمكنك تجربتها بنفسك:
- ماذا يحدث عند الإشارة إلى التطبيق باستخدام @؟ جرِّب تحديث التطبيق لتحسين أدائه.
- لا بأس بتسلسل حالة الاستطلاع في البطاقة للمساحات الصغيرة، ولكن هناك حدود لذلك. حاوِل التبديل إلى خيار أفضل.
- ماذا لو أراد صاحب الاستطلاع تعديله أو إيقاف تلقّي أصوات جديدة؟ كيف ستنفّذ هذه الميزات؟
- لم يتم تأمين نقطة نهاية التطبيق بعد. حاوِل إضافة بعض إجراءات التحقّق للتأكّد من أنّ الطلبات واردة من Google Chat.
هذه ليست سوى بعض الطرق المختلفة لتحسين التطبيق. استمتع وأطلق العنان لمخيلتك!
تَنظيم
لتجنُّب تحمّل رسوم في حسابك على Google Cloud Platform مقابل الموارد المستخدَمة في هذا البرنامج التعليمي، اتّبِع الخطوات التالية:
- في Cloud Console، انتقِل إلى صفحة إدارة الموارد. في أعلى يمين الصفحة، انقر على القائمة
 > إدارة الهوية وإمكانية الوصول والمشرف > إدارة الموارد.
- في قائمة المشاريع، اختَر مشروعك ثم انقر على حذف.
- في مربّع الحوار، اكتب رقم تعريف المشروع، ثم انقر على إيقاف لحذف المشروع.
مزيد من المعلومات
لمزيد من المعلومات حول تطوير تطبيقات Chat، يُرجى الاطّلاع على ما يلي:
لمزيد من المعلومات حول التطوير في Google Cloud Console، يُرجى الاطّلاع على ما يلي: