
1. บทนำ
แอป Google Chat จะนำบริการและแหล่งข้อมูลของคุณมาไว้ใน Google Chat โดยตรง เพื่อให้ผู้ใช้รับข้อมูลและดำเนินการอย่างรวดเร็วได้โดยไม่ต้องออกจากการสนทนา
ในโค้ดแล็บนี้ คุณจะได้เรียนรู้วิธีสร้างและทําให้แอปแบบสํารวจใช้งานได้โดยใช้ Node.js และ Cloud Functions

สิ่งที่คุณจะได้เรียนรู้
- ใช้ Cloud Shell
- ทำให้ใช้งานได้กับ Cloud Functions
- รับข้อมูลจากผู้ใช้ด้วยคำสั่งเครื่องหมายทับและกล่องโต้ตอบ
- สร้างการ์ดแบบอินเทอร์แอกทีฟ
2. การตั้งค่าและข้อกำหนด
สร้างโปรเจ็กต์ Google Cloud จากนั้นเปิดใช้ API และบริการที่แอป Chat จะใช้
ข้อกำหนดเบื้องต้น
การพัฒนาแอป Google Chat ต้องใช้บัญชี Google Workspace ที่มีสิทธิ์เข้าถึง Google Chat หากยังไม่มีบัญชี Google Workspace ให้สร้างบัญชีและลงชื่อเข้าใช้ก่อนดำเนินการต่อใน Codelab นี้
การตั้งค่าสภาพแวดล้อมแบบเรียนรู้ด้วยตนเอง
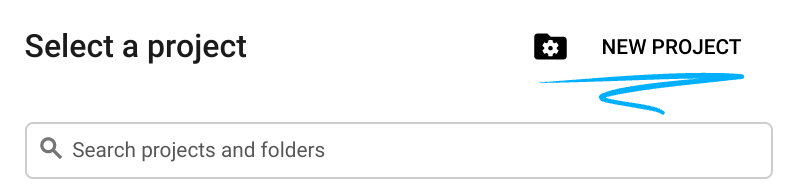
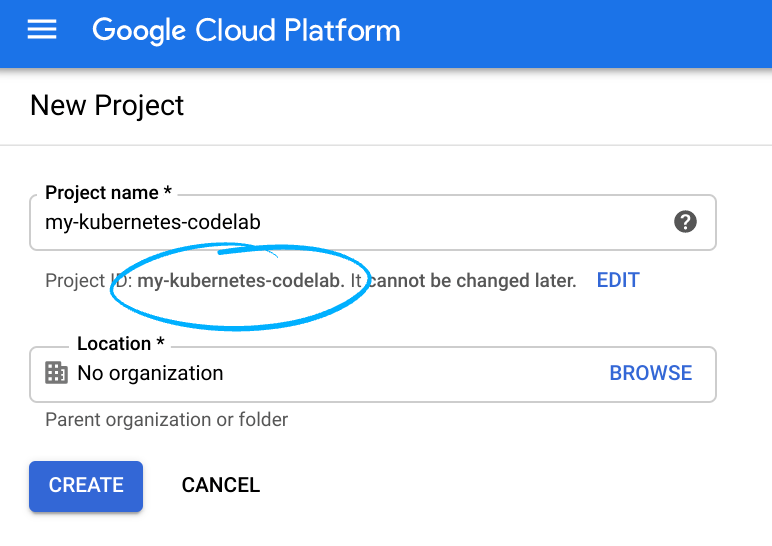
- เปิดคอนโซล Google Cloud แล้วสร้างโปรเจ็กต์
โปรดจดจำรหัสโปรเจ็กต์ ซึ่งเป็นชื่อที่ไม่ซ้ำกันในโปรเจ็กต์ Google Cloud ทั้งหมด (ชื่อด้านบนถูกใช้ไปแล้วและจะใช้ไม่ได้ ขออภัย) ซึ่งจะเรียกว่าPROJECT_IDในภายหลังใน Codelab นี้

- จากนั้นเปิดใช้การเรียกเก็บเงินใน Cloud Console เพื่อใช้ทรัพยากร Google Cloud
การทำตาม Codelab นี้ไม่ควรมีค่าใช้จ่ายมากนัก หรืออาจไม่มีค่าใช้จ่ายเลย อย่าลืมทำตามวิธีการในส่วน "ล้างข้อมูล" ที่ตอนท้ายของ Codelab ซึ่งจะแนะนำวิธีปิดแหล่งข้อมูลเพื่อไม่ให้มีการเรียกเก็บเงินนอกเหนือจากบทแนะนำนี้ ผู้ใช้ใหม่ของ Google Cloud มีสิทธิ์เข้าร่วมโปรแกรมช่วงทดลองใช้ฟรีมูลค่า$300USD
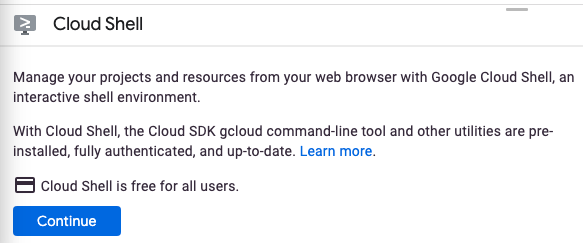
Google Cloud Shell
แม้ว่าคุณจะใช้งาน Google Cloud จากแล็ปท็อประยะไกลได้ แต่ใน Codelab นี้เราจะใช้ Google Cloud Shell ซึ่งเป็นสภาพแวดล้อมบรรทัดคำสั่งที่ทำงานใน Google Cloud
เปิดใช้งาน Cloud Shell
- จาก Cloud Console ให้คลิกเปิดใช้งาน Cloud Shell
เมื่อเปิด Cloud Shell เป็นครั้งแรก คุณจะเห็นข้อความต้อนรับที่อธิบายรายละเอียด หากเห็นข้อความต้อนรับ ให้คลิกต่อไป ข้อความต้อนรับจะไม่ปรากฏขึ้นอีก ข้อความต้อนรับมีดังนี้
การจัดสรรและเชื่อมต่อกับ Cloud Shell จะใช้เวลาเพียงไม่กี่นาที หลังจากเชื่อมต่อแล้ว คุณจะเห็นเทอร์มินัล Cloud Shell ดังนี้
เครื่องเสมือนนี้โหลดเครื่องมือพัฒนาทั้งหมดที่คุณต้องการ โดยมีไดเรกทอรีหลักขนาด 5 GB ที่คงอยู่ถาวรและทำงานใน Google Cloud ซึ่งช่วยเพิ่มประสิทธิภาพเครือข่ายและการตรวจสอบสิทธิ์ได้อย่างมาก คุณสามารถทำงานทั้งหมดในโค้ดแล็บนี้ได้ด้วยเบราว์เซอร์หรือ Chromebook เมื่อเชื่อมต่อกับ Cloud Shell แล้ว คุณจะเห็นว่าระบบได้ตรวจสอบสิทธิ์ให้คุณแล้ว และโปรเจ็กต์ได้ตั้งค่าเป็นรหัสโปรเจ็กต์ของคุณแล้ว - เรียกใช้คำสั่งต่อไปนี้ใน Cloud Shell เพื่อยืนยันว่าคุณได้รับการตรวจสอบสิทธิ์แล้ว
gcloud auth list
เอาต์พุตของคำสั่งCredentialed Accounts ACTIVE ACCOUNT * <my_account>@<my_domain.com>
$ gcloud config set account <ACCOUNT>


- ยืนยันว่าคุณได้เลือกโปรเจ็กต์ที่ถูกต้องแล้ว ใน Cloud Shell ให้เรียกใช้คำสั่งต่อไปนี้
gcloud config list project
[core]
project = <PROJECT_ID>
gcloud config set project <PROJECT_ID>
Updated property [core/project].
เมื่อทำ Codelab นี้เสร็จแล้ว คุณจะได้ใช้การดำเนินการบรรทัดคำสั่งและแก้ไขไฟล์ สำหรับการแก้ไขไฟล์ คุณสามารถทำงานกับโปรแกรมแก้ไขโค้ดในตัวของ Cloud Shell ซึ่งก็คือ Cloud Shell Editor ได้โดยคลิกเปิดโปรแกรมแก้ไขทางด้านขวาของแถบเครื่องมือ Cloud Shell นอกจากนี้ Cloud Shell ยังมีโปรแกรมแก้ไขยอดนิยมอย่าง Vim และ Emacs ด้วย
3. เปิดใช้ Cloud Functions, Cloud Build และ Google Chat API
จาก Cloud Shell ให้เปิดใช้ API และบริการต่อไปนี้
gcloud services enable \
  cloudfunctions \
  cloudbuild.googleapis.com \
  chat.googleapis.com
การดำเนินการนี้อาจใช้เวลาสักครู่จึงจะเสร็จสมบูรณ์
เมื่อเสร็จสมบูรณ์แล้ว ข้อความแสดงความสำเร็จที่คล้ายกับข้อความนี้จะปรากฏขึ้น
Operation "operations/acf.cc11852d-40af-47ad-9d59-477a12847c9e" finished successfully.
4. สร้างแอป Chat เริ่มต้น
เริ่มต้นโปรเจ็กต์
ในการเริ่มต้น คุณจะต้องสร้างและติดตั้งใช้งานแอป "Hello world" อย่างง่ายก่อน แอปใน Chat เป็นบริการเว็บที่ตอบสนองต่อคำขอ https และตอบกลับด้วยเพย์โหลด JSON สำหรับแอปนี้ คุณจะใช้ Node.js และ Cloud Functions
สร้างไดเรกทอรีใหม่ชื่อ poll-app ใน Cloud Shell แล้วไปที่ไดเรกทอรีดังกล่าว
mkdir ~/poll-app
cd ~/poll-app
งานที่เหลือทั้งหมดสำหรับโค้ดแล็บและไฟล์ที่คุณจะสร้างจะอยู่ในไดเรกทอรีนี้
เริ่มต้นโปรเจ็กต์ Node.js โดยใช้คำสั่งต่อไปนี้
npm init
NPM จะถามคำถามหลายข้อเกี่ยวกับการกำหนดค่าโปรเจ็กต์ เช่น ชื่อและเวอร์ชัน สำหรับแต่ละคำถาม ให้กด ENTER เพื่อยอมรับค่าเริ่มต้น จุดแรกเข้าเริ่มต้นคือไฟล์ชื่อ index.js ซึ่งเราจะสร้างในขั้นตอนถัดไป
สร้างแบ็กเอนด์ของแอป Chat
ได้เวลาเริ่มสร้างแอปแล้ว สร้างไฟล์ชื่อ index.js โดยมีเนื้อหาดังนี้
/**
 * App entry point.
 */
exports.app = async (req, res) => {
  if (!(req.method === 'POST' && req.body)) {
      res.status(400).send('')
  }
  const event = req.body;
  let reply = {};
  if (event.type === 'MESSAGE') {
    reply = {
        text: `Hello ${event.user.displayName}`
    };
  }
  res.json(reply)
}
แอปจะยังทำอะไรไม่ได้มาก แต่ก็ไม่เป็นไร คุณจะเพิ่มฟังก์ชันการทำงานเพิ่มเติมได้ในภายหลัง
ปรับใช้แอป
หากต้องการทําให้แอป "Hello world" ใช้งานได้ คุณจะต้องทําให้ Cloud Functions ใช้งานได้ กําหนดค่าแอป Chat ใน Google Cloud Console และส่งข้อความทดสอบไปยังแอปเพื่อยืนยันการทําให้ใช้งานได้
ทำให้ Cloud Function ใช้งานได้
หากต้องการทําให้ Cloud Function ของแอป "Hello world" ใช้งานได้ ให้ป้อนคําสั่งต่อไปนี้
gcloud functions deploy app --trigger-http --security-level=secure-always --allow-unauthenticated --runtime nodejs14
เมื่อเสร็จแล้ว เอาต์พุตควรมีลักษณะดังนี้
availableMemoryMb: 256
buildId: 993b2ca9-2719-40af-86e4-42c8e4563a4b
buildName: projects/595241540133/locations/us-central1/builds/993b2ca9-2719-40af-86e4-42c8e4563a4b
entryPoint: app
httpsTrigger:
  securityLevel: SECURE_ALWAYS
  url: https://us-central1-poll-app-codelab.cloudfunctions.net/app
ingressSettings: ALLOW_ALL
labels:
  deployment-tool: cli-gcloud
name: projects/poll-app-codelab/locations/us-central1/functions/app
runtime: nodejs14
serviceAccountEmail: poll-app-codelab@appspot.gserviceaccount.com
sourceUploadUrl: https://storage.googleapis.com/gcf-upload-us-central1-66a01777-67f0-46d7-a941-079c24414822/94057943-2b7c-4b4c-9a21-bb3acffc84c6.zip
status: ACTIVE
timeout: 60s
updateTime: '2021-09-17T19:30:33.694Z'
versionId: '1'
จด URL ของฟังก์ชันที่ทําให้ใช้งานได้แล้วในพร็อพเพอร์ตี้ httpsTrigger.url คุณจะต้องใช้ข้อมูลนี้ในขั้นตอนถัดไป
กำหนดค่าแอป
หากต้องการกำหนดค่าแอป ให้ไปที่หน้าการกำหนดค่าแชทใน Cloud Console
- ยกเลิกการเลือกสร้างแอป Chat นี้เป็นส่วนเสริมของ Workspace แล้วคลิกปิดใช้เพื่อยืนยัน
- ในชื่อแอป ให้ป้อน "PollCodelab"
- ใน URL ของรูปโปรไฟล์ ให้ป้อน
https://raw.githubusercontent.com/google/material-design-icons/master/png/social/poll/materialicons/24dp/2x/baseline_poll_black_24dp.png - ในคำอธิบาย ให้ป้อน "แอปแบบสำรวจสำหรับโค้ดแล็บ"
- ในส่วนฟังก์ชันการทำงาน ให้เลือกรับข้อความแบบ 1:1 และเข้าร่วมพื้นที่ทำงานและการสนทนากลุ่ม
- ในส่วนการตั้งค่าการเชื่อมต่อ ให้เลือก URL ของปลายทาง HTTP แล้ววาง URL สำหรับ Cloud Function (พร็อพเพอร์ตี้
httpsTrigger.urlจากส่วนสุดท้าย) - ในส่วนสิทธิ์ ให้เลือกบุคคลและกลุ่มเฉพาะในโดเมน แล้วป้อนอีเมลของคุณ
- คลิกบันทึก
ตอนนี้แอปพร้อมส่งข้อความแล้ว
ทดสอบแอป
ก่อนดำเนินการต่อ ให้ตรวจสอบว่าแอปทำงานได้โดยเพิ่มแอปไปยังพื้นที่ทำงานใน Google Chat
- ไปที่ Google Chat
- คลิก + > ค้นหาแอป ข้าง Chat
- ป้อน "PollCodelab" ในการค้นหา
- คลิก Chat
- หากต้องการส่งข้อความถึงแอป ให้พิมพ์ "สวัสดี" แล้วกด Enter
แอปควรตอบกลับด้วยข้อความทักทายสั้นๆ
ตอนนี้เรามีโครงร่างพื้นฐานแล้ว ก็ถึงเวลาเปลี่ยนให้เป็นสิ่งที่ใช้งานได้มากขึ้น
5. สร้างฟีเจอร์โพล
ภาพรวมคร่าวๆ เกี่ยวกับวิธีการทำงานของแอป
แอปประกอบด้วย 2 ส่วนหลัก ได้แก่
- คำสั่งเครื่องหมายทับที่แสดงกล่องโต้ตอบสำหรับการกำหนดค่าโพล
- การ์ดแบบอินเทอร์แอกทีฟสำหรับการโหวตและดูผลลัพธ์
นอกจากนี้ แอปยังต้องมีสถานะบางอย่างเพื่อจัดเก็บการกำหนดค่าและการตอบกลับของแบบสำรวจ ซึ่งทำได้ด้วย Firestore หรือฐานข้อมูลใดก็ได้ หรือจะจัดเก็บสถานะไว้ในข้อความของแอปเองก็ได้ เนื่องจากแอปนี้มีไว้สำหรับการทำแบบสำรวจความคิดเห็นแบบไม่เป็นทางการอย่างรวดเร็วของทีม การจัดเก็บสถานะในข้อความของแอปจึงเหมาะอย่างยิ่งสำหรับ Use Case นี้
รูปแบบข้อมูลของแอป (แสดงใน Typescript) มีดังนี้
interface Poll {
  /* Question/topic of poll */
  topic: string;
  /** User that submitted the poll */
  author: {
    /** Unique resource name of user */
    name: string;
    /** Display name */
    displayName: string;
  };
  /** Available choices to present to users */
  choices: string[];
  /** Map of user ids to the index of their selected choice */
  votes: { [key: string]: number };
}
นอกจากหัวข้อหรือคำถามและรายการตัวเลือกแล้ว สถานะยังรวมถึงรหัสและชื่อของผู้เขียน รวมถึงคะแนนโหวตที่บันทึกไว้ด้วย ระบบจะจัดเก็บคะแนนโหวตเป็นแผนที่ของรหัสผู้ใช้ไปยังดัชนีของตัวเลือกที่ผู้ใช้เลือก เพื่อป้องกันไม่ให้ผู้ใช้โหวตหลายครั้ง
แน่นอนว่ามีแนวทางที่แตกต่างกันมากมาย แต่แนวทางนี้เป็นจุดเริ่มต้นที่ดีสำหรับการทำแบบสำรวจด่วนในพื้นที่ทำงาน
ใช้คำสั่งการกำหนดค่าการสำรวจ
หากต้องการอนุญาตให้ผู้ใช้เริ่มและกำหนดค่าแบบสำรวจ ให้ตั้งค่าคำสั่ง Slash ที่เปิดกล่องโต้ตอบ ซึ่งเป็นกระบวนการแบบหลายขั้นตอน ดังนี้
- ลงทะเบียนคำสั่งเครื่องหมายทับที่เริ่มการสำรวจ
- สร้างกล่องโต้ตอบที่ตั้งค่าแบบสำรวจ
- อนุญาตให้แอปจดจำและจัดการคำสั่งเครื่องหมายทับ
- สร้างการ์ดแบบอินเทอร์แอกทีฟที่ช่วยให้ลงคะแนนในโพลได้
- ใช้โค้ดที่ช่วยให้แอปเรียกใช้การสำรวจได้
- นำฟังก์ชันระบบคลาวด์ไปใช้งานอีกครั้ง
ลงทะเบียนคำสั่งเครื่องหมายทับ
หากต้องการลงทะเบียนคำสั่ง Slash ให้กลับไปที่หน้าการกำหนดค่า Chat ในคอนโซล (API และบริการ > แดชบอร์ด > Hangouts Chat API > การกำหนดค่า)
- ในส่วนคำสั่งเครื่องหมายทับ ให้คลิกเพิ่มคำสั่งเครื่องหมายทับใหม่
- ในชื่อ ให้ป้อน "/poll"
- ใน Command id ให้ป้อน "1"
- ในคำอธิบาย ให้ป้อน "เริ่มการสำรวจความคิดเห็น"
- เลือกเปิดกล่องโต้ตอบ
- คลิกเสร็จสิ้น
- คลิกบันทึก
ตอนนี้แอปจะรู้จักคำสั่ง /poll และจะเปิดกล่องโต้ตอบ จากนั้นมากำหนดค่ากล่องโต้ตอบกัน
สร้างแบบฟอร์มการกำหนดค่าเป็นกล่องโต้ตอบ
คำสั่งเครื่องหมายทับจะเปิดกล่องโต้ตอบเพื่อกำหนดค่าหัวข้อโพลและตัวเลือกที่เป็นไปได้ สร้างไฟล์ใหม่ชื่อ config-form.js โดยมีเนื้อหาดังนี้
/** Upper bounds on number of choices to present. */
const MAX_NUM_OF_OPTIONS = 5;

/**
 * Build widget with instructions on how to use form.
 *
 * @returns {object} card widget
 */
function helpText() {
  return {
    textParagraph: {
      text: 'Enter the poll topic and up to 5 choices in the poll. Blank options will be omitted.',
    },
  };
}

/**
 * Build the text input for a choice.
 *
 * @param {number} index - Index to identify the choice
 * @param {string|undefined} value - Initial value to render (optional)
 * @returns {object} card widget
 */
function optionInput(index, value) {
  return {
    textInput: {
      label: `Option ${index + 1}`,
      type: 'SINGLE_LINE',
      name: `option${index}`,
      value: value || '',
    },
  };
}

/**
 * Build the text input for the poll topic.
 *
 * @param {string|undefined} topic - Initial value to render (optional)
 * @returns {object} card widget
 */
function topicInput(topic) {
  return {
    textInput: {
      label: 'Topic',
      type: 'MULTIPLE_LINE',
      name: 'topic',
      value: topic || '',
    },
  };
}

/**
 * Build the buttons/actions for the form.
 *
 * @returns {object} card widget
 */
function buttons() {
  return {
    buttonList: {
      buttons: [
        {
          text: 'Submit',
          onClick: {
            action: {
              function: 'start_poll',
            },
          },
        },
      ],
    },
  };
}

/**
 * Build the configuration form.
 *
 * @param {object} options - Initial state to render with form
 * @param {string|undefined} options.topic - Topic of poll (optional)
 * @param {string[]|undefined} options.choices - Text of choices to display to users (optional)
 * @returns {object} card
 */
function buildConfigurationForm(options) {
  const widgets = [];
  widgets.push(helpText());
  widgets.push(topicInput(options.topic));
  for (let i = 0; i < MAX_NUM_OF_OPTIONS; ++i) {
    const choice = options?.choices?.[i];
    widgets.push(optionInput(i, choice));
  }
  widgets.push(buttons());

  // Assemble the card
  return {
    sections: [
      {
        widgets,
      },
    ],
  };
}

exports.MAX_NUM_OF_OPTIONS = MAX_NUM_OF_OPTIONS;
exports.buildConfigurationForm = buildConfigurationForm;
โค้ดนี้จะสร้างแบบฟอร์มกล่องโต้ตอบที่ช่วยให้ผู้ใช้ตั้งค่าโพลได้ นอกจากนี้ยังส่งออกค่าคงที่สำหรับจำนวนตัวเลือกสูงสุดที่คำถามจะมีได้ด้วย แนวทางปฏิบัติที่ดีคือการแยกการสร้างมาร์กอัป UI ออกเป็นฟังก์ชันแบบไม่เก็บสถานะโดยส่งสถานะเป็นพารามิเตอร์ ซึ่งจะช่วยให้ใช้ซ้ำได้ และในภายหลังการ์ดนี้จะแสดงในบริบทต่างๆ
การติดตั้งใช้งานนี้ยังแยกการ์ดออกเป็นหน่วยหรือคอมโพเนนต์ที่เล็กลงด้วย แม้ว่าจะไม่บังคับ แต่เทคนิคนี้เป็นแนวทางปฏิบัติแนะนำเนื่องจากมักจะอ่านและบำรุงรักษาได้ง่ายกว่าเมื่อสร้างอินเทอร์เฟซที่ซับซ้อน
หากต้องการดูตัวอย่าง JSON ที่สมบูรณ์ซึ่งสร้างขึ้น ให้ดูในเครื่องมือสร้างการ์ด
จัดการคำสั่งเครื่องหมายทับ
คำสั่ง Slash จะปรากฏเป็นเหตุการณ์ MESSAGE เมื่อส่งไปยังแอป ให้อัปเดต index.js เพื่อตรวจสอบว่ามีคำสั่ง Slash ผ่านเหตุการณ์ MESSAGE หรือไม่ และเพื่อตอบกลับด้วยกล่องโต้ตอบ แทนที่ index.js ด้วยข้อมูลต่อไปนี้
const { buildConfigurationForm, MAX_NUM_OF_OPTIONS } = require('./config-form');

/**
 * App entry point.
 */
exports.app = async (req, res) => {
  if (!(req.method === 'POST' && req.body)) {
      res.status(400).send('')
  }
  const event = req.body;
  let reply = {};
  // Dispatch slash and action events
  if (event.type === 'MESSAGE') {
    const message = event.message;
    if (message.slashCommand?.commandId === '1') {
      reply = showConfigurationForm(event);
    }
  } else if (event.type === 'CARD_CLICKED') {
    if (event.action?.actionMethodName === 'start_poll') {
      reply = await startPoll(event);
    }
  }
  res.json(reply);
}

/**
 * Handles the slash command to display the config form.
 *
 * @param {object} event - chat event
 * @returns {object} Response to send back to Chat
 */
function showConfigurationForm(event) {
  // Seed the topic with any text after the slash command
  const topic = event.message?.argumentText?.trim();
  const dialog = buildConfigurationForm({
    topic,
    choices: [],
  });
  return {
    actionResponse: {
      type: 'DIALOG',
      dialogAction: {
        dialog: {
          body: dialog,
        },
      },
    },
  };
}

/**
 * Handle the custom start_poll action.
 *
 * @param {object} event - chat event
 * @returns {object} Response to send back to Chat
 */
function startPoll(event) {
  // Not fully implemented yet -- just close the dialog
  return {
    actionResponse: {
      type: 'DIALOG',
      dialogAction: {
        actionStatus: {
          statusCode: 'OK',
          userFacingMessage: 'Poll started.',
        },
      },
    },
  }
}
ตอนนี้แอปจะแสดงกล่องโต้ตอบเมื่อเรียกใช้คำสั่ง /poll ทดสอบการโต้ตอบโดยการติดตั้งใช้งาน Cloud Function อีกครั้งจาก Cloud Shell
gcloud functions deploy app --trigger-http --security-level=secure-always
หลังจากที่ Cloud Function ได้รับการติดตั้งใช้งานแล้ว ให้ส่งข้อความถึงแอปด้วยคำสั่ง /poll เพื่อทดสอบคำสั่งเครื่องหมายทับและกล่องโต้ตอบ กล่องโต้ตอบจะส่งCARD_CLICKEDเหตุการณ์พร้อมการดำเนินการที่กำหนดเองstart_poll ระบบจะจัดการเหตุการณ์ในจุดแรกเข้าที่อัปเดตแล้ว ซึ่งจะเรียกใช้เมธอด startPoll ตอนนี้เราได้สร้างstartPollเพื่อปิดกล่องโต้ตอบเท่านั้น ในส่วนถัดไป คุณจะใช้ฟังก์ชันการลงคะแนนและเชื่อมต่อทุกส่วนเข้าด้วยกัน
นำบัตรลงคะแนนไปใช้
หากต้องการใช้ส่วนการโหวตของแอป ให้เริ่มต้นด้วยการกำหนดการ์ดแบบอินเทอร์แอกทีฟซึ่งมีอินเทอร์เฟซให้ผู้ใช้โหวต
ติดตั้งใช้งานอินเทอร์เฟซการโหวต
สร้างไฟล์ชื่อ vote-card.js ที่มีเนื้อหาต่อไปนี้
/**
 * Creates a small progress bar to show percent of votes for an option. Since
 * width is limited, the percentage is scaled to 20 steps (5% increments).
 *
 * @param {number} voteCount - Number of votes for this option
 * @param {number} totalVotes - Total votes cast in the poll
 * @returns {string} Text snippet with bar and vote totals
 */
function progressBarText(voteCount, totalVotes) {
  if (voteCount === 0 || totalVotes === 0) {
    return '';
  }

  // For progress bar, calculate share of votes and scale it
  const percentage = (voteCount * 100) / totalVotes;
  const progress = Math.round((percentage / 100) * 20);
  return '▀'.repeat(progress);
}

/**
 * Builds a line in the card for a single choice, including
 * the current totals and voting action.
 *
 * @param {number} index - Index to identify the choice
 * @param {string|undefined} value - Text of the choice
 * @param {number} voteCount - Current number of votes cast for this item
 * @param {number} totalVotes - Total votes cast in poll
 * @param {string} state - Serialized state to send in events
 * @returns {object} card widget
 */
function choice(index, text, voteCount, totalVotes, state) {
  const progressBar = progressBarText(voteCount, totalVotes);
  return {
    keyValue: {
      bottomLabel: `${progressBar} ${voteCount}`,
      content: text,
      button: {
        textButton: {
          text: 'vote',
          onClick: {
            action: {
              actionMethodName: 'vote',
              parameters: [
                {
                  key: 'state',
                  value: state,
                },
                {
                  key: 'index',
                  value: index.toString(10),
                },
              ],
            },
          },
        },
      },
    },
  };
}

/**
 * Builds the card header including the question and author details.
 *
 * @param {string} topic - Topic of the poll
 * @param {string} author - Display name of user that created the poll
 * @returns {object} card widget
 */
function header(topic, author) {
  return {
    title: topic,
    subtitle: `Posted by ${author}`,
    imageUrl:
      'https://raw.githubusercontent.com/google/material-design-icons/master/png/social/poll/materialicons/24dp/2x/baseline_poll_black_24dp.png',
    imageStyle: 'AVATAR',
  };
}

/**
 * Builds the configuration form.
 *
 * @param {object} poll - Current state of poll
 * @param {object} poll.author - User that submitted the poll
 * @param {string} poll.topic - Topic of poll
 * @param {string[]} poll.choices - Text of choices to display to users
 * @param {object} poll.votes - Map of cast votes keyed by user ids
 * @returns {object} card
 */
function buildVoteCard(poll) {
  const widgets = [];
  const state = JSON.stringify(poll);
  const totalVotes = Object.keys(poll.votes).length;

  for (let i = 0; i < poll.choices.length; ++i) {
    // Count votes for this choice
    const votes = Object.values(poll.votes).reduce((sum, vote) => {
      if (vote === i) {
        return sum + 1;
      }
      return sum;
    }, 0);
    widgets.push(choice(i, poll.choices[i], votes, totalVotes, state));
  }

  return {
    header: header(poll.topic, poll.author.displayName),
    sections: [
      {
        widgets,
      },
    ],
  };
}

exports.buildVoteCard = buildVoteCard;
การติดตั้งใช้งานจะคล้ายกับแนวทางที่ใช้กับกล่องโต้ตอบ แม้ว่ามาร์กอัปสำหรับการ์ดแบบอินเทอร์แอกทีฟจะแตกต่างจากกล่องโต้ตอบเล็กน้อยก็ตาม คุณยังดูตัวอย่าง JSON ที่สร้างขึ้นได้ในเครื่องมือสร้างการ์ดเช่นเดิม
ใช้การดำเนินการโหวต
การ์ดการโหวตจะมีปุ่มสำหรับแต่ละตัวเลือก ระบบจะแนบดัชนีของตัวเลือกนั้นพร้อมกับสถานะที่แปลงเป็นอนุกรมของแบบสำรวจไปกับปุ่ม แอปจะได้รับ CARD_CLICKED พร้อมการดำเนินการ vote รวมถึงข้อมูลที่แนบมากับปุ่มเป็นพารามิเตอร์
อัปเดต index.js ด้วยข้อมูลต่อไปนี้
const { buildConfigurationForm, MAX_NUM_OF_OPTIONS } = require('./config-form');
const { buildVoteCard } = require('./vote-card');

/**
 * App entry point.
 */
exports.app = async (req, res) => {
  if (!(req.method === 'POST' && req.body)) {
      res.status(400).send('')
  }
  const event = req.body;
  let reply = {};
  // Dispatch slash and action events
  if (event.type === 'MESSAGE') {
    const message = event.message;
    if (message.slashCommand?.commandId === '1') {
      reply = showConfigurationForm(event);
    }
  } else if (event.type === 'CARD_CLICKED') {
    if (event.action?.actionMethodName === 'start_poll') {
      reply = await startPoll(event);
    } else if (event.action?.actionMethodName === 'vote') {
        reply = recordVote(event);
    }
  }
  res.json(reply);
}

/**
 * Handles the slash command to display the config form.
 *
 * @param {object} event - chat event
 * @returns {object} Response to send back to Chat
 */
function showConfigurationForm(event) {
  // Seed the topic with any text after the slash command
  const topic = event.message?.argumentText?.trim();
  const dialog = buildConfigurationForm({
    topic,
    choices: [],
  });
  return {
    actionResponse: {
      type: 'DIALOG',
      dialogAction: {
        dialog: {
          body: dialog,
        },
      },
    },
  };
}

/**
 * Handle the custom start_poll action.
 *
 * @param {object} event - chat event
 * @returns {object} Response to send back to Chat
 */
function startPoll(event) {
  // Not fully implemented yet -- just close the dialog
  return {
    actionResponse: {
      type: 'DIALOG',
      dialogAction: {
        actionStatus: {
          statusCode: 'OK',
          userFacingMessage: 'Poll started.',
        },
      },
    },
  }
}

/**
 * Handle the custom vote action. Updates the state to record
 * the user's vote then rerenders the card.
 *
 * @param {object} event - chat event
 * @returns {object} Response to send back to Chat
 */
function recordVote(event) {
  const parameters = event.common?.parameters;

  const choice = parseInt(parameters['index']);
  const userId = event.user.name;
  const state = JSON.parse(parameters['state']);

  // Add or update the user's selected option
  state.votes[userId] = choice;

  const card = buildVoteCard(state);
  return {
    thread: event.message.thread,
    actionResponse: {
      type: 'UPDATE_MESSAGE',
    },
    cards: [card],
  }
}
recordVote วิธีการจะแยกวิเคราะห์สถานะที่จัดเก็บไว้และอัปเดตด้วยคะแนนของผู้ใช้ จากนั้นจึงแสดงการ์ดอีกครั้ง ระบบจะจัดรูปแบบผลการสำรวจและจัดเก็บไว้ในการ์ดทุกครั้งที่มีการอัปเดต
เชื่อมโยงสิ่งต่างๆ
แอปใกล้เสร็จแล้ว เมื่อใช้คำสั่งนี้ร่วมกับการโหวต สิ่งที่เหลืออยู่คือการทำให้startPollวิธีการเสร็จสมบูรณ์
แต่ก็มีข้อจำกัด
เมื่อส่งการกำหนดค่าแบบสำรวจแล้ว แอปจะต้องดำเนินการ 2 อย่างต่อไปนี้
- ปิดกล่องโต้ตอบ
- โพสต์ข้อความใหม่ไปยังพื้นที่ทำงานที่มีการ์ดการโหวต
แต่การตอบกลับคำขอ HTTP โดยตรงจะทำได้เพียงอย่างเดียวและต้องเป็นคำขอแรก หากต้องการโพสต์การ์ดการโหวต แอปต้องใช้ Chat API เพื่อสร้างข้อความใหม่แบบไม่พร้อมกัน
เพิ่มไลบรารีของไคลเอ็นต์
เรียกใช้คำสั่งต่อไปนี้เพื่ออัปเดตการอ้างอิงของแอปให้รวมไคลเอ็นต์ Google API สำหรับ Node.js
npm install --save googleapis
เริ่มโพล
อัปเดต index.js เป็นเวอร์ชันสุดท้ายด้านล่าง
const { buildConfigurationForm, MAX_NUM_OF_OPTIONS } = require('./config-form');
const { buildVoteCard } = require('./vote-card');
const {google} = require('googleapis');

/**
 * App entry point.
 */
exports.app = async (req, res) => {
  if (!(req.method === 'POST' && req.body)) {
      res.status(400).send('')
  }
  const event = req.body;
  let reply = {};
  // Dispatch slash and action events
  if (event.type === 'MESSAGE') {
    const message = event.message;
    if (message.slashCommand?.commandId === '1') {
      reply = showConfigurationForm(event);
    }
  } else if (event.type === 'CARD_CLICKED') {
    if (event.action?.actionMethodName === 'start_poll') {
      reply = await startPoll(event);
    } else if (event.action?.actionMethodName === 'vote') {
        reply = recordVote(event);
    }
  }
  res.json(reply);
}

/**
 * Handles the slash command to display the config form.
 *
 * @param {object} event - chat event
 * @returns {object} Response to send back to Chat
 */
function showConfigurationForm(event) {
  // Seed the topic with any text after the slash command
  const topic = event.message?.argumentText?.trim();
  const dialog = buildConfigurationForm({
    topic,
    choices: [],
  });
  return {
    actionResponse: {
      type: 'DIALOG',
      dialogAction: {
        dialog: {
          body: dialog,
        },
      },
    },
  };
}

/**
 * Handle the custom start_poll action.
 *
 * @param {object} event - chat event
 * @returns {object} Response to send back to Chat
 */
async function startPoll(event) {
  // Get the form values
  const formValues = event.common?.formInputs;
  const topic = formValues?.['topic']?.stringInputs.value[0]?.trim();
  const choices = [];
  for (let i = 0; i < MAX_NUM_OF_OPTIONS; ++i) {
    const choice = formValues?.[`option${i}`]?.stringInputs.value[0]?.trim();
    if (choice) {
      choices.push(choice);
    }
  }

  if (!topic || choices.length === 0) {
    // Incomplete form submitted, rerender
    const dialog = buildConfigurationForm({
      topic,
      choices,
    });
    return {
      actionResponse: {
        type: 'DIALOG',
        dialogAction: {
          dialog: {
            body: dialog,
          },
        },
      },
    };
  }

  // Valid configuration, build the voting card to display
  // in the space
  const pollCard = buildVoteCard({
    topic: topic,
    author: event.user,
    choices: choices,
    votes: {},
  });
  const message = {
    cards: [pollCard],
  };
  const request = {
    parent: event.space.name,
    requestBody: message,
  };
  // Use default credentials (service account)
  const credentials = new google.auth.GoogleAuth({
    scopes: ['https://www.googleapis.com/auth/chat.bot'],
  });
  const chatApi = google.chat({
    version: 'v1',
    auth: credentials,
  });
  await chatApi.spaces.messages.create(request);

  // Close dialog
  return {
    actionResponse: {
      type: 'DIALOG',
      dialogAction: {
        actionStatus: {
          statusCode: 'OK',
          userFacingMessage: 'Poll started.',
        },
      },
    },
  };
}

/**
 * Handle the custom vote action. Updates the state to record
 * the user's vote then rerenders the card.
 *
 * @param {object} event - chat event
 * @returns {object} Response to send back to Chat
 */
function recordVote(event) {
  const parameters = event.common?.parameters;

  const choice = parseInt(parameters['index']);
  const userId = event.user.name;
  const state = JSON.parse(parameters['state']);

  // Add or update the user's selected option
  state.votes[userId] = choice;

  const card = buildVoteCard(state);
  return {
    thread: event.message.thread,
    actionResponse: {
      type: 'UPDATE_MESSAGE',
    },
    cards: [card],
  }
}
ทำให้ฟังก์ชันใช้งานได้อีกครั้ง
gcloud functions deploy app --trigger-http --security-level=secure-always
ตอนนี้คุณควรใช้แอปได้อย่างเต็มที่แล้ว ลองเรียกใช้คำสั่ง /poll แล้วระบุคำถามและตัวเลือก 2-3 รายการ หลังจากส่งแล้ว การ์ดแบบสำรวจจะปรากฏขึ้น
โหวตแล้วดูว่าจะเกิดอะไรขึ้น
แน่นอนว่าการทำแบบสำรวจด้วยตัวเองอาจไม่ค่อยมีประโยชน์เท่าไรนัก ดังนั้นลองเชิญเพื่อนหรือเพื่อนร่วมงานมาลองใช้ดู
6. ขอแสดงความยินดี
ยินดีด้วย คุณสร้างและติดตั้งใช้งานแอป Google Chat โดยใช้ Cloud Functions เรียบร้อยแล้ว แม้ว่า Codelab จะครอบคลุมแนวคิดหลักหลายอย่างในการสร้างแอป แต่ก็ยังมีอีกมากมายให้สำรวจ ดูแหล่งข้อมูลด้านล่างและอย่าลืมล้างข้อมูลในโปรเจ็กต์เพื่อหลีกเลี่ยงการเรียกเก็บเงินเพิ่มเติม
กิจกรรมเพิ่มเติม
หากต้องการสำรวจแพลตฟอร์ม Chat และแอปนี้อย่างละเอียดมากขึ้น คุณสามารถลองทำสิ่งต่อไปนี้ด้วยตนเอง
- สิ่งที่จะเกิดขึ้นเมื่อคุณ @ กล่าวถึงแอป โปรดลองอัปเดตแอปเพื่อปรับปรุงลักษณะการทำงาน
- การแปลงสถานะการสำรวจเป็นอนุกรมในบัตรใช้ได้กับพื้นที่ขนาดเล็ก แต่มีข้อจำกัด ลองเปลี่ยนไปใช้ตัวเลือกที่ดีกว่า
- จะเกิดอะไรขึ้นหากผู้สร้างต้องการแก้ไขโพลหรือหยุดรับคะแนนโหวตใหม่ คุณจะใช้ฟีเจอร์เหล่านั้นอย่างไร
- ปลายทางของแอปยังไม่ปลอดภัย ลองเพิ่มการยืนยันเพื่อให้มั่นใจว่าคำขอมาจาก Google Chat
ที่กล่าวมาเป็นเพียงวิธีต่างๆ ในการปรับปรุงแอป ขอให้สนุกและใช้จินตนาการของคุณ
ล้างข้อมูล
โปรดดำเนินการดังนี้เพื่อเลี่ยงไม่ให้เกิดการเรียกเก็บเงินกับบัญชี Google Cloud Platform สำหรับทรัพยากรที่ใช้ในบทแนะนำนี้
- ใน Cloud Console ให้ไปที่หน้าจัดการทรัพยากร ที่มุมซ้ายบน ให้คลิกเมนู
 > IAM และผู้ดูแลระบบ > จัดการทรัพยากร
- เลือกโปรเจ็กต์ในรายการโปรเจ็กต์ แล้วคลิกลบ
- ในกล่องโต้ตอบ ให้พิมพ์รหัสโปรเจ็กต์ แล้วคลิกปิดเพื่อลบโปรเจ็กต์
ดูข้อมูลเพิ่มเติม
ดูข้อมูลเพิ่มเติมเกี่ยวกับการพัฒนาแอป Chat ได้ที่
- เอกสารประกอบสำหรับนักพัฒนาซอฟต์แวร์ของ Google Chat
- คำสั่งเครื่องหมายทับ
- กล่องโต้ตอบ
- การ์ดแบบอินเทอร์แอกทีฟ
ดูข้อมูลเพิ่มเติมเกี่ยวกับการพัฒนาใน Google Cloud Console ได้ที่