
1. Giriş
Google Chat uygulamaları, hizmetlerinizi ve kaynaklarınızı doğrudan Google Chat'e getirerek kullanıcıların sohbetten ayrılmadan bilgi almasına ve hızlıca işlem yapmasına olanak tanır.
Bu codelab'de, Node.js ve Cloud Functions kullanarak bir anket uygulaması oluşturmayı ve dağıtmayı öğreneceksiniz.

Neler öğreneceksiniz?
- Cloud Shell'i kullanma
- Cloud Functions'a dağıtma
- Eğik çizgi komutları ve iletişim kutularıyla kullanıcı girişi alma
- Etkileşimli kartlar oluşturma
2. Kurulum ve şartlar
Google Cloud projesi oluşturun, ardından Chat uygulamasının kullanacağı API'leri ve hizmetleri etkinleştirin.
Ön koşullar
Google Chat uygulaması geliştirmek için Google Chat'e erişimi olan bir Google Workspace hesabı gerekir. Henüz bir Google Workspace hesabınız yoksa bu codelab'e devam etmeden önce bir hesap oluşturup oturum açın.
Kendi hızınızda ortam kurulumu
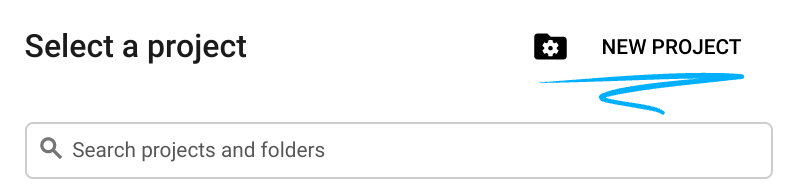
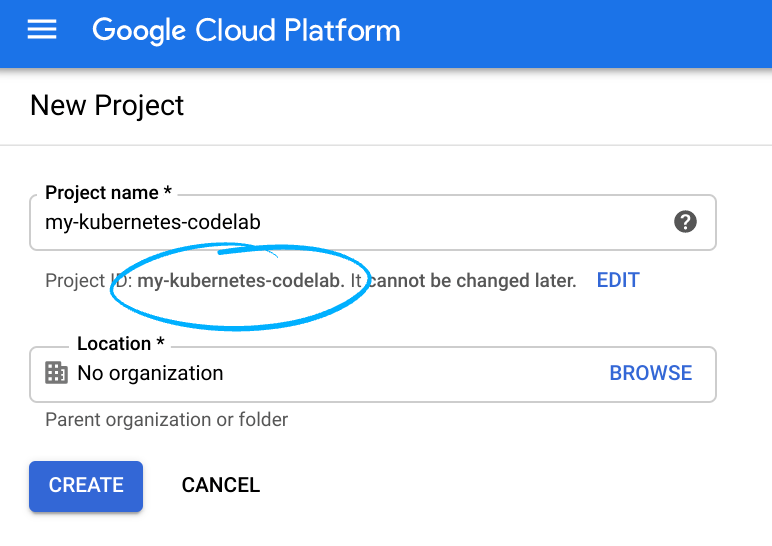
- Google Cloud Console'u açıp bir proje oluşturun.
Tüm Google Cloud projelerinde benzersiz olan proje kimliğini unutmayın (Yukarıdaki ad zaten alınmış olduğundan sizin için çalışmayacaktır). Bu codelab'in ilerleyen kısımlarındaPROJECT_IDolarak adlandırılacaktır.

- Ardından, Google Cloud kaynaklarını kullanmak için Cloud Console'da faturalandırmayı etkinleştirin.
Bu codelab'i tamamlamak neredeyse hiç maliyetli değildir. Bu eğiticinin ötesinde faturalandırmaya tabi olmamak için kaynakları nasıl kapatacağınız konusunda size tavsiyelerde bulunan codelab'in sonundaki"Temizleme" bölümündeki talimatları uyguladığınızdan emin olun. Google Cloud'un yeni kullanıcıları 300 ABD doları değerinde ücretsiz deneme programından yararlanabilir.
Google Cloud Shell
Google Cloud'u dizüstü bilgisayarınızdan uzaktan çalıştırabilirsiniz ancak bu codelab'de Google Cloud'da çalışan bir komut satırı ortamı olan Google Cloud Shell'i kullanacağız.
Cloud Shell'i etkinleştirme
- Cloud Console'da Cloud Shell'i etkinleştir 'i
tıklayın.
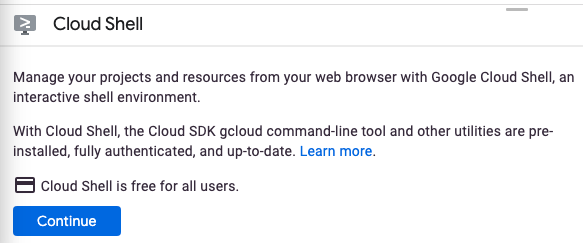
Cloud Shell'i ilk kez açtığınızda açıklayıcı bir karşılama mesajı gösterilir. Karşılama mesajını görürseniz Devam'ı tıklayın. Karşılama mesajı tekrar görünmez. İşte karşılama mesajı:
Cloud Shell'in sağlanması ve bağlanması yalnızca birkaç saniye sürer. Bağlandıktan sonra Cloud Shell Terminali'ni görürsünüz:
Bu sanal makineye ihtiyacınız olan tüm geliştirme araçları yüklenmiştir. 5 GB boyutunda kalıcı bir ana dizin sunar ve Google Cloud'da çalışır. Bu sayede ağ performansı ve kimlik doğrulama önemli ölçüde iyileştirilir. Bu codelab'deki tüm çalışmalarınızı tarayıcı veya Chromebook'unuzla yapabilirsiniz.Cloud Shell'e bağlandıktan sonra kimliğinizin doğrulandığını ve projenin proje kimliğinize ayarlandığını görürsünüz. - Kimliğinizin doğrulandığını onaylamak için Cloud Shell'de aşağıdaki komutu çalıştırın:
gcloud auth list
Komut çıkışıCredentialed Accounts ACTIVE ACCOUNT * <my_account>@<my_domain.com>
$ gcloud config set account <ACCOUNT>


- Doğru projeyi seçtiğinizi onaylayın. Cloud Shell'de şunu çalıştırın:
gcloud config list project
[core]
project = <PROJECT_ID>
gcloud config set project <PROJECT_ID>
Updated property [core/project].
Bu codelab'i tamamlarken komut satırı işlemlerini kullanacak ve dosyaları düzenleyeceksiniz. Dosya düzenleme için Cloud Shell araç çubuğunun sağ tarafındaki Open Editor'ı (Düzenleyiciyi Aç) tıklayarak Cloud Shell'in yerleşik kod düzenleyicisi Cloud Shell Editor'ı kullanabilirsiniz. Vim ve Emacs gibi popüler düzenleyiciler de Cloud Shell'de kullanılabilir.
3. Cloud Functions, Cloud Build ve Google Chat API'lerini etkinleştirme
Cloud Shell'den aşağıdaki API'leri ve hizmetleri etkinleştirin:
gcloud services enable \
  cloudfunctions \
  cloudbuild.googleapis.com \
  chat.googleapis.com
Bu işlemin tamamlanması birkaç dakika sürebilir.
İşlem tamamlandığında şuna benzer bir başarı mesajı gösterilir:
Operation "operations/acf.cc11852d-40af-47ad-9d59-477a12847c9e" finished successfully.
4. İlk Chat uygulamasını oluşturma
Projeyi başlatma
Başlamak için basit bir "Hello world" uygulaması oluşturup dağıtın. Chat uygulamaları, https isteklerine yanıt veren ve JSON yüküyle yanıt veren web hizmetleridir. Bu uygulamada Node.js ve Cloud Functions'ı kullanacaksınız.
Cloud Shell'de poll-app adlı yeni bir dizin oluşturun ve bu dizine gidin:
mkdir ~/poll-app
cd ~/poll-app
Codelab'deki kalan tüm çalışmalar ve oluşturacağınız dosyalar bu dizinde yer alır.
Node.js projesini başlatın:
npm init
NPM, proje yapılandırmasıyla ilgili ad ve sürüm gibi çeşitli sorular sorar. Her soru için varsayılan değerleri kabul etmek üzere ENTER tuşuna basın. Varsayılan giriş noktası, bir sonraki adımda oluşturacağımız index.js adlı dosyadır.
Chat uygulaması arka ucunu oluşturma
Uygulamayı oluşturmaya başlayabilirsiniz. Aşağıdaki içeriğe sahip index.js adlı bir dosya oluşturun:
/**
 * App entry point.
 */
exports.app = async (req, res) => {
  if (!(req.method === 'POST' && req.body)) {
      res.status(400).send('')
  }
  const event = req.body;
  let reply = {};
  if (event.type === 'MESSAGE') {
    reply = {
        text: `Hello ${event.user.displayName}`
    };
  }
  res.json(reply)
}
Uygulama henüz çok fazla şey yapmıyor ancak bu sorun değil. Daha sonra başka işlevler ekleyebilirsiniz.
Uygulamayı dağıtın
"Hello world" uygulamasını dağıtmak için Cloud Functions işlevini dağıtacak, Google Cloud Console'da Chat uygulamasını yapılandıracak ve dağıtımı doğrulamak için uygulamaya bir test mesajı göndereceksiniz.
Cloud Functions işlevini dağıtma
"Hello world" uygulamasının Cloud Function'ını dağıtmak için aşağıdaki komutu girin:
gcloud functions deploy app --trigger-http --security-level=secure-always --allow-unauthenticated --runtime nodejs14
İşlem tamamlandığında çıkış aşağıdaki gibi görünmelidir:
availableMemoryMb: 256
buildId: 993b2ca9-2719-40af-86e4-42c8e4563a4b
buildName: projects/595241540133/locations/us-central1/builds/993b2ca9-2719-40af-86e4-42c8e4563a4b
entryPoint: app
httpsTrigger:
  securityLevel: SECURE_ALWAYS
  url: https://us-central1-poll-app-codelab.cloudfunctions.net/app
ingressSettings: ALLOW_ALL
labels:
  deployment-tool: cli-gcloud
name: projects/poll-app-codelab/locations/us-central1/functions/app
runtime: nodejs14
serviceAccountEmail: poll-app-codelab@appspot.gserviceaccount.com
sourceUploadUrl: https://storage.googleapis.com/gcf-upload-us-central1-66a01777-67f0-46d7-a941-079c24414822/94057943-2b7c-4b4c-9a21-bb3acffc84c6.zip
status: ACTIVE
timeout: 60s
updateTime: '2021-09-17T19:30:33.694Z'
versionId: '1'
httpsTrigger.url özelliğinde dağıtılan işlevin URL'sini not edin. Bu bilgiyi sonraki adımda kullanacaksınız.
Uygulamayı yapılandırma
Uygulamayı yapılandırmak için Cloud Console'da Sohbet yapılandırması sayfasına gidin.
- Bu Chat uygulamasını Workspace eklentisi olarak oluştur seçeneğinin işaretini kaldırın ve onaylamak için DEVRE DIŞI BIRAK'ı tıklayın.
- Uygulama adı bölümüne "PollCodelab" yazın.
- Avatar URL'si bölümüne
https://raw.githubusercontent.com/google/material-design-icons/master/png/social/poll/materialicons/24dp/2x/baseline_poll_black_24dp.pnggirin. - Açıklama bölümüne "Poll app for codelab" (Kod laboratuvarı için anket uygulaması) yazın.
- İşlevsellik bölümünde Bire bir mesaj alma ve Alanlara ve grup görüşmelerine katılma'yı seçin.
- Bağlantı ayarları bölümünde HTTP uç nokta URL'si'ni seçin ve Cloud Function'ın URL'sini (son bölümdeki
httpsTrigger.urlözelliği) yapıştırın. - İzinler bölümünde Alanınızdaki belirli kişiler ve gruplar'ı seçip e-posta adresinizi girin.
- Kaydet'i tıklayın.
Uygulama artık mesaj göndermeye hazır.
Uygulamayı test etme
Devam etmeden önce, uygulamayı Google Chat'te bir alana ekleyerek çalıştığını doğrulayın.
- Google Chat'e gidin.
- Chat'in yanında + > Uygulama bul'u tıklayın.
- Arama alanına "PollCodelab" yazın.
- Sohbet'i tıklayın.
- Uygulamaya mesaj göndermek için "Merhaba" yazıp Enter tuşuna basın.
Uygulama, kısa bir "Merhaba" mesajıyla yanıt vermelidir.
Temel iskelet oluşturulduğuna göre, artık bunu daha kullanışlı bir hale getirebiliriz.
5. Anket özelliklerini oluşturma
Uygulamanın nasıl çalışacağına dair kısa bir genel bakış
Uygulama iki ana bölümden oluşur:
- Anketi yapılandırmak için bir iletişim kutusu görüntüleyen eğik çizgi komutu.
- Oy kullanma ve sonuçları görüntüleme için etkileşimli bir kart.
Uygulamanın, anket yapılandırmasını ve sonuçlarını depolamak için de bazı durumlara ihtiyacı vardır. Bu işlem Firestore veya herhangi bir veritabanı ile yapılabilir ya da durum, uygulama mesajlarının kendisinde saklanabilir. Bu uygulama, bir ekibin hızlı ve gayri resmi anketleri için tasarlandığından durumu uygulama mesajlarında saklamak bu kullanım alanı için idealdir.
Uygulamanın veri modeli (Typescript ile ifade edilir):
interface Poll {
  /* Question/topic of poll */
  topic: string;
  /** User that submitted the poll */
  author: {
    /** Unique resource name of user */
    name: string;
    /** Display name */
    displayName: string;
  };
  /** Available choices to present to users */
  choices: string[];
  /** Map of user ids to the index of their selected choice */
  votes: { [key: string]: number };
}
Konu veya soru ve seçenekler listesinin yanı sıra durum, yazarın kimliğini ve adını, kaydedilen oyları da içerir. Kullanıcıların birden fazla kez oy vermesini önlemek için oylar, kullanıcı kimliklerinin seçtikleri seçeneğin dizinine eşlendiği bir harita olarak saklanır.
Elbette birçok farklı yaklaşım vardır ancak bu, bir alanda hızlı anketler yürütmek için iyi bir başlangıç noktasıdır.
Yoklama yapılandırma komutunu uygulama
Kullanıcıların anket başlatmasına ve yapılandırmasına izin vermek için iletişim kutusu açan bir eğik çizgi komutu ayarlayın. Bu işlem birden fazla adımdan oluşur:
- Anket başlatan eğik çizgi komutunu kaydedin.
- Anket oluşturma iletişim kutusunu oluşturun.
- Uygulamanın eğik çizgi komutunu tanımasına ve işlemesine izin verin.
- Ankette oylamayı kolaylaştıran etkileşimli kartlar oluşturun.
- Uygulamanın anket çalıştırmasına olanak tanıyan kodu uygulayın.
- Cloud Functions işlevini yeniden dağıtın.
Eğik çizgi komutunu kaydetme
Bir eğik çizgi komutunu kaydetmek için konsoldaki Chat yapılandırması sayfasına geri dönün (API'ler ve Hizmetler > Kontrol Paneli > Hangouts Chat API'si > Yapılandırma).
- Eğik çizgi komutları bölümünde Yeni bir eğik çizgi komutu ekle'yi tıklayın.
- Ad bölümüne "/poll" yazın.
- Komut kimliği bölümüne "1" girin.
- Açıklama bölümüne "Anket başlat" yazın.
- İletişim kutusu açar'ı seçin.
- Bitti'yi tıklayın.
- Kaydet'i tıklayın.
Uygulama artık /poll komutunu tanıyor ve bir iletişim kutusu açıyor. Ardından, iletişim kutusunu yapılandıralım.
Yapılandırma formunu iletişim kutusu olarak oluşturma
Eğik çizgi komutu, anket konusunu ve olası seçenekleri yapılandırmak için bir iletişim kutusu açar. Aşağıdaki içeriğe sahip config-form.js adlı yeni bir dosya oluşturun:
/** Upper bounds on number of choices to present. */
const MAX_NUM_OF_OPTIONS = 5;

/**
 * Build widget with instructions on how to use form.
 *
 * @returns {object} card widget
 */
function helpText() {
  return {
    textParagraph: {
      text: 'Enter the poll topic and up to 5 choices in the poll. Blank options will be omitted.',
    },
  };
}

/**
 * Build the text input for a choice.
 *
 * @param {number} index - Index to identify the choice
 * @param {string|undefined} value - Initial value to render (optional)
 * @returns {object} card widget
 */
function optionInput(index, value) {
  return {
    textInput: {
      label: `Option ${index + 1}`,
      type: 'SINGLE_LINE',
      name: `option${index}`,
      value: value || '',
    },
  };
}

/**
 * Build the text input for the poll topic.
 *
 * @param {string|undefined} topic - Initial value to render (optional)
 * @returns {object} card widget
 */
function topicInput(topic) {
  return {
    textInput: {
      label: 'Topic',
      type: 'MULTIPLE_LINE',
      name: 'topic',
      value: topic || '',
    },
  };
}

/**
 * Build the buttons/actions for the form.
 *
 * @returns {object} card widget
 */
function buttons() {
  return {
    buttonList: {
      buttons: [
        {
          text: 'Submit',
          onClick: {
            action: {
              function: 'start_poll',
            },
          },
        },
      ],
    },
  };
}

/**
 * Build the configuration form.
 *
 * @param {object} options - Initial state to render with form
 * @param {string|undefined} options.topic - Topic of poll (optional)
 * @param {string[]|undefined} options.choices - Text of choices to display to users (optional)
 * @returns {object} card
 */
function buildConfigurationForm(options) {
  const widgets = [];
  widgets.push(helpText());
  widgets.push(topicInput(options.topic));
  for (let i = 0; i < MAX_NUM_OF_OPTIONS; ++i) {
    const choice = options?.choices?.[i];
    widgets.push(optionInput(i, choice));
  }
  widgets.push(buttons());

  // Assemble the card
  return {
    sections: [
      {
        widgets,
      },
    ],
  };
}

exports.MAX_NUM_OF_OPTIONS = MAX_NUM_OF_OPTIONS;
exports.buildConfigurationForm = buildConfigurationForm;
Bu kod, kullanıcının anketi ayarlamasına olanak tanıyan iletişim kutusu formunu oluşturur. Ayrıca, bir sorunun sahip olabileceği maksimum seçenek sayısı için bir sabit de dışa aktarır. Kullanıcı arayüzü işaretlemesini oluşturma işlemini, parametre olarak iletilen durumlarla durum bilgisiz işlevlere ayırmak iyi bir uygulamadır. Yeniden kullanımı kolaylaştırır ve bu kart daha sonra farklı bağlamlarda oluşturulur.
Bu uygulama, kartı daha küçük birimlere veya bileşenlere de ayırır. Zorunlu olmasa da bu teknik, karmaşık arayüzler oluştururken daha okunabilir ve sürdürülebilir olduğu için en iyi uygulamadır.
Oluşturduğu JSON'un tamamının örneğini görmek için Kart Oluşturucu aracında görüntüleyin.
Eğik çizgi komutunu işleme
Uygulamaya gönderilen eğik çizgi komutları MESSAGE etkinlikleri olarak görünür. MESSAGE etkinliği aracılığıyla eğik çizgi komutunun varlığını kontrol etmek ve bir iletişim kutusuyla yanıt vermek için index.js öğesini güncelleyin. index.js yerine aşağıdakini yazın:
const { buildConfigurationForm, MAX_NUM_OF_OPTIONS } = require('./config-form');

/**
 * App entry point.
 */
exports.app = async (req, res) => {
  if (!(req.method === 'POST' && req.body)) {
      res.status(400).send('')
  }
  const event = req.body;
  let reply = {};
  // Dispatch slash and action events
  if (event.type === 'MESSAGE') {
    const message = event.message;
    if (message.slashCommand?.commandId === '1') {
      reply = showConfigurationForm(event);
    }
  } else if (event.type === 'CARD_CLICKED') {
    if (event.action?.actionMethodName === 'start_poll') {
      reply = await startPoll(event);
    }
  }
  res.json(reply);
}

/**
 * Handles the slash command to display the config form.
 *
 * @param {object} event - chat event
 * @returns {object} Response to send back to Chat
 */
function showConfigurationForm(event) {
  // Seed the topic with any text after the slash command
  const topic = event.message?.argumentText?.trim();
  const dialog = buildConfigurationForm({
    topic,
    choices: [],
  });
  return {
    actionResponse: {
      type: 'DIALOG',
      dialogAction: {
        dialog: {
          body: dialog,
        },
      },
    },
  };
}

/**
 * Handle the custom start_poll action.
 *
 * @param {object} event - chat event
 * @returns {object} Response to send back to Chat
 */
function startPoll(event) {
  // Not fully implemented yet -- just close the dialog
  return {
    actionResponse: {
      type: 'DIALOG',
      dialogAction: {
        actionStatus: {
          statusCode: 'OK',
          userFacingMessage: 'Poll started.',
        },
      },
    },
  }
}
Uygulama artık /poll komutu çağrıldığında bir iletişim kutusu gösterecek. Cloud Functions işlevini Cloud Shell'den yeniden dağıtarak etkileşimi test edin.
gcloud functions deploy app --trigger-http --security-level=secure-always
Cloud Functions işlevi dağıtıldıktan sonra, eğik çizgi komutunu ve iletişim kutusunu test etmek için /poll komutuyla uygulamaya mesaj gönderin. İletişim kutusu, CARD_CLICKED özel işlemle birlikte bir etkinlik start_poll gönderir. Etkinlik, startPoll yönteminin çağrıldığı güncellenmiş giriş noktasında işlenir. Şimdilik startPoll yöntemi yalnızca iletişim kutusunu kapatacak şekilde tasarlanmıştır. Bir sonraki bölümde, oylama işlevini uygulayacak ve tüm parçaları birbirine bağlayacaksınız.
Oylama kartını uygulama
Uygulamanın oylama bölümünü uygulamak için öncelikle kullanıcılara oy verme arayüzü sağlayan etkileşimli kartı tanımlayarak başlayın.
Oylama arayüzünü uygulama
Aşağıdaki içeriğe sahip vote-card.js adlı bir dosya oluşturun:
/**
 * Creates a small progress bar to show percent of votes for an option. Since
 * width is limited, the percentage is scaled to 20 steps (5% increments).
 *
 * @param {number} voteCount - Number of votes for this option
 * @param {number} totalVotes - Total votes cast in the poll
 * @returns {string} Text snippet with bar and vote totals
 */
function progressBarText(voteCount, totalVotes) {
  if (voteCount === 0 || totalVotes === 0) {
    return '';
  }

  // For progress bar, calculate share of votes and scale it
  const percentage = (voteCount * 100) / totalVotes;
  const progress = Math.round((percentage / 100) * 20);
  return '▀'.repeat(progress);
}

/**
 * Builds a line in the card for a single choice, including
 * the current totals and voting action.
 *
 * @param {number} index - Index to identify the choice
 * @param {string|undefined} value - Text of the choice
 * @param {number} voteCount - Current number of votes cast for this item
 * @param {number} totalVotes - Total votes cast in poll
 * @param {string} state - Serialized state to send in events
 * @returns {object} card widget
 */
function choice(index, text, voteCount, totalVotes, state) {
  const progressBar = progressBarText(voteCount, totalVotes);
  return {
    keyValue: {
      bottomLabel: `${progressBar} ${voteCount}`,
      content: text,
      button: {
        textButton: {
          text: 'vote',
          onClick: {
            action: {
              actionMethodName: 'vote',
              parameters: [
                {
                  key: 'state',
                  value: state,
                },
                {
                  key: 'index',
                  value: index.toString(10),
                },
              ],
            },
          },
        },
      },
    },
  };
}

/**
 * Builds the card header including the question and author details.
 *
 * @param {string} topic - Topic of the poll
 * @param {string} author - Display name of user that created the poll
 * @returns {object} card widget
 */
function header(topic, author) {
  return {
    title: topic,
    subtitle: `Posted by ${author}`,
    imageUrl:
      'https://raw.githubusercontent.com/google/material-design-icons/master/png/social/poll/materialicons/24dp/2x/baseline_poll_black_24dp.png',
    imageStyle: 'AVATAR',
  };
}

/**
 * Builds the configuration form.
 *
 * @param {object} poll - Current state of poll
 * @param {object} poll.author - User that submitted the poll
 * @param {string} poll.topic - Topic of poll
 * @param {string[]} poll.choices - Text of choices to display to users
 * @param {object} poll.votes - Map of cast votes keyed by user ids
 * @returns {object} card
 */
function buildVoteCard(poll) {
  const widgets = [];
  const state = JSON.stringify(poll);
  const totalVotes = Object.keys(poll.votes).length;

  for (let i = 0; i < poll.choices.length; ++i) {
    // Count votes for this choice
    const votes = Object.values(poll.votes).reduce((sum, vote) => {
      if (vote === i) {
        return sum + 1;
      }
      return sum;
    }, 0);
    widgets.push(choice(i, poll.choices[i], votes, totalVotes, state));
  }

  return {
    header: header(poll.topic, poll.author.displayName),
    sections: [
      {
        widgets,
      },
    ],
  };
}

exports.buildVoteCard = buildVoteCard;
Uygulama, iletişim kutusunda kullanılan yaklaşıma benzer olsa da etkileşimli kartların işaretlemesi iletişim kutularından biraz farklıdır. Daha önce olduğu gibi, oluşturulan JSON'un bir örneğini Kart Oluşturucu aracında görüntüleyebilirsiniz.
Oylama işlemini uygulama
Oylama kartında her seçenek için bir düğme bulunur. Bu seçimin dizini, anketin serileştirilmiş durumuyla birlikte düğmeye eklenir. Uygulama, düğmeye eklenen tüm verilerle birlikte parametre olarak vote işlemiyle CARD_CLICKED alır.
index.js öğesini şunlarla güncelleyin:
const { buildConfigurationForm, MAX_NUM_OF_OPTIONS } = require('./config-form');
const { buildVoteCard } = require('./vote-card');

/**
 * App entry point.
 */
exports.app = async (req, res) => {
  if (!(req.method === 'POST' && req.body)) {
      res.status(400).send('')
  }
  const event = req.body;
  let reply = {};
  // Dispatch slash and action events
  if (event.type === 'MESSAGE') {
    const message = event.message;
    if (message.slashCommand?.commandId === '1') {
      reply = showConfigurationForm(event);
    }
  } else if (event.type === 'CARD_CLICKED') {
    if (event.action?.actionMethodName === 'start_poll') {
      reply = await startPoll(event);
    } else if (event.action?.actionMethodName === 'vote') {
        reply = recordVote(event);
    }
  }
  res.json(reply);
}

/**
 * Handles the slash command to display the config form.
 *
 * @param {object} event - chat event
 * @returns {object} Response to send back to Chat
 */
function showConfigurationForm(event) {
  // Seed the topic with any text after the slash command
  const topic = event.message?.argumentText?.trim();
  const dialog = buildConfigurationForm({
    topic,
    choices: [],
  });
  return {
    actionResponse: {
      type: 'DIALOG',
      dialogAction: {
        dialog: {
          body: dialog,
        },
      },
    },
  };
}

/**
 * Handle the custom start_poll action.
 *
 * @param {object} event - chat event
 * @returns {object} Response to send back to Chat
 */
function startPoll(event) {
  // Not fully implemented yet -- just close the dialog
  return {
    actionResponse: {
      type: 'DIALOG',
      dialogAction: {
        actionStatus: {
          statusCode: 'OK',
          userFacingMessage: 'Poll started.',
        },
      },
    },
  }
}

/**
 * Handle the custom vote action. Updates the state to record
 * the user's vote then rerenders the card.
 *
 * @param {object} event - chat event
 * @returns {object} Response to send back to Chat
 */
function recordVote(event) {
  const parameters = event.common?.parameters;

  const choice = parseInt(parameters['index']);
  const userId = event.user.name;
  const state = JSON.parse(parameters['state']);

  // Add or update the user's selected option
  state.votes[userId] = choice;

  const card = buildVoteCard(state);
  return {
    thread: event.message.thread,
    actionResponse: {
      type: 'UPDATE_MESSAGE',
    },
    cards: [card],
  }
}
recordVote yöntemi, depolanan durumu ayrıştırır ve kullanıcının oyuyla güncelledikten sonra kartı yeniden oluşturur. Anket sonuçları, kart her güncellendiğinde serileştirilip kartla birlikte saklanır.
Parçaları birleştirin
Uygulama neredeyse tamamlandı. Oylama ile birlikte eğik çizgi komutu uygulandığında, geriye yalnızca startPoll yöntemini tamamlamak kalır.
Ancak bir hususa dikkat edilmesi gerekir.
Anket yapılandırması gönderildiğinde uygulamanın iki işlem gerçekleştirmesi gerekir:
- İletişim kutusunu kapatın.
- Oylama kartını içeren alana yeni bir mesaj gönderin.
Maalesef, HTTP isteğine doğrudan yanıt yalnızca bir işlem yapabilir ve bu işlem ilk işlem olmalıdır. Uygulamanın, oylama kartını yayınlamak için Chat API'yi kullanarak yeni bir mesajı eşzamansız olarak oluşturması gerekir.
İstemci kitaplığını ekleme
Uygulamanın bağımlılarını Node.js için Google API istemcisini içerecek şekilde güncellemek üzere aşağıdaki komutu çalıştırın.
npm install --save googleapis
Anketi başlatma
index.js cihazını aşağıdaki nihai sürüme güncelleyin:
const { buildConfigurationForm, MAX_NUM_OF_OPTIONS } = require('./config-form');
const { buildVoteCard } = require('./vote-card');
const {google} = require('googleapis');

/**
 * App entry point.
 */
exports.app = async (req, res) => {
  if (!(req.method === 'POST' && req.body)) {
      res.status(400).send('')
  }
  const event = req.body;
  let reply = {};
  // Dispatch slash and action events
  if (event.type === 'MESSAGE') {
    const message = event.message;
    if (message.slashCommand?.commandId === '1') {
      reply = showConfigurationForm(event);
    }
  } else if (event.type === 'CARD_CLICKED') {
    if (event.action?.actionMethodName === 'start_poll') {
      reply = await startPoll(event);
    } else if (event.action?.actionMethodName === 'vote') {
        reply = recordVote(event);
    }
  }
  res.json(reply);
}

/**
 * Handles the slash command to display the config form.
 *
 * @param {object} event - chat event
 * @returns {object} Response to send back to Chat
 */
function showConfigurationForm(event) {
  // Seed the topic with any text after the slash command
  const topic = event.message?.argumentText?.trim();
  const dialog = buildConfigurationForm({
    topic,
    choices: [],
  });
  return {
    actionResponse: {
      type: 'DIALOG',
      dialogAction: {
        dialog: {
          body: dialog,
        },
      },
    },
  };
}

/**
 * Handle the custom start_poll action.
 *
 * @param {object} event - chat event
 * @returns {object} Response to send back to Chat
 */
async function startPoll(event) {
  // Get the form values
  const formValues = event.common?.formInputs;
  const topic = formValues?.['topic']?.stringInputs.value[0]?.trim();
  const choices = [];
  for (let i = 0; i < MAX_NUM_OF_OPTIONS; ++i) {
    const choice = formValues?.[`option${i}`]?.stringInputs.value[0]?.trim();
    if (choice) {
      choices.push(choice);
    }
  }

  if (!topic || choices.length === 0) {
    // Incomplete form submitted, rerender
    const dialog = buildConfigurationForm({
      topic,
      choices,
    });
    return {
      actionResponse: {
        type: 'DIALOG',
        dialogAction: {
          dialog: {
            body: dialog,
          },
        },
      },
    };
  }

  // Valid configuration, build the voting card to display
  // in the space
  const pollCard = buildVoteCard({
    topic: topic,
    author: event.user,
    choices: choices,
    votes: {},
  });
  const message = {
    cards: [pollCard],
  };
  const request = {
    parent: event.space.name,
    requestBody: message,
  };
  // Use default credentials (service account)
  const credentials = new google.auth.GoogleAuth({
    scopes: ['https://www.googleapis.com/auth/chat.bot'],
  });
  const chatApi = google.chat({
    version: 'v1',
    auth: credentials,
  });
  await chatApi.spaces.messages.create(request);

  // Close dialog
  return {
    actionResponse: {
      type: 'DIALOG',
      dialogAction: {
        actionStatus: {
          statusCode: 'OK',
          userFacingMessage: 'Poll started.',
        },
      },
    },
  };
}

/**
 * Handle the custom vote action. Updates the state to record
 * the user's vote then rerenders the card.
 *
 * @param {object} event - chat event
 * @returns {object} Response to send back to Chat
 */
function recordVote(event) {
  const parameters = event.common?.parameters;

  const choice = parseInt(parameters['index']);
  const userId = event.user.name;
  const state = JSON.parse(parameters['state']);

  // Add or update the user's selected option
  state.votes[userId] = choice;

  const card = buildVoteCard(state);
  return {
    thread: event.message.thread,
    actionResponse: {
      type: 'UPDATE_MESSAGE',
    },
    cards: [card],
  }
}
İşlevi yeniden dağıtın:
gcloud functions deploy app --trigger-http --security-level=secure-always
Artık uygulamayı tam olarak kullanabilirsiniz. /poll komutunu çağırarak bir soru ve birkaç seçenek sunmayı deneyin. Gönderdikten sonra anket kartı görünür.
Oy verin ve neler olacağını görün.
Elbette kendinize anket uygulamak pek de faydalı olmayacaktır. Bu nedenle, bazı arkadaşlarınızı veya iş arkadaşlarınızı davet ederek bu özelliği denemelerini isteyin.
6. Tebrikler
Tebrikler! Cloud Functions'ı kullanarak bir Google Chat uygulaması oluşturup dağıtmayı başardınız. Codelab'de uygulama oluşturmayla ilgili birçok temel kavram ele alınsa da keşfedebileceğiniz daha pek çok şey var. Aşağıdaki kaynaklara göz atın ve ek ücretlerden kaçınmak için projenizi temizlemeyi unutmayın.
Ek etkinlikler
Chat platformunu ve bu uygulamayı daha ayrıntılı şekilde incelemek isterseniz kendi başınıza deneyebileceğiniz birkaç şey:
- Uygulamadan @ bahsettiğinizde ne olur? Davranışı iyileştirmek için uygulamayı güncellemeyi deneyin.
- Karttaki anket durumunu serileştirmek küçük alanlar için uygundur ancak sınırlamaları vardır. Daha iyi bir seçeneğe geçmeyi deneyin.
- Yazar anketi düzenlemek veya yeni oy almayı durdurmak isterse ne olur? Bu özellikleri nasıl uygulayacaksınız?
- Uygulama uç noktası henüz güvenli değil. İsteklerin Google Chat'ten geldiğinden emin olmak için doğrulama eklemeyi deneyin.
Bunlar, uygulamayı iyileştirmenin farklı yollarından sadece birkaçı. Eğlenin ve hayal gücünüzü kullanın.
Temizleme
Bu eğiticide kullanılan kaynaklar için Google Cloud Platform hesabınızın ücretlendirilmesini istemiyorsanız şunları yapın:
- Cloud Console'da Kaynakları yönetin sayfasına gidin. Sol üst köşede Menü
 > IAM ve Yönetici > Kaynakları Yönet'i tıklayın.
- Proje listesinde projenizi seçip Sil'i tıklayın.
- İletişim kutusunda proje kimliğini yazın ve projeyi silmek için Kapat'ı tıklayın.
Daha fazla bilgi
Chat uygulamaları geliştirme hakkında daha fazla bilgi için aşağıdaki kaynaklara bakın:
Google Cloud Console'da geliştirme hakkında daha fazla bilgi için aşağıdaki kaynaklara bakın: