1. Welcome
In this lab, you'll take an existing web application and make it work offline. This is the first in a series of companion codelabs for the Progressive Web App workshop. There are seven more codelabs in this series.
What you'll learn
- Write a Service Worker by hand
- Add a Service Worker to an existing web application
- Use the Service Worker and the Cache Storage API to make resources available offline
What you should know
- Basic HTML and JavaScript
What you will need
- A browser that supports Service Workers
2. Get Set Up
Start by either cloning or downloading the starter code needed to complete this codelab:
If you clone the repo, make sure you're on the starter branch. The zip file contains the code for that branch, too.
This codebase requires Node.js 14 or higher. Once you have the code available, run npm ci from the command line in the code's folder in order to install all of the dependencies you'll need. Then, run npm start to start the development server for the codelab.
The source code's README.md file provides an explanation for all distributed files. In addition, the following are the key existing files you'll be working with throughout this codelab:
Key Files
js/main.js- Main application JavaScript fileservice-worker.js- Application's service worker file
3. Test Offline
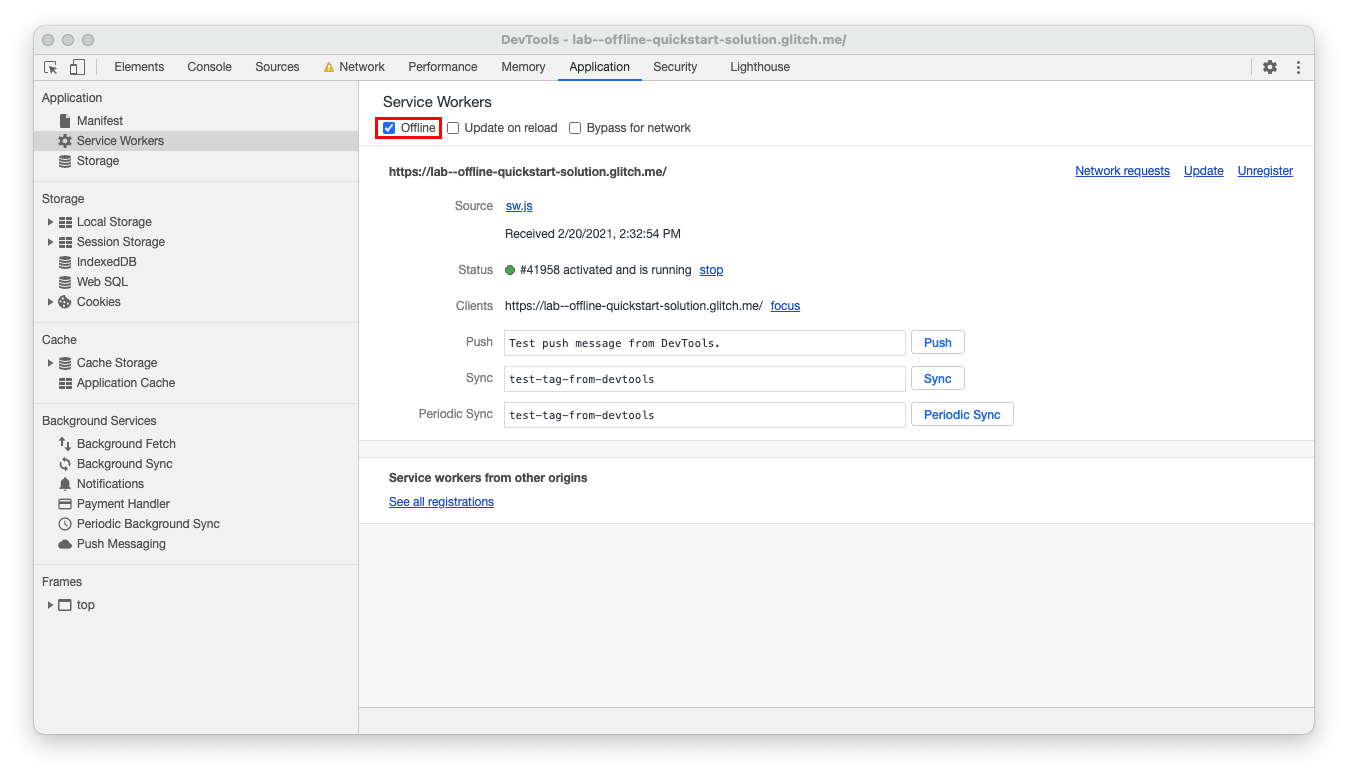
Before making any changes, let's test to show that the web app doesn't currently work offline. To do so, either take our computer offline and reload the web app, or, if you're using Chrome:
- Open up Chrome Dev Tools
- Switch to the Application tab
- Switch to the Service Workers section
- Check the Offline checkbox
- Refresh the page without closing Chrome Dev Tools

With the site tested and successfully failing to load offline, it's time to add some online functionality! Uncheck the offline checkbox and continue to the next step.
4. Take It Offline
It's time to add a basic service worker! This will happen in two steps: registering the service worker and caching resources.
Register a Service Worker
There's already an empty service worker file, so to make sure the changes show up, let's register it in our application. To do so, add the following code to the top of js/main.js:
// Register the service worker
if ('serviceWorker' in navigator) {
  // Wait for the 'load' event to not block other work
  window.addEventListener('load', async () => {
    // Try to register the service worker.
    try {
      // Capture the registration for later use, if needed
      let reg;

      // Use ES Module version of our Service Worker in development
      if (import.meta.env?.DEV) {
        reg = await navigator.serviceWorker.register('/service-worker.js', {
          type: 'module',
        });
      } else {
        // In production, use the normal service worker registration
        reg = await navigator.serviceWorker.register('/service-worker.js');
      }

      console.log('Service worker registered! 😎', reg);
    } catch (err) {
      console.log('😥 Service worker registration failed: ', err);
    }
  });
}
Explanation
This code registers the empty service-worker.js service worker file once the page has loaded, and only if the site supports service workers.
Precache resources
In order to get the web app working offline, the browser needs to be able to respond to network requests and choose where to route them. To do so, add the following to service-worker.js
// Choose a cache name
const cacheName = 'cache-v1';
// List the files to precache
const precacheResources = ['/', '/index.html', '/css/style.css', '/js/main.js', '/js/app/editor.js', '/js/lib/actions.js'];

// When the service worker is installing, open the cache and add the precache resources to it
self.addEventListener('install', (event) => {
  console.log('Service worker install event!');
  event.waitUntil(caches.open(cacheName).then((cache) => cache.addAll(precacheResources)));
});

self.addEventListener('activate', (event) => {
  console.log('Service worker activate event!');
});

// When there's an incoming fetch request, try and respond with a precached resource, otherwise fall back to the network
self.addEventListener('fetch', (event) => {
  console.log('Fetch intercepted for:', event.request.url);
  event.respondWith(
    caches.match(event.request).then((cachedResponse) => {
      if (cachedResponse) {
        return cachedResponse;
      }
      return fetch(event.request);
    }),
  );
});
Now, return to the browser, close your preview tab, and open it back up again. You should see console.logs corresponding to the different events in the service worker!
Next, go offline again and refresh the site. You should see that it loads even though you're offline!
Explanation
During the service worker's install event, a named cache is opened using the Cache Storage API. The files and routes specified in precacheResources are then loaded into the cache using the cache.addAll method. This is called precaching because it preemptively caches the set of files during install time as opposed to caching them when they're needed or requested.
Once the service worker is controlling the site, requested resources pass through the service worker like a proxy. Each request triggers a fetch event that, in this service worker, searches the cache for a match, if there's a match, responds with cached resource. If there isn't a match, the resource is requested normally.
Caching resources allows the app to work offline by avoiding network requests. Now the app can respond with a 200 status code when offline!
5. Congratulations!
You've learned how to take your web app offline using service workers and the cache storage API.
The next codelab in the series is Working with Workbox
