1. 您将构建的内容
您将从支持基于密码的登录功能的基本网络应用入手。
然后,您将通过安全密钥(基于 WebAuthn)添加对双重身份验证的支持。为此,您需要实现以下目标:
- 用户可注册 WebAuthn 凭据。
- 一种双重身份验证流程,要求用户注册第二重身份验证,即 WebAuthn 凭据(如果用户已注册该凭据)。
- 凭据管理界面:可让用户重命名和删除凭据的一系列凭据。
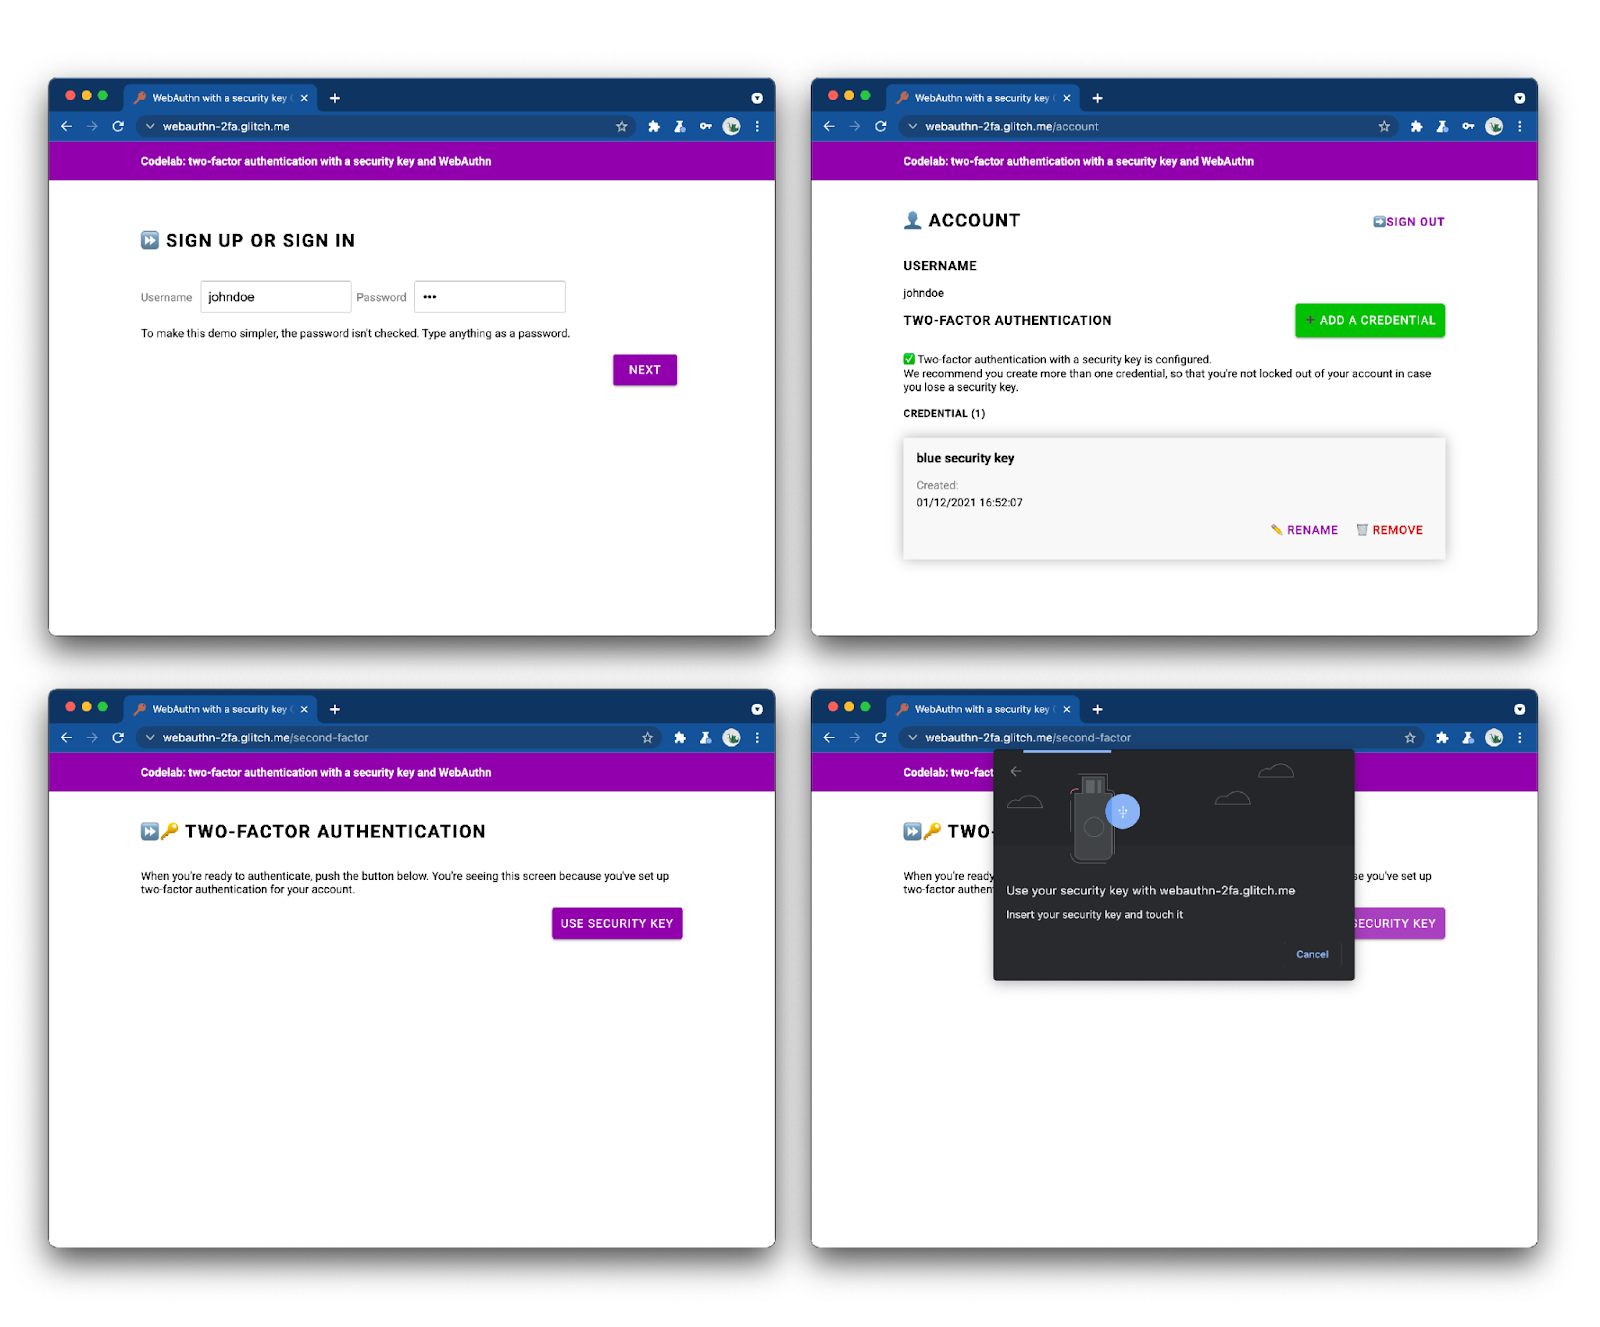
请查看完成后的 Web 应用,进行试用。
2. 关于 WebAuthn
WebAuthn 基础知识
为什么选择 WebAuthn?
钓鱼式攻击会在网络上造成巨大的安全问题:大多数帐号入侵都会使用安全性薄弱或被盗的密码,而这些密码会重复使用。业界对此问题的集体响应一直是多重身份验证,但实施是零碎的,并且仍然有很多无法充分防范钓鱼式攻击。
Web Authentication API(简称 WebAuthn)是一个标准的防网上诱骗的协议,可供任何 Web 应用使用。
工作原理
WebAuthn 可让服务器使用公钥加密(而不是密码)对用户进行注册和身份验证。网站可以创建包含私钥/公钥对的凭据。
- 私钥安全地存储在用户的设备上。
- 公钥和随机生成的凭据 ID 会发送到服务器进行存储。
公钥供服务器用于证明用户的身份。这不是秘密的,因为没有相应的私钥就无法使用。
益处
WebAuthn 有两大优势:
- 没有共享密钥:服务器不存储任何密钥。这使得数据库对黑客的吸引力降低,因为公钥对他们没有用处。
- 限定范围的凭据:在
evil-site.example上注册的site.example凭据。这使得 WebAuthn 得以防范钓鱼式攻击。
使用场景
WebAuthn 的一个用例是使用安全密钥进行双重身份验证。这一点可能与企业 Web 应用密切相关。
浏览器支持
由 W3C 和 FIDO 编写,在 Google、Mozilla、Microsoft、Yubico 以及其他公司的参与下。
术语库
- 身份验证器:可以注册用户,并在之后断言拥有所注册凭据的软件或硬件实体。身份验证器有两种类型:
- 漫游身份验证器:可与用户尝试登录的任何设备搭配使用的身份验证器。示例:USB 安全密钥、智能手机。
- 平台身份验证器:一种内置于用户设备的身份验证器。示例:Apple 的触控 ID。
- 凭据:私钥-公钥对
- 依赖方:尝试对用户进行身份验证的网站(服务器)
- FIDO 服务器:用于身份验证的服务器。FIDO 是由 FIDO 联盟开发的协议系列,其中一种是 WebAuthn 协议。
在本研讨会中,我们将使用漫游身份验证器。
3.准备工作
您需要满足的条件
要完成本 Codelab,您需要:
- 对 WebAuthn 有基本的了解。
- 具备 JavaScript 和 HTML 方面的基础知识。
- 支持 WebAuthn 的最新浏览器。
- 一个符合 U2F 要求的安全密钥。
您可以使用以下安全密钥之一作为安全密钥:
- 一部搭载 Android>=7 (Nougat) 并搭载 Chrome 的 Android 手机。在这种情况下,您还需要一台运行蓝牙的 Windows 计算机、macOS 设备或 Chrome 操作系统设备。
- USB 密钥,例如 YubiKey。
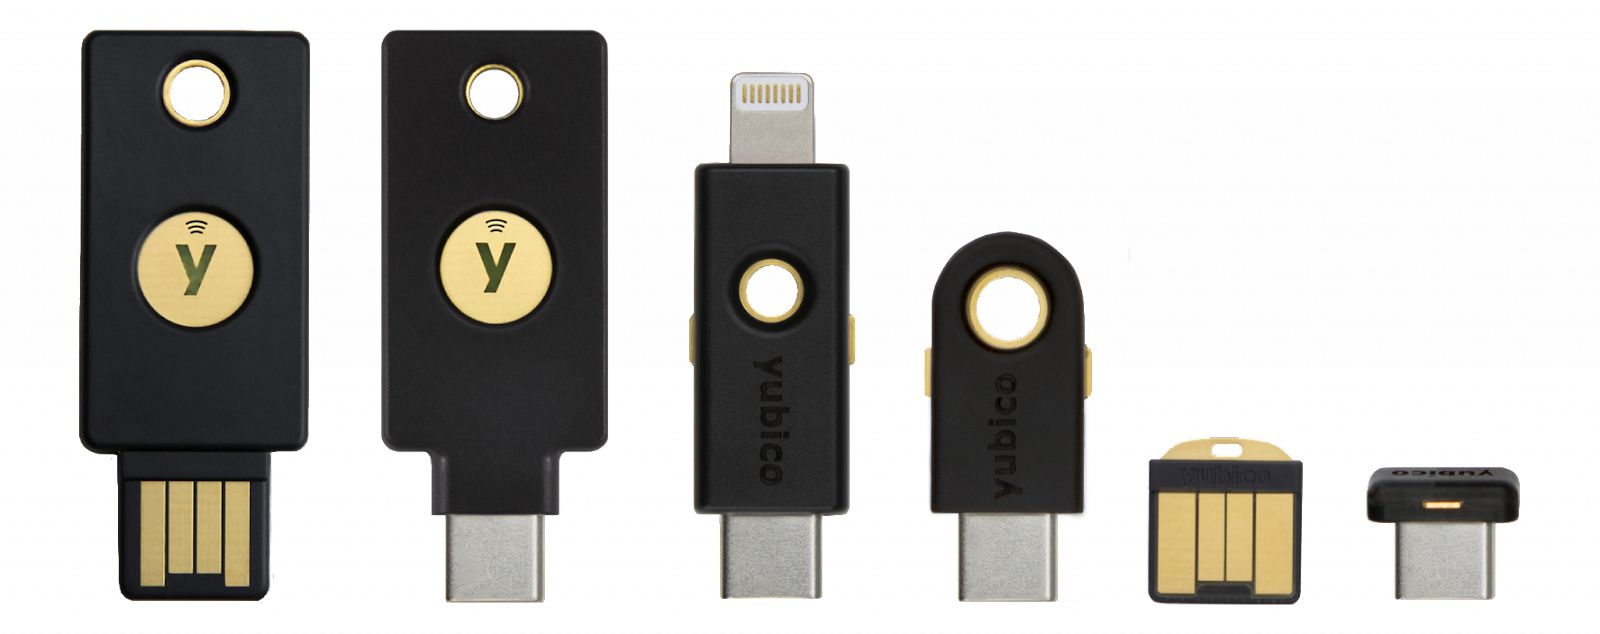
来源:https://www.yubico.com/products/security-key/
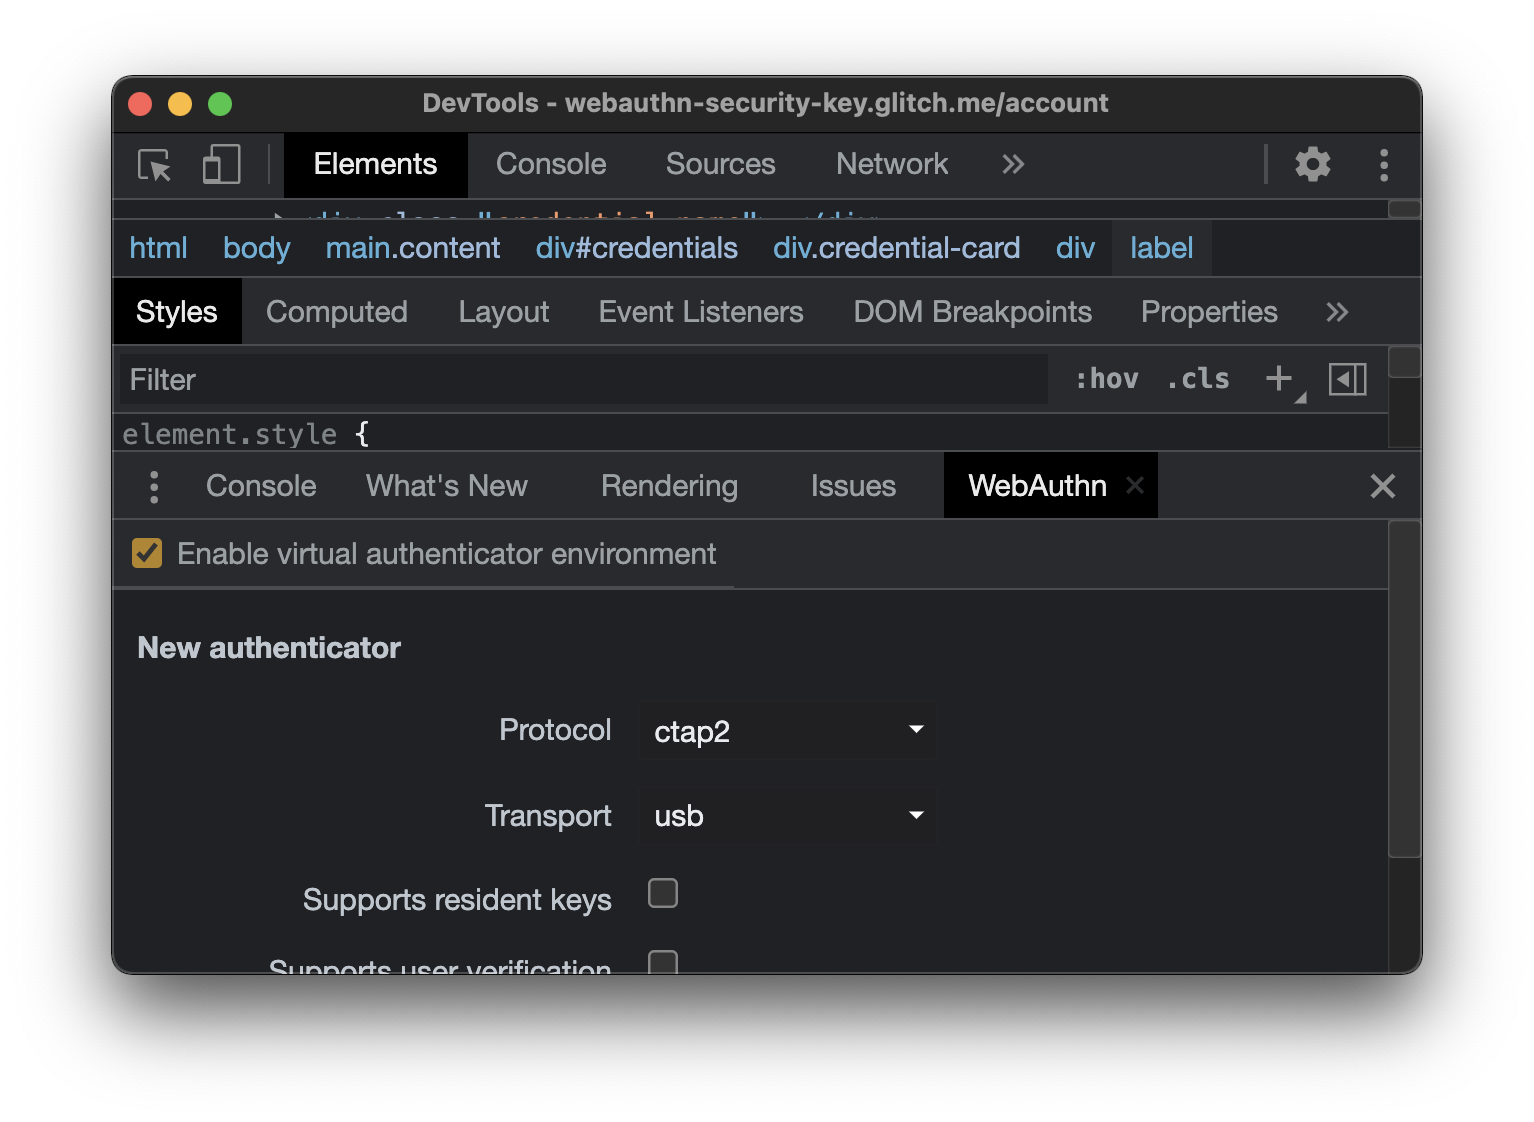
学习内容
您将学习 ✅
- 如何注册并使用安全密钥作为 WebAuthn 身份验证的第二重身份验证。
- 如何让此过程便于用户使用。
您不会学到 🎮?
- 如何构建 FIDO 服务器(用于进行身份验证的服务器)。这没有关系,因为通常情况下,作为 Web 应用或网站开发者,您需要依靠现有的 FIDO 服务器实现。请务必时常验证您依赖的服务器实施方案的功能和质量。在此 Codelab 中,FIDO 服务器使用 SimpleWebAuthn。如需了解其他选项,请参阅 FIDO Alliance 官方页面。对于开源库,请参阅 webauthn.io 或 AwesomeWebAuthn。
免责声明
用户必须输入密码才能登录。不过,为了简单起见,在本 Codelab 中,系统不会存储或检查密码。在真实的应用中,您需要检查其是否在服务器端正确。
此 Codelab 中实现了 CSRF 检查、会话验证和输入排错等基本安全检查。然而,很多安全措施却并非如此,例如,为防止暴力破解攻击,对密码没有限制。此处并不重要,因为系统不会存储密码,但切勿在生产环境中使用此代码。
4.设置身份验证器
如果您要将 Android 手机用作身份验证器
- 确保 Chrome 浏览器在桌面和手机上都是最新版本。
- 在您的桌面和手机上,打开 Chrome 并使用您希望用于此研讨会的个人资料登录 ⏤。
- 在桌面设备和手机上为此个人资料启用同步功能。为此,请使用 chrome://settings/syncSetup。
- 同时在桌面和手机上开启蓝牙。
- 在登录 Chrome 桌面的个人资料中,打开 webauthn.io。
- 请输入简单的用户名。将证明类型和身份验证器类型保留为无和未指定(默认)值。点击注册。
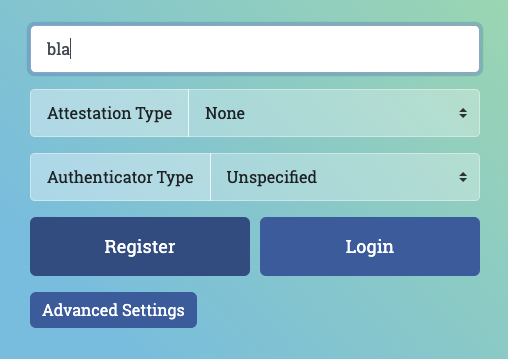
- 系统会打开一个浏览器窗口,要求您验证身份。在列表中选择您的手机。
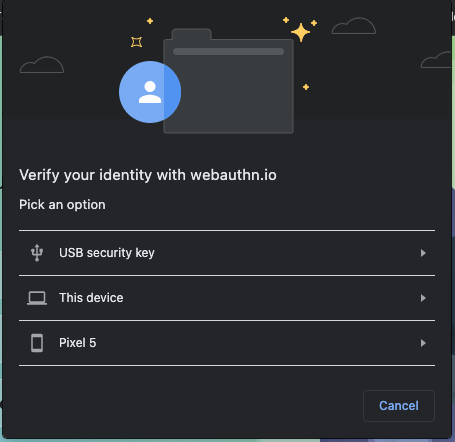
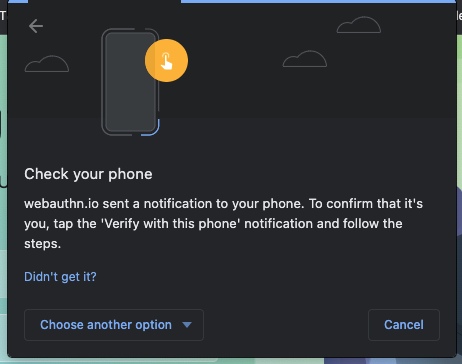
- 您应该会在手机上收到标题为验证您的身份的通知。点按该图标。
- 在手机上,系统会要求您输入手机的 PIN 码(或要触摸指纹传感器)。输入。
- 在桌面设备上的 webauthn.io 上,您应该会看到“成功”指示符。
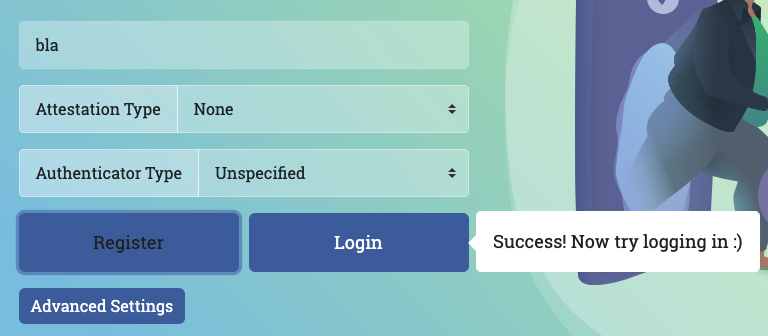
- 在桌面设备的 webauthn.io 上,点击 登录 按钮。
- 同样,浏览器窗口应该会打开;请在列表中选择您的手机。
- 在手机上,点按弹出的通知,然后输入您的 PIN 码(或触摸指纹传感器)。
- webauthn.io 会提示您登录。您的手机已作为安全密钥正常运作,您已准备好参加研讨会!
将 USB 安全密钥用作身份验证器
- 在 Chrome 桌面中打开 webauthn.io。
- 请输入简单的用户名。将证明类型和身份验证器类型保留为无和未指定(默认)值。点击注册。
- 系统会打开一个浏览器窗口,要求您验证身份。选择列表中的 USB 安全密钥。

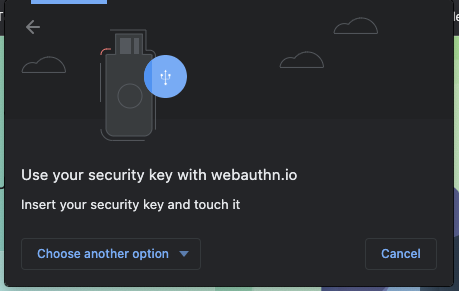
- 将您的安全密钥插入桌面设备,然后轻触一下。
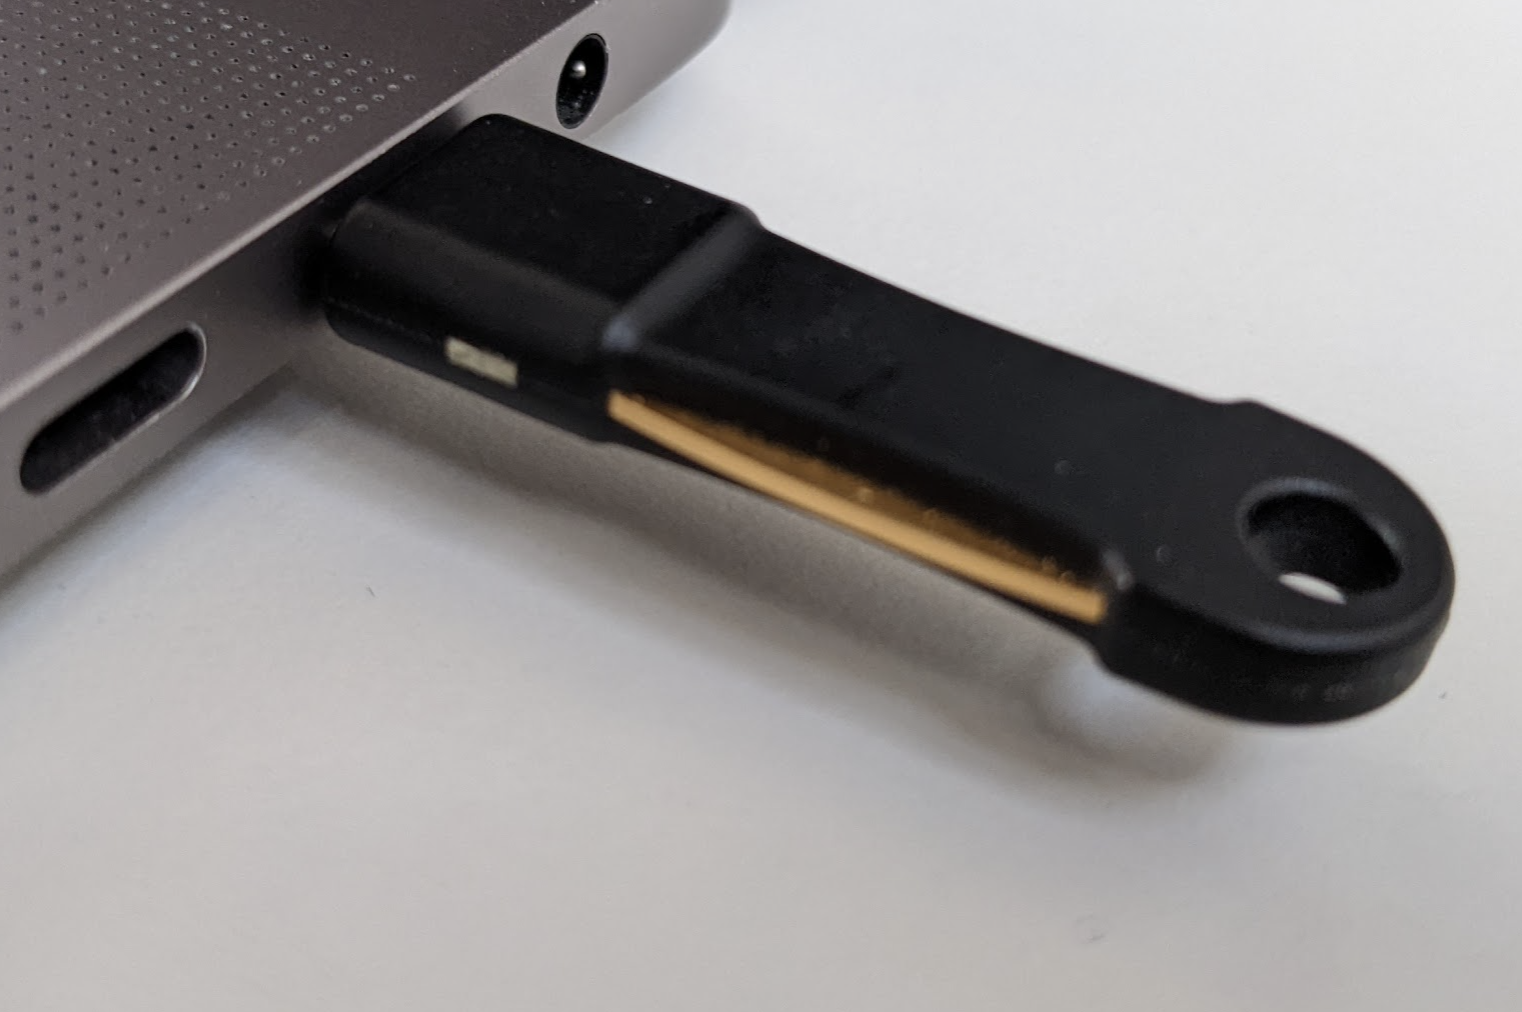
- 在桌面设备上的 webauthn.io 上,您应该会看到“成功”指示符。

- 在桌面设备的 webauthn.io 上,点击 Login(登录)按钮。
- 同样,浏览器窗口应该会打开;请在列表中选择 USB 安全密钥。
- 轻触按键。
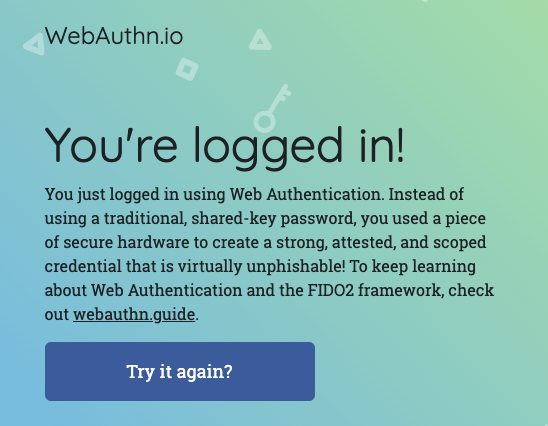
- Webauthn.io 应该会通知您,您已经登录。您的 USB 安全密钥正常工作;您已做好参加研讨会的准备!
5. 进行设置
在此 Codelab 中,您将使用 Glitch,这是一种在线代码编辑器,可自动即时部署您的代码。
创建起始代码分支
打开入门级项目。
点击混音按钮。
系统会创建起始代码的副本。现在,您已有要编辑的代码。您将通过此分支(在 Glitch 中称为“重新混音”)完成此 Codelab 的所有工作。
探索起始代码
探索您刚刚创建一段时间的起始代码。
请注意,在 libs 下,已提供了一个名为 auth.js 的库。它是一个负责处理服务器端身份验证逻辑的自定义库。它使用 fido 库作为依赖项。
6. 实现凭据注册
实现凭据注册
要使用安全密钥设置双重身份验证,我们需要做的第一件事是允许用户创建凭据。
我们首先在客户端代码中添加一个可执行这项操作的函数。
请注意,在 public/auth.client.js 中有一个名为 registerCredential() 的函数尚未执行任何操作。将以下代码添加到该文件中:
async function registerCredential() {
  // Fetch the credential creation options from the backend
  const credentialCreationOptionsFromServer = await _fetch(
    "/auth/credential-options",
    "POST"
  );
  // Decode the credential creation options
  const credentialCreationOptions = decodeServerOptions(
    credentialCreationOptionsFromServer
  );
  // Create a credential via the browser API; this will prompt the user to touch their security key or tap a button on their phone
  const credential = await navigator.credentials.create({
    publicKey: {
      ...credentialCreationOptions,
    }
  });
  // Encode the newly created credential to send it to the backend
  const encodedCredential = encodeCredential(credential);
  // Send the encoded credential to the backend for storage
  return await _fetch("/auth/credential", "POST", encodedCredential);
}
请注意,系统已为您导出此函数。
registerCredential 的用途如下:
- 它从服务器 (
/auth/credential-options) 提取凭据创建选项 - 由于服务器选项返回编码,因此它使用实用函数
decodeServerOptions对其进行解码。 - 它通过调用 Web API
navigator.credential.create创建凭据。调用navigator.credential.create时,浏览器会接管并提示用户选择安全密钥。 - 对新创建的凭据进行解码
- 它通过向包含编码凭据的
/auth/credential发出请求,在服务器端注册新凭据。
延伸阅读:服务器代码
registerCredential() 对服务器进行两次调用,所以让我们花点时间看看后端发生了什么。
凭据创建选项
当客户端向 /auth/credential-options 发出请求时,服务器会生成选项对象并将其发送回客户端。
然后,客户端将在实际凭据创建调用中使用该对象:
navigator.credentials.create({
    publicKey: {
    // Options generated server-side
    ...credentialCreationOptions
// ...
}
那么,在此 credentialCreationOptions 中,您在上一步中最终实现过的客户端 registerCredential 使用了什么?
请查看 router.post"/credential-options", ... 下的服务器代码。
我们不考虑每个属性,但以下是服务器代码选项对象中一些有趣的属性,这些属性是使用 fido2 库生成并最终返回到客户端的:
rpName和rpId用于描述注册和对用户进行身份验证的组织。请注意,在 WebAuthn 中,凭据的作用域限定在某个特定网域,这具有安全优势;此处的rpName和rpId用于限定凭据的范围。例如,有效的rpId就是您网站的主机名。请注意,当您启动入门级项目时,系统会如何自动更新这些项目 🧘?👟? К️- “
excludeCredentials”是一个凭据列表;在同时包含excludeCredentials中列出的某个凭据的身份验证器上,不能创建新凭据。在本 Codelab 中,excludeCredentials是此用户的现有凭据列表。借助此密钥和user.id,我们可以确保用户创建的每个凭据都位于不同的身份验证器(安全密钥)上。这是一种很好的做法,因为这意味着如果用户注册了多个凭据,他们将使用不同的身份验证程序(安全密钥),因此丢失一个安全密钥不会使用户无法访问其帐号。 authenticatorSelection定义您的 Web 应用中要允许的身份验证器类型。让我们来详细了解一下authenticatorSelection:residentKey: preferred表示此应用不会强制执行客户端可发现的凭据。客户端可发现凭据是一种特殊类型的凭据,用户在验证用户身份时无需先进行识别。我们在这里设置preferred,因为此 Codelab 重点介绍的是基本实现;可查找凭据适用于更高级的流程。requireResidentKey仅与 WebAuthn v1 具有向后兼容性。userVerification: preferred表示如果身份验证器支持用户验证(例如,生物识别安全密钥或具有内置 PIN 码功能的密钥),依赖方将在创建凭据时请求该密钥。如果身份验证器没有 - 基本安全密钥,则服务器不会请求用户验证。
pubKeyCredParam会按照偏好设置的先后顺序描述所需的凭据加密属性。
所有这些选项都是 Web 应用需要针对其安全模型做出的决策。请注意,在服务器上,这些选项是在单个 authSettings 对象中定义的。
挑战
这里另一个有趣的地方是 req.session.challenge = options.challenge;。
由于 WebAuthn 是一种加密协议,因此它依赖随机挑战来避免重放攻击。当攻击者窃取载荷以重播身份验证时,他们并不是要启用身份验证的私钥的所有者。
为了缓解此问题,系统会在服务器上生成一个质询,并实时对其进行签名,然后将签名与预期进行比较。这样可验证用户是否在生成凭据时保留了私钥。
凭据注册代码
请查看 router.post("/credential", ...) 下的服务器代码。
该凭据会在服务器端进行注册。
那么,接下来会发生什么呢?
此代码中最值得关注的一个位就是通过 fido2.verifyAttestationResponse 进行的验证调用:
- 系统会检查已签名的质询,这可确保凭据是由创建时实际保留了私钥的人员创建的。
- 信赖方的 ID 也会绑定到其来源。这样可确保凭据绑定到这个 Web 应用(且仅限这个 Web 应用)。
向界面添加此功能
现在,用于创建凭据的函数“registerCredential()”已准备就绪,接下来可以将其提供给用户。,
您需要从帐号页面执行此操作,因为这是身份验证管理的常用位置。
在 account.html 标记中的用户名下方,有一个空的 div,其布局类为 class="flex-h-between"。对于与双重身份验证功能相关的界面元素,我们将使用此 div。
在此 div 中添加 ino:
- 标题为“双重身份验证”
- 用于创建凭据的按钮
 <div class="flex-h-between">
    <h3>
        Two-factor authentication
    </h3>
    <button class="create" id="registerButton" raised>
        ➕ Add a credential
    </button>
</div>
在该 div 的下方,添加一个我们稍后需要使用的凭据 div:
<div class="flex-h-between">
(HTML you've just added)
</div>
<div id="credentials"></div>
在 account.html 内嵌脚本中,导入您刚刚创建的函数,然后添加调用该函数的函数 register,以及附加到您刚创建的按钮的事件处理程序。
// Set up the handler for the button that registers credentials
const registerButton = document.querySelector('#registerButton');
registerButton.addEventListener('click', register);

// Register a credential
async function register() {
  let user = {};
  try {
    const user = await registerCredential();
  } catch (e) {
    // Alert the user that something went wrong
    if (Array.isArray(e)) {
      alert(
        // `msg` not `message`, this is the key's name as per the express validator API
        `Registration failed. ${e.map((err) => `${err.msg} (${err.param})`)}`
      );
    } else {
      alert(`Registration failed. ${e}`);
    }
  }
}
向用户显示凭据
您已经添加了创建凭据的功能,现在用户需要通过一种方法来查看自己添加的凭据。
帐号页面非常适合进行关联。
在 account.html 中,查找名为 updateCredentialList() 的函数。
向其中添加以下代码,以执行后端调用以获取当前登录用户的所有已注册凭据,并显示返回的凭据:
// Update the list that displays credentials
async function updateCredentialList() {
  // Fetch the latest credential list from the backend
  const response = await _fetch('/auth/credentials', 'GET');
  const credentials = response.credentials || [];
  // Generate the credential list as HTML and pass remove/rename functions as args
  const credentialListHtml = getCredentialListHtml(
    credentials,
    removeEl,
    renameEl
  );
  // Display the list of credentials in the DOM
  const list = document.querySelector('#credentials');
  render(credentialListHtml, list);
}
目前,我们先介绍removeEl和renameEl,本 Codelab 后面会介绍这些内容。
在 account.html 的内嵌脚本的开头添加一次对 updateCredentialList 的调用。此调用会在用户到达其帐号页面时提取可用凭据。
<script type="module">
    // ... (imports)
    // Initialize the credential list by updating it once on page load
    updateCredentialList();
现在,在 registerCredential 成功完成后调用 updateCredentialList,以便列表显示新创建的凭据:
async function register() {
  let user = {};
  try {
    // ...
  } catch (e) {
    // ...
  }
  // Refresh the credential list to display the new credential
  await updateCredentialList();
}
试试看!🇨?🇦? 🇮?
您已完成凭据注册!用户现在可以创建基于安全密钥的凭据,并在自己的帐号页面中查看它们。
试试看吧:
- 退出。
- 使用任意用户及密码登录。如前所述,实际上并未检查密码是否正确,但在此 Codelab 中,为简单起见,输入任意非空密码。
- 进入帐号页面后,点击添加凭据。
- 系统会提示您插入并轻触安全密钥。身体力行。
- 成功创建凭据后,该凭据应显示在帐号页面上。
- 重新加载帐号页面。应显示凭据。
- 如果您有两个可用的安全密钥,请尝试添加两个不同的安全密钥作为凭据。应同时显示二者。
- 尝试使用同一身份验证器(密钥)创建两个凭据,您会发现二者不受支持。这是有意为之,这是因为我们在后端中使用了
excludeCredentials。
7. 启用双重身份验证
您的用户可以注册和取消注册凭据,但系统只会显示凭据,实际上尚未使用。
现在,是时候投入使用和设置实际的双重身份验证了。
在本部分中,您将从 Web 应用的以下基本流程中更改身份验证流程:

转换为以下双重身份验证流程:

实现双重身份验证
我们首先添加我们需要的功能并实现与后端的通信;我们将在下一步中将它添加到前端。
在这里,您需要实现的函数会使用凭据对用户进行身份验证。
在 public/auth.client.js 中,查找空函数 authenticateTwoFactor,然后向其中添加以下代码:
async function authenticateTwoFactor() {
  // Fetch the 2F options from the backend
  const optionsFromServer = await _fetch("/auth/two-factor-options", "POST");
  // Decode them
  const decodedOptions = decodeServerOptions(optionsFromServer);
  // Get a credential via the browser API; this will prompt the user to touch their security key or tap a button on their phone
  const credential = await navigator.credentials.get({
    publicKey: decodedOptions
  });
  // Encode the credential
  const encodedCredential = encodeCredential(credential);
  // Send it to the backend for verification
  return await _fetch("/auth/authenticate-two-factor", "POST", {
    credential: encodedCredential
  });
}
请注意,我们已为您导出了此函数;下一步需要用到它。
authenticateTwoFactor 的用途如下:
- 它会从服务器请求双重身份验证选项。与您之前看到的凭据创建选项一样,这些选项是在服务器上定义的,并且取决于 Web 应用的安全模型。如需了解详情,请查看
router.post("/two-factors-options", ...下的服务器代码。 - 通过调用
navigator.credentials.get,可以让浏览器接管并插入和触摸以前注册的键。这会导致系统为此特定双重身份验证操作选择凭据。 - 所选凭据随后会传递到后端请求以提取 "/auth/authenticated-two-factor"`。如果该凭据对该用户有效,系统会对用户进行身份验证。
延伸阅读:服务器代码
请注意,server.js 已处理了一些导航和访问行为:它确保只有经过身份验证的用户才能访问帐号页面,并执行一些必要的重定向。
现在,请查看 router.post("/initialize-authentication", ... 下的服务器代码。
有两点值得注意:
- 在此阶段,系统会同时检查密码和凭据。这是一项安全措施:对于设置了双重身份验证的用户,我们不希望界面流程因密码是否正确而有所不同。因此,在此步骤中,我们会同时检查密码和凭据。
- 如果密码和凭据都有效,我们会通过调用
completeAuthentication(req, res);完成身份验证。这意味着在实际操作中,我们会将会话从用户尚未进行身份验证的临时auth会话切换到用户进行身份验证的主会话main。
在用户流中包含双重身份验证页面
在 views 文件夹中,注意新页面 second-factor.html。
该按钮有使用安全密钥按钮,但目前不会执行任何操作。
使此按钮在用户点击时调用 authenticateTwoFactor()。
- 如果
authenticateTwoFactor()成功,用户就会重定向至帐号页面。 - 如果下载不成功,请提醒用户发生了错误。在实际应用中,您可以实现更实用的错误消息 - 为简单起见,在此演示中,我们仅使用窗口提醒。
    <main>
...
    </main>
    <script type="module">
      import { authenticateTwoFactor, authStatuses } from "/auth.client.js";

      const button = document.querySelector("#authenticateButton");
      button.addEventListener("click", async e => {
        try {
          // Ask the user to authenticate with the second factor; this will trigger a browser prompt
          const response = await authenticateTwoFactor();
          const { authStatus } = response;
          if (authStatus === authStatuses.COMPLETE) {
            // The user is properly authenticated => Navigate to the Account page
            location.href = "/account";
          } else {
            throw new Error("Two-factor authentication failed");
          }
        } catch (e) {
          // Alert the user that something went wrong
          alert(`Two-factor authentication failed. ${e}`);
        }
      });
    </script>
  </body>
</html>
使用双重身份验证
现在,您就可以开始添加双重身份验证步骤了。
现在,您需要针对已配置双重身份验证的用户从 index.html 添加此步骤。

在 index.html 中的 location.href = "/account"; 下方,添加相应代码,前提是用户设置了双重身份验证页面(如果用户设置了 2FA)。
在此 Codelab 中,创建凭据会自动为用户启用双重身份验证。
请注意,server.js 还会实施服务器端会话检查,以确保只有经过身份验证的用户才能访问 account.html。
const { authStatus } = response;
if (authStatus === authStatuses.COMPLETE) {
  // The user is properly authenticated => navigate to account
  location.href = '/account';
} else if (authStatus === authStatuses.NEED_SECOND_FACTOR) {
  // Navigate to the two-factor-auth page because two-factor-auth is set up for this user
  location.href = '/second-factor';
}
试试看!🇨?🇦? 🇮?
- 使用新用户 johndoe 登录。
- 退出帐号。
- 以 johndoe 的身份登录您的帐号;请注意,您只需提供密码。
- 创建凭据。实际上,这意味着您已激活双重身份验证 johndoe。
- 退出帐号。
- 输入您的用户名 johndoe 和密码。
- 查看您如何自动导航到双重身份验证页面。
- (尝试访问位于
/account的帐号页面;请注意系统如何将您重定向到索引页面,因为您没有完全进行身份验证:您缺少第二重身份验证) - 返回双重身份验证页面,然后点击使用安全密钥进行双重身份验证。
- 您现在已登录,应该会看到帐号页面!
8. 让凭据更易于使用
您已通过安全密钥完成双重身份验证的基本功能 🚀?
但是... 您注意到了吗?
目前,我们的凭据列表不是很方便:凭据 ID 和公钥是管理凭据时很有用的长字符串!人不是长字符串和数字 🤖?
因此,让我们对此进行改进,并添加功能来命名和重命名人类可读字符串。
查看 RenameCredential
为了节省您实现此函数(不会有过任何开创性的作用),我们在 auth.client.js 的起始代码中添加了一个用于重命名凭据的函数:
async function renameCredential(credId, newName) {
  const params = new URLSearchParams({
    credId,
    name: newName
  });
  return _fetch(
    `/auth/credential?${params}`,
    "PUT"
  );
}
这是一个常规的数据库更新调用:客户端向后端发送一个 PUT 请求,其中包含凭据的凭据和新名称。
实现自定义凭据名称
在 account.html 中,请注意空函数 rename。
将以下代码添加到该文件中:
// Rename a credential
async function rename(credentialId) {
  // Let the user input a new name
  const newName = window.prompt(`Name this credential:`);
  // Rename only if the user didn't cancel AND didn't enter an empty name
  if (newName && newName.trim()) {
    try {
      // Make the backend call to rename the credential (the name is sanitized) server-side
      await renameCredential(credentialId, newName);
    } catch (e) {
      // Alert the user that something went wrong
      if (Array.isArray(e)) {
        alert(
          // `msg` not `message`, this is the key's name as per the express validator API
          `Renaming failed. ${e.map((err) => `${err.msg} (${err.param})`)}`
        );
      } else {
        alert(`Renaming failed. ${e}`);
      }
    }
    // Refresh the credential list to display the new name
    await updateCredentialList();
  }
}
只有在成功创建凭据后,才能为凭据命名。因此,让我们创建一个没有名称的凭据,并在成功创建后重命名该凭据。但这会导致两次后端调用。
在 register() 中使用 rename 函数,以便用户能够在注册时为凭据命名:
async function register() {
  let user = {};
  try {
    const user = await registerCredential();
    // Get the latest credential's ID (newly created credential)
    const allUserCredentials = user.credentials;
    const newCredential = allUserCredentials[allUserCredentials.length - 1];
    // Rename it
    await rename(newCredential.credId);
  } catch (e) {
    // ...
  }
  // Refresh the credential list to display the new credential
  await updateCredentialList();
}
请注意,系统将在后端中验证并清理用户输入:
  check("name")
    .trim()
    .escape()
显示凭据名称
前往templates.js的getCredentialHtml。
请注意,此时凭据代码的顶部已经显示了凭据的名称:
// Register credential
const getCredentialHtml = (credential, removeEl, renameEl) => {
 const { name, credId, publicKey } = credential;
 return html`
    <div class="credential-card">
      <div class="credential-name">
        ${name
          ? html`
              ${name}
            `
          : html`
              <span class="unnamed">(Unnamed)</span>
            `}
      </div>
     // ...
    </div>
  `;
};
试试看!🇨?🇦? 🇮?
- 创建凭据。
- 系统会提示您命名。
- 输入新名称,然后点击确定。
- 该凭据现已重命名。
- 重复检查名称字段是否为空时还能顺畅运行。
启用凭据重命名
用户可能需要重命名凭据,例如,他们希望添加第二个密钥,并希望重命名第一个密钥,以便更好地区分。
在 account.html 中,找到最远的空函数 renameEl 并向其中添加以下代码:
// Rename a credential via HTML element
async function renameEl(el) {
  // Define the ID of the credential to update
  const credentialId = el.srcElement.dataset.credentialId;
  // Rename the credential
  await rename(credentialId);
  // Refresh the credential list to display the new name
  await updateCredentialList();
}
现在,在 templates.js 的 getCredentialHtml 中的 class="flex-end" div 内添加以下代码,此代码向凭据卡片模板添加了 Rename 按钮;点击该按钮后,系统会调用我们刚刚创建的 renameEl 函数:
const getCredentialHtml = (credential, removeEl, renameEl) => {
// ...
 <div class="flex-end">
  <button
    data-credential-id="${credId}"
    @click="${renameEl}"
    class="secondary right"
  >
   Rename
  </button>
 </div>
 // ...
  `;
};
试试看!🇨?🇦? 🇮?
- 点击重命名。
- 出现提示时,输入一个新名称。
- 点击 OK。
- 凭据应该已成功重命名,并且列表应该会自动更新。
- 重新加载页面应该仍会显示新名称(这表明新名称会在服务器端持久保留)。
显示凭据创建日期
通过 navigator.credential.create() 创建的凭据中不存在创建日期。
不过,由于此信息可以帮助用户区分凭据,我们在入门代码中代您调整了服务器端库,并在存储新凭据时添加了一个等于 Date.now() 的 creationDate 字段。
在 templates.js 中的 class="creation-date" div 内,添加以下代码,以向用户显示创建日期信息:
<div class="creation-date">
  <label>Created:</label>
  <div class="info">
    ${new Date(creationDate).toLocaleDateString()}
    ${new Date(creationDate).toLocaleTimeString()}
  </div>
</div>
9. 让您的代码满足未来需求
到目前为止,我们仅要求用户注册一个简单的漫游身份验证器,然后在登录过程中将其用作第二重身份验证。
一种更高级的方法是使用更强大的身份验证工具:用户验证漫游身份验证器 (UVRA)。UVRA 可以在单步登录流程中提供两种身份验证因素和防止网上诱骗。
理想情况下,您可以同时支持这两种方法。为此,您需要自定义用户体验:
- 如果用户只有简单的(未经用户验证的)漫游身份验证器,请让用户使用它来实现防网上诱骗帐号引导加载程序,但还必须输入用户名和密码。这就是我们的 Codelab 已有的功能。
- 如果其他用户拥有更高级的用户验证漫游身份验证器,则在帐号引导过程中可以跳过密码步骤,甚至可以跳过用户名步骤。
如需了解详情,请参阅利用可选无密码登录实现防网上诱骗帐号引导。
在此 Codelab 中,我们实际上并不会自定义用户体验,但我们会设置您的代码库,以便您获得自定义用户体验所需的数据。
您需要做好以下两件事:
- 在后端的设置中设置
residentKey: preferred。系统已为您完成这项操作。 - 设置查明是否创建了可发现凭据(也称为常驻密钥)的方法。
如需确定是否创建了可发现的凭据,请执行以下操作:
- 在创建凭据 (
credProps: true) 时查询credProps的值。 - 在创建凭据时查询
transports的值。这有助于您确定底层平台是否支持 UVRA 功能,也就是说,它是否确实是手机。 - 将
credProps和transports的值存储在后端。起始代码中已为您完成此步骤。如有兴趣,请查看auth.js。
让我们获取 credProps 和 transports 的值,并将其发送到后端。在 auth.client.js 中,按如下方式修改 registerCredential:
- 调用
navigator.credentials.create时添加一个extensions字段 - 在将凭据发送到后端进行存储之前设置
encodedCredential.transports和encodedCredential.credProps。
registerCredential 应如下所示:
async function registerCredential() {
  // Fetch the credential creation options from the backend
  const credentialCreationOptionsFromServer = await _fetch(
    '/auth/credential-options',
    'POST'
  );
  // Decode the credential creation options
  const credentialCreationOptions = decodeServerOptions(
    credentialCreationOptionsFromServer
  );
  // Create a credential via the browser API; this will prompt the user
  const credential = await navigator.credentials.create({
    publicKey: {
      ...credentialCreationOptions,
      extensions: {
        credProps: true,
      },
    },
  });
  // Encode the newly created credential to send it to the backend
  const encodedCredential = encodeCredential(credential);
  // Set transports and credProps for more advanced user flows
  encodedCredential.transports = credential.response.getTransports();
  encodedCredential.credProps =
    credential.getClientExtensionResults().credProps;
  // Send the encoded credential to the backend for storage
  return await _fetch('/auth/credential', 'POST', encodedCredential);
}
10. 确保提供跨浏览器支持
支持非 Chromium 浏览器
在 public/auth.client.js 的 registerCredential 函数中,我们将对新创建的凭据调用 credential.response.getTransports(),以最终将此信息作为提示保存到后端。
但是,目前并非所有浏览器都支持 getTransports()(不同于浏览器支持的 getClientExtensionResults):在 Firefox 和 Safari 中,调用 getTransports() 会抛出错误,从而阻止在这些浏览器中创建凭据。
为了确保您的代码在所有主流浏览器中运行,请将 encodedCredential.transports 调用封装在一个条件中:
if (credential.response.getTransports) {
  encodedCredential.transports = credential.response.getTransports();
}
请注意,在服务器上,transports 设置为 transports || []。在 Firefox 和 Safari 中,transports 列表不能为 undefined,而是空列表 [],这样可以防止出错。
警告用户使用不支持 WebAuthn 的浏览器
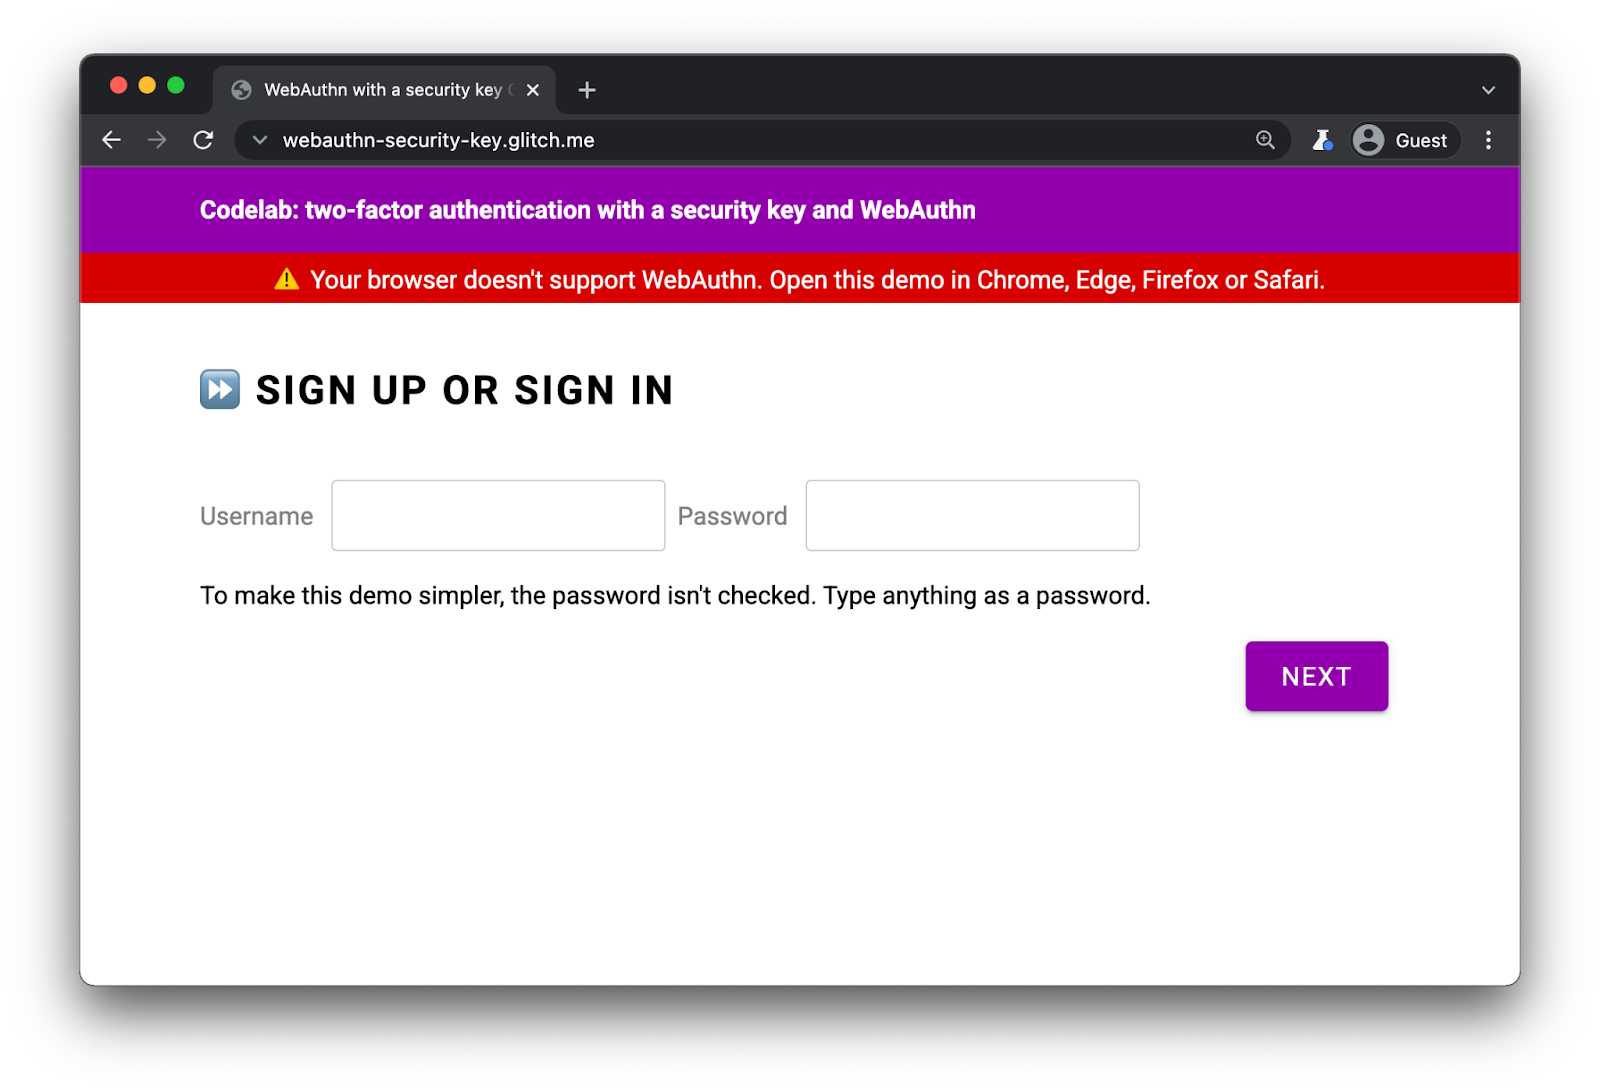
尽管所有主要浏览器都支持 WebAuthn,但最好在不支持 WebAuthn 的浏览器中显示警告。
在 index.html 中,注意此 div 的存在:
<div id="warningbanner" class="invisible">
⚠️ Your browser doesn't support WebAuthn. Open this demo in Chrome, Edge, Firefox or Safari.
</div>
在 index.html 的内嵌脚本中,添加以下代码,以便在不支持 WebAuthn 的浏览器中显示横幅:
// Display a banner in browsers that don't support WebAuthn
if (!window.PublicKeyCredential) {
  document.querySelector('#warningbanner').classList.remove('invisible');
}
在实际的 Web 应用中,您需要针对这些浏览器进行更精细、更恰当的回退机制,但这会向您显示如何检查是否支持 WebAuthn。
11. 干得好!
✨ 您完成了!
您已使用安全密钥实现双重身份验证。
在此 Codelab 中,我们介绍了一些基础知识。如果您想进一步了解 2FA 的 WebAuthn,可以尝试接下来尝试以下操作:
- 将“上次使用”的信息添加到凭据卡片。这对于用户确定是否正在使用给定的安全密钥尤其有用,尤其是在用户注册了多个密钥的情况下。
- 实现更强大的错误处理机制和更精确的错误消息。
- 查看
auth.js,了解更改某些authSettings时会发生什么,特别是使用支持用户验证的密钥时。

