1. What you'll build
You'll start with a basic web application that supports password-based login.
You'll then add support for two-factor authentication via a security key, based on WebAuthn. To do so, you'll implement the following:
- A way for a user to register a WebAuthn credential.
- A two-factor-authentication flow where the user is asked for their second factor—a WebAuthn credential—if they've registered one.
- A credential management interface: a list of credentials that enables users to rename and delete credentials.
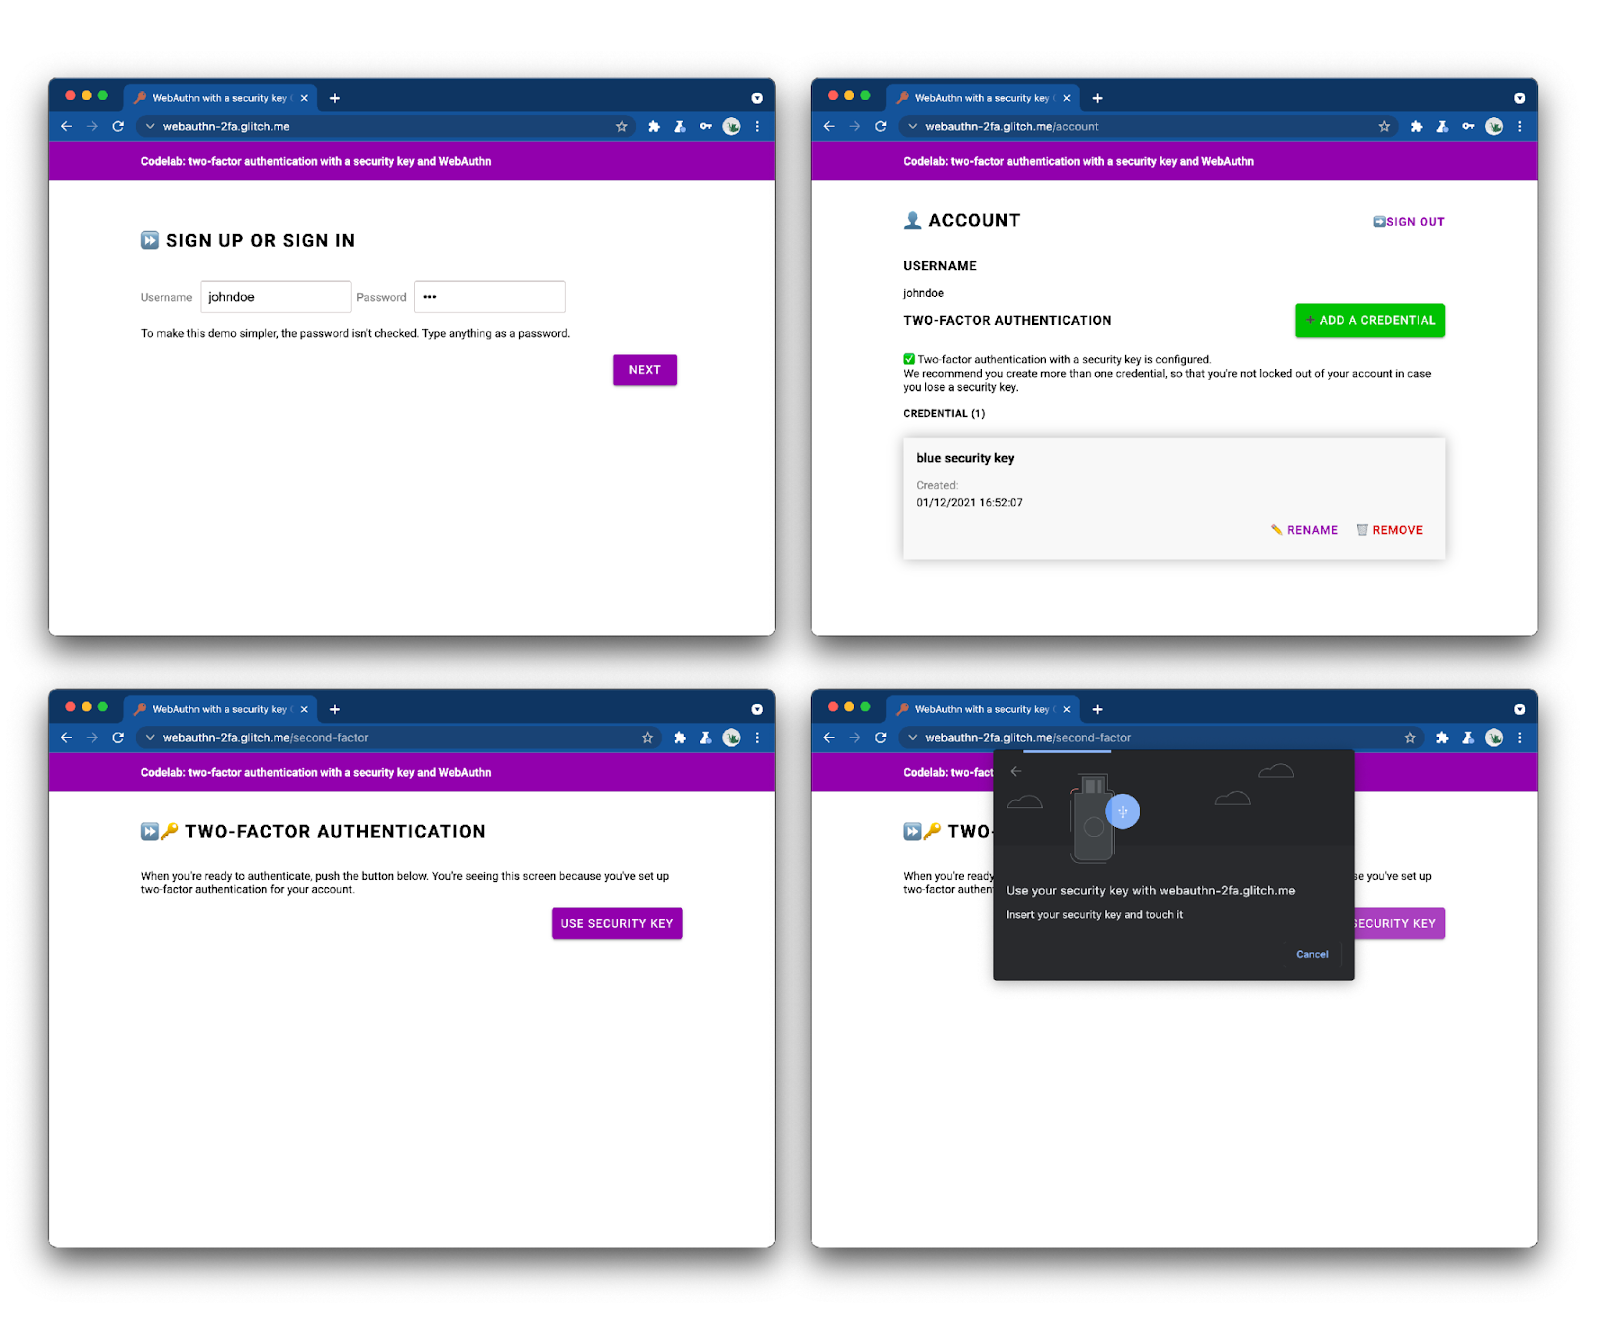
Take a look at the finished web app and try it out.
2. About WebAuthn
WebAuthn basics
Why WebAuthn?
Phishing is a massive security issue on the web: most account breaches leverage weak or stolen passwords that are reused across sites. The industry's collective response to this problem has been multi-factor authentication, but implementations are fragmented and many still don't adequately address phishing.
The Web Authentication API, or WebAuthn, is a standardized phishing-resistant protocol that can be used by any web application.
How it works
Source: webauthn.guide
WebAuthn allows servers to register and authenticate users using public key cryptography instead of a password. Websites can create a credential, consisting of a private-public keypair.
- The private key is stored securely on the user's device.
- The public key and randomly generated credential ID are sent to the server for storage.
The public key is used by the server to prove the user's identity. It's not secret, because it's useless without the corresponding private key.
Benefits
WebAuthn has two main benefits:
- No shared secret: the server stores no secret. This makes databases less attractive to hackers, because the public keys aren't useful to them.
- Scoped credentials: a credential registered for
site.examplecan't be used onevil-site.example. This makes WebAuthn phishing-proof.
Use cases
One use case for WebAuthn is two-factor authentication with a security key. This may be especially relevant for enterprise web applications.
Browser support
It's written by the W3C and FIDO, with the participation of Google, Mozilla, Microsoft, Yubico, and others.
Glossary
- Authenticator: a software or hardware entity that can register a user and later assert possession of the registered credential. There are two types of authenticators:
- Roaming authenticator: an authenticator usable with any device the user is trying to sign-in from. Example: a USB security key, a smartphone.
- Platform authenticator: an authenticator that is built into a user's device. Example: Apple's Touch ID.
- Credential: the private-public keypair
- Relying party: the (server for) the website that is trying to authenticate the user
- FIDO server: the server that is used for authentication. FIDO is a family of protocols developed by the FIDO alliance; one of these protocols is WebAuthn.
In this workshop, we'll use a roaming authenticator.
3. Before you begin
What you'll need
To complete this codelab, you'll need:
- A basic understanding of WebAuthn.
- Basic knowledge of JavaScript and HTML.
- An up-to-date browser that supports WebAuthn.
- A security key that is U2F-compliant.
You can use one of the following as a security key:
- An Android phone with Android>=7 (Nougat) that runs Chrome. In this case, you'll also need a Windows, macOS, or ChromeOS machine with working Bluetooth.
- A USB key, such as a YubiKey.
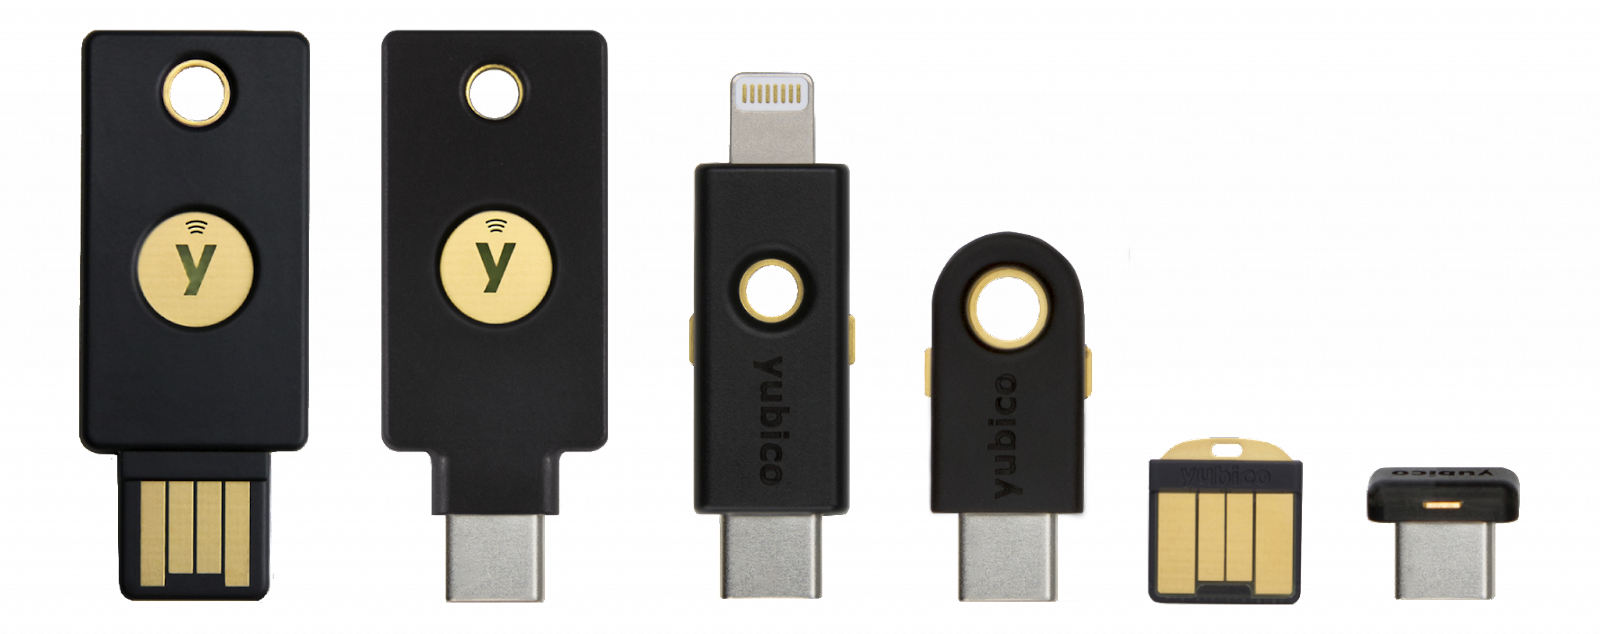
Source: https://www.yubico.com/products/security-key/
What you'll learn
You will learn ✅
- How to register and use a security key as a second factor for WebAuthn authentication.
- How to make this process user-friendly.
You won't learn ❌
- How to build a FIDO server—the server that is used for authentication. This is OK because typically, as a web application or site developer, you would rely on existing FIDO server implementations. Make sure to always verify the functionality and quality of the server implementations you rely on. In this codelab, the FIDO server uses SimpleWebAuthn. For other options, see the FIDO Alliance official page. For open source libraries, see webauthn.io or AwesomeWebAuthn.
Disclaimer
The user must enter a password to sign in. However, for simplicity in this codelab the password isn't stored nor checked. In a real application, you would check that it's correct server-side.
Basic security checks such as CSRF checks, session validation, and input sanitizing are implemented in this codelab. However, many security measures are not—for example, there's no input limit on passwords to prevent brute-force attacks. It doesn't matter here because passwords are not stored, but make sure to not use this code as-is in production.
4. Set up your authenticator
If you're using an Android phone as an authenticator
- Make sure Chrome is up to date on both your desktop and your phone.
- On both your desktop and your phone, open Chrome and sign in with the same profile⏤the profile you wish to use for this workshop.
- Turn on Sync for this profile, on your desktop and phone. Use chrome://settings/syncSetup for this.
- Turn on Bluetooth on both your desktop and your phone.
- In Chrome desktop logged-in with the same profile, open webauthn.io.
- Enter a simple username. Leave the Attestation type and Authenticator type to the None and Unspecified (default) values. Click Register.
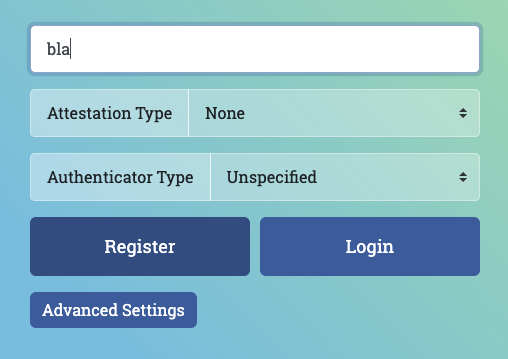
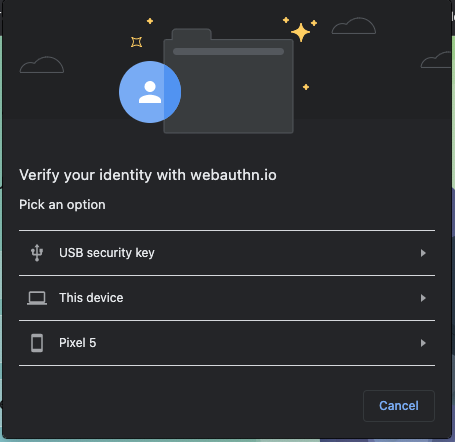
- A browser window should open, asking you to verify your identity. Select your phone in the list.
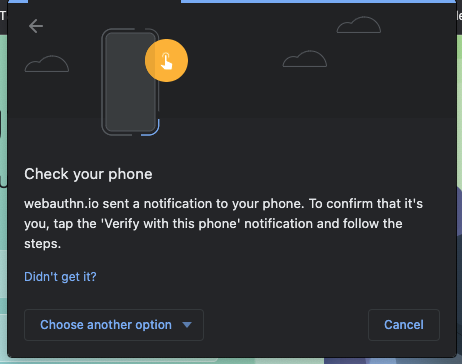
- On your phone, you should get a notification titled Verify your identity. Tap it.
- On your phone, you'll be asked for your phone's PIN code (or to touch the fingerprint sensor). Enter it.
- On webauthn.io on your desktop, a "Success" indicator should appear.
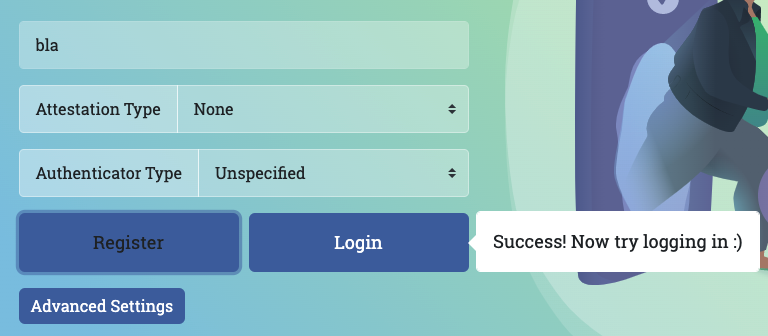
- On webauthn.io on your desktop, click the Login button.
- Again, a browser window should open; select your phone in the list.
- On your phone, tap the notification that pops up, and enter your PIN (or touch the fingerprint sensor).
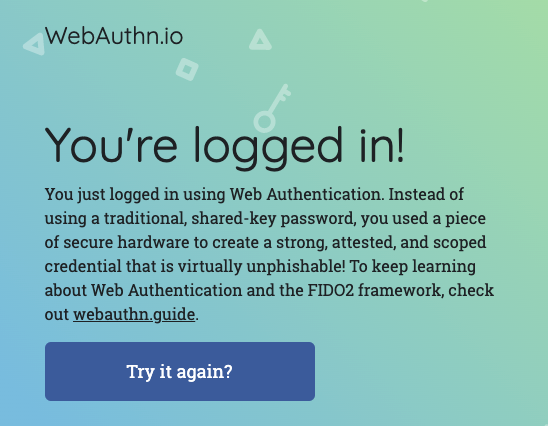
- webauthn.io should tell you that you're logged in. Your phone is working properly as a security key; you're all set for the workshop!
If you're using a USB security key as an authenticator
- In Chrome desktop, open webauthn.io.
- Enter a simple username. Leave the Attestation type and Authenticator type to the None and Unspecified (default) values. Click Register.
- A browser window should open, asking you to verify your identity. Select USB security key in the list.

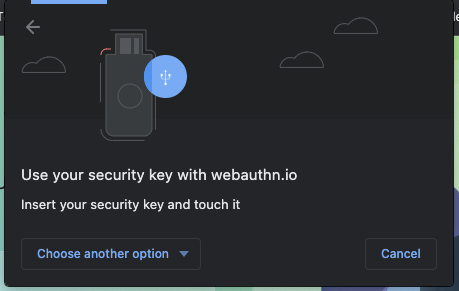
- Insert your security key into your desktop and touch it.

- On webauthn.io on your desktop, a "Success" indicator should appear.

- On webauthn.io on your desktop, click the Login button.
- Again, a browser window should open; select USB security key in the list.
- Touch the key.
- Webauthn.io should tell you that you're logged in. Your USB security key is working properly; you're all set for the workshop!
5. Get set up
In this codelab, you'll use Glitch, an online code editor that automatically and instantly deploys your code.
Fork the starter code
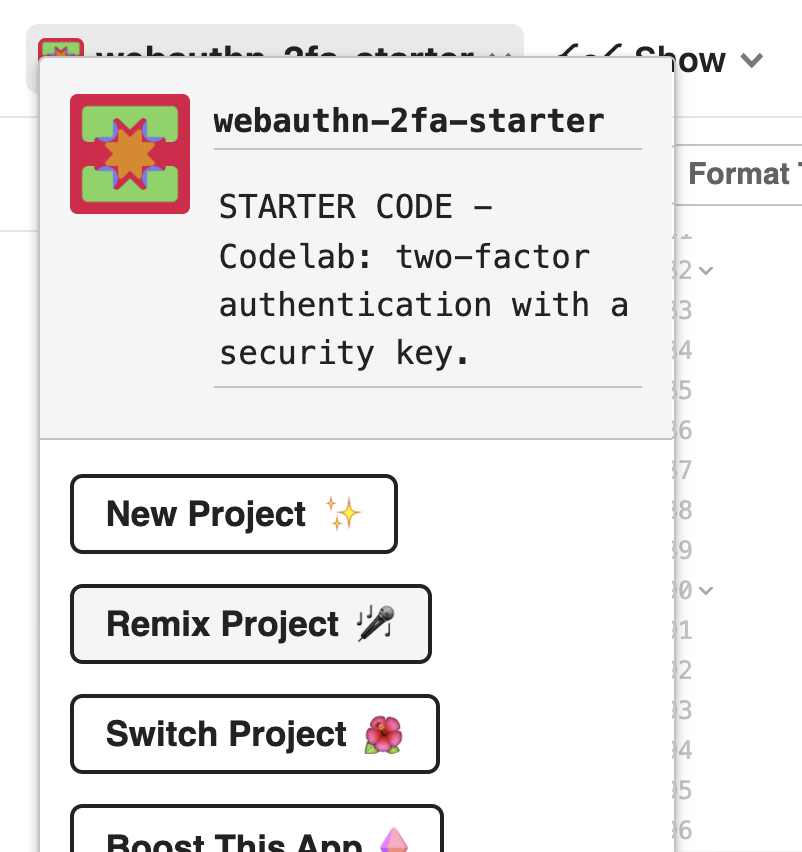
Open the starter project.
Click the Remix button.
This creates a copy of the starter code. You now have your own code to edit. Your fork (called "remix" in Glitch) is where you'll do all of the work for this codelab.
Explore the starter code
Explore the starter code you've just forked for a bit.
Observe that under libs, a library called auth.js is already provided. It's a custom library that takes care of the server-side authentication logic. It uses the fido library as a dependency.
6. Implement credential registration
Implement credential registration
The first thing we need in order to set up two-factor authentication with a security key is to enable the user to create a credential.
Let's first add a function that does this in our client-side code.
In public/auth.client.js, note that there's a function called registerCredential()that doesn't do anything just yet. Add the following code to it:
async function registerCredential() {
  // Fetch the credential creation options from the backend
  const credentialCreationOptionsFromServer = await _fetch(
    "/auth/credential-options",
    "POST"
  );
  // Decode the credential creation options
  const credentialCreationOptions = decodeServerOptions(
    credentialCreationOptionsFromServer
  );
  // Create a credential via the browser API; this will prompt the user to touch their security key or tap a button on their phone
  const credential = await navigator.credentials.create({
    publicKey: {
      ...credentialCreationOptions,
    }
  });
  // Encode the newly created credential to send it to the backend
  const encodedCredential = encodeCredential(credential);
  // Send the encoded credential to the backend for storage
  return await _fetch("/auth/credential", "POST", encodedCredential);
}
Note that this function is already exported for you.
Here's what registerCredential does:
- It fetches the credential creation options from the server (
/auth/credential-options) - Because the server options come back encoded, it uses the utility function
decodeServerOptionsto decode them. - It creates a credential by calling the web API
navigator.credential.create. Whennavigator.credential.createis called, the browser takes over and prompts the user to choose a security key. - It decodes the newly created credential
- It registers the new credential server-side by making a request to
/auth/credentialthat contains the encoded credential.
Aside: take a look at the server code
registerCredential() makes two calls to the server, so let's take a moment to look at what's happening in the backend.
Credential creation options
When the client makes a request to (/auth/credential-options), the server generates an options object and sends it back to the client.
This object is then used by the client in the actual credential creation call:
navigator.credentials.create({
    publicKey: {
    // Options generated server-side
    ...credentialCreationOptions
// ...
}
So, what's in this credentialCreationOptions that's ultimately used in the client-side registerCredential you've implemented in the previous step?
Take a look at the server code under router.post("/credential-options", ....
Let's not look at every single property, but here are a few interesting ones that you can see in the server code's options object, that's generated using the fido2 library and ultimately returned to the client:
rpNameandrpIddescribe the organization that registers and authenticates the user. Remember that in WebAuthn, credentials are scoped to a certain domain, which is a security benefit;rpNameandrpIdhere are used to scope the credential. A validrpIdis for example the hostname of your site. Note how these will be automatically updated as you fork the starter project 🧘🏻♀️excludeCredentialsis a list of credentials; the new credential can't be created on an authenticator that also contains one of the credentials listed inexcludeCredentials. In our codelab,excludeCredentialsis a list of existing credentials for this user. With this anduser.id, we're ensuring that each credential a user creates will live on a different authenticator (security key). This is a good practice because it means that if a user has registered multiple credentials, they'll be on different authenticators (security keys), so losing one security key wouldn't lock the user out of their account.authenticatorSelectiondefines the type of authenticators you want to allow in your web application. Let's take a closer look atauthenticatorSelection:residentKey: preferredmeans that this application doesn't enforce client-side discoverable credentials. A client-side discoverable credential is a special type of credential that makes it possible to authenticate a user without needing to first identify them. Here, we've set uppreferredbecause this codelab focuses on the basic implementation; discoverable credentials are for more advanced flows.requireResidentKeyis only present for backwards-compatibility with WebAuthn v1.userVerification: preferredmeans that if the authenticator supports user verification—for example, if it's a biometric security key or a key with a built-in PIN feature—the relying party will request it when creating the credential. If the authenticator doesn't—basic security key—then the server will not request user verification.
pubKeyCredParamdescribes, in order of preference, the desired cryptographic properties of the credential.
All these options are decisions that the web application needs to make for its security model. Observe that on the server, these options are defined in a single authSettings object.
Challenge
Another more interesting bit here is req.session.challenge = options.challenge;.
Because WebAuthn is a cryptographic protocol, it depends upon randomized challenges to avoid replay attacks—when an attacker steals a payload to replay the authentication, when they aren't the owner of the private key that would enable authentication.
To mitigate this, a challenge is generated on the server, and will be signed on the fly; the signature will then be compared with what's expected. This verifies that the user detains the private key at the time of credential generation.
Credential registration code
Take a look at the server code under router.post("/credential", ....
This is where the credential gets registered server-side.
So, what's going on there?
One of the most noteworthy bits in this code is the verification call, via fido2.verifyAttestationResponse:
- The signed challenge is checked, and this ensures that the credential was created by someone who actually detained the private key at creation time.
- The relying party's ID, bound to its origin, is also verified. This ensures that the credential is bound to this web application (and only this web application).
Add this functionality to the UI
Now that your function to create a credential, ``registerCredential(),is ready, let's make it available to the user.
You're going to do this from the Account page, because this is a usual location for authentication management.
In account.html's markup, below the username, there's a so-far empty div with a layout class class="flex-h-between". We'll use this div for UI elements that relate to 2FA functionality.
Add ino this div:
- A title that says "Two-factor authentication"
- A button to create a credential
 <div class="flex-h-between">
    <h3>
        Two-factor authentication
    </h3>
    <button class="create" id="registerButton" raised>
        ➕ Add a credential
    </button>
</div>
Below this div, add a credential div that we'll need later:
<div class="flex-h-between">
(HTML you've just added)
</div>
<div id="credentials"></div>
In account.html inline script, import the function you've just created and add a function register that calls it, as well as an event handler attached to the button you've just created.
// Set up the handler for the button that registers credentials
const registerButton = document.querySelector('#registerButton');
registerButton.addEventListener('click', register);

// Register a credential
async function register() {
  let user = {};
  try {
    const user = await registerCredential();
  } catch (e) {
    // Alert the user that something went wrong
    if (Array.isArray(e)) {
      alert(
        // `msg` not `message`, this is the key's name as per the express validator API
        `Registration failed. ${e.map((err) => `${err.msg} (${err.param})`)}`
      );
    } else {
      alert(`Registration failed. ${e}`);
    }
  }
}
Display the credentials for the user to see
Now that you've added the functionality to create a credential, users need a way to see the credentials they've added.
The Account page is a good place for this.
In account.html, look for the function called updateCredentialList().
Add to it the following code that makes a backend call to fetch all registered credentials for the currently logged-in user, and that displays the returned credentials:
// Update the list that displays credentials
async function updateCredentialList() {
  // Fetch the latest credential list from the backend
  const response = await _fetch('/auth/credentials', 'GET');
  const credentials = response.credentials || [];
  // Generate the credential list as HTML and pass remove/rename functions as args
  const credentialListHtml = getCredentialListHtml(
    credentials,
    removeEl,
    renameEl
  );
  // Display the list of credentials in the DOM
  const list = document.querySelector('#credentials');
  render(credentialListHtml, list);
}
For now, don't mind removeEl and renameEl; you'll learn about them later in this codelab.
Add one call to updateCredentialList at the start of your inline script, within account.html. With this call, available credentials are fetched when the user lands on their account page.
<script type="module">
    // ... (imports)
    // Initialize the credential list by updating it once on page load
    updateCredentialList();
Now, call updateCredentialList once registerCredential has successfully completed, so that the lists displays the newly created credential:
async function register() {
  let user = {};
  try {
    // ...
  } catch (e) {
    // ...
  }
  // Refresh the credential list to display the new credential
  await updateCredentialList();
}
Try it out! 👩🏻💻
You're done with credential registration! Users can now create security key-based credentials, and visualize them in their Account page.
Try it out:
- Sign out.
- Log in—with any user and password. As mentioned earlier, the password is not actually checked for correctness, to keep things simple in this codelab. Enter any non-empty password.
- Once you're on the Account page, click Add a credential.
- You should be prompted to insert and touch a security key. Do it.
- Upon successful credential creation, the credential should be displayed on the account page.
- Reload the Account page. The credentials should be displayed.
- If you have two keys available, try adding two different security keys as credentials. They should both be displayed.
- Try creating two credentials with the same authenticator (key); you'll notice that won't be supported. That's intentional—this is due to our use of
excludeCredentialsin the backend.
7. Enable second-factor authentication
Your users can register and unregister credentials, but credentials are just displayed and not actually used yet.
Now is the time to put them to use, and set up actual two-factor authentication.
In this section, you'll change the authentication flow in your web application from this basic flow:

To this two-factor flow:

Implement second-factor authentication
Let's first add the functionality we need and implement communication with the backend; we'll add this in the frontend in a next step.
What you need to implement here is a function that authenticates the user with a credential.
In public/auth.client.js, look for the empty function authenticateTwoFactor, and add to it the following code:
async function authenticateTwoFactor() {
  // Fetch the 2F options from the backend
  const optionsFromServer = await _fetch("/auth/two-factor-options", "POST");
  // Decode them
  const decodedOptions = decodeServerOptions(optionsFromServer);
  // Get a credential via the browser API; this will prompt the user to touch their security key or tap a button on their phone
  const credential = await navigator.credentials.get({
    publicKey: decodedOptions
  });
  // Encode the credential
  const encodedCredential = encodeCredential(credential);
  // Send it to the backend for verification
  return await _fetch("/auth/authenticate-two-factor", "POST", {
    credential: encodedCredential
  });
}
Note that this function is already exported for you; we'll need it in the next step.
Here's what authenticateTwoFactor does:
- It requests two factor authentication options from the server. Just like the credential creation options you've seen previously, these are defined on the server and depend on the security model of the web application. Dig into the server code under
router.post("/two-factors-options", ...for details. - By calling
navigator.credentials.get, it lets the browser take over and prompt the user to insert and touch a previously registered key. This results in a credential being selected for this specific second-factor authentication operation. - The selected credential is then passed in a backend request to fetch("/auth/authenticate-two-factor"`. If the credential is valid for that user, the user is then authenticated.
Aside: take a look at the server code
Note that server.js already takes care of some navigation and access: it ensures that the Account page can only be accessed by authenticated users, and performs some necessary redirects.
Now, take a look at the server code under router.post("/initialize-authentication", ....
There are two interesting points to note there:
- Both the password and the credential are checked simultaneously at this stage. This is a security measure: for users who have two-factor authentication set up, we don't want UI flows to look different depending on whether or not the password was correct. So we check both the password and the credential simultaneously, in this step.
- If both the password and the credential are valid, we then complete the authentication by calling
completeAuthentication(req, res);What this means in practice is that we switch sessions , from a temporaryauthsession where the user isn't yet authenticated, to the main sessionmainwhere the user is authenticated.
Include the second-factor authentication page in the user flow
In the views folder, notice the new page second-factor.html.
It has a button that says Use security key, but for now, it doesn't do anything.
Make this button call authenticateTwoFactor() on click.
- If
authenticateTwoFactor()is successful, redirect the user to their Account page. - If it's not successful, alert the user that an error has occurred. In a real application, you'd implement more helpful error messages— for the sake of simplicity in this demo, we'll only use a window alert.
    <main>
...
    </main>
    <script type="module">
      import { authenticateTwoFactor, authStatuses } from "/auth.client.js";

      const button = document.querySelector("#authenticateButton");
      button.addEventListener("click", async e => {
        try {
          // Ask the user to authenticate with the second factor; this will trigger a browser prompt
          const response = await authenticateTwoFactor();
          const { authStatus } = response;
          if (authStatus === authStatuses.COMPLETE) {
            // The user is properly authenticated => Navigate to the Account page
            location.href = "/account";
          } else {
            throw new Error("Two-factor authentication failed");
          }
        } catch (e) {
          // Alert the user that something went wrong
          alert(`Two-factor authentication failed. ${e}`);
        }
      });
    </script>
  </body>
</html>
Use second-factor authentication
You're now all set to add a second-factor authentication step.
What you need to do now is to add this step from index.html, for users who have configured two-factor authentication.

In index.html, below location.href = "/account";, add code that conditionally navigates the user to the second factor authentication page if they've set up 2FA.
In this codelab, creating a credential automatically opts in the user into two-factor authentication.
Note that server.js also implements server-side session check, which ensures that only authenticated users can access account.html.
const { authStatus } = response;
if (authStatus === authStatuses.COMPLETE) {
  // The user is properly authenticated => navigate to account
  location.href = '/account';
} else if (authStatus === authStatuses.NEED_SECOND_FACTOR) {
  // Navigate to the two-factor-auth page because two-factor-auth is set up for this user
  location.href = '/second-factor';
}
Try it out! 👩🏻💻
- Log in with a new user johndoe.
- Log out.
- Log into your account as johndoe; see that only a password is required.
- Create a credential. This will effectively mean that you've activated two-factor authentication as johndoe.
- Log out.
- Insert your username johndoe and password.
- See how you're automatically navigating to the second-factor authentication page.
- (Try accessing the Account page at
/account; note how you're redirected to the index page because you're not fully authenticated: you're missing a second factor) - Go back to the second-factor authentication page, and click Use security key to second-factor authenticate.
- You're now logged in and should see your Account page!
8. Make credentials easier to use
You're done with the basic functionality of two-factor authentication with a security key 🚀
But... Did you notice?
At the moment, our credential list is not very convenient: the credential ID and public key are long strings that are not helpful when managing credentials! Humans are not too good with long strings and numbers 🤖
So let's improve this, and add functionality to name and rename credentials with human-readable strings.
Take a look at renameCredential
To save you time implementing this function that doesn't do anything too groundbreaking, a function to rename a credential has been added for you in the starter code, in auth.client.js:
async function renameCredential(credId, newName) {
  const params = new URLSearchParams({
    credId,
    name: newName
  });
  return _fetch(
    `/auth/credential?${params}`,
    "PUT"
  );
}
This is a regular database update call: the client sends a PUT request to the backend, with a credential ID and new name for that credential.
Implement custom credential names
In account.html, notice the empty function rename.
Add to it the following code::
// Rename a credential
async function rename(credentialId) {
  // Let the user input a new name
  const newName = window.prompt(`Name this credential:`);
  // Rename only if the user didn't cancel AND didn't enter an empty name
  if (newName && newName.trim()) {
    try {
      // Make the backend call to rename the credential (the name is sanitized) server-side
      await renameCredential(credentialId, newName);
    } catch (e) {
      // Alert the user that something went wrong
      if (Array.isArray(e)) {
        alert(
          // `msg` not `message`, this is the key's name as per the express validator API
          `Renaming failed. ${e.map((err) => `${err.msg} (${err.param})`)}`
        );
      } else {
        alert(`Renaming failed. ${e}`);
      }
    }
    // Refresh the credential list to display the new name
    await updateCredentialList();
  }
}
It may make more sense to name a credential only once the credential has been successfully created. So let's create a credential with no name, and upon successful creation, rename the credential. This will result in two backend calls, though.
Use the rename function in register(), in order to enable users to name credentials upon registration:
async function register() {
  let user = {};
  try {
    const user = await registerCredential();
    // Get the latest credential's ID (newly created credential)
    const allUserCredentials = user.credentials;
    const newCredential = allUserCredentials[allUserCredentials.length - 1];
    // Rename it
    await rename(newCredential.credId);
  } catch (e) {
    // ...
  }
  // Refresh the credential list to display the new credential
  await updateCredentialList();
}
Note that user input will be validated and sanitized in the backend:
  check("name")
    .trim()
    .escape()
Display credential names
Head over to getCredentialHtml in templates.js.
Note that there's already code to display the credential's name at the top of the credential card:
// Register credential
const getCredentialHtml = (credential, removeEl, renameEl) => {
 const { name, credId, publicKey } = credential;
 return html`
    <div class="credential-card">
      <div class="credential-name">
        ${name
          ? html`
              ${name}
            `
          : html`
              <span class="unnamed">(Unnamed)</span>
            `}
      </div>
     // ...
    </div>
  `;
};
Try it out! 👩🏻💻
- Create a credential.
- You'll be prompted to name it.
- Enter a new name and click OK.
- The credential is now renamed.
- Repeat and check that things work smoothly too when leaving the name field empty.
Enable credential renaming
Users may need to rename credentials–for example, they're adding a second key and want to rename their first key to better distinguish them.
In account.html, look for the so-far empty function renameEl and add to it the following code:
// Rename a credential via HTML element
async function renameEl(el) {
  // Define the ID of the credential to update
  const credentialId = el.srcElement.dataset.credentialId;
  // Rename the credential
  await rename(credentialId);
  // Refresh the credential list to display the new name
  await updateCredentialList();
}
Now, in templates.js's getCredentialHtml, within the class="flex-end" div, add the following code, This code adds a Rename button to the credential card template; when clicked, that button will call the renameEl function we've just created:
const getCredentialHtml = (credential, removeEl, renameEl) => {
// ...
 <div class="flex-end">
  <button
    data-credential-id="${credId}"
    @click="${renameEl}"
    class="secondary right"
  >
   Rename
  </button>
 </div>
 // ...
  `;
};
Try it out! 👩🏻💻
- Click Rename.
- Enter a new name when prompted.
- Click OK.
- The credential should be successfully renamed, and the list should update automatically.
- Reloading the page should still show the new name (this shows that the new name is persisted server-side).
Display the credential creation date
The creation date isn't present in credentials created via navigator.credential.create().
But because this information can be useful to the user to distinguish between credentials, we've tweaked the server-side library in the starter code for you, and added a creationDate field equal to Date.now() upon storing new credentials.
In templates.js within the class="creation-date" div, add the following to display creation date information to the user:
<div class="creation-date">
  <label>Created:</label>
  <div class="info">
    ${new Date(creationDate).toLocaleDateString()}
    ${new Date(creationDate).toLocaleTimeString()}
  </div>
</div>
9. Make your code future-friendly
So far we only asked the user to register a simple roaming authenticator that is then used as a second factor during sign-in.
One more advanced approach would be to rely on a more powerful type of authenticator: a user-verifying roaming authenticator (UVRA). A UVRA can provide two authentication factors and phishing resistance in single-step sign-in flows.
Ideally, you'd support both approaches. To do so, you'd need to customize the user experience:
- If a user only has a simple (non-user-verifying) roaming authenticator, let them use it to achieve a phishing-resistant account bootstrap, but they will have to also type a username and password. This is what our codelab already does.
- If another user has a more advanced user-verifying roaming authenticator, they will be able to skip the password step—and potentially even the username step—during account bootstrap.
Learn more about this in Phishing-Resistant Account Bootstrapping with Optional Passwordless Sign-In.
In this codelab, we won't actually customize the user experience, but we will set up your codebase so that you have the data you need in order to customize the user experience.
You need two things:
- Set
residentKey: preferredin your backend's settings. This is already done for you. - Set up a way to find out whether or not a discoverable credential (also called resident key) was created.
To find out whether or not a discoverable credential was created:
- Query the value of
credPropsupon credential creation (credProps: true). - Query the value of
transportsupon credential creation. This will help you determine whether the underlying platform supports UVRA functionality, that is whether it's really a mobile phone, for example. - Store the value of
credPropsandtransportsin the backend. This was already done for you in the starter code. Take a look atauth.jsif you're curious.
Let's get the value of credProps and transports, and send them to the backend. In auth.client.js, modify registerCredential as follows:
- Add an
extensionsfield upon callingnavigator.credentials.create - Set
encodedCredential.transportsandencodedCredential.credPropsbefore sending the credential to the backend for storage.
registerCredential should look as follows:
async function registerCredential() {
  // Fetch the credential creation options from the backend
  const credentialCreationOptionsFromServer = await _fetch(
    '/auth/credential-options',
    'POST'
  );
  // Decode the credential creation options
  const credentialCreationOptions = decodeServerOptions(
    credentialCreationOptionsFromServer
  );
  // Create a credential via the browser API; this will prompt the user
  const credential = await navigator.credentials.create({
    publicKey: {
      ...credentialCreationOptions,
      extensions: {
        credProps: true,
      },
    },
  });
  // Encode the newly created credential to send it to the backend
  const encodedCredential = encodeCredential(credential);
  // Set transports and credProps for more advanced user flows
  encodedCredential.transports = credential.response.getTransports();
  encodedCredential.credProps =
    credential.getClientExtensionResults().credProps;
  // Send the encoded credential to the backend for storage
  return await _fetch('/auth/credential', 'POST', encodedCredential);
}
10. Ensure cross-browser support
Support non-Chromium browsers
In public/auth.client.js's registerCredential function, we're calling credential.response.getTransports() on the newly created credential to ultimately save this information in the backend as a hint to the server.
However, getTransports() is not currently implemented in all browsers (unlike getClientExtensionResults that is supported across browsers): the getTransports() call will throw an error in Firefox and Safari, which would prevent credential creation in these browsers.
To ensure your code will run in all major browsers, wrap the encodedCredential.transports call in a condition:
if (credential.response.getTransports) {
  encodedCredential.transports = credential.response.getTransports();
}
Note that on the server, transports is set to transports || []. In Firefox and Safari the transports list won't be undefined but an empty list [], which prevents errors.
Warn users that use browsers that don't support WebAuthn
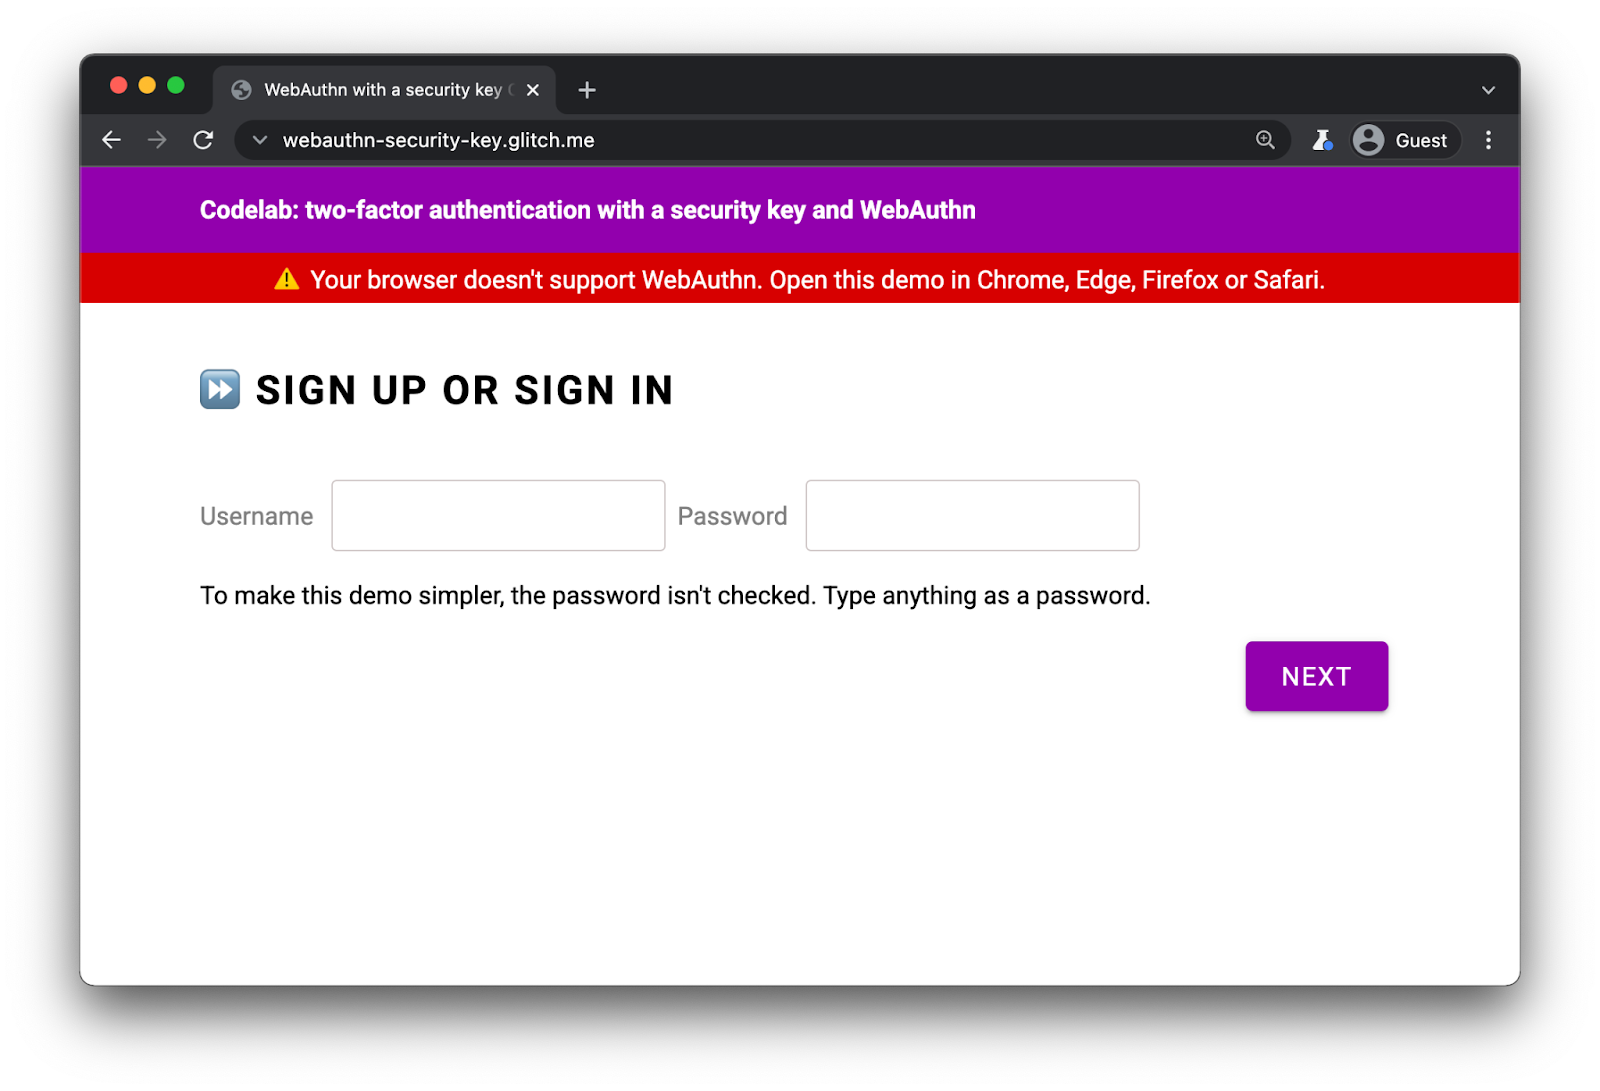
Even though WebAuthn is supported in all major browsers, it's a good idea to display a warning in browsers that don't support WebAuthn.
In index.html, observe the presence of this div:
<div id="warningbanner" class="invisible">
⚠️ Your browser doesn't support WebAuthn. Open this demo in Chrome, Edge, Firefox or Safari.
</div>
In index.html's inline script, add following code to display the banner in browsers that don't support WebAuthn:
// Display a banner in browsers that don't support WebAuthn
if (!window.PublicKeyCredential) {
  document.querySelector('#warningbanner').classList.remove('invisible');
}
In a real web application, you'd do something more elaborate and have a proper fallback mechanism for these browsers—but this shows you how to check for WebAuthn support.
11. Well done!
✨You're done!
You've implemented two-factor authentication with a security key.
In this codelab, we've covered the basics. If you'd like to explore WebAuthn for 2FA further, here are some ideas of what you could try next:
- Add "Last used" information to the credential card. This is useful information for users to determine whether a given security key is actively used or not—especially if they've registered multiple keys.
- Implement more robust error handling and more precise error messages.
- Look into
auth.js, and explore what happens when you change some of theauthSettings, in particular when using a key that supports user verification.
