شروع به کار با کتابخانه مشتری دات نت
با مجموعهها، منظم بمانید
ذخیره و طبقهبندی محتوا براساس اولویتهای شما.
جف فیشر، تیم Google Data APIs
آگوست 2007مقدمه
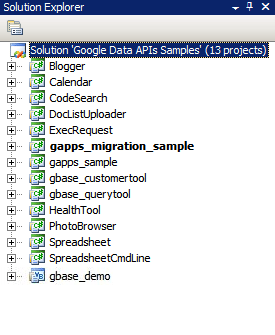
شکل 1: راه حل Google Data API برای بسیاری از توسعه دهندگان، سخت ترین بخش یک پروژه جدید، نصب بسته های نرم افزاری جدید، پیکربندی محیط توسعه و یادگیری کتابخانه های جدید است. در این مقاله، من دستورالعمل های گام به گام را برای نحوه شروع با کتابخانه مشتری دات نت با استفاده از Visual Studio 2005 برای ویندوز یا Mono برای لینوکس و سایر سیستم عامل های یونیکس گردآوری کرده ام. امیدوارم که این کار باعث صرفه جویی در زمان شما در شروع کار شود و به شما امکان می دهد به سرعت کار با برخی کدها را شروع کنید.
ویژوال استودیو 2008
اگر از قبل ویژوال استودیو 2008 را نصب نکرده اید، ممکن است بخواهید از Visual C# 2008 Express Edition استفاده کنید، نسخه رایگان ویژوال استودیو که به شما امکان می دهد با کتابخانه کلاینت دات نت کار کنید.
تنظیم محیط خود
- آخرین نسخه MSI کتابخانه مشتری را از http://code.google.com/p/google-gdata/downloads/list دانلود کنید.
- فایل MSI دانلود شده را برای نصب بسته اجرا کنید. به طور پیش فرض در "C:\Program Files\Google\Google Data API SDK\" نصب می شود. مثالهای بیشتر در این مقاله فرض میکنند که شما کتابخانه مشتری را در این مکان نصب کردهاید.
- فایل راه حل به نام "Google Data API SDK" را در پوشه "Google Data API SDK" در منوی Start باز کنید.
گردآوری و اجرای نمونه ها
- بررسی کنید که اجرای «Build > Build Solution» بدون هیچ خطایی کامل شود.
- برای ایجاد یک بیلد Debug به «Build > Configuration Manager» بروید و «Debug» را به عنوان پیکربندی راه حل فعال انتخاب کنید. سپس "Build > Build Solution" را انتخاب کنید.
- فایلهای باینری و DLL را میتوانید در «C:\Program Files\Google\Google Data API SDK\Sources\Samples\» پیدا کنید، به عنوان مثال، میتوانید با اجرای «C:\Program Files\Google\Google Data API SDK\Sources\Samples\calendar\Camples\Calendar» نمونه برنامه را برای Calendar اجرا کنید. همچنین برخی از میانبرهای منوی شروع برای این نمونه ها وجود دارد.
در حال توسعه اپلیکیشن خود
اگر می خواهید در پروژه ای خارج از فایل راه حل ارائه شده توسط فایل MSI توسعه دهید، باید فایل های DLL کتابخانه مشتری را به عنوان مسیر مرجع اضافه کنید.
- پروژه ای خارج از راه حل Google API SDK ایجاد یا باز کنید.
- از منوی Project گزینه "Add Reference" را انتخاب کنید.
- روی تب Browse کلیک کنید.
- به دایرکتوری Redist در SDK بروید: "C:\Program Files\Google\Google Data API SDK\Redist".
- فایل های DLL را که توسط کد شما استفاده می شود انتخاب کنید. گوگل.
توجه: همچنین یک فایل راه حل برای کتابخانه های مشتری در دستگاه های تلفن همراه وجود دارد. به طور پیش فرض در "C:\Program Files\Google\Google Data API SDK\Sources\Library\VS2005.mobile" یافت می شود. این راه حل فقط فایل های DLL را برای کتابخانه های مشتری کامپایل می کند.
اجرای تست های NUnit
در صورت ایجاد هر گونه تغییر در کتابخانه های سرویس گیرنده یا برنامه ریزی برای کمک به آنها، اطمینان از قبولی آزمون های NUnit مناسب، گام مهمی است. اگر قصد دارید از کتابخانه های سرویس گیرنده بدون تغییر استفاده کنید، معمولاً نیازی به اجرای آنها نیست.
- نسخه NET 2.0 MSI NUnit را از http://www.nunit.org/index.php?p=download دانلود کنید.
- NUnit را با اجرای فایل MSI نصب کنید. محل نصب پیش فرض مشابه "C:\Program Files\NUnit 2.4.8" است. ممکن است بخواهید این را به چیزی مانند "C:\Program Files\NUnit" تغییر دهید تا بتوانید در آینده بدون نیاز به تغییر مسیر در پروژه ویژوال استودیو، NUnit را ارتقا دهید.
- به دایرکتوری "C:\Program Files\Google\Google Data API SDK\Sources\Library\VS2005" بروید و فایل راه حل با نام "Google Data APIs" را باز کنید. جادوگر تبدیل را خواهید دید زیرا این یک فایل پروژه ویژوال استودیو 2005 است. یا از طریق دستورات کلیک کنید یا به سادگی روی دکمه "پایان" کلیک کنید. باید گزارش تبدیل را نمایش دهد که می توان آن را نادیده گرفت.
- اکنون NUnit باید به عنوان یک مسیر مرجع اضافه شود. روی پروژه "unittests" در Solution Explorer در سمت راست کلیک کرده و "Properties" را انتخاب کنید. اکنون در پنجره باز شده روی تب "Reference Paths" کلیک کنید. محل زیرشاخه "bin" نصب NUnit را به عنوان مسیر مرجع وارد کنید و روی "افزودن پوشه" کلیک کنید. به عنوان مثال، اگر NUnit در "C:\Program Files\NUnit\" نصب شده باشد، باید "C:\Program Files\NUnit\bin" را وارد کنید. قبل از ادامه، حتما این تغییر را ذخیره کنید.
- مراحل ذکر شده در کامپایل و اجرای نمونه ها را برای بازسازی کتابخانه مشتری و تست های واحد دنبال کنید.
- فایل "unittests.dll.config" را در "C:\Program Files\Google\Google Data API SDK\Sources\Library\unittests\" در دایرکتوری ساخت اشکال زدایی خود "C:\Program Files\Google\Google Data API SDK\Source\Library\VS2005\unittests\" کپی کنید. به یاد داشته باشید که فایل را ویرایش کنید تا حاوی اطلاعات مناسب برای آزمون هایی باشد که در حال اجرا هستید. برای مثال، Base به یک کلید API و Calendar به نام کاربری و رمز عبور نیاز دارد. توصیه می شود برای جلوگیری از حذف اطلاعات توسط تست های واحد، از یک حساب آزمایشی بدون داده های زنده استفاده کنید.
- NUnit را از منوی Start باز کنید.
- به "File > Open Project" بروید و فایل "unittests.dll" را از "C:\Program Files\Google\Google Data API SDK\Source\Library\VS2005\unittests\bin\Debug\" انتخاب کنید.
- تست های واحدی را که به آنها علاقه دارید اجرا کنید. به یاد داشته باشید که برای انجام تست های خاص نیاز به تنظیم پارامترها در unittests.dll.config است. اگر تست استرس را برای سرویسهای خاصی اجرا میکنید، ممکن است حساب آزمایشی شما بهعنوان تولیدکننده هرزنامه پرچمگذاری شود و نتوانید بدون مواجهه با چالشهای CAPTCHA محتوا را به صورت برنامهنویسی به سرورهای Google ارسال کنید.
مونونوکلئوز
Mono یک پروژه متن باز است که به شما امکان می دهد برنامه های سرویس گیرنده و سرور دات نت را روی لینوکس، سولاریس، Mac OS X، ویندوز و یونیکس اجرا کنید. ما یک فایل ZIP جداگانه از کتابخانه مشتری خود را برای توسعه دهندگانی که می خواهند روی یکی از این پلتفرم ها کار کنند، ارائه می دهیم.
تنظیم محیط خود
- آخرین نسخه فایل ZIP از کتابخانه مشتری را از http://code.google.com/p/google-gdata/downloads/list دانلود کنید
- استخراج به یک فهرست محلی (به عنوان مثال "/scratch/gdata.NET")
- از مدیریت بسته توزیع خود برای نصب Mono استفاده کنید. یا می توانید آن را از http://www.mono-project.com دانلود کنید.
- در برخی از توزیع ها باید مطمئن شوید که فایل nunit.framework.dll به درستی به کتابخانه مونو پیوند داده شده است. اگر mono در "/usr/lib/mono" نصب شده است، مطمئن شوید که پیوندهای نمادین در "/usr/lib/mono/1.0" و "/usr/lib/mono/2.0" برای nunit.framework.dll (که باید در "/usr/lib/mono/gac/nunit.frameworkstr."/><s نصب شود، وجود دارد.
گردآوری و اجرای نمونه ها
- با فرض اینکه کتابخانه سرویس گیرنده را در "/scratch/gdata.NET" نصب کرده اید، به دایرکتوری "/scratch/gdata.NET/clients/cs" تغییر دهید.
- بسته به نسخه دات نت که می خواهید از آن استفاده کنید، Makefile را ویرایش کنید. برای NET 1.x از
CSC=mcs
و برای NET 2.x از CSC=gmcs
استفاده کنید. - برای کامپایل کردن کتابخانه ها و نمونه برنامه ها،
make
را اجرا کنید. - اگر می خواهید DLL های کتابخانه مشتری را در کتابخانه مونو نصب کنید،
make install
را اجرا کنید.
در حال توسعه اپلیکیشن خود
اگر پس از کامپایل کردن کتابخانه سرویس گیرنده، یک make install
اجرا کرده اید، باید بتوانید کتابخانه ها را با ارسال -r:Google.GData.Extensions.dll -r:Google.GData.Client.dll
به کامپایلر Mono C# همراه با ارجاع به فایل های DLL هر پسوند سرویس خاصی که می خواهید استفاده کنید، در کد خود قرار دهید.
اجرای تست های NUnit
- فایل unittests.dll.config را از «/scratch/gdata.NET/clients/cs/src/unittests» در «/scratch/gdata.NET/clients/cs/» کپی کنید.
- "/scratch/gdata.NET/clients/cs/unittests.dll.config" را ویرایش کنید تا اطلاعات مناسبی را برای آزمایشهایی که در حال اجرا هستید شامل شود. برای مثال، Base به یک کلید API و Calendar به نام کاربری و رمز عبور نیاز دارد. توصیه میکنم از یک حساب آزمایشی بدون دادههای زنده استفاده کنید تا از حذف اطلاعات توسط آزمایشهای واحد جلوگیری کنید.
- پس از کامپایل کردن کتابخانه، یک فایل unittests.dll در "/scratch/gdata.NET/clients/cs" وجود خواهد داشت. از این DLL با مدیر آزمون NUnit انتخابی خود (nunit-console، gnunit و غیره) استفاده کنید.
نتیجه گیری
اکنون باید بتوانید کتابخانه ها را کامپایل کرده و کد نمونه را اجرا کنید. با این حال، این تنها آغاز است. من شما را تشویق می کنم که اسناد موجود در فهرست راهنمای ".../clients/cs/docs" کتابخانه مشتری را مطالعه کنید. همچنین ممکن است بخواهید راهنمای توسعهدهنده کتابخانه مشتری دات نت ، صفحه پروژه و راهنمای مرجع ، و تالار گفتمان کتابخانه سرویس گیرنده Google Data .NET را بررسی کنید.
ابزارهای مورد اشاره در این مقاله:
در برنامه بعدی دات نت موفق باشید!
جز در مواردی که غیر از این ذکر شده باشد،محتوای این صفحه تحت مجوز Creative Commons Attribution 4.0 License است. نمونه کدها نیز دارای مجوز Apache 2.0 License است. برای اطلاع از جزئیات، به خطمشیهای سایت Google Developers مراجعه کنید. جاوا علامت تجاری ثبتشده Oracle و/یا شرکتهای وابسته به آن است.
تاریخ آخرین بهروزرسانی 2025-07-24 بهوقت ساعت هماهنگ جهانی.
[null,null,["تاریخ آخرین بهروزرسانی 2025-07-24 بهوقت ساعت هماهنگ جهانی."],[[["\u003cp\u003eThis guide provides step-by-step instructions for setting up and using the Google Data .NET client library with either Visual Studio 2008 or Mono.\u003c/p\u003e\n"],["\u003cp\u003eDevelopers can use this library to interact with various Google services like Calendar by compiling and running provided sample applications or by developing their own applications.\u003c/p\u003e\n"],["\u003cp\u003eThe guide includes details on compiling the library, running provided unit tests for verifying functionality, and configuring the development environment for both Windows and Unix-based systems.\u003c/p\u003e\n"],["\u003cp\u003eAdditional resources such as the .NET Client Library Developer's Guide and project forums are available for further assistance.\u003c/p\u003e\n"]]],[],null,["# Getting Started with the .NET Client Library\n\n*Jeff Fisher, Google Data APIs team\nAugust 2007*\n\n- [Introduction](#introduction)\n- [Visual Studio 2008](#vs2005)\n - [Setting up your environment](#vssetup)\n - [Compiling and running samples](#vscompile)\n - [Developing your own application](#vsdevelop)\n - [Running the NUnit tests](#vsnunit)\n- [Mono](#mono)\n - [Setting up your environment](#monosetup)\n - [Compiling and running samples](#monocompile)\n - [Developing your own application](#monodevelop)\n - [Running the NUnit tests](#mononunit)\n- [Conclusion](#conclusion)\n\n### Introduction\n\n\u003cbr /\u003e\n\n**Figure 1: The Google Data API solution**\n\nFor many developers, the most difficult part of a new project is getting the ball rolling-installing new software packages, configuring a development environment, and learning new libraries. In this article, I have pulled together some step-by-step instructions for how to begin with the .NET client library using either Visual Studio 2005 for Windows or Mono for Linux and other Unix operating systems. It is my hope that this will save you some time in getting started and let you quickly start working with some code.\n\nVisual Studio 2008\n------------------\n\nIf you do not already have Visual Studio 2008 installed, you may want to consider using [Visual C# 2008 Express Edition](http://msdn.microsoft.com/en-us/library/orm-9780596521066-01-02.aspx), a free version of Visual Studio that will allow you to work with the .NET client library.\n\n### Setting up your environment\n\n1. Download the latest MSI release of the client library from [http://code.google.com/p/google-gdata/downloads/list](//code.google.com/p/google-gdata/downloads/list).\n2. Run the downloaded MSI file to install the package. It will install to \"C:\\\\Program Files\\\\Google\\\\Google Data API SDK\\\\\" by default. Further examples in this article will assume you installed the client library to this location.\n3. Open the solution file called \"Google Data API SDK\" in the \"Google Data API SDK\" folder in the Start Menu.\n\n### Compiling and running samples\n\n1. Verify that running \"Build \\\u003e Build Solution\" completes without any errors.\n2. To create a Debug build go to \"Build \\\u003e Configuration Manager\" and select \"Debug\" as the active solution configuration. Then select \"Build \\\u003e Build Solution\".\n3. The binaries and DLL files you have just compiled can be found in \"C:\\\\Program Files\\\\Google\\\\Google Data API SDK\\\\Sources\\\\Samples\\\\\" For example, you can run the sample application for Calendar by executing \"C:\\\\Program Files\\\\Google\\\\Google Data API SDK\\\\Sources\\\\Samples\\\\calendar\\\\bin\\\\Debug\\\\Calendar.exe\". There are also some Start Menu shortcuts to these samples.\n\n### Developing your own application\n\nIf you want to develop in a project outside of the solution file provided by the MSI file, you need to add the client library DLL files as a reference path.\n\n1. Create or open a project outside of the Google API SDK solution.\n2. Select \"Add Reference\" from the Project menu.\n3. Click on the Browse tab.\n4. Navigate to the Redist directory in the SDK: \"C:\\\\Program Files\\\\Google\\\\Google Data API SDK\\\\Redist\".\n5. Select the DLL files that will be used by your code. Google.GData.Extensions.dll and Google.GData.Client.dll will be needed for most projects, along with the DLL file specific to the Google service(s) you are using in your application.\n\n**Note:** There is also a solution file for client libraries on Mobile devices. It is found in \"C:\\\\Program Files\\\\Google\\\\Google Data API SDK\\\\Sources\\\\Library\\\\VS2005.mobile\" by default. This solution will only compile the DLL files for the client libraries.\n\n### Running the NUnit tests\n\nMaking sure the appropriate NUnit tests pass is an important step if you make any changes to the client libraries or plan to contribute to them. If you plan to use the client libraries without modifications then there is normally no need to run them.\n\n1. Download the .NET 2.0 MSI file release of NUnit from \u003chttp://www.nunit.org/index.php?p=download\u003e.\n2. Install NUnit by running the MSI file. The default install location is similar to \"C:\\\\Program Files\\\\NUnit 2.4.8\". You may wish to change this to something like \"C:\\\\Program Files\\\\NUnit\" so you can upgrade NUnit in the future without having to change the path in your Visual Studio project.\n3. Go to the \"C:\\\\Program Files\\\\Google\\\\Google Data API SDK\\\\Sources\\\\Library\\\\VS2005\" directory and open the solution file named \"Google Data APIs\". You will see the Conversion Wizard since this is a Visual Studio 2005 project file. Either click through the prompts or simply click on the \"Finish\" button. It should display the conversion log, which can be ignored.\n4. Now NUnit must be added as a reference path. Right click on the \"unittests\" project in the Solution Explorer on the right and select \"Properties\". Now click on the \"Reference Paths\" tab within the window that opens. Enter in the location of the \"bin\" subdirectory of the NUnit installation as a reference path and click \"Add Folder\". For example, if NUnit is installed to \"C:\\\\Program Files\\\\NUnit\\\\\", one would enter \"C:\\\\Program Files\\\\NUnit\\\\bin\". Be sure to save this change before continuing.\n5. Follow the steps listed in [Compiling and running samples](#vscompile) to rebuild the client library and the unit tests.\n6. Copy the \"unittests.dll.config\" file in \"C:\\\\Program Files\\\\Google\\\\Google Data API SDK\\\\Sources\\\\Library\\\\unittests\\\\\" to your debug build directory \"C:\\\\Program Files\\\\Google\\\\Google Data API SDK\\\\Source\\\\Library\\\\VS2005\\\\unittests\\\\bin\\\\Debug\\\\\". Remember to edit the file to include the appropriate information for the tests you are running. For example, Base requires an API key and Calendar requires a username and password. It is recommended to use a test account without any live data to avoid having information deleted by the unit tests.\n7. Open NUnit from the Start Menu.\n8. Go to \"File \\\u003e Open Project\" and select the \"unittests.dll\" file from \"C:\\\\Program Files\\\\Google\\\\Google Data API SDK\\\\Source\\\\Library\\\\VS2005\\\\unittests\\\\bin\\\\Debug\\\\\".\n9. Run the unit tests you are interested in. Remember that certain tests require parameters be set in unittests.dll.config to work. If you run the stress tests for certain services you may have your test account flagged as generating spam and be unable to programmatically submit content to Google servers without encountering CAPTCHA challenges.\n\nMono\n----\n\nMono is an open source project that allows you to run .NET client and server applications on Linux, Solaris, Mac OS X, Windows, and Unix. We offer a separate ZIP file of our client library for developers who want to work on one of these platforms.\n\n### Setting up your environment\n\n1. Download the latest ZIP file release of the client library from [http://code.google.com/p/google-gdata/downloads/list](//code.google.com/p/google-gdata/downloads/list)\n2. Extract to a local directory (e.g. \"/scratch/gdata.NET\")\n3. Use your distribution's package management to install Mono. Alternatively, you can download it from \u003chttp://www.mono-project.com\u003e.\n4. In some distributions you have to make sure that the nunit.framework.dll file is properly linked into the mono library. If mono was installed to \"/usr/lib/mono\", then ensure that there are symbolic links in \"/usr/lib/mono/1.0\" and \"/usr/lib/mono/2.0\" for nunit.framework.dll (which should be installed in \"/usr/lib/mono/gac/nunit.framework/\\\u003csomeversionstring\\\u003e/nunit.framework.dll\").\n\n### Compiling and running samples\n\n1. Assuming you installed the client library to \"/scratch/gdata.NET\", change to the \"/scratch/gdata.NET/clients/cs\" directory.\n2. Edit the Makefile depending on what version of .NET you wish to use. For .NET 1.x, use `CSC=mcs` and for .NET 2.x, use `CSC=gmcs`.\n3. Run `make` to compile the libraries and sample applications.\n4. Execute `make install` if you want to install the client library DLLs into the Mono library.\n\n### Developing your own application\n\nIf you executed a `make install` after compiling the client library, you should be able to include the libraries in your own code by passing `-r:Google.GData.Extensions.dll -r:Google.GData.Client.dll` to the Mono C# compiler along with references to the DLL files of any specific service extensions you wish to use.\n\n### Running the NUnit tests\n\n1. Copy the unittests.dll.config file from \"/scratch/gdata.NET/clients/cs/src/unittests\" to \"/scratch/gdata.NET/clients/cs/\".\n2. Edit \"/scratch/gdata.NET/clients/cs/unittests.dll.config\" to include the appropriate information for the tests you are running. For example, Base requires an API key and Calendar requires a username and password. I recommend using a test account without any live data to avoid having information deleted by the unit tests.\n3. After compiling the library there will be a unittests.dll file in \"/scratch/gdata.NET/clients/cs\". Use this DLL with your NUnit test manager of choice (nunit-console, gnunit, etc.).\n\n### Conclusion\n\nNow you should be able to compile the libraries and run the sample code. This is only the beginning, however. I encourage you to read through the documentation found in the \".../clients/cs/docs\" directory of the client library.\nYou might also want to check out the [.NET Client Library Developer's Guide](/gdata/client-cs), the [project page](http://code.google.com/p/google-gdata/) and [reference guide](http://google-gdata.googlecode.com/svn/docs/Index.html), and the [Google Data .NET client library forum](http://groups.google.com/group/gdata-dotnet-client-library).\n\nTools referenced in this article:\n\n- [Mono Project](http://www.mono-project.com/Main_Page)\n- [Visual Studio](http://msdn2.microsoft.com/en-us/vstudio/default.aspx)\n- [Visual C# 2008 Express Edition](http://msdn.microsoft.com/en-us/library/orm-9780596521066-01-02.aspx)\n- [NUnit](http://www.nunit.org/)\n\nGood luck on your next .NET application!"]]