การเริ่มต้นใช้งานไลบรารีของไคลเอ็นต์ .NET
จัดทุกอย่างให้เป็นระเบียบอยู่เสมอด้วยคอลเล็กชัน
บันทึกและจัดหมวดหมู่เนื้อหาตามค่ากำหนดของคุณ
Jeff Fisher ทีม Google Data APIs
สิงหาคม 2007
บทนำ
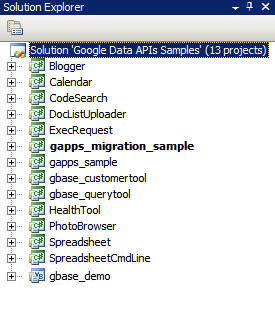
รูปที่ 1: โซลูชัน Google Data API
สำหรับนักพัฒนาแอปหลายๆ คน ส่วนที่ยากที่สุดของโปรเจ็กต์ใหม่คือการเริ่มต้น ซึ่งได้แก่ การติดตั้งแพ็กเกจซอฟต์แวร์ใหม่ การกำหนดค่าสภาพแวดล้อมการพัฒนา และการเรียนรู้ไลบรารีใหม่ๆ ในบทความนี้ ฉันได้รวบรวมวิธีการทีละขั้นตอนในการเริ่มต้นใช้งานไลบรารีของไคลเอ็นต์ .NET โดยใช้ Visual Studio 2005 สำหรับ Windows หรือ Mono สำหรับ Linux และระบบปฏิบัติการ Unix อื่นๆ เราหวังว่าข้อมูลนี้จะช่วยให้คุณประหยัดเวลาในการเริ่มต้นใช้งานและเริ่มทำงานกับโค้ดได้อย่างรวดเร็ว
Visual Studio 2008
หากยังไม่ได้ติดตั้ง Visual Studio 2008 คุณอาจพิจารณาใช้ Visual C# 2008 Express Edition ซึ่งเป็น Visual Studio เวอร์ชันฟรีที่จะช่วยให้คุณทำงานกับไลบรารีไคลเอ็นต์ .NET ได้
การตั้งค่าสภาพแวดล้อม
- ดาวน์โหลด MSI เวอร์ชันล่าสุดของไลบรารีของไคลเอ็นต์จาก http://code.google.com/p/google-gdata/downloads/list
- เรียกใช้ไฟล์ MSI ที่ดาวน์โหลดมาเพื่อติดตั้งแพ็กเกจ โดยจะติดตั้งใน "C:\Program Files\Google\Google Data API SDK\" โดยค่าเริ่มต้น ตัวอย่างเพิ่มเติมในบทความนี้จะถือว่าคุณได้ติดตั้งไลบรารีของไคลเอ็นต์ไว้ในตำแหน่งนี้
- เปิดไฟล์โซลูชันชื่อ "Google Data API SDK" ในโฟลเดอร์ "Google Data API SDK" ในเมนูเริ่ม
การคอมไพล์และเรียกใช้ตัวอย่าง
- ตรวจสอบว่าการเรียกใช้ "Build > Build Solution" เสร็จสมบูรณ์โดยไม่มีข้อผิดพลาด
- หากต้องการสร้างบิลด์สำหรับแก้ไขข้อบกพร่อง ให้ไปที่ "Build > Configuration Manager" แล้วเลือก "Debug" เป็นการกำหนดค่าโซลูชันที่ใช้งานอยู่ จากนั้นเลือก "สร้าง > สร้างโซลูชัน"
- คุณจะค้นหาไฟล์ไบนารีและ DLL ที่เพิ่งคอมไพล์ได้ใน
"C:\Program Files\Google\Google Data API SDK\Sources\Samples\"
เช่น คุณเรียกใช้แอปพลิเคชันตัวอย่างสำหรับปฏิทินได้โดยการเรียกใช้ "C:\Program Files\Google\Google Data API SDK\Sources\Samples\calendar\bin\Debug\Calendar.exe" นอกจากนี้ยังมีทางลัดในเมนูเริ่มไปยังตัวอย่างเหล่านี้ด้วย
การพัฒนาแอปพลิเคชันของคุณเอง
หากต้องการพัฒนาในโปรเจ็กต์ภายนอกไฟล์โซลูชันที่จัดทำโดยไฟล์ MSI คุณจะต้องเพิ่มไฟล์ DLL ของไลบรารีของไคลเอ็นต์เป็นเส้นทางการอ้างอิง
- สร้างหรือเปิดโปรเจ็กต์ภายนอกโซลูชัน Google API SDK
- เลือก "เพิ่มข้อมูลอ้างอิง" จากเมนูโปรเจ็กต์
- คลิกแท็บเรียกดู
- ไปที่ไดเรกทอรี Redist ใน SDK: "C:\Program Files\Google\Google Data API SDK\Redist"
- เลือกไฟล์ DLL ที่โค้ดของคุณจะใช้ คุณจะต้องใช้ Google.GData.Extensions.dll และ Google.GData.Client.dll สำหรับโปรเจ็กต์ส่วนใหญ่ รวมถึงไฟล์ DLL ที่เจาะจงสำหรับบริการของ Google ที่คุณใช้ในแอปพลิเคชัน
หมายเหตุ: นอกจากนี้ยังมีไฟล์โซลูชันสำหรับไลบรารีของไคลเอ็นต์ในอุปกรณ์เคลื่อนที่ด้วย โดยค่าเริ่มต้นจะอยู่ใน "C:\Program Files\Google\Google Data API SDK\Sources\Library\VS2005.mobile" โซลูชันนี้จะคอมไพล์เฉพาะไฟล์ DLL สำหรับไลบรารีของไคลเอ็นต์
การเรียกใช้การทดสอบ NUnit
การตรวจสอบว่าการทดสอบ NUnit ที่เหมาะสมผ่านเป็นขั้นตอนสำคัญหากคุณทำการเปลี่ยนแปลงใดๆ ในไลบรารีไคลเอ็นต์หรือวางแผนที่จะมีส่วนร่วมในไลบรารีเหล่านั้น หากคุณวางแผนที่จะใช้ไลบรารีของไคลเอ็นต์โดยไม่มีการแก้ไข โดยปกติแล้วคุณไม่จำเป็นต้องเรียกใช้
- ดาวน์โหลดไฟล์ .NET 2.0 MSI ของ NUnit จาก http://www.nunit.org/index.php?p=download
- ติดตั้ง NUnit โดยเรียกใช้ไฟล์ MSI ตำแหน่งการติดตั้งเริ่มต้นจะคล้ายกับ "C:\Program Files\NUnit 2.4.8" คุณอาจต้องการเปลี่ยนเป็น "C:\Program Files\NUnit" เพื่อให้คุณอัปเกรด NUnit ในอนาคตได้โดยไม่ต้องเปลี่ยนเส้นทางในโปรเจ็กต์ Visual Studio
- ไปที่ไดเรกทอรี "C:\Program Files\Google\Google Data API SDK\Sources\Library\VS2005" แล้วเปิดไฟล์โซลูชันชื่อ "Google Data APIs"
คุณจะเห็นวิซาร์ดการแปลงเนื่องจากนี่คือไฟล์โปรเจ็กต์ Visual Studio 2005 คลิกผ่านข้อความแจ้งหรือคลิกปุ่ม "เสร็จสิ้น" โดยควรแสดงบันทึก Conversion ซึ่งคุณสามารถละเว้นได้
- ตอนนี้ต้องเพิ่ม NUnit เป็นเส้นทางการอ้างอิง คลิกขวาที่โปรเจ็กต์ "unittests" ใน Solution Explorer ทางด้านขวา แล้วเลือก "Properties" ตอนนี้ให้คลิกแท็บ "เส้นทางอ้างอิง" ในหน้าต่างที่เปิดขึ้น ป้อนตำแหน่งของไดเรกทอรีย่อย "bin" ของการติดตั้ง NUnit เป็นเส้นทางการอ้างอิง แล้วคลิก "เพิ่มโฟลเดอร์" เช่น หากติดตั้ง NUnit ไว้ที่ "C:\Program Files\NUnit\" คุณจะต้องป้อน "C:\Program Files\NUnit\bin" อย่าลืมบันทึกการเปลี่ยนแปลงนี้ก่อนดำเนินการต่อ
- ทำตามขั้นตอนที่ระบุไว้ในการคอมไพล์และการเรียกใช้ตัวอย่างเพื่อสร้างไลบรารีของไคลเอ็นต์และการทดสอบหน่วยใหม่
- คัดลอกไฟล์ "unittests.dll.config" ใน "C:\Program Files\Google\Google Data API SDK\Sources\Library\unittests\" ไปยังไดเรกทอรีบิลด์การแก้ไขข้อบกพร่อง "C:\Program Files\Google\Google Data API SDK\Source\Library\VS2005\unittests\bin\Debug\" อย่าลืมแก้ไขไฟล์เพื่อให้มีข้อมูลที่เหมาะสมสำหรับการทดสอบที่คุณกำลังเรียกใช้ เช่น Base ต้องใช้คีย์ API และ Calendar ต้องใช้ชื่อผู้ใช้และรหัสผ่าน เราขอแนะนำให้ใช้บัญชีทดสอบที่ไม่มีข้อมูลจริงเพื่อหลีกเลี่ยงไม่ให้การทดสอบหน่วยลบข้อมูล
- เปิด NUnit จากเมนูเริ่ม
- ไปที่ "File > Open Project" แล้วเลือกไฟล์ "unittests.dll" จาก "C:\Program Files\Google\Google Data API SDK\Source\Library\VS2005\unittests\bin\Debug\"
- เรียกใช้การทดสอบหน่วยที่คุณสนใจ โปรดทราบว่าการทดสอบบางอย่างต้องตั้งค่าพารามิเตอร์ใน unittests.dll.config จึงจะทำงานได้ หากคุณทำการทดสอบความเครียดสำหรับบริการบางอย่าง ระบบอาจแจ้งว่าบัญชีทดสอบของคุณสร้างสแปม และคุณจะไม่สามารถส่งเนื้อหาไปยังเซิร์ฟเวอร์ของ Google โดยอัตโนมัติได้โดยไม่ต้องเจอบททดสอบ CAPTCHA
โมโน
Mono เป็นโปรเจ็กต์โอเพนซอร์สที่ช่วยให้คุณเรียกใช้แอปพลิเคชันไคลเอ็นต์และเซิร์ฟเวอร์ .NET ใน Linux, Solaris, Mac OS X, Windows และ Unix ได้ เรามีไฟล์ ZIP แยกต่างหากของไลบรารีของไคลเอ็นต์สำหรับนักพัฒนาซอฟต์แวร์ที่ต้องการทำงานบนแพลตฟอร์มใดแพลตฟอร์มหนึ่งเหล่านี้
การตั้งค่าสภาพแวดล้อม
- ดาวน์โหลดไฟล์ ZIP ล่าสุดของไลบรารีของไคลเอ็นต์จาก http://code.google.com/p/google-gdata/downloads/list
- แตกไฟล์ไปยังไดเรกทอรีในเครื่อง (เช่น "/scratch/gdata.NET")
- ใช้การจัดการแพ็กเกจของ Distribution เพื่อติดตั้ง Mono
หรือจะดาวน์โหลดจาก http://www.mono-project.com ก็ได้
- ในการเผยแพร่บางครั้ง คุณต้องตรวจสอบว่าไฟล์ nunit.framework.dll ลิงก์กับไลบรารี Mono อย่างถูกต้อง หากติดตั้ง Mono ไว้ที่ "/usr/lib/mono" ให้ตรวจสอบว่ามีลิงก์สัญลักษณ์ใน "/usr/lib/mono/1.0" และ "/usr/lib/mono/2.0" สำหรับ nunit.framework.dll (ซึ่งควรติดตั้งไว้ที่ "/usr/lib/mono/gac/nunit.framework/<someversionstring>/nunit.framework.dll")
การคอมไพล์และเรียกใช้ตัวอย่าง
- สมมติว่าคุณติดตั้งไลบรารีของไคลเอ็นต์ไว้ที่ "/scratch/gdata.NET" ให้เปลี่ยนไปที่ไดเรกทอรี "/scratch/gdata.NET/clients/cs"
- แก้ไข Makefile ตามเวอร์ชันของ .NET ที่ต้องการใช้ สำหรับ .NET 1.x ให้ใช้
CSC=mcs
และสำหรับ .NET 2.x ให้ใช้ CSC=gmcs
- เรียกใช้
make
เพื่อคอมไพล์ไลบรารีและแอปพลิเคชันตัวอย่าง
- เรียกใช้
make install
หากต้องการติดตั้ง DLL ของไลบรารีของไคลเอ็นต์ลงในไลบรารี Mono
การพัฒนาแอปพลิเคชันของคุณเอง
หากคุณเรียกใช้ make install
หลังจากคอมไพล์ไลบรารีของไคลเอ็นต์ คุณควรจะรวมไลบรารีไว้ในโค้ดของคุณเองได้โดยส่ง -r:Google.GData.Extensions.dll -r:Google.GData.Client.dll
ไปยังคอมไพเลอร์ Mono C# พร้อมกับการอ้างอิงไปยังไฟล์ DLL ของส่วนขยายบริการที่เฉพาะเจาะจงที่คุณต้องการใช้
การเรียกใช้การทดสอบ NUnit
- คัดลอกไฟล์ unittests.dll.config จาก "/scratch/gdata.NET/clients/cs/src/unittests" ไปยัง "/scratch/gdata.NET/clients/cs/"
- แก้ไข "/scratch/gdata.NET/clients/cs/unittests.dll.config" เพื่อรวมข้อมูลที่เหมาะสมสำหรับการทดสอบที่คุณกำลังเรียกใช้ เช่น Base ต้องใช้คีย์ API และ Calendar ต้องใช้ชื่อผู้ใช้และรหัสผ่าน เราขอแนะนำให้ใช้บัญชีทดสอบที่ไม่มีข้อมูลจริงเพื่อหลีกเลี่ยงไม่ให้การทดสอบหน่วยลบข้อมูล
- หลังจากคอมไพล์ไลบรารีแล้ว จะมีไฟล์ unittests.dll ใน "/scratch/gdata.NET/clients/cs" ใช้ DLL นี้กับเครื่องมือจัดการการทดสอบ NUnit ที่คุณเลือก (nunit-console, gnunit ฯลฯ)
บทสรุป
ตอนนี้คุณควรจะคอมไพล์ไลบรารีและเรียกใช้โค้ดตัวอย่างได้แล้ว อย่างไรก็ตาม นี่เป็นเพียงจุดเริ่มต้นเท่านั้น เราขอแนะนำให้อ่านเอกสารประกอบที่อยู่ในไดเรกทอรี ".../clients/cs/docs" ของไลบรารีของไคลเอ็นต์
นอกจากนี้ คุณยังดูคู่มือสำหรับนักพัฒนาซอฟต์แวร์เกี่ยวกับไลบรารีของไคลเอ็นต์ .NET, หน้าโปรเจ็กต์และคู่มืออ้างอิง รวมถึงฟอรัมไลบรารีของไคลเอ็นต์ Google Data .NET ได้ด้วย
เครื่องมือที่อ้างอิงในบทความนี้
ขอให้โชคดีกับแอปพลิเคชัน .NET ตัวถัดไป
เนื้อหาของหน้าเว็บนี้ได้รับอนุญาตภายใต้ใบอนุญาตที่ต้องระบุที่มาของครีเอทีฟคอมมอนส์ 4.0 และตัวอย่างโค้ดได้รับอนุญาตภายใต้ใบอนุญาต Apache 2.0 เว้นแต่จะระบุไว้เป็นอย่างอื่น โปรดดูรายละเอียดที่นโยบายเว็บไซต์ Google Developers Java เป็นเครื่องหมายการค้าจดทะเบียนของ Oracle และ/หรือบริษัทในเครือ
อัปเดตล่าสุด 2025-07-27 UTC
[null,null,["อัปเดตล่าสุด 2025-07-27 UTC"],[[["\u003cp\u003eThis guide provides step-by-step instructions for setting up and using the Google Data .NET client library with either Visual Studio 2008 or Mono.\u003c/p\u003e\n"],["\u003cp\u003eDevelopers can use this library to interact with various Google services like Calendar by compiling and running provided sample applications or by developing their own applications.\u003c/p\u003e\n"],["\u003cp\u003eThe guide includes details on compiling the library, running provided unit tests for verifying functionality, and configuring the development environment for both Windows and Unix-based systems.\u003c/p\u003e\n"],["\u003cp\u003eAdditional resources such as the .NET Client Library Developer's Guide and project forums are available for further assistance.\u003c/p\u003e\n"]]],[],null,["# Getting Started with the .NET Client Library\n\n*Jeff Fisher, Google Data APIs team\nAugust 2007*\n\n- [Introduction](#introduction)\n- [Visual Studio 2008](#vs2005)\n - [Setting up your environment](#vssetup)\n - [Compiling and running samples](#vscompile)\n - [Developing your own application](#vsdevelop)\n - [Running the NUnit tests](#vsnunit)\n- [Mono](#mono)\n - [Setting up your environment](#monosetup)\n - [Compiling and running samples](#monocompile)\n - [Developing your own application](#monodevelop)\n - [Running the NUnit tests](#mononunit)\n- [Conclusion](#conclusion)\n\n### Introduction\n\n\u003cbr /\u003e\n\n**Figure 1: The Google Data API solution**\n\nFor many developers, the most difficult part of a new project is getting the ball rolling-installing new software packages, configuring a development environment, and learning new libraries. In this article, I have pulled together some step-by-step instructions for how to begin with the .NET client library using either Visual Studio 2005 for Windows or Mono for Linux and other Unix operating systems. It is my hope that this will save you some time in getting started and let you quickly start working with some code.\n\nVisual Studio 2008\n------------------\n\nIf you do not already have Visual Studio 2008 installed, you may want to consider using [Visual C# 2008 Express Edition](http://msdn.microsoft.com/en-us/library/orm-9780596521066-01-02.aspx), a free version of Visual Studio that will allow you to work with the .NET client library.\n\n### Setting up your environment\n\n1. Download the latest MSI release of the client library from [http://code.google.com/p/google-gdata/downloads/list](//code.google.com/p/google-gdata/downloads/list).\n2. Run the downloaded MSI file to install the package. It will install to \"C:\\\\Program Files\\\\Google\\\\Google Data API SDK\\\\\" by default. Further examples in this article will assume you installed the client library to this location.\n3. Open the solution file called \"Google Data API SDK\" in the \"Google Data API SDK\" folder in the Start Menu.\n\n### Compiling and running samples\n\n1. Verify that running \"Build \\\u003e Build Solution\" completes without any errors.\n2. To create a Debug build go to \"Build \\\u003e Configuration Manager\" and select \"Debug\" as the active solution configuration. Then select \"Build \\\u003e Build Solution\".\n3. The binaries and DLL files you have just compiled can be found in \"C:\\\\Program Files\\\\Google\\\\Google Data API SDK\\\\Sources\\\\Samples\\\\\" For example, you can run the sample application for Calendar by executing \"C:\\\\Program Files\\\\Google\\\\Google Data API SDK\\\\Sources\\\\Samples\\\\calendar\\\\bin\\\\Debug\\\\Calendar.exe\". There are also some Start Menu shortcuts to these samples.\n\n### Developing your own application\n\nIf you want to develop in a project outside of the solution file provided by the MSI file, you need to add the client library DLL files as a reference path.\n\n1. Create or open a project outside of the Google API SDK solution.\n2. Select \"Add Reference\" from the Project menu.\n3. Click on the Browse tab.\n4. Navigate to the Redist directory in the SDK: \"C:\\\\Program Files\\\\Google\\\\Google Data API SDK\\\\Redist\".\n5. Select the DLL files that will be used by your code. Google.GData.Extensions.dll and Google.GData.Client.dll will be needed for most projects, along with the DLL file specific to the Google service(s) you are using in your application.\n\n**Note:** There is also a solution file for client libraries on Mobile devices. It is found in \"C:\\\\Program Files\\\\Google\\\\Google Data API SDK\\\\Sources\\\\Library\\\\VS2005.mobile\" by default. This solution will only compile the DLL files for the client libraries.\n\n### Running the NUnit tests\n\nMaking sure the appropriate NUnit tests pass is an important step if you make any changes to the client libraries or plan to contribute to them. If you plan to use the client libraries without modifications then there is normally no need to run them.\n\n1. Download the .NET 2.0 MSI file release of NUnit from \u003chttp://www.nunit.org/index.php?p=download\u003e.\n2. Install NUnit by running the MSI file. The default install location is similar to \"C:\\\\Program Files\\\\NUnit 2.4.8\". You may wish to change this to something like \"C:\\\\Program Files\\\\NUnit\" so you can upgrade NUnit in the future without having to change the path in your Visual Studio project.\n3. Go to the \"C:\\\\Program Files\\\\Google\\\\Google Data API SDK\\\\Sources\\\\Library\\\\VS2005\" directory and open the solution file named \"Google Data APIs\". You will see the Conversion Wizard since this is a Visual Studio 2005 project file. Either click through the prompts or simply click on the \"Finish\" button. It should display the conversion log, which can be ignored.\n4. Now NUnit must be added as a reference path. Right click on the \"unittests\" project in the Solution Explorer on the right and select \"Properties\". Now click on the \"Reference Paths\" tab within the window that opens. Enter in the location of the \"bin\" subdirectory of the NUnit installation as a reference path and click \"Add Folder\". For example, if NUnit is installed to \"C:\\\\Program Files\\\\NUnit\\\\\", one would enter \"C:\\\\Program Files\\\\NUnit\\\\bin\". Be sure to save this change before continuing.\n5. Follow the steps listed in [Compiling and running samples](#vscompile) to rebuild the client library and the unit tests.\n6. Copy the \"unittests.dll.config\" file in \"C:\\\\Program Files\\\\Google\\\\Google Data API SDK\\\\Sources\\\\Library\\\\unittests\\\\\" to your debug build directory \"C:\\\\Program Files\\\\Google\\\\Google Data API SDK\\\\Source\\\\Library\\\\VS2005\\\\unittests\\\\bin\\\\Debug\\\\\". Remember to edit the file to include the appropriate information for the tests you are running. For example, Base requires an API key and Calendar requires a username and password. It is recommended to use a test account without any live data to avoid having information deleted by the unit tests.\n7. Open NUnit from the Start Menu.\n8. Go to \"File \\\u003e Open Project\" and select the \"unittests.dll\" file from \"C:\\\\Program Files\\\\Google\\\\Google Data API SDK\\\\Source\\\\Library\\\\VS2005\\\\unittests\\\\bin\\\\Debug\\\\\".\n9. Run the unit tests you are interested in. Remember that certain tests require parameters be set in unittests.dll.config to work. If you run the stress tests for certain services you may have your test account flagged as generating spam and be unable to programmatically submit content to Google servers without encountering CAPTCHA challenges.\n\nMono\n----\n\nMono is an open source project that allows you to run .NET client and server applications on Linux, Solaris, Mac OS X, Windows, and Unix. We offer a separate ZIP file of our client library for developers who want to work on one of these platforms.\n\n### Setting up your environment\n\n1. Download the latest ZIP file release of the client library from [http://code.google.com/p/google-gdata/downloads/list](//code.google.com/p/google-gdata/downloads/list)\n2. Extract to a local directory (e.g. \"/scratch/gdata.NET\")\n3. Use your distribution's package management to install Mono. Alternatively, you can download it from \u003chttp://www.mono-project.com\u003e.\n4. In some distributions you have to make sure that the nunit.framework.dll file is properly linked into the mono library. If mono was installed to \"/usr/lib/mono\", then ensure that there are symbolic links in \"/usr/lib/mono/1.0\" and \"/usr/lib/mono/2.0\" for nunit.framework.dll (which should be installed in \"/usr/lib/mono/gac/nunit.framework/\\\u003csomeversionstring\\\u003e/nunit.framework.dll\").\n\n### Compiling and running samples\n\n1. Assuming you installed the client library to \"/scratch/gdata.NET\", change to the \"/scratch/gdata.NET/clients/cs\" directory.\n2. Edit the Makefile depending on what version of .NET you wish to use. For .NET 1.x, use `CSC=mcs` and for .NET 2.x, use `CSC=gmcs`.\n3. Run `make` to compile the libraries and sample applications.\n4. Execute `make install` if you want to install the client library DLLs into the Mono library.\n\n### Developing your own application\n\nIf you executed a `make install` after compiling the client library, you should be able to include the libraries in your own code by passing `-r:Google.GData.Extensions.dll -r:Google.GData.Client.dll` to the Mono C# compiler along with references to the DLL files of any specific service extensions you wish to use.\n\n### Running the NUnit tests\n\n1. Copy the unittests.dll.config file from \"/scratch/gdata.NET/clients/cs/src/unittests\" to \"/scratch/gdata.NET/clients/cs/\".\n2. Edit \"/scratch/gdata.NET/clients/cs/unittests.dll.config\" to include the appropriate information for the tests you are running. For example, Base requires an API key and Calendar requires a username and password. I recommend using a test account without any live data to avoid having information deleted by the unit tests.\n3. After compiling the library there will be a unittests.dll file in \"/scratch/gdata.NET/clients/cs\". Use this DLL with your NUnit test manager of choice (nunit-console, gnunit, etc.).\n\n### Conclusion\n\nNow you should be able to compile the libraries and run the sample code. This is only the beginning, however. I encourage you to read through the documentation found in the \".../clients/cs/docs\" directory of the client library.\nYou might also want to check out the [.NET Client Library Developer's Guide](/gdata/client-cs), the [project page](http://code.google.com/p/google-gdata/) and [reference guide](http://google-gdata.googlecode.com/svn/docs/Index.html), and the [Google Data .NET client library forum](http://groups.google.com/group/gdata-dotnet-client-library).\n\nTools referenced in this article:\n\n- [Mono Project](http://www.mono-project.com/Main_Page)\n- [Visual Studio](http://msdn2.microsoft.com/en-us/vstudio/default.aspx)\n- [Visual C# 2008 Express Edition](http://msdn.microsoft.com/en-us/library/orm-9780596521066-01-02.aspx)\n- [NUnit](http://www.nunit.org/)\n\nGood luck on your next .NET application!"]]