Koleksiyonlar ile düzeninizi koruyun
İçeriği tercihlerinize göre kaydedin ve kategorilere ayırın.
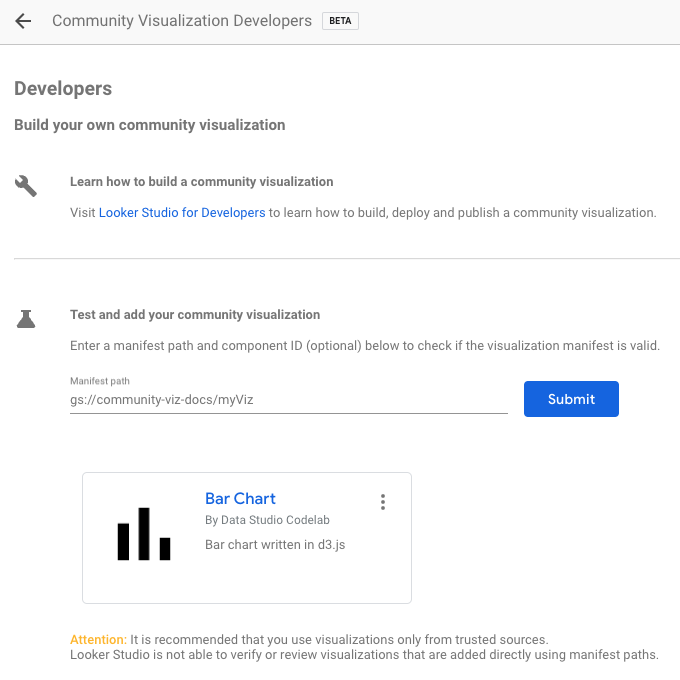
Geliştirdiğiniz bir topluluk görselleştirmesini yüklemek için manifest dosyasının konumunu gs:// ile ekleyin.
Raporunuzu düzenleme
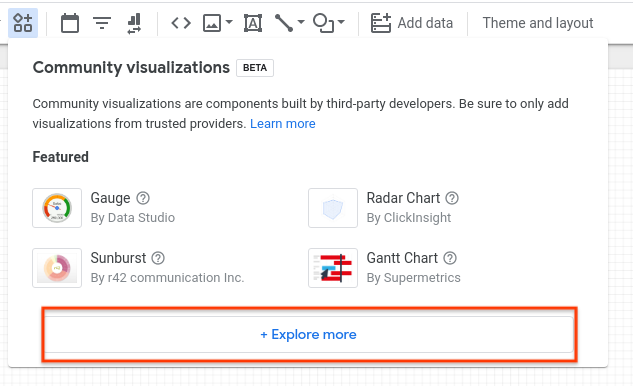
Araç çubuğunda Topluluk görselleştirmeleri ve bileşenleri'ni tıklayın.
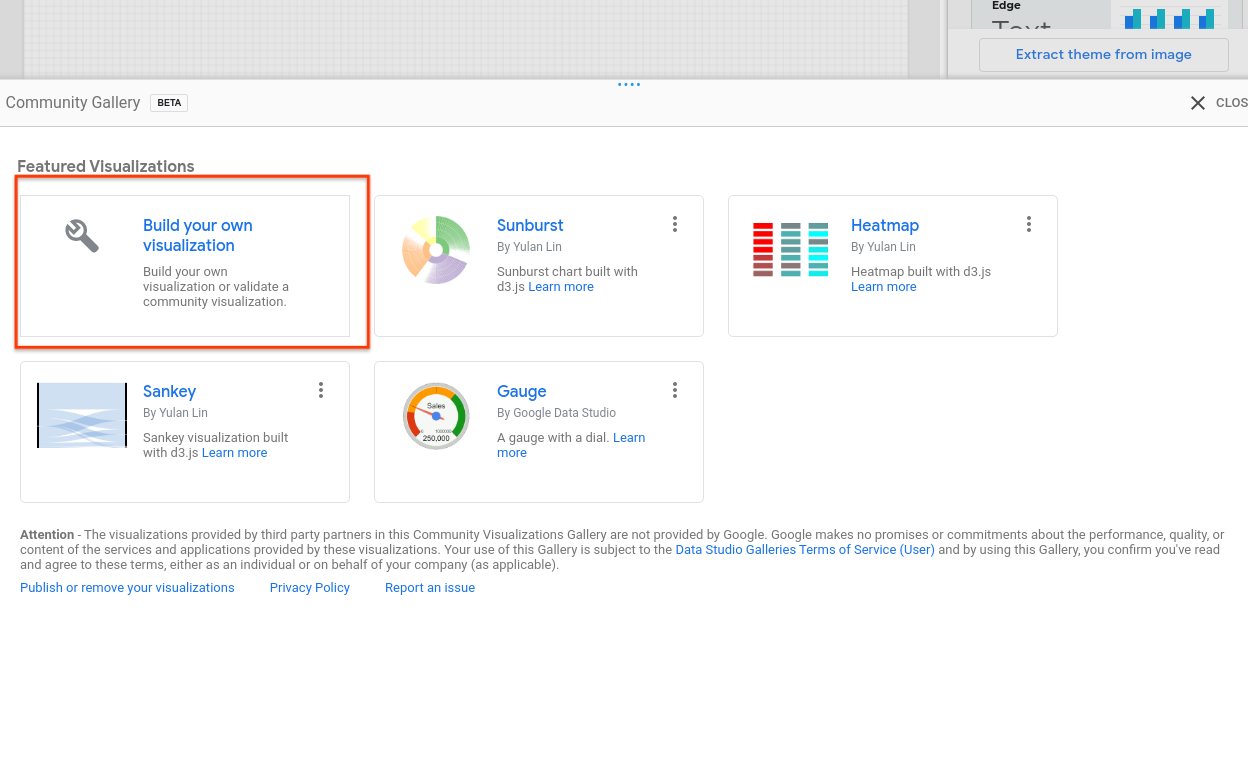
İletişim kutusunda, Topluluk Galerisi gölgesini açmak için Daha fazlasını keşfet'i tıklayın
Kendi görselleştirmenizi oluşturun'u tıklayın
Manifest Yolunuzu girin ve Gönder'i tıklayın. Manifest dosyanızdaki her bileşen için bir görselleştirme simgesi oluşturulur. Raporunuza eklemek için
bir görselleştirme simgesini tıklayın.
Sonraki adımlar
Bir topluluk görselleştirmesi yazıp dağıttığınıza göre, derlediğiniz görselleştirmeleri paylaşabilirsiniz.
[null,null,["Son güncelleme tarihi: 2025-07-25 UTC."],[[["\u003cp\u003eCommunity Visualization is a Developer Preview feature allowing users to load and utilize custom visualizations in Looker Studio reports.\u003c/p\u003e\n"],["\u003cp\u003eUsers can load their developed community visualizations by providing the manifest file's Google Cloud Storage path.\u003c/p\u003e\n"],["\u003cp\u003eAdding a community visualization involves navigating to the Community Gallery within the report editor and providing the manifest path.\u003c/p\u003e\n"],["\u003cp\u003eEach visualization within the manifest will be represented by an icon which can be clicked and added to the report.\u003c/p\u003e\n"],["\u003cp\u003eAfter development and deployment, users are encouraged to share their community visualizations with others.\u003c/p\u003e\n"]]],[],null,["# Using your visualization\n\n| **Note:** The Community Visualization feature is in \"Developer Preview\". To learn more about upcoming features and improvements during this period visit the [Developer Preview](/looker-studio/visualization/developer-preview) page.\n\nTo load a community visualization you've developed, use the location of the\nmanifest file prefixed by `gs://`.\n\n1. Edit your report\n2. In the toolbar, click **Community visualizations and components**\n3. In the dialog, click **Explore more** to open the Community Gallery shade\n4. Click **Build your own visualization**\n5. Enter your **Manifest Path** and click **Submit**. One visualization icon will be rendered for each component in your manifest. Click a visualization icon to add it to your report.\n\nNext steps\n----------\n\nNow that you have written and deployed a community visualization, [share](/looker-studio/visualization/sharing) the\nvisualizations that you build."]]