[Video](https://www.youtube.com/watch?v=iENK5EDO2iU)
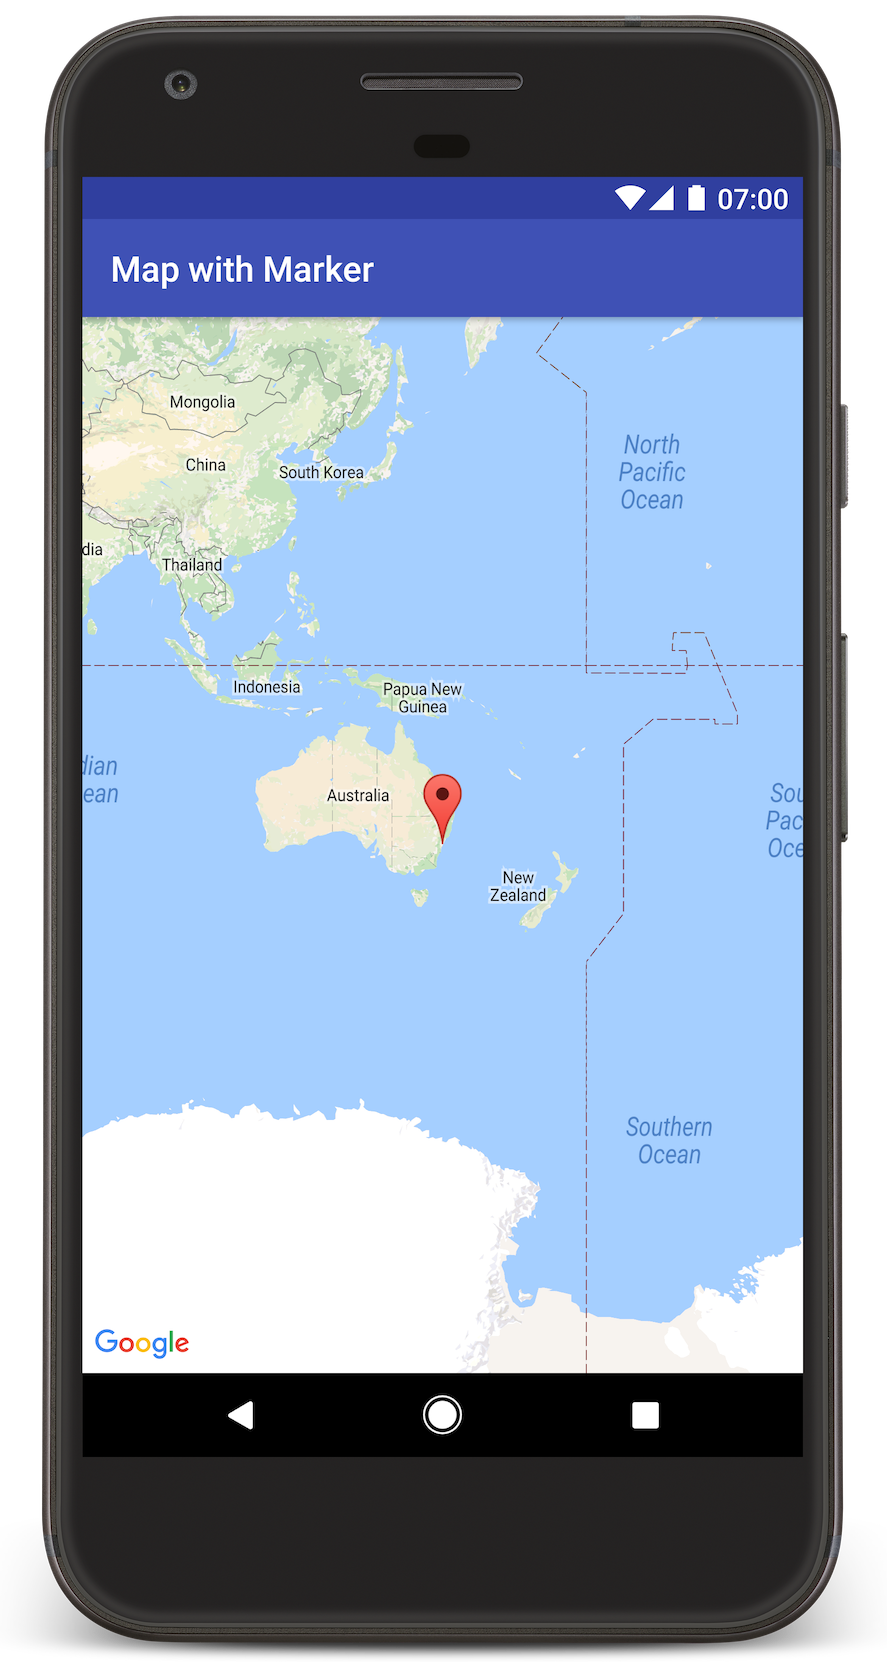
This tutorial shows you how to add a Google map to your Android app. The map
includes a marker, also called a pin, to indicate a specific location.
Follow the tutorial to build an Android app using the
Maps SDK for Android. The recommended development environment is
[Android Studio](https://developer.android.com/studio/).
## Get the code
[Clone or download the Google Maps Android API v2 Samples repository](https://github.com/googlemaps-samples/android-samples)
from GitHub.
View the Java version of the activity:
```java
// Copyright 2020 Google LLC
//
// Licensed under the Apache License, Version 2.0 (the "License");
// you may not use this file except in compliance with the License.
// You may obtain a copy of the License at
//
// http://www.apache.org/licenses/LICENSE-2.0
//
// Unless required by applicable law or agreed to in writing, software
// distributed under the License is distributed on an "AS IS" BASIS,
// WITHOUT WARRANTIES OR CONDITIONS OF ANY KIND, either express or implied.
// See the License for the specific language governing permissions and
// limitations under the License.
package com.example.mapwithmarker;
import android.os.Bundle;
import androidx.appcompat.app.AppCompatActivity;
import com.google.android.gms.maps.CameraUpdateFactory;
import com.google.android.gms.maps.GoogleMap;
import com.google.android.gms.maps.OnMapReadyCallback;
import com.google.android.gms.maps.SupportMapFragment;
import com.google.android.gms.maps.model.LatLng;
import com.google.android.gms.maps.model.MarkerOptions;
/** An activity that displays a Google map with a marker (pin) to indicate a particular location. */
public class MapsMarkerActivity extends AppCompatActivity implements OnMapReadyCallback {
@Override
protected void onCreate(Bundle savedInstanceState) {
super.onCreate(savedInstanceState);
// Retrieve the content view that renders the map.
setContentView(R.layout.activity_maps);
// Get the SupportMapFragment and request notification when the map is ready to be used.
SupportMapFragment mapFragment =
(SupportMapFragment) getSupportFragmentManager().findFragmentById(R.id.map);
mapFragment.getMapAsync(this);
}
/**
* Manipulates the map when it's available. The API invokes this callback when the map is ready
* to be used. This is where we can add markers or lines, add listeners or move the camera. In
* this case, we just add a marker near Sydney, Australia. If Google Play services is not
* installed on the device, the user receives a prompt to install Play services inside the
* SupportMapFragment. The API invokes this method after the user has installed Google Play
* services and returned to the app.
*/
@Override
public void onMapReady(GoogleMap googleMap) {
// Add a marker in Sydney, Australia,
// and move the map's camera to the same location.
LatLng sydney = new LatLng(-33.852, 151.211);
googleMap.addMarker(new MarkerOptions().position(sydney).title("Marker in Sydney"));
googleMap.moveCamera(CameraUpdateFactory.newLatLng(sydney));
}
}
```
View the Kotlin version of the activity:
```kotlin
// Copyright 2020 Google LLC
//
// Licensed under the Apache License, Version 2.0 (the "License");
// you may not use this file except in compliance with the License.
// You may obtain a copy of the License at
//
// http://www.apache.org/licenses/LICENSE-2.0
//
// Unless required by applicable law or agreed to in writing, software
// distributed under the License is distributed on an "AS IS" BASIS,
// WITHOUT WARRANTIES OR CONDITIONS OF ANY KIND, either express or implied.
// See the License for the specific language governing permissions and
// limitations under the License.
package com.example.mapwithmarker
import android.os.Bundle
import androidx.appcompat.app.AppCompatActivity
import com.google.android.gms.maps.CameraUpdateFactory
import com.google.android.gms.maps.GoogleMap
import com.google.android.gms.maps.OnMapReadyCallback
import com.google.android.gms.maps.SupportMapFragment
import com.google.android.gms.maps.model.LatLng
import com.google.android.gms.maps.model.MarkerOptions
/**
* An activity that displays a Google map with a marker (pin) to indicate a particular location.
*/
class MapsMarkerActivity :
AppCompatActivity(),
OnMapReadyCallback {
override fun onCreate(savedInstanceState: Bundle?) {
super.onCreate(savedInstanceState)
// Retrieve the content view that renders the map.
setContentView(R.layout.activity_maps)
// Get the SupportMapFragment and request notification when the map is ready to be used.
val mapFragment = supportFragmentManager.findFragmentById(R.id.map) as? SupportMapFragment
mapFragment?.getMapAsync(this)
}
override fun onMapReady(googleMap: GoogleMap) {
val sydney = LatLng(-33.852, 151.211)
googleMap.addMarker(
MarkerOptions()
.position(sydney)
.title("Marker in Sydney"),
)
googleMap.moveCamera(CameraUpdateFactory.newLatLng(sydney))
}
}
```
## Set up your development project
Follow these steps to create the tutorial project in Android Studio.
1. [Download](https://developer.android.com/studio/index.html) and [install](https://developer.android.com/studio/install.html?pkg=studio) Android Studio.
2. [Add the **Google Play services** package](https://developer.android.com/studio/intro/update.html#sdk-manager) to Android Studio.
3. [Clone or download the Google Maps Android API v2 Samples repository](https://github.com/googlemaps-samples/android-samples) if you didn't do that when you started reading this tutorial.
4. Open the project in Android Studio:
- In Android Studio, select **File \> Open**.
- Go to the location where you saved the Google Maps Android API v2 Samples repository after downloading it, select the root `android-samples` directory, and click **Open**. Android Studio syncs the multi-module project using Gradle.
- In the Android Studio run configuration menu in the toolbar, select **tutorials.java.MapWithMarker** (source in `tutorials/java/MapWithMarker`) or **tutorials.kotlin.MapWithMarker** (source in `tutorials/kotlin/MapWithMarker`).
## Enable the necessary APIs and get an API key
To complete this tutorial, you need a Google Cloud project with the necessary
APIs enabled and an API key that's authorized to use the
Maps SDK for Android. For more details, see:
- [Set up your Google Cloud project](https://developers.google.com/maps/documentation/android-sdk/cloud-setup)
- [Use an API key](https://developers.google.com/maps/documentation/android-sdk/get-api-key.md.txt)
## Add the API key to your app
1. In the root `android-samples` directory (the same folder as `local.defaults.properties`), open or create a `secrets.properties` file. Don't check this file into version control.
2. Add the following string to `secrets.properties` and replace `YOUR_API_KEY`
with the value of your API key:
MAPS_API_KEY=YOUR_API_KEY
When you build your app, the
[Secrets Gradle Plugin for Android](https://github.com/google/secrets-gradle-plugin)
copies the API key and makes it available as a build variable in the
Android manifest, as explained in
[Check your Android manifest](https://developers.google.com/maps/documentation/android-sdk/map-with-marker.md.txt#manifest).
## Build and run your app
To build and run the app:
1. Connect an Android device to your computer. Follow the
[instructions](https://developer.android.com/studio/run/device.html) to enable developer options on your Android
device and configure your system to detect the device.
Alternatively, you can use the [Device Manager](https://developer.android.com/studio/run/managing-avds.html) in Android
Studio to configure a virtual device. When choosing an emulator, pick a
device profile with the Google Play icon in the **Play** column so that the
system image includes the Google APIs. For more details, see
[Set up an Android Studio project](https://developers.google.com/maps/documentation/android-sdk/config.md.txt).
2. In Android Studio, verify that **tutorials.java.MapWithMarker** or
**tutorials.kotlin.MapWithMarker** is selected in the run configuration
menu, then click **Run** and choose a device as prompted.
You can also build the tutorial from the root `android-samples` directory on
the command line:
./gradlew :tutorials:java:MapWithMarker:assembleDebug
./gradlew :tutorials:kotlin:MapWithMarker:assembleDebug
Android Studio invokes Gradle to build the app, and then runs the app on
the device or on the emulator. You should see a map with a marker pointing at
Sydney on the east coast of Australia, similar to the image on this page.
Troubleshooting:
- If you don't see a map, check that you've obtained an API key and added it to `secrets.properties`, as described in [Enable the necessary APIs and get an API key](https://developers.google.com/maps/documentation/android-sdk/map-with-marker.md.txt#api-key). Check [Logcat](https://developer.android.com/studio/debug/logcat) in Android Studio for error messages about the API key.
- Use the [Android Studio debugging tools](https://developer.android.com/studio/debug/logcat) to view logs and debug the app.
## Understand the code
This part of the tutorial explains the most significant parts of the
**MapWithMarker** app, to help you understand how to build a similar
app.
### Check your Android manifest
Note the following elements in your app's `AndroidManifest.xml` file:
- Add a `meta-data` element to embed the version of Google Play services that
the app was compiled with.
- Add a `meta-data` element specifying your API key. The sample accompanying
this tutorial maps the value for the API key to a build variable matching
the name of the key you defined earlier, `MAPS_API_KEY`.
When you build your app, the [Secrets Gradle Plugin for Android](https://github.com/google/secrets-gradle-plugin)
makes the keys in your `secrets.properties` file available as manifest build
variables.
In your module-level `build.gradle.kts` file, the
`com.google.android.libraries.mapsplatform.secrets-gradle-plugin` plugin and
the following `secrets` block configure the
[Secrets Gradle plugin](https://developers.google.com/maps/documentation/android-sdk/secrets-gradle-plugin.md.txt)
to read your API key from `secrets.properties` (with
`local.defaults.properties` as a fallback) and pass it to your Android
manifest:
```kotlin
secrets {
// To add your Maps API key to this project:
// 1. If the secrets.properties file does not exist, create it in the root directory (the same folder as the root local.properties file).
// 2. Add this line, where YOUR_API_KEY is your API key:
// MAPS_API_KEY=YOUR_API_KEY
propertiesFileName = "secrets.properties"
// A properties file containing default secret values. This file can be
// checked in version control.
defaultPropertiesFileName = "local.defaults.properties"
}
```
The following example shows a complete manifest:
```xml
```
### Add a map
Display a map, using the Maps SDK for Android.
1. Add a `` element to your activity's layout file,
`activity_maps.xml`. This element defines a
[`SupportMapFragment`](https://developers.google.com/android/reference/com/google/android/gms/maps/SupportMapFragment.md.txt) to act as a container for the map
and to provide access to the `GoogleMap` object. The tutorial uses the
AndroidX version of the map fragment, to ensure backward
compatibility with earlier versions of the Android framework.
```xml
```
2. In your activity's `onCreate` method, set the layout file as the content
view. Get a handle to the map fragment by calling
[`FragmentManager.findFragmentById`](https://developer.android.com/reference/androidx/fragment/app/FragmentManager#findFragmentById(int)). Then use
[`getMapAsync`](https://developers.google.com/android/reference/com/google/android/gms/maps/MapFragment.md.txt#getMapAsync(com.google.android.gms.maps.OnMapReadyCallback)) to register for the map callback:
### Java
```java
@Override
protected void onCreate(Bundle savedInstanceState) {
super.onCreate(savedInstanceState);
// Retrieve the content view that renders the map.
setContentView(R.layout.activity_maps);
// Get the SupportMapFragment and request notification when the map is ready to be used.
SupportMapFragment mapFragment =
(SupportMapFragment) getSupportFragmentManager().findFragmentById(R.id.map);
mapFragment.getMapAsync(this);
}
```
### Kotlin
```kotlin
override fun onCreate(savedInstanceState: Bundle?) {
super.onCreate(savedInstanceState)
// Retrieve the content view that renders the map.
setContentView(R.layout.activity_maps)
// Get the SupportMapFragment and request notification when the map is ready to be used.
val mapFragment = supportFragmentManager.findFragmentById(R.id.map) as? SupportMapFragment
mapFragment?.getMapAsync(this)
}
```
3. Implement the [`OnMapReadyCallback`](https://developers.google.com/android/reference/com/google/android/gms/maps/OnMapReadyCallback.md.txt) interface and
override the `onMapReady` method, to set up the map when the `GoogleMap`
object is available:
### Java
```java
public class MapsMarkerActivity extends AppCompatActivity implements OnMapReadyCallback {
// ...
@Override
public void onMapReady(GoogleMap googleMap) {
LatLng sydney = new LatLng(-33.852, 151.211);
googleMap.addMarker(new MarkerOptions().position(sydney).title("Marker in Sydney"));
}
}
```
### Kotlin
```kotlin
class MapsMarkerActivity :
AppCompatActivity(),
OnMapReadyCallback {
// ...
override fun onMapReady(googleMap: GoogleMap) {
val sydney = LatLng(-33.852, 151.211)
googleMap.addMarker(
MarkerOptions()
.position(sydney)
.title("Marker in Sydney"),
)
}
}
```
By default, the Maps SDK for Android displays the content of the
info window when the user taps a marker. There's no need to add a click listener
for the marker if you're happy to use the default behavior.
> [!NOTE]
> **Congratulations!** You've built an Android app that displays a Google map with a marker to indicate a particular location. You've also learned how to use the [Maps SDK for Android](https://developers.google.com/maps/documentation/android-sdk).
## Next steps
Learn more about the [map object](https://developers.google.com/maps/documentation/android-sdk/map.md.txt) and what you can do with
[markers](https://developers.google.com/maps/documentation/android-sdk/marker.md.txt).