Memilih Lokasi Saat Ini dan Menampilkan Detail pada Peta
Tutorial ini menunjukkan cara membangun aplikasi iOS yang mengambil lokasi perangkat saat ini, mengidentifikasi kemungkinan lokasi, meminta pengguna memilih yang paling cocok, dan menampilkan penanda peta untuk lokasi yang dipilih.
Metode ini cocok bagi mereka yang memiliki pengetahuan awal atau menengah tentang Swift atau Objective-C dan pengetahuan umum tentang Xcode. Untuk panduan tingkat lanjut cara membuat peta, baca panduan developer.
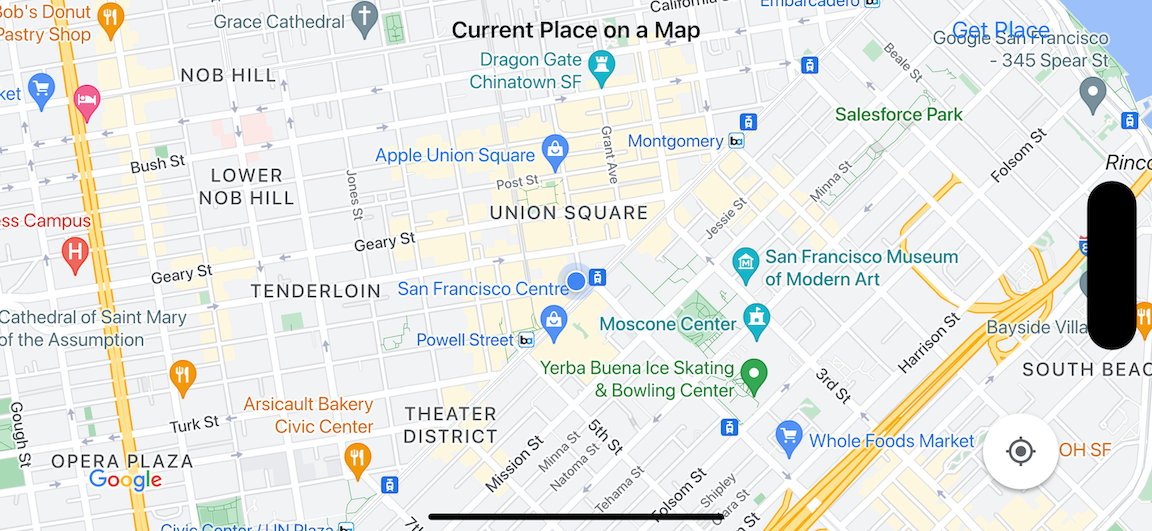
Anda akan membuat peta berikut menggunakan tutorial ini. Penanda peta diposisikan di San Francisco, California, namun akan berpindah ke lokasi mana pun perangkat atau simulator berada.
Tutorial ini menggunakan Places SDK for iOS, Maps SDK for iOS, dan framework Apple Core Location.
Mendapatkan kode
Clone atau download repositori contoh Google Maps untuk iOS dari GitHub.Atau, klik tombol berikut untuk mendownload kode sumber:
Swift MapViewController
/*
 * Copyright 2016 Google Inc. All rights reserved.
 *
 *
 * Licensed under the Apache License, Version 2.0 (the "License"); you may not use this
 * file except in compliance with the License. You may obtain a copy of the License at
 *
 *     http://www.apache.org/licenses/LICENSE-2.0
 *
 * Unless required by applicable law or agreed to in writing, software distributed under
 * the License is distributed on an "AS IS" BASIS, WITHOUT WARRANTIES OR CONDITIONS OF
 * ANY KIND, either express or implied. See the License for the specific language governing
 * permissions and limitations under the License.
 */

import UIKit
import GoogleMaps
import GooglePlaces

class MapViewController: UIViewController {

  var locationManager: CLLocationManager!
  var currentLocation: CLLocation?
  var mapView: GMSMapView!
  var placesClient: GMSPlacesClient!
  var preciseLocationZoomLevel: Float = 15.0
  var approximateLocationZoomLevel: Float = 10.0

  // An array to hold the list of likely places.
  var likelyPlaces: [GMSPlace] = []

  // The currently selected place.
  var selectedPlace: GMSPlace?

  // Update the map once the user has made their selection.
  @IBAction func unwindToMain(segue: UIStoryboardSegue) {
    // Clear the map.
    mapView.clear()

    // Add a marker to the map.
    if let place = selectedPlace {
      let marker = GMSMarker(position: place.coordinate)
      marker.title = selectedPlace?.name
      marker.snippet = selectedPlace?.formattedAddress
      marker.map = mapView
    }

    listLikelyPlaces()
  }

  override func viewDidLoad() {
    super.viewDidLoad()

    // Initialize the location manager.
    locationManager = CLLocationManager()
    locationManager.desiredAccuracy = kCLLocationAccuracyBest
    locationManager.requestWhenInUseAuthorization()
    locationManager.distanceFilter = 50
    locationManager.startUpdatingLocation()
    locationManager.delegate = self

    placesClient = GMSPlacesClient.shared()

    // A default location to use when location permission is not granted.
    let defaultLocation = CLLocation(latitude: -33.869405, longitude: 151.199)

    // Create a map.
    let zoomLevel = locationManager.accuracyAuthorization == .fullAccuracy ? preciseLocationZoomLevel : approximateLocationZoomLevel
    let camera = GMSCameraPosition.camera(withLatitude: defaultLocation.coordinate.latitude,
                                          longitude: defaultLocation.coordinate.longitude,
                                          zoom: zoomLevel)
    mapView = GMSMapView.map(withFrame: view.bounds, camera: camera)
    mapView.settings.myLocationButton = true
    mapView.autoresizingMask = [.flexibleWidth, .flexibleHeight]
    mapView.isMyLocationEnabled = true

    // Add the map to the view, hide it until we've got a location update.
    view.addSubview(mapView)
    mapView.isHidden = true

    listLikelyPlaces()
  }

  // Populate the array with the list of likely places.
  func listLikelyPlaces() {
    // Clean up from previous sessions.
    likelyPlaces.removeAll()

    let placeFields: GMSPlaceField = [.name, .coordinate]
    placesClient.findPlaceLikelihoodsFromCurrentLocation(withPlaceFields: placeFields) { (placeLikelihoods, error) in
      guard error == nil else {
        // TODO: Handle the error.
        print("Current Place error: \(error!.localizedDescription)")
        return
      }

      guard let placeLikelihoods = placeLikelihoods else {
        print("No places found.")
        return
      }

      // Get likely places and add to the list.
      for likelihood in placeLikelihoods {
        let place = likelihood.place
        self.likelyPlaces.append(place)
      }
    }
  }

  // Prepare the segue.
  override func prepare(for segue: UIStoryboardSegue, sender: Any?) {
    if segue.identifier == "segueToSelect" {
      if let nextViewController = segue.destination as? PlacesViewController {
        nextViewController.likelyPlaces = likelyPlaces
      }
    }
  }
}

// Delegates to handle events for the location manager.
extension MapViewController: CLLocationManagerDelegate {

  // Handle incoming location events.
  func locationManager(_ manager: CLLocationManager, didUpdateLocations locations: [CLLocation]) {
    let location: CLLocation = locations.last!
    print("Location: \(location)")

    let zoomLevel = locationManager.accuracyAuthorization == .fullAccuracy ? preciseLocationZoomLevel : approximateLocationZoomLevel
    let camera = GMSCameraPosition.camera(withLatitude: location.coordinate.latitude,
                                          longitude: location.coordinate.longitude,
                                          zoom: zoomLevel)

    if mapView.isHidden {
      mapView.isHidden = false
      mapView.camera = camera
    } else {
      mapView.animate(to: camera)
    }

    listLikelyPlaces()
  }

  // Handle authorization for the location manager.
  func locationManager(_ manager: CLLocationManager, didChangeAuthorization status: CLAuthorizationStatus) {
    // Check accuracy authorization
    let accuracy = manager.accuracyAuthorization
    switch accuracy {
    case .fullAccuracy:
        print("Location accuracy is precise.")
    case .reducedAccuracy:
        print("Location accuracy is not precise.")
    @unknown default:
      fatalError()
    }

    // Handle authorization status
    switch status {
    case .restricted:
      print("Location access was restricted.")
    case .denied:
      print("User denied access to location.")
      // Display the map using the default location.
      mapView.isHidden = false
    case .notDetermined:
      print("Location status not determined.")
    case .authorizedAlways: fallthrough
    case .authorizedWhenInUse:
      print("Location status is OK.")
    @unknown default:
      fatalError()
    }
  }

  // Handle location manager errors.
  func locationManager(_ manager: CLLocationManager, didFailWithError error: Error) {
    locationManager.stopUpdatingLocation()
    print("Error: \(error)")
  }
}
PlacesViewController Swift
/*
 * Copyright 2017 Google Inc. All rights reserved.
 *
 *
 * Licensed under the Apache License, Version 2.0 (the "License"); you may not use this
 * file except in compliance with the License. You may obtain a copy of the License at
 *
 *     http://www.apache.org/licenses/LICENSE-2.0
 *
 * Unless required by applicable law or agreed to in writing, software distributed under
 * the License is distributed on an "AS IS" BASIS, WITHOUT WARRANTIES OR CONDITIONS OF
 * ANY KIND, either express or implied. See the License for the specific language governing
 * permissions and limitations under the License.
 */

import UIKit
import GooglePlaces

class PlacesViewController: UIViewController {

  @IBOutlet weak var tableView: UITableView!

  // An array to hold the list of possible locations.
  var likelyPlaces: [GMSPlace] = []
  var selectedPlace: GMSPlace?

  // Cell reuse id (cells that scroll out of view can be reused).
  let cellReuseIdentifier = "cell"

  override func viewDidLoad() {
    super.viewDidLoad()

    // Register the table view cell class and its reuse id.
    tableView.register(UITableViewCell.self, forCellReuseIdentifier: cellReuseIdentifier)

    // This view controller provides delegate methods and row data for the table view.
    tableView.delegate = self
    tableView.dataSource = self

    tableView.reloadData()
  }

  // Pass the selected place to the new view controller.
  override func prepare(for segue: UIStoryboardSegue, sender: Any?) {
    if segue.identifier == "unwindToMain" {
      if let nextViewController = segue.destination as? MapViewController {
        nextViewController.selectedPlace = selectedPlace
      }
    }
  }
}

// Respond when a user selects a place.
extension PlacesViewController: UITableViewDelegate {
  func tableView(_ tableView: UITableView, didSelectRowAt indexPath: IndexPath) {
    selectedPlace = likelyPlaces[indexPath.row]
    performSegue(withIdentifier: "unwindToMain", sender: self)
  }

  // Adjust cell height to only show the first five items in the table
  // (scrolling is disabled in IB).
  func tableView(_ tableView: UITableView, heightForRowAt indexPath: IndexPath) -> CGFloat {
    return self.tableView.frame.size.height/5
  }

  // Make table rows display at proper height if there are less than 5 items.
  func tableView(_ tableView: UITableView, heightForFooterInSection section: Int) -> CGFloat {
    if (section == tableView.numberOfSections - 1) {
      return 1
    }
    return 0
  }
}

// Populate the table with the list of most likely places.
extension PlacesViewController: UITableViewDataSource {
  func tableView(_ tableView: UITableView, numberOfRowsInSection section: Int) -> Int {
    return likelyPlaces.count
  }

  func tableView(_ tableView: UITableView, cellForRowAt indexPath: IndexPath) -> UITableViewCell {
    let cell = tableView.dequeueReusableCell(withIdentifier: cellReuseIdentifier, for: indexPath)
    let collectionItem = likelyPlaces[indexPath.row]

    cell.textLabel?.text = collectionItem.name

    return cell
  }
}
Peta Obj-C
//
//  MapsViewController.m
//  current-place-on-map
//
//  Created by Chris Arriola on 9/18/20.
//  Copyright © 2020 William French. All rights reserved.
//

#import "MapViewController.h"
#import "PlacesViewController.h"
@import CoreLocation;
@import GooglePlaces;
@import GoogleMaps;

@interface MapViewController () <CLLocationManagerDelegate>

@end

@implementation MapViewController {
  CLLocationManager *locationManager;
  CLLocation * _Nullable currentLocation;
  GMSMapView *mapView;
  GMSPlacesClient *placesClient;
  float preciseLocationZoomLevel;
  float approximateLocationZoomLevel;

  // An array to hold the list of likely places.
  NSMutableArray<GMSPlace *> *likelyPlaces;

  // The currently selected place.
  GMSPlace * _Nullable selectedPlace;
}

- (void)viewDidLoad {
  [super viewDidLoad];
  preciseLocationZoomLevel = 15.0;
  approximateLocationZoomLevel = 15.0;

  // Initialize the location manager.
  locationManager = [[CLLocationManager alloc] init];
  locationManager.desiredAccuracy = kCLLocationAccuracyBest;
  [locationManager requestWhenInUseAuthorization];
  locationManager.distanceFilter = 50;
  [locationManager startUpdatingLocation];
  locationManager.delegate = self;

  placesClient = [GMSPlacesClient sharedClient];

  // A default location to use when location permission is not granted.
  CLLocationCoordinate2D defaultLocation = CLLocationCoordinate2DMake(-33.869405, 151.199);

  // Create a map.
  float zoomLevel = locationManager.accuracyAuthorization == CLAccuracyAuthorizationFullAccuracy ? preciseLocationZoomLevel : approximateLocationZoomLevel;
  GMSCameraPosition *camera = [GMSCameraPosition cameraWithLatitude:defaultLocation.latitude
                                                          longitude:defaultLocation.longitude
                                                               zoom:zoomLevel];
  mapView = [GMSMapView mapWithFrame:self.view.bounds camera:camera];
  mapView.settings.myLocationButton = YES;
  mapView.autoresizingMask = UIViewAutoresizingFlexibleWidth | UIViewAutoresizingFlexibleHeight;
  mapView.myLocationEnabled = YES;

  // Add the map to the view, hide it until we've got a location update.
  [self.view addSubview:mapView];
  mapView.hidden = YES;

  [self listLikelyPlaces];
}

// Populate the array with the list of likely places.
- (void) listLikelyPlaces
{
  // Clean up from previous sessions.
  likelyPlaces = [NSMutableArray array];

  GMSPlaceField placeFields = GMSPlaceFieldName | GMSPlaceFieldCoordinate;
  [placesClient findPlaceLikelihoodsFromCurrentLocationWithPlaceFields:placeFields callback:^(NSArray<GMSPlaceLikelihood *> * _Nullable likelihoods, NSError * _Nullable error) {
    if (error != nil) {
      // TODO: Handle the error.
      NSLog(@"Current Place error: %@", error.localizedDescription);
      return;
    }

    if (likelihoods == nil) {
      NSLog(@"No places found.");
      return;
    }

    for (GMSPlaceLikelihood *likelihood in likelihoods) {
      GMSPlace *place = likelihood.place;
      [likelyPlaces addObject:place];
    }
  }];
}

// Update the map once the user has made their selection.
- (void) unwindToMain:(UIStoryboardSegue *)segue
{
  // Clear the map.
  [mapView clear];

  // Add a marker to the map.
  if (selectedPlace != nil) {
    GMSMarker *marker = [GMSMarker markerWithPosition:selectedPlace.coordinate];
    marker.title = selectedPlace.name;
    marker.snippet = selectedPlace.formattedAddress;
    marker.map = mapView;
  }

  [self listLikelyPlaces];
}

// Prepare the segue.
- (void)prepareForSegue:(UIStoryboardSegue *)segue sender:(id)sender
{
  if ([segue.identifier isEqualToString:@"segueToSelect"]) {
    if ([segue.destinationViewController isKindOfClass:[PlacesViewController class]]) {
      PlacesViewController *placesViewController = (PlacesViewController *)segue.destinationViewController;
      placesViewController.likelyPlaces = likelyPlaces;
    }
  }
}

// Delegates to handle events for the location manager.
#pragma mark - CLLocationManagerDelegate

// Handle incoming location events.
- (void)locationManager:(CLLocationManager *)manager didUpdateLocations:(NSArray<CLLocation *> *)locations
{
  CLLocation *location = locations.lastObject;
  NSLog(@"Location: %@", location);

  float zoomLevel = locationManager.accuracyAuthorization == CLAccuracyAuthorizationFullAccuracy ? preciseLocationZoomLevel : approximateLocationZoomLevel;
  GMSCameraPosition * camera = [GMSCameraPosition cameraWithLatitude:location.coordinate.latitude
                                                           longitude:location.coordinate.longitude
                                                                zoom:zoomLevel];

  if (mapView.isHidden) {
    mapView.hidden = NO;
    mapView.camera = camera;
  } else {
    [mapView animateToCameraPosition:camera];
  }

  [self listLikelyPlaces];
}

// Handle authorization for the location manager.
- (void)locationManager:(CLLocationManager *)manager didChangeAuthorizationStatus:(CLAuthorizationStatus)status
{
  // Check accuracy authorization
  CLAccuracyAuthorization accuracy = manager.accuracyAuthorization;
  switch (accuracy) {
    case CLAccuracyAuthorizationFullAccuracy:
      NSLog(@"Location accuracy is precise.");
      break;
    case CLAccuracyAuthorizationReducedAccuracy:
      NSLog(@"Location accuracy is not precise.");
      break;
  }

  // Handle authorization status
  switch (status) {
    case kCLAuthorizationStatusRestricted:
      NSLog(@"Location access was restricted.");
      break;
    case kCLAuthorizationStatusDenied:
      NSLog(@"User denied access to location.");
      // Display the map using the default location.
      mapView.hidden = NO;
    case kCLAuthorizationStatusNotDetermined:
      NSLog(@"Location status not determined.");
    case kCLAuthorizationStatusAuthorizedAlways:
    case kCLAuthorizationStatusAuthorizedWhenInUse:
      NSLog(@"Location status is OK.");
  }
}

// Handle location manager errors.
- (void)locationManager:(CLLocationManager *)manager didFailWithError:(NSError *)error
{
  [manager stopUpdatingLocation];
  NSLog(@"Error: %@", error.localizedDescription);
}

@end
PlacesViewController Obj-C
// Copyright 2020 Google LLC
//
// Licensed under the Apache License, Version 2.0 (the "License");
// you may not use this file except in compliance with the License.
// You may obtain a copy of the License at
//
//      http://www.apache.org/licenses/LICENSE-2.0
//
// Unless required by applicable law or agreed to in writing, software
// distributed under the License is distributed on an "AS IS" BASIS,
// WITHOUT WARRANTIES OR CONDITIONS OF ANY KIND, either express or implied.
// See the License for the specific language governing permissions and
// limitations under the License.

#import "PlacesViewController.h"

@interface PlacesViewController () <UITableViewDataSource, UITableViewDelegate>
@property (nonatomic, weak) UITableView *tableView;
@end

@implementation PlacesViewController {
  // Cell reuse id (cells that scroll out of view can be reused).
  NSString *cellReuseIdentifier;
}

- (void)viewDidLoad {
  [super viewDidLoad];
  cellReuseIdentifier = @"cell";
}

-(void)prepareForSegue:(UIStoryboardSegue *)segue sender:(id)sender
{

}

#pragma mark - UITableViewDelegate

// Respond when a user selects a place.
-(void)tableView:(UITableView *)tableView didSelectRowAtIndexPath:(NSIndexPath *)indexPath
{
  self.selectedPlace = [self.likelyPlaces objectAtIndex:indexPath.row];
  [self performSegueWithIdentifier:@"unwindToMain" sender:self];
}

// Adjust cell height to only show the first five items in the table
// (scrolling is disabled in IB).
-(CGFloat)tableView:(UITableView *)tableView heightForRowAtIndexPath:(NSIndexPath *)indexPath
{
  return self.tableView.frame.size.height/5;
}

// Make table rows display at proper height if there are less than 5 items.
-(CGFloat)tableView:(UITableView *)tableView heightForFooterInSection:(NSInteger)section
{
  if (section == tableView.numberOfSections - 1) {
    return 1;
  }
  return 0;
}

#pragma mark - UITableViewDataSource

- (NSInteger)tableView:(UITableView *)tableView numberOfRowsInSection:(NSInteger)section
{
  return self.likelyPlaces.count;
}

- (UITableViewCell *)tableView:(UITableView *)tableView cellForRowAtIndexPath:(NSIndexPath *)indexPath
{
  return [tableView dequeueReusableCellWithIdentifier:cellReuseIdentifier forIndexPath:indexPath];
}
@end
Memulai
Swift Package Manager
Maps SDK for iOS dapat diinstal menggunakan Swift Package Manager.
- Pastikan Anda telah menghapus dependensi Maps SDK for iOS yang ada.
- Buka jendela terminal dan buka direktori
tutorials/current-place-on-map. -
Pastikan ruang kerja Xcode Anda sudah ditutup dan jalankan perintah berikut:
sudo gem install cocoapods-deintegrate cocoapods-clean
pod deintegrate
pod cache clean --all
rm Podfile
rm current-place-on-map.xcworkspace
- Buka project Xcode dan hapus podfile.
- Tambahkan Places SDK dan Maps SDK:
- Buka File > Add Package Dependencies.
- Masukkan https://github.com/googlemaps/ios-places-sdk sebagai URL, tekan Enter untuk menarik paket, lalu klik Tambahkan Paket.
- Masukkan https://github.com/googlemaps/ios-maps-sdk sebagai URL, tekan Enter untuk menarik paket, lalu klik Tambahkan Paket.
- Anda mungkin perlu mereset cache paket menggunakan File > Packages > Reset Package Cache.
Menggunakan CocoaPods
- Download dan instal Xcode versi 14.0 atau yang lebih baru.
- Jika Anda belum memiliki CocoaPods,
instal di macOS dengan menjalankan perintah berikut dari terminal:
sudo gem install cocoapods
- Buka direktori
tutorials/current-place-on-map. - Jalankan perintah
pod install. Tindakan ini akan menginstal Maps and Places SDK yang ditentukan diPodfile, beserta dependensi apa pun. - Jalankan
pod outdateduntuk membandingkan versi pod yang terinstal dengan update baru. Jika versi baru terdeteksi, jalankanpod updateuntuk mengupdatePodfiledan menginstal SDK terbaru. Untuk mengetahui detail selengkapnya, lihat Panduan CocoaPods. - Buka (klik dua kali) file current-place-on-map.xcworkspace project untuk membukanya di Xcode. Anda harus menggunakan file
.xcworkspaceuntuk membuka project.
Mendapatkan kunci API dan mengaktifkan API yang diperlukan
Untuk menyelesaikan tutorial ini, Anda memerlukan kunci Google API yang telah diberi otorisasi untuk menggunakan Maps SDK for iOS dan Places API.
- Ikuti petunjuk di Memulai Google Maps Platform untuk menyiapkan akun penagihan dan project yang diaktifkan dengan kedua produk ini.
- Ikuti petunjuk di Mendapatkan Kunci API guna membuat kunci API untuk project pengembangan yang Anda siapkan sebelumnya.
Menambahkan kunci API ke aplikasi
Tambahkan kunci API ke AppDelegate.swift sebagai berikut:
- Perhatikan bahwa pernyataan impor berikut telah ditambahkan ke file:
import GooglePlaces
import GoogleMaps
- Edit baris berikut di metode
application(_:didFinishLaunchingWithOptions:)Anda, dengan mengganti YOUR_API_KEY dengan kunci API Anda:GMSPlacesClient.provideAPIKey("YOUR_API_KEY") GMSServices.provideAPIKey("YOUR_API_KEY")
Membuat dan menjalankan aplikasi
- Hubungkan perangkat iOS ke komputer Anda, atau pilih simulator dari menu pop-up skema Xcode.
- Jika Anda menggunakan perangkat, pastikan layanan lokasi diaktifkan. Jika Anda menggunakan simulator, pilih lokasi dari menu Features.
- Di Xcode, klik opsi menu Product/Run (atau ikon tombol putar).
- Xcode akan membuat aplikasi, lalu menjalankan aplikasi tersebut di perangkat atau di simulator.
- Anda akan melihat peta dengan sejumlah penanda yang dipusatkan di sekitar lokasi Anda saat ini.
Pemecahan masalah:
- Jika Anda tidak melihat peta, pastikan bahwa Anda telah mendapatkan kunci API dan menambahkannya ke aplikasi, seperti yang dijelaskan di atas. Periksa konsol proses debug Xcode untuk melihat pesan error tentang kunci API.
- Jika Anda telah membatasi kunci API menurut ID paket iOS, edit kunci ini agar dapat menambahkan ID paket tersebut untuk aplikasi:
com.google.examples.current-place-on-map. - Peta tidak akan ditampilkan dengan benar jika permintaan izin untuk layanan lokasi ditolak.
- Jika Anda menggunakan perangkat, buka Setelan/Umum/Privasi/Layanan Lokasi, dan aktifkan kembali layanan lokasi.
- Jika Anda menggunakan simulator, buka Simulator/Reset Content and Settings...
- Pastikan Anda memiliki koneksi WiFi atau GPS yang baik.
- Jika aplikasi diluncurkan tetapi peta tidak ditampilkan, pastikan Anda telah memperbarui Info.plist untuk project Anda dengan izin akses lokasi yang sesuai. Untuk informasi selengkapnya tentang penanganan izin, lihat panduan untuk meminta izin akses lokasi di aplikasi Anda di bawah.
- Gunakan alat proses debug Xcode untuk melihat log dan melakukan debug pada aplikasi.
Memahami kode
Bagian tutorial ini menjelaskan bagian yang paling signifikan dari aplikasi current-place-on-map untuk membantu Anda memahami cara membangun aplikasi serupa.
Aplikasi current-place-on-map menampilkan dua pengontrol tampilan:
Satu untuk menampilkan peta yang menunjukkan tempat yang saat ini dipilih pengguna, dan satu lagi
untuk menampilkan daftar kemungkinan tempat untuk dipilih kepada pengguna. Perhatikan bahwa
setiap pengontrol tampilan memiliki variabel yang sama untuk melacak daftar
kemungkinan tempat (likelyPlaces), dan untuk menunjukkan pilihan
pengguna (selectedPlace). Navigasi antar-tampilan
dicapai menggunakan segue.
Meminta izin akses lokasi
Aplikasi Anda harus meminta izin kepada pengguna untuk menggunakan layanan lokasi. Untuk
melakukannya, sertakan kunci NSLocationAlwaysUsageDescription dalam
file Info.plist untuk aplikasi tersebut, dan setel nilai setiap kunci ke
string yang menjelaskan cara aplikasi akan menggunakan data lokasi.
Menyiapkan pengelola lokasi
Gunakan CLLocationManager untuk menemukan lokasi perangkat saat ini dan meminta update rutin saat perangkat berpindah ke lokasi baru. Tutorial ini menyediakan kode yang Anda perlukan untuk mendapatkan lokasi perangkat. Untuk mengetahui detail selengkapnya, lihat panduan untuk Mendapatkan Lokasi Pengguna di Dokumentasi Developer Apple.
- Deklarasikan pengelola lokasi, lokasi saat ini, tampilan peta, klien tempat, dan tingkat zoom default di tingkat kelas.
- Lakukan inisialisasi pengelola lokasi dan
GMSPlacesClientdiviewDidLoad(). - Deklarasikan variabel untuk menyimpan daftar kemungkinan tempat, dan tempat yang dipilih pengguna.
- Tambahkan delegasi untuk menangani peristiwa bagi pengelola lokasi, menggunakan klausa ekstensi.
Swift
var locationManager: CLLocationManager!
var currentLocation: CLLocation?
var mapView: GMSMapView!
var placesClient: GMSPlacesClient!
var preciseLocationZoomLevel: Float = 15.0
var approximateLocationZoomLevel: Float = 10.0
Objective-C
CLLocationManager *locationManager;
CLLocation * _Nullable currentLocation;
GMSMapView *mapView;
GMSPlacesClient *placesClient;
float preciseLocationZoomLevel;
float approximateLocationZoomLevel;
Swift
// Initialize the location manager.
locationManager = CLLocationManager()
locationManager.desiredAccuracy = kCLLocationAccuracyBest
locationManager.requestWhenInUseAuthorization()
locationManager.distanceFilter = 50
locationManager.startUpdatingLocation()
locationManager.delegate = self

placesClient = GMSPlacesClient.shared()
Objective-C
// Initialize the location manager.
locationManager = [[CLLocationManager alloc] init];
locationManager.desiredAccuracy = kCLLocationAccuracyBest;
[locationManager requestWhenInUseAuthorization];
locationManager.distanceFilter = 50;
[locationManager startUpdatingLocation];
locationManager.delegate = self;

placesClient = [GMSPlacesClient sharedClient];
Swift
// An array to hold the list of likely places.
var likelyPlaces: [GMSPlace] = []

// The currently selected place.
var selectedPlace: GMSPlace?
Objective-C
// An array to hold the list of likely places.
NSMutableArray<GMSPlace *> *likelyPlaces;

// The currently selected place.
GMSPlace * _Nullable selectedPlace;
Swift
// Delegates to handle events for the location manager.
extension MapViewController: CLLocationManagerDelegate {

  // Handle incoming location events.
  func locationManager(_ manager: CLLocationManager, didUpdateLocations locations: [CLLocation]) {
    let location: CLLocation = locations.last!
    print("Location: \(location)")

    let zoomLevel = locationManager.accuracyAuthorization == .fullAccuracy ? preciseLocationZoomLevel : approximateLocationZoomLevel
    let camera = GMSCameraPosition.camera(withLatitude: location.coordinate.latitude,
                                          longitude: location.coordinate.longitude,
                                          zoom: zoomLevel)

    if mapView.isHidden {
      mapView.isHidden = false
      mapView.camera = camera
    } else {
      mapView.animate(to: camera)
    }

    listLikelyPlaces()
  }

  // Handle authorization for the location manager.
  func locationManager(_ manager: CLLocationManager, didChangeAuthorization status: CLAuthorizationStatus) {
    // Check accuracy authorization
    let accuracy = manager.accuracyAuthorization
    switch accuracy {
    case .fullAccuracy:
        print("Location accuracy is precise.")
    case .reducedAccuracy:
        print("Location accuracy is not precise.")
    @unknown default:
      fatalError()
    }

    // Handle authorization status
    switch status {
    case .restricted:
      print("Location access was restricted.")
    case .denied:
      print("User denied access to location.")
      // Display the map using the default location.
      mapView.isHidden = false
    case .notDetermined:
      print("Location status not determined.")
    case .authorizedAlways: fallthrough
    case .authorizedWhenInUse:
      print("Location status is OK.")
    @unknown default:
      fatalError()
    }
  }

  // Handle location manager errors.
  func locationManager(_ manager: CLLocationManager, didFailWithError error: Error) {
    locationManager.stopUpdatingLocation()
    print("Error: \(error)")
  }
}
Objective-C
// Delegates to handle events for the location manager.
#pragma mark - CLLocationManagerDelegate

// Handle incoming location events.
- (void)locationManager:(CLLocationManager *)manager didUpdateLocations:(NSArray<CLLocation *> *)locations
{
  CLLocation *location = locations.lastObject;
  NSLog(@"Location: %@", location);

  float zoomLevel = locationManager.accuracyAuthorization == CLAccuracyAuthorizationFullAccuracy ? preciseLocationZoomLevel : approximateLocationZoomLevel;
  GMSCameraPosition * camera = [GMSCameraPosition cameraWithLatitude:location.coordinate.latitude
                                                           longitude:location.coordinate.longitude
                                                                zoom:zoomLevel];

  if (mapView.isHidden) {
    mapView.hidden = NO;
    mapView.camera = camera;
  } else {
    [mapView animateToCameraPosition:camera];
  }

  [self listLikelyPlaces];
}

// Handle authorization for the location manager.
- (void)locationManager:(CLLocationManager *)manager didChangeAuthorizationStatus:(CLAuthorizationStatus)status
{
  // Check accuracy authorization
  CLAccuracyAuthorization accuracy = manager.accuracyAuthorization;
  switch (accuracy) {
    case CLAccuracyAuthorizationFullAccuracy:
      NSLog(@"Location accuracy is precise.");
      break;
    case CLAccuracyAuthorizationReducedAccuracy:
      NSLog(@"Location accuracy is not precise.");
      break;
  }

  // Handle authorization status
  switch (status) {
    case kCLAuthorizationStatusRestricted:
      NSLog(@"Location access was restricted.");
      break;
    case kCLAuthorizationStatusDenied:
      NSLog(@"User denied access to location.");
      // Display the map using the default location.
      mapView.hidden = NO;
    case kCLAuthorizationStatusNotDetermined:
      NSLog(@"Location status not determined.");
    case kCLAuthorizationStatusAuthorizedAlways:
    case kCLAuthorizationStatusAuthorizedWhenInUse:
      NSLog(@"Location status is OK.");
  }
}

// Handle location manager errors.
- (void)locationManager:(CLLocationManager *)manager didFailWithError:(NSError *)error
{
  [manager stopUpdatingLocation];
  NSLog(@"Error: %@", error.localizedDescription);
}
Menambahkan peta
Buat peta dan tambahkan ke tampilan di viewDidLoad() di
pengontrol tampilan utama. Peta tetap tersembunyi hingga pembaruan lokasi diterima (pembaruan lokasi ditangani di ekstensi CLLocationManagerDelegate).
Swift
// A default location to use when location permission is not granted.
let defaultLocation = CLLocation(latitude: -33.869405, longitude: 151.199)

// Create a map.
let zoomLevel = locationManager.accuracyAuthorization == .fullAccuracy ? preciseLocationZoomLevel : approximateLocationZoomLevel
let camera = GMSCameraPosition.camera(withLatitude: defaultLocation.coordinate.latitude,
                                      longitude: defaultLocation.coordinate.longitude,
                                      zoom: zoomLevel)
mapView = GMSMapView.map(withFrame: view.bounds, camera: camera)
mapView.settings.myLocationButton = true
mapView.autoresizingMask = [.flexibleWidth, .flexibleHeight]
mapView.isMyLocationEnabled = true

// Add the map to the view, hide it until we've got a location update.
view.addSubview(mapView)
mapView.isHidden = true
Objective-C
// A default location to use when location permission is not granted.
CLLocationCoordinate2D defaultLocation = CLLocationCoordinate2DMake(-33.869405, 151.199);

// Create a map.
float zoomLevel = locationManager.accuracyAuthorization == CLAccuracyAuthorizationFullAccuracy ? preciseLocationZoomLevel : approximateLocationZoomLevel;
GMSCameraPosition *camera = [GMSCameraPosition cameraWithLatitude:defaultLocation.latitude
                                                        longitude:defaultLocation.longitude
                                                             zoom:zoomLevel];
mapView = [GMSMapView mapWithFrame:self.view.bounds camera:camera];
mapView.settings.myLocationButton = YES;
mapView.autoresizingMask = UIViewAutoresizingFlexibleWidth | UIViewAutoresizingFlexibleHeight;
mapView.myLocationEnabled = YES;

// Add the map to the view, hide it until we've got a location update.
[self.view addSubview:mapView];
mapView.hidden = YES;
Meminta pengguna untuk memilih tempat mereka saat ini
Gunakan Places SDK for iOS untuk mendapatkan lima kemungkinan peringkat teratas berdasarkan lokasi pengguna saat ini, dan tampilkan daftar ini di UITableView. Saat pengguna memilih tempat, tambahkan penanda ke peta.
- Dapatkan daftar kemungkinan tempat untuk mengisi
UITableView, dari mana pengguna dapat memilih tempat mereka berada saat ini. - Buka tampilan baru untuk menampilkan kemungkinan tempat kepada pengguna. Saat pengguna
mengetuk "Get Place", kita akan beralih ke tampilan baru, dan menunjukkan kepada pengguna daftar kemungkinan
tempat yang dapat dipilih. Fungsi
preparemengupdatePlacesViewControllerdengan daftar kemungkinan tempat saat ini, dan otomatis dipanggil saat segue dilakukan. - Di
PlacesViewController, isi tabel menggunakan daftar tempat yang paling mungkin, menggunakan ekstensi delegasiUITableViewDataSource. - Tangani pilihan pengguna menggunakan ekstensi delegasi
UITableViewDelegate.
Swift
// Populate the array with the list of likely places.
func listLikelyPlaces() {
  // Clean up from previous sessions.
  likelyPlaces.removeAll()

  let placeFields: GMSPlaceField = [.name, .coordinate]
  placesClient.findPlaceLikelihoodsFromCurrentLocation(withPlaceFields: placeFields) { (placeLikelihoods, error) in
    guard error == nil else {
      // TODO: Handle the error.
      print("Current Place error: \(error!.localizedDescription)")
      return
    }

    guard let placeLikelihoods = placeLikelihoods else {
      print("No places found.")
      return
    }

    // Get likely places and add to the list.
    for likelihood in placeLikelihoods {
      let place = likelihood.place
      self.likelyPlaces.append(place)
    }
  }
}
Objective-C
// Populate the array with the list of likely places.
- (void) listLikelyPlaces
{
  // Clean up from previous sessions.
  likelyPlaces = [NSMutableArray array];

  GMSPlaceField placeFields = GMSPlaceFieldName | GMSPlaceFieldCoordinate;
  [placesClient findPlaceLikelihoodsFromCurrentLocationWithPlaceFields:placeFields callback:^(NSArray<GMSPlaceLikelihood *> * _Nullable likelihoods, NSError * _Nullable error) {
    if (error != nil) {
      // TODO: Handle the error.
      NSLog(@"Current Place error: %@", error.localizedDescription);
      return;
    }

    if (likelihoods == nil) {
      NSLog(@"No places found.");
      return;
    }

    for (GMSPlaceLikelihood *likelihood in likelihoods) {
      GMSPlace *place = likelihood.place;
      [likelyPlaces addObject:place];
    }
  }];
}
Swift
// Prepare the segue.
override func prepare(for segue: UIStoryboardSegue, sender: Any?) {
  if segue.identifier == "segueToSelect" {
    if let nextViewController = segue.destination as? PlacesViewController {
      nextViewController.likelyPlaces = likelyPlaces
    }
  }
}
Objective-C
// Prepare the segue.
- (void)prepareForSegue:(UIStoryboardSegue *)segue sender:(id)sender
{
  if ([segue.identifier isEqualToString:@"segueToSelect"]) {
    if ([segue.destinationViewController isKindOfClass:[PlacesViewController class]]) {
      PlacesViewController *placesViewController = (PlacesViewController *)segue.destinationViewController;
      placesViewController.likelyPlaces = likelyPlaces;
    }
  }
}
Swift
// Populate the table with the list of most likely places.
extension PlacesViewController: UITableViewDataSource {
  func tableView(_ tableView: UITableView, numberOfRowsInSection section: Int) -> Int {
    return likelyPlaces.count
  }

  func tableView(_ tableView: UITableView, cellForRowAt indexPath: IndexPath) -> UITableViewCell {
    let cell = tableView.dequeueReusableCell(withIdentifier: cellReuseIdentifier, for: indexPath)
    let collectionItem = likelyPlaces[indexPath.row]

    cell.textLabel?.text = collectionItem.name

    return cell
  }
}
Objective-C
#pragma mark - UITableViewDataSource

- (NSInteger)tableView:(UITableView *)tableView numberOfRowsInSection:(NSInteger)section
{
  return self.likelyPlaces.count;
}

- (UITableViewCell *)tableView:(UITableView *)tableView cellForRowAtIndexPath:(NSIndexPath *)indexPath
{
  return [tableView dequeueReusableCellWithIdentifier:cellReuseIdentifier forIndexPath:indexPath];
}
@end
Swift
class PlacesViewController: UIViewController {

  // ...

  // Pass the selected place to the new view controller.
  override func prepare(for segue: UIStoryboardSegue, sender: Any?) {
    if segue.identifier == "unwindToMain" {
      if let nextViewController = segue.destination as? MapViewController {
        nextViewController.selectedPlace = selectedPlace
      }
    }
  }
}

// Respond when a user selects a place.
extension PlacesViewController: UITableViewDelegate {
  func tableView(_ tableView: UITableView, didSelectRowAt indexPath: IndexPath) {
    selectedPlace = likelyPlaces[indexPath.row]
    performSegue(withIdentifier: "unwindToMain", sender: self)
  }

  // Adjust cell height to only show the first five items in the table
  // (scrolling is disabled in IB).
  func tableView(_ tableView: UITableView, heightForRowAt indexPath: IndexPath) -> CGFloat {
    return self.tableView.frame.size.height/5
  }

  // Make table rows display at proper height if there are less than 5 items.
  func tableView(_ tableView: UITableView, heightForFooterInSection section: Int) -> CGFloat {
    if (section == tableView.numberOfSections - 1) {
      return 1
    }
    return 0
  }
}
Objective-C
@interface PlacesViewController () <UITableViewDataSource, UITableViewDelegate>
// ...

-(void)prepareForSegue:(UIStoryboardSegue *)segue sender:(id)sender
{

}

#pragma mark - UITableViewDelegate

// Respond when a user selects a place.
-(void)tableView:(UITableView *)tableView didSelectRowAtIndexPath:(NSIndexPath *)indexPath
{
  self.selectedPlace = [self.likelyPlaces objectAtIndex:indexPath.row];
  [self performSegueWithIdentifier:@"unwindToMain" sender:self];
}

// Adjust cell height to only show the first five items in the table
// (scrolling is disabled in IB).
-(CGFloat)tableView:(UITableView *)tableView heightForRowAtIndexPath:(NSIndexPath *)indexPath
{
  return self.tableView.frame.size.height/5;
}

// Make table rows display at proper height if there are less than 5 items.
-(CGFloat)tableView:(UITableView *)tableView heightForFooterInSection:(NSInteger)section
{
  if (section == tableView.numberOfSections - 1) {
    return 1;
  }
  return 0;
}
Menambahkan penanda ke peta
Saat pengguna membuat pilihan, gunakan segue yang santai untuk kembali ke tampilan sebelumnya, dan tambahkan penanda ke peta. PMM
unwindToMain dipanggil secara otomatis setelah kembali ke pengontrol tampilan utama.
Swift
// Update the map once the user has made their selection.
@IBAction func unwindToMain(segue: UIStoryboardSegue) {
  // Clear the map.
  mapView.clear()

  // Add a marker to the map.
  if let place = selectedPlace {
    let marker = GMSMarker(position: place.coordinate)
    marker.title = selectedPlace?.name
    marker.snippet = selectedPlace?.formattedAddress
    marker.map = mapView
  }

  listLikelyPlaces()
}
Objective-C
// Update the map once the user has made their selection.
- (void) unwindToMain:(UIStoryboardSegue *)segue
{
  // Clear the map.
  [mapView clear];

  // Add a marker to the map.
  if (selectedPlace != nil) {
    GMSMarker *marker = [GMSMarker markerWithPosition:selectedPlace.coordinate];
    marker.title = selectedPlace.name;
    marker.snippet = selectedPlace.formattedAddress;
    marker.map = mapView;
  }

  [self listLikelyPlaces];
}
Selamat! Anda telah membuat aplikasi iOS yang memungkinkan pengguna memilih tempat saat ini, dan menampilkan hasilnya di peta Google. Selama melakukannya, Anda telah mempelajari cara menggunakan Places SDK for iOS, Maps SDK for iOS, dan framework Apple Core Location.