Select platform: [Android](https://developers.google.com/maps/documentation/android-sdk/marker.md.txt "View this page for the Android platform docs.") [iOS](https://developers.google.com/maps/documentation/ios-sdk/marker.md.txt "View this page for the iOS platform docs.") [JavaScript](https://developers.google.com/maps/documentation/javascript/markers.md.txt "View this page for the JavaScript platform docs.")
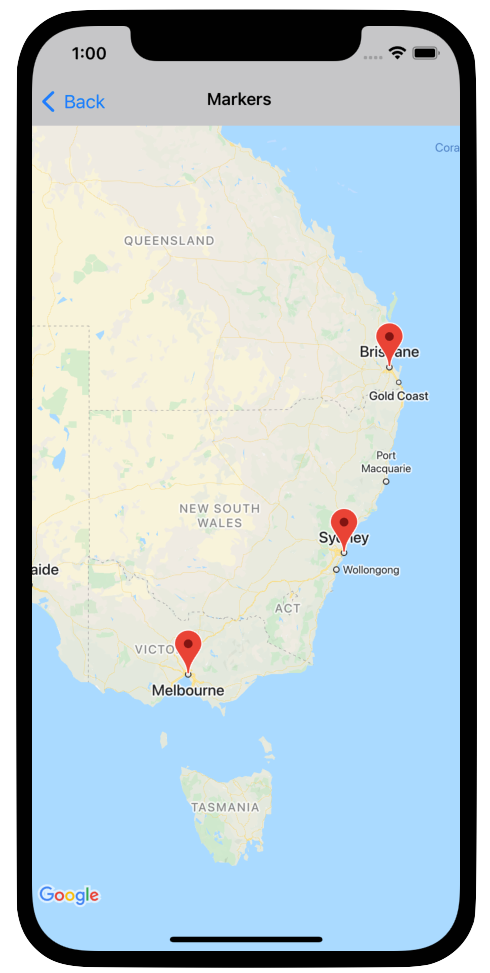
Markers indicate single locations on the map.
By default, markers use a standard icon that has the common Google Maps look and
feel. If you want to customize your marker, you can change the color of the
default marker, or replace the marker image with a custom icon, or change other
properties of the marker.
In response to a click event on a marker, you can open an [info
window](https://developers.google.com/maps/documentation/ios-sdk/infowindows). An info window displays text or images in a dialog window
above the marker. You can use a default info window to display text, or create
your own custom info window to completely control its content.
## Adding a marker
To add a marker, create a
[`GMSMarker`](https://developers.google.com/maps/documentation/ios-sdk/reference/objc/Classes/GMSMarker.md.txt)
object that includes a `position` and `title`, and set its `map`.
The following example demonstrates how to add a marker to an existing
`GMSMapView` object. The marker is created at coordinates `10,10`, and displays
the string "Hello world" in an info window when clicked.
### Swift
```swift
let position = CLLocationCoordinate2D(latitude: 10, longitude: 10)
let marker = GMSMarker(position: position)
marker.title = "Hello World"
marker.map = mapView
```
### Objective-C
```objective-c
CLLocationCoordinate2D position = CLLocationCoordinate2DMake(10, 10);
GMSMarker *marker = [GMSMarker markerWithPosition:position];
marker.title = @"Hello World";
marker.map = mapView;
```
You can animate the addition of new markers to the map by setting the
`marker.appearAnimation` property to:
- `kGMSMarkerAnimationPop` to cause the marker to pop from its `groundAnchor` when added.
- `kGMSMarkerAnimationFadeIn` to cause the marker to fade in when added.
## Removing a marker
You can remove a marker from the map by setting the `map` property of the
`GMSMarker` to `nil`. Alternatively, you can remove all of the overlays
(including markers) currently on the map by calling the `GMSMapView` `clear`
method.
### Swift
```swift
let camera = GMSCameraPosition.camera(
withLatitude: -33.8683,
longitude: 151.2086,
zoom: 6
)
let options = GMSMapViewOptions()
options.camera = camera
let mapView = GMSMapView(options: options)
// ...
mapView.clear()
```
### Objective-C
```objective-c
GMSCameraPosition *camera = [GMSCameraPosition cameraWithLatitude:-33.8683
longitude:151.2086
zoom:6];
GMSMapViewOptions *options = [[GMSMapViewOptions alloc] init];
options.camera = camera;
mapView = [[GMSMapView alloc] initWithOptions:options];
// ...
[mapView clear];
```
If you wish to make modifications to a marker after you've added it to the map,
ensure that you keep hold of the `GMSMarker` object. You can modify the marker
later by making changes to this object.
### Swift
```swift
let position = CLLocationCoordinate2D(latitude: 10, longitude: 10)
let marker = GMSMarker(position: position)
marker.map = mapView
// ...
marker.map = nil
```
### Objective-C
```objective-c
CLLocationCoordinate2D position = CLLocationCoordinate2DMake(10, 10);
GMSMarker *marker = [GMSMarker markerWithPosition:position];
marker.map = mapView;
// ...
marker.map = nil;
```
## Changing the marker color
You can customize the color of the default marker image by requesting a tinted
version of the default icon with `markerImageWithColor:`, and passing the
resulting image to the `GMSMarker`'s icon property.
### Swift
```swift
marker.icon = GMSMarker.markerImage(with: .black)
```
### Objective-C
```objective-c
marker.icon = [GMSMarker markerImageWithColor:[UIColor blackColor]];
```
## Customizing the marker image
If you want to change the default marker image you can set a custom icon, using
the marker's `icon` or `iconView` property. If `iconView` is set, the API
ignores the `icon` property.
### Using the marker's `icon` property
The following snippet creates a marker with a custom icon provided as a
`UIImage` in the `icon` property. The icon is centered at London, England. The
snippet assumes that your application contains an image named "house.png".
### Swift
```swift
let positionLondon = CLLocationCoordinate2D(latitude: 51.5, longitude: -0.127)
let london = GMSMarker(position: positionLondon)
london.title = "London"
london.icon = UIImage(named: "house")
london.map = mapView
```
### Objective-C
```objective-c
CLLocationCoordinate2D positionLondon = CLLocationCoordinate2DMake(51.5, -0.127);
GMSMarker *london = [GMSMarker markerWithPosition:positionLondon];
london.title = @"London";
london.icon = [UIImage imageNamed:@"house"];
london.map = mapView;
```
If you are creating several markers with the same image, use the same instance
of `UIImage` for each of the markers. This helps improve the performance of your
application and optimizes texture cache utilization when displaying many
markers.
> [!WARNING]
> **Warning:** Adding a large number of markers with unique, dynamic, or
> high-resolution custom images can exhaust the Maps SDK for iOS's internal
> texture cache. When the cache capacity is reached, rendering anomalies such as
> icon flickering or swapped icons between markers may occur.
>
>
> If your application requires a large number of unique or dynamically generated
> markers, we recommend migrating to `GMSAdvancedMarker` (supported on
> Maps SDK for iOS 8.2 and later). In most cases you can expect to support custom
> markers in the low hundreds, but this limit depends heavily on the size of the
> markers, and could be much lower.
> `GMSAdvancedMarker` renders icons
> directly using native views (`UIView` or `CALayers`),
> completely bypassing the internal texture atlas packing system.
>
>
> Additionally, you should reuse the same `UIImage` reference across multiple
> markers whenever possible to optimize texture cache utilization.
This image may have multiple frames. Additionally, the `alignmentRectInsets`
property is respected, which is useful if a marker has a shadow or other
unusable region.
### Using the marker's `iconView` property
The following snippet creates a marker with a custom icon by setting the
marker's `iconView` property, and animates a change in the color of the marker.
The snippet assumes that your application contains an image named "house.png".
### Swift
```swift
import CoreLocation
import GoogleMaps
class MarkerViewController: UIViewController, GMSMapViewDelegate {
var mapView: GMSMapView!
var london: GMSMarker?
var londonView: UIImageView?
override func viewDidLoad() {
super.viewDidLoad()
let camera = GMSCameraPosition.camera(
withLatitude: 51.5,
longitude: -0.127,
zoom: 14
)
let options = GMSMapViewOptions()
options.camera = camera
let mapView = GMSMapView(options: options)
view = mapView
mapView.delegate = self
let house = UIImage(named: "House")!.withRenderingMode(.alwaysTemplate)
let markerView = UIImageView(image: house)
markerView.tintColor = .red
londonView = markerView
let position = CLLocationCoordinate2D(latitude: 51.5, longitude: -0.127)
let marker = GMSMarker(position: position)
marker.title = "London"
marker.iconView = markerView
marker.tracksViewChanges = true
marker.map = mapView
london = marker
}
func mapView(_ mapView: GMSMapView, idleAt position: GMSCameraPosition) {
UIView.animate(withDuration: 5.0, animations: { () -> Void in
self.londonView?.tintColor = .blue
}, completion: {(finished) in
// Stop tracking view changes to allow CPU to idle.
self.london?.tracksViewChanges = false
})
}
}
```
### Objective-C
```objective-c
@import CoreLocation;
@import GoogleMaps;
@interface MarkerViewController : UIViewController
@property (strong, nonatomic) GMSMapView *mapView;
@end
@implementation MarkerViewController {
GMSMarker *_london;
UIImageView *_londonView;
}
- (void)viewDidLoad {
[super viewDidLoad];
GMSCameraPosition *camera = [GMSCameraPosition cameraWithLatitude:51.5
longitude:-0.127
zoom:14];
GMSMapViewOptions *options = [[GMSMapViewOptions alloc] init];
options.camera = camera;
_mapView = [[GMSMapView alloc] initWithOptions:options];
self.view = _mapView;
_mapView.delegate = self;
UIImage *house = [UIImage imageNamed:@"House"];
house = [house imageWithRenderingMode:UIImageRenderingModeAlwaysTemplate];
_londonView = [[UIImageView alloc] initWithImage:house];
_londonView.tintColor = [UIColor redColor];
CLLocationCoordinate2D position = CLLocationCoordinate2DMake(51.5, -0.127);
_london = [GMSMarker markerWithPosition:position];
_london.title = @"London";
_london.iconView = _londonView;
_london.tracksViewChanges = YES;
_london.map = self.mapView;
}
- (void)mapView:(GMSMapView *)mapView idleAtCameraPosition:(GMSCameraPosition *)position {
[UIView animateWithDuration:5.0
animations:^{
self->_londonView.tintColor = [UIColor blueColor];
}
completion:^(BOOL finished) {
// Stop tracking view changes to allow CPU to idle.
self->_london.tracksViewChanges = NO;
}];
}
@end
```
Because `iconView` accepts a `UIView`, you can have a hierarchy of standard UI
controls defining your markers, each view having the standard set of animation
capabilities. You can include changes to the marker size, color, and alpha
levels, as well as applying arbitrary transformations. The `iconView` property
supports animation of all animatable properties of `UIView` except `frame` and
`center`.
Please note the following considerations when using `iconView`:
- The `UIView` can be demanding on resources when `tracksViewChanges` is set to `YES`, which may result in increased battery usage. In comparison, a single frame `UIImage` is static and does not need to be re-rendered.
- Some devices may struggle to render the map if you have many markers on screen, and each marker has its own `UIView`, and all markers are tracking changes at the same time.
- An `iconView` does not respond to user interaction, as it is a snapshot of the view.
- The view behaves as if `clipsToBounds` is set to `YES`, regardless of its actual value. You can apply transforms that work outside the bounds, but the object you draw must be within the bounds of the object. All transforms/shifts are monitored and applied. In short: subviews must be contained within the view.
- To use `-copyWithZone:` on `GMSMarker`, you must copy the `GMSMarker` first and then set a new instance of the `iconView` on the copy. `UIView` does not support `NSCopying`, so it can't copy the `iconView`.
To decide when to set the `tracksViewChanges` property, you should weigh up
performance considerations against the advantages of having the marker redrawn
automatically. For example:
- If you have a series of changes to make, you can change the property to `YES` then back to `NO`.
- When an animation is running or the contents are being loaded asynchronously, you should keep the property set to `YES` until the actions are complete.
## Changing the marker opacity
You can control the opacity of a marker with its `opacity` property. You should
specify the opacity as a float between 0.0 and 1.0, where 0 is fully transparent
and 1 is fully opaque.
### Swift
```swift
marker.opacity = 0.6
```
### Objective-C
```objective-c
marker.opacity = 0.6;
```
You can animate the marker opacity with
[Core Animation](https://developer.apple.com/library/ios/documentation/Cocoa/Conceptual/CoreAnimation_guide/Introduction/Introduction.html)
using `GMSMarkerLayer`.
## Flattening a marker
Marker icons are normally drawn oriented against the device's screen rather than
the map's surface, so rotating, tilting or zooming the map does not necessarily
change the orientation of the marker.
You can set the orientation of a marker to be flat against the earth. Flat
markers rotate when the map is rotated, and change perspective when the map is
tilted. As with regular markers, flat markers retain their size when the map is
zoomed in or out.
To change the orientation of the marker, set the marker's `flat` property to
`YES` or `true`.
### Swift
```swift
let positionLondon = CLLocationCoordinate2D(latitude: 51.5, longitude: -0.127)
let londonMarker = GMSMarker(position: positionLondon)
londonMarker.isFlat = true
londonMarker.map = mapView
```
### Objective-C
```objective-c
CLLocationCoordinate2D positionLondon = CLLocationCoordinate2DMake(51.5, -0.127);
GMSMarker *londonMarker = [GMSMarker markerWithPosition:positionLondon];
londonMarker.flat = YES;
londonMarker.map = mapView;
```
## Rotating a marker
You can rotate a marker around its anchor point by setting the `rotation`
property. Specify the rotation as a `CLLocationDegrees` type, measured in
degrees clockwise from the default position. When the marker is flat on the map,
the default position is North.
The following example rotates the marker 90°. Setting the `groundAnchor`
property to `0.5,0.5` causes the marker to be rotated around its center, instead
of its base.
### Swift
```swift
let degrees = 90.0
londonMarker.groundAnchor = CGPoint(x: 0.5, y: 0.5)
londonMarker.rotation = degrees
londonMarker.map = mapView
```
### Objective-C
```objective-c
CLLocationDegrees degrees = 90;
londonMarker.groundAnchor = CGPointMake(0.5, 0.5);
londonMarker.rotation = degrees;
londonMarker.map = mapView;
```
## Handling events on markers
You can listen to events that occur on the map, such as when a user taps a
marker. To listen to events, you must implement the
[`GMSMapViewDelegate`](https://developers.google.com/maps/documentation/ios-sdk/reference/objc/Protocols/GMSMapViewDelegate.md.txt) protocol. See [marker events and
gestures](https://developers.google.com/maps/documentation/ios-sdk/marker-gestures) to learn how to handle
specific marker events. The [guide to events](https://developers.google.com/maps/documentation/ios-sdk/events.md.txt) also provides a list of
methods on GMSMapViewDelegate. For Street View events, see
[`GMSPanoramaViewDelegate`](https://developers.google.com/maps/documentation/ios-sdk/reference/objc/Protocols/GMSPanoramaViewDelegate.md.txt).