
उपभोक्ता SDK टूल का इस्तेमाल करके, 'ऑन-डिमांड राइड और डिलीवरी सलूशन' बैकएंड सेवाओं के साथ इंटिग्रेट किया गया बेसिक उपभोक्ता ऐप्लिकेशन बनाया और चलाया जा सकता है. आप यात्रा और ऑर्डर की स्थिति दिखाने वाला ऐसा ऐप्लिकेशन बना सकते हैं जो चालू यात्रा दिखा सकता है, यात्रा से जुड़े अपडेट के जवाब दे सकता है, और यात्रा की गड़बड़ियों को ठीक कर सकता है.
Consumer SDK टूल में मॉड्यूलर आर्किटेक्चर है. इसलिए, एपीआई के उन हिस्सों का इस्तेमाल किया जा सकता है जिनका इस्तेमाल आपको अपने ऐप्लिकेशन के लिए करना है. साथ ही, उन्हें अपने एपीआई, फ़्लीट इंजन से मिलने वाली बैकएंड सेवाओं, और Google Maps Platform के अन्य एपीआई के साथ इंटिग्रेट किया जा सकता है.
सिस्टम के लिए ज़रूरी शर्तें
प्रोजेक्ट कॉन्फ़िगरेशन
स्विफ़्ट पैकेज मैनेजर
उपभोक्ता SDK टूल को Swift Package Manager की मदद से इंस्टॉल किया जा सकता है. SDK टूल जोड़ने के लिए, पक्का करें कि आपने सभी मौजूदा Consumer SDK डिपेंडेंसी हटा दी हैं.
SDK टूल को किसी नए या मौजूदा प्रोजेक्ट में जोड़ने के लिए, यह तरीका अपनाएं:
-
अपना Xcode
projectयाworkspaceखोलें. इसके बाद, फ़ाइल > पैकेज डिपेंडेंसी जोड़ें पर जाएं. - यूआरएल के तौर पर https://github.com/googlemaps/ios-consumer-sdk डालें. पैकेज पाने के लिए, Enter दबाएं और "पैकेज जोड़ें" पर क्लिक करें.
-
किसी खास
versionको इंस्टॉल करने के लिए, डिपेंडेंसी नियम फ़ील्ड को वर्शन-आधारित विकल्पों में से किसी एक पर सेट करें. नए प्रोजेक्ट के लिए, हमारा सुझाव है कि आप सबसे नया वर्शन तय करें. साथ ही, "एग्ज़ैक्ट वर्शन" विकल्प इस्तेमाल करें. यह प्रोसेस पूरी होने के बाद, "पैकेज जोड़ें" पर क्लिक करें. -
पैकेज के प्रॉडक्ट चुनें विंडो से, पुष्टि करें कि
GoogleRidesharingConsumerको आपके तय किए गएmainटारगेट में जोड़ दिया जाएगा. यह प्रोसेस पूरी होने के बाद, "पैकेज जोड़ें" पर क्लिक करें. -
अपने इंस्टॉलेशन की पुष्टि करने के लिए, अपने टारगेट के
Generalपैनल पर जाएं. फ़्रेमवर्क, लाइब्रेरी, और एम्बेड किए गए कॉन्टेंट में, आपको इंस्टॉल किए गए पैकेज दिखेंगे. पैकेज और उसके वर्शन की पुष्टि करने के लिए, "Project Navigator" के "पैकेज डिपेंडेंसी" सेक्शन में भी देखा जा सकता है.
किसी मौजूदा प्रोजेक्ट के लिए, package को अपडेट करने के लिए, यह तरीका अपनाएं:
- Xcode से, "फ़ाइल > पैकेज > सबसे नए पैकेज वर्शन में अपडेट करें" पर जाएं.
- अपने इंस्टॉलेशन की पुष्टि करने के लिए, प्रोजेक्ट नेविगेटर के पैकेज डिपेंडेंसी सेक्शन में जाकर पैकेज और उसके वर्शन की पुष्टि करें.
CocoaPods
का इस्तेमाल करके जोड़ी गई मौजूदा Consumer SDK डिपेंडेंसी हटाने के लिए, यह तरीका अपनाएं:
- Xcode के फ़ाइल फ़ोल्डर को बंद करें. टर्मिनल खोलें और यह निर्देश दें:
sudo gem install cocoapods-deintegrate cocoapods-clean
pod deintegrate
pod cache clean --all
-
अगर
Podfile,Podfile.resolved, और Xcodeworkspaceको CocoaPod के अलावा किसी और काम के लिए इस्तेमाल नहीं किया जा रहा है, तो उन्हें हटा दें.
मैन्युअल तरीके से इंस्टॉल किए गए मौजूदा उपभोक्ता SDK टूल को हटाने के लिए, यह तरीका अपनाएं:
अपने Xcode प्रोजेक्ट की कॉन्फ़िगरेशन सेटिंग में जाकर, फ़्रेमवर्क, लाइब्रेरी, और एम्बेड किया गया कॉन्टेंट ढूंढें. नीचे दिए गए फ़्रेमवर्क को हटाने के लिए, माइनस के निशान
(-)का इस्तेमाल करें:GoogleRidesharingConsumer.xcframework
अपने Xcode प्रोजेक्ट की टॉप लेवल डायरेक्ट्री से,
GoogleRidesharingConsumerबंडल हटाएं.
CocoaPods
CocoaPods का इस्तेमाल करके उपभोक्ता SDK टूल को कॉन्फ़िगर करने के लिए, आपको इन आइटम की ज़रूरत होगी:
CocoaPods टूल: इस टूल को इंस्टॉल करने के लिए, टर्मिनल खोलें और यहां दिया गया कमांड चलाएं.
sudo gem install cocoapods
ज़्यादा जानकारी के लिए, CocoaPods के इस्तेमाल शुरू करने की गाइड देखें.
Consumer SDK के लिए एक Podfile बनाएं और इसका इस्तेमाल, एपीआई और इसकी डिपेंडेंसी को इंस्टॉल करने के लिए करें. सबसे पहले, अपनी प्रोजेक्ट डायरेक्ट्री में Podfile नाम की फ़ाइल बनाएं. यह फ़ाइल आपके प्रोजेक्ट की डिपेंडेंसी के बारे में बताती है. इसके बाद, Podfile में बदलाव करें और डिपेंडेंसी जोड़ें. यहां एक उदाहरण दिया गया है, जिसमें डिपेंडेंसी शामिल हैं:
  source "https://github.com/CocoaPods/Specs.git"

  target 'YOUR_APPLICATION_TARGET_NAME_HERE' do
    pod 'GoogleRidesharingConsumer'
  end
Podfile सेव करें. कोई टर्मिनल खोलें और उस डायरेक्ट्री पर जाएं जिसमें Podfile है:
cd <path-to-project>पॉड इंस्टॉल निर्देश चलाएं. इससे, Podfile में बताए गए एपीआई इंस्टॉल हो जाएंगे. साथ ही, उनकी डिपेंडेंसी भी इंस्टॉल हो जाएगी.
pod installXcode को बंद करें और फिर Xcode को लॉन्च करने के लिए, अपने प्रोजेक्ट की .xcworkspace फ़ाइल खोलें (दो बार क्लिक करें). प्रोजेक्ट को बाद में खोलने के लिए, .xcworkspace फ़ाइल का इस्तेमाल करें.
मैन्युअल तरीके से इंस्टॉल करना
XCFramework एक बाइनरी पैकेज होता है. इसे उपभोक्ता के SDK टूल को इंस्टॉल करने के लिए इस्तेमाल किया जाता है. इस पैकेज को कई प्लैटफ़ॉर्म पर इस्तेमाल किया जा सकता है. इनमें M1 चिपसेट का इस्तेमाल करने वाली मशीनें भी शामिल हैं. इस गाइड में बताया गया है कि अपने प्रोजेक्ट में उपभोक्ता SDK टूल वाले XCFramework को मैन्युअल तरीके से कैसे जोड़ें और Xcode में बिल्ड सेटिंग कैसे कॉन्फ़िगर करें.
SDK टूल से जुड़ी बाइनरी और संसाधन डाउनलोड करें:
XCFramework और संसाधनों को ऐक्सेस करने के लिए, ZIP फ़ाइलों को अनपैक करें.
Xcode शुरू करें और कोई मौजूदा प्रोजेक्ट खोलें या कोई नया प्रोजेक्ट बनाएं. अगर आपने iOS का इस्तेमाल पहले नहीं किया है, तो नया प्रोजेक्ट बनाएं और iOS ऐप्लिकेशन टेंप्लेट चुनें.
अगर आपके प्रोजेक्ट ग्रुप में कोई फ़्रेमवर्क ग्रुप पहले से मौजूद नहीं है, तो उसके तहत एक फ़्रेमवर्क ग्रुप बनाएं.
उपभोक्ता SDK टूल इंस्टॉल करने के लिए,
GoogleRidesharingConsumer.xcframeworkफ़ाइल को फ़्रेमवर्क, लाइब्रेरी, और एम्बेड किए गए कॉन्टेंट में अपने प्रोजेक्ट में खींचें और छोड़ें. अगर ज़रूरी हो, तो आइटम कॉपी करें चुनें.डाउनलोड किए गए
GoogleRidesharingConsumer.bundleको अपने Xcode प्रोजेक्ट की टॉप लेवल डायरेक्ट्री में खींचें और छोड़ें. जब कहा जाए, तबCopy items if neededचुनें.Project Navigator से अपना प्रोजेक्ट चुनें और ऐप्लिकेशन का टारगेट चुनें.
बिल्ड फ़ेज़ टैब खोलें और लिंक बाइनरी विद लाइब्रेरी में, अगर नीचे दिए गए फ़्रेमवर्क और लाइब्रेरी पहले से मौजूद नहीं हैं, तो उन्हें जोड़ें:
Accelerate.frameworkCoreData.frameworkCoreGraphics.frameworkCoreImage.frameworkCoreLocation.frameworkCoreTelephony.frameworkCoreText.frameworkGLKit.frameworkImageIO.frameworklibc++.tbdlibz.tbdMetal.frameworkOpenGLES.frameworkQuartzCore.frameworkSystemConfiguration.frameworkUIKit.framework
खास टारगेट के बजाय अपना प्रोजेक्ट चुनें और बिल्ड सेटिंग टैब खोलें. अन्य लिंकर फ़्लैग सेक्शन में, डीबग और रिलीज़, दोनों के लिए
-ObjCजोड़ें. अगर ये सेटिंग नहीं दिख रही हैं, तो बिल्ड सेटिंग बार में फ़िल्टर को बेसिक से सभी में बदलें.
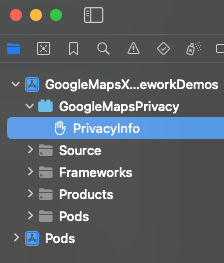
Apple की निजता मेनिफ़ेस्ट फ़ाइल जोड़ें
- iOS के लिए उपभोक्ता SDK टूल के लिए, निजता मेनिफ़ेस्ट बंडल डाउनलोड करें: GoogleRidesharingConsumerPrivacy.
GoogleRidesharingConsumerPrivacy.bundleको ऐक्सेस करने के लिए फ़ाइल निकालें.- इनमें से किसी एक तरीके का इस्तेमाल करके,
GoogleRidesharingConsumerPrivacy.bundleको Xcode प्रोजेक्ट नेविगेटर में जोड़ें. पक्का करें कि आपके ऐप्लिकेशन के टारगेट के लिए, "टारगेट में जोड़ें" बॉक्स चुना गया हो. जोड़े जाने के बाद, PrivacyInfo फ़ाइल, प्रोजेक्ट नेविगेटर में दिखती है और आपके पास वैल्यू की जांच करने का विकल्प होता है. - पुष्टि करें कि आपके ऐप्लिकेशन का संग्रह बनाकर और संग्रह से निजता रिपोर्ट जनरेट करके, निजता मेनिफ़ेस्ट को जोड़ा गया हो.
ऐप्लिकेशन इंटिग्रेशन
पुष्टि करने वाला टोकन दें
जब आपका Consumer ऐप्लिकेशन, Fleet Engine से यात्रा के अपडेट का अनुरोध करता है, तब अनुरोधों में मान्य ऐक्सेस टोकन शामिल होने चाहिए. इन अनुरोधों को अनुमति देने और उनकी पुष्टि करने के लिए,
उपभोक्ता SDK टूल आपके ऑब्जेक्ट को
GMTCAuthorization प्रोटोकॉल के मुताबिक कॉल करता है. ऑब्जेक्ट, ज़रूरी ऐक्सेस टोकन देने के लिए ज़िम्मेदार है.
ऐप्लिकेशन डेवलपर के तौर पर, आपको टोकन जनरेट करने का तरीका चुनना होता है. आपके लागू करने से ये काम करने की सुविधा मिलनी चाहिए:
- एचटीटीपीएस सर्वर से, JSON फ़ॉर्मैट में ऐक्सेस टोकन फ़ेच करें.
- टोकन को पार्स और कैश मेमोरी में सेव करें.
- टोकन की समयसीमा खत्म होने पर, उसे रीफ़्रेश करें.
Fleet Engine सर्वर से जिन टोकन की उम्मीद की जाती है उनके बारे में जानने के लिए, अनुमति के लिए JSON Web Token (JWT) बनाना देखें.
प्रोवाइडर आईडी और Google Cloud प्रोजेक्ट आईडी एक ही होते हैं. ज़्यादा जानकारी के लिए, फ़्लीट इंजन का इस्तेमाल शुरू करना देखें.
नीचे दिए गए उदाहरण में, ऐक्सेस टोकन देने वाली कंपनी लागू की गई है:
Swift
/*

    *   SampleAccessTokenProvider.swift
 */
import GoogleRidesharingConsumer

private let providerURL = "INSERT_YOUR_TOKEN_PROVIDER_URL"

class SampleAccessTokenProvider: NSObject, GMTCAuthorization {
  private struct AuthToken {
    // The cached trip token.
    let token: String
    // Keep track of when the token expires for caching.
    let expiration: TimeInterval
    // Keep track of the trip ID the cached token is for.
    let tripID: String
  }

  enum AccessTokenError: Error {
    case missingAuthorizationContext
    case missingData
  }

  private var authToken: AuthToken?

  func fetchToken(
    with authorizationContext: GMTCAuthorizationContext?,
    completion: @escaping GMTCAuthTokenFetchCompletionHandler
  ) {
    // Get the trip ID from the authorizationContext. This is set by the Consumer SDK.
    guard let authorizationContext = authorizationContext else {
      completion(nil, AccessTokenError.missingAuthorizationContext)
      return
    }
    let tripID = authorizationContext.tripID

    // If appropriate, use the cached token.
    if let authToken = authToken,
      authToken.expiration > Date.now.timeIntervalSince1970 && authToken.tripID == tripID
    {
      completion(authToken.token, nil)
      return
    }

    // Otherwise, try to fetch a new token from your server.
    let request = URLRequest(url: URL(string: providerURL))
    let task = URLSession.shared.dataTask(with: request) { [weak self] data, _, error in
      guard let strongSelf = self else { return }
      guard error == nil else {
        completion(nil, error)
        return
      }

      // Replace the following key values with the appropriate keys based on your
      // server's expected response.
      let tripTokenKey = "TRIP_TOKEN_KEY"
      let tokenExpirationKey = "TOKEN_EXPIRATION"
      guard let data = data,
        let fetchData = try? JSONSerialization.jsonObject(with: data) as? [String: Any],
        let token = fetchData[tripTokenKey] as? String,
        let expiration = fetchData[tokenExpirationKey] as? Double
      else {
        completion(nil, AccessTokenError.missingData)
        return
      }

      strongSelf.authToken = AuthToken(token: token, expiration: expiration, tripID: tripID)
      completion(token, nil)
    }
    task.resume()
  }
}
Objective-C
/*

    *   SampleAccessTokenProvider.h
 */
#import <Foundation/Foundation.h>
#import <GoogleRidesharingConsumer/GoogleRidesharingConsumer.h>

NS_ASSUME_NONNULL_BEGIN

@interface SampleAccessTokenProvider : NSObject <GMTCAuthorization>

@end

NS_ASSUME_NONNULL_END

/*

    *   SampleAccessTokenProvider.m
 */
#import "SampleAccessTokenProvider.h"
#import "GoogleRidesharingConsumer/GoogleRidesharingConsumer.h"

static NSString *const PROVIDER_URL = @"INSERT_YOUR_TOKEN_PROVIDER_URL";

// SampleAccessTokenProvider.m
@implementation SampleAccessTokenProvider {
  // The cached token with claims to the current trip.
  NSString *_cachedTripToken;
  // Keep track of the Trip ID the cached token is for.
  NSString *_lastKnownTripID;
  // Keep track of when tokens expire for caching.
  NSTimeInterval _tokenExpiration;
}

-   (void)fetchTokenWithContext:(nullable GMTCAuthorizationContext *)authorizationContext
                   completion:(nonnull GMTCAuthTokenFetchCompletionHandler)completion {
  // Get the trip ID from the authorizationContext. This is set by the Consumer SDK.
  NSString *tripID = authorizationContext.tripID;

  // Clear cached trip token if trip ID has changed.
  if (![_lastKnownTripID isEqual:tripID]) {
    _tokenExpiration = 0.0;
    _cachedTripToken = nil;
  }
  _lastKnownTripID = tripID;

  // Clear cached tripToken if it has expired.
  if ([[NSDate date] timeIntervalSince1970] > _tokenExpiration) {
    _cachedTripToken = nil;
  }

  // If appropriate, use the cached token.
  if (_cachedTripToken) {
    completion(_cachedTripToken, nil);
    return;
  }
  // Otherwise, try to fetch a new token from your server.
  NSURL *requestURL = [NSURL URLWithString:PROVIDER_URL];
  NSMutableURLRequest *request =
      [[NSMutableURLRequest alloc] initWithURL:requestURL];
  request.HTTPMethod = @"GET";

  // Replace the following key values with the appropriate keys based on your
  // server's expected response.
  NSString *tripTokenKey = @"TRIP_TOKEN_KEY";
  NSString *tokenExpirationKey = @"TOKEN_EXPIRATION";

  __weak typeof(self) weakSelf = self;
  void (^handler)(NSData *_Nullable data, NSURLResponse *_Nullable response,
                  NSError *_Nullable error) =
      ^(NSData *_Nullable data, NSURLResponse *_Nullable response, NSError *_Nullable error) {
        typeof(self) strongSelf = weakSelf;
        if (error) {
          completion(nil, error);
          return;
        }

        NSError *JSONError;
        NSMutableDictionary *JSONResponse =
            [NSJSONSerialization JSONObjectWithData:data options:kNilOptions error:&JSONError];

        if (JSONError) {
          completion(nil, JSONError);
          return;
        } else {
          // Sample code only. No validation logic.
          id expirationData = JSONResponse[tokenExpirationKey];
          if ([expirationData isKindOfClass:[NSNumber class]]) {
            NSTimeInterval expirationTime = ((NSNumber *)expirationData).doubleValue;
            strongSelf->_tokenExpiration = [[NSDate date] timeIntervalSince1970] + expirationTime;
          }
          strongSelf->_cachedTripToken = JSONResponse[tripTokenKey];
          completion(JSONResponse[tripTokenKey], nil);
        }
      };
  NSURLSessionConfiguration *config = [NSURLSessionConfiguration defaultSessionConfiguration];
  NSURLSession *mainQueueURLSession =
      [NSURLSession sessionWithConfiguration:config delegate:nil
                               delegateQueue:[NSOperationQueue mainQueue]];
  NSURLSessionDataTask *task = [mainQueueURLSession dataTaskWithRequest:request completionHandler:handler];
  [task resume];
}

@end
ऐप्लिकेशन शुरू करना
Swift
/*

    *   AppDelegate.swift
 */
import GoogleRidesharingConsumer
import GoogleMaps

@UIApplicationMain
class AppDelegate: UIResponder, UIApplicationDelegate {

  func application(_ application: UIApplication,
      didFinishLaunchingWithOptions launchOptions: [UIApplication.LaunchOptionsKey: Any]?) -> Bool {
    // Register your API key for GMSServices.
    GMSServices.provideAPIKey(yourMapsAPIKey)

    // Set the instance of the SampleAccessTokenProvider.
    GMTCServices.setAccessTokenProvider(SampleAccessTokenProvider(), providerID: yourProviderID)

    // Other initialization code ...
    return true
  }
}
Objective-C
/*

    *   AppDelegate.m
 */
#import <GoogleMaps/GoogleMaps.h>
#import <GoogleRidesharingConsumer/GoogleRidesharingConsumer.h>

@implementation AppDelegate

-   (BOOL)application:(UIApplication *)application
    didFinishLaunchingWithOptions:(NSDictionary *)launchOptions {
  //Register your API key for GMSServices.
  [GMSServices provideAPIKey:yourMapsAPIKey];

  //Set the instance of the AccessTokenFactory.
  [GMTCServices setAccessTokenProvider:[[SampleAccessTokenProvider alloc] init]
                            providerID:yourProviderID];

  // Other initialization code ...
  return YES;
}

@end
मैप व्यू इंटिग्रेशन
मैप व्यू शुरू करना
इस उदाहरण में, GMTCMapView को शुरू करने का तरीका बताया गया है.
Swift
/*

    *   MapViewController.swift
 */
class ViewController: UIViewController, GMTCMapViewDelegate {
  private var rideSharingMap: GMTCMapView?

  override func viewDidLoad() {
    super.viewDidLoad()

    self.rideSharingMap = GMTCMapView(frame: UIScreen.main.bounds)
    self.rideSharingMap.delegate = self
    self.rideSharingMap?.settings.myLocationButton = true
    self.view.addSubview(self.rideSharingMap!)
    ...
  }
Objective-C
/*

    *   MapViewController.h
 */
@interface MapViewController : UIViewController<GMTCMapViewDelegate>
...
@end

/*

    *   MapViewController.m
 */
@implementation MapViewController

-   (void)viewDidLoad {
  [super viewDidLoad];
  ...
  self.mapView = [[GMTCMapView alloc] initWithFrame:CGRectZero];
  self.mapView.settings.myLocationButton = YES;
  self.mapView.delegate = self;
  ...
}

...

@end
मैप व्यू इवेंट मैनेज करना
नीचे दिए गए उदाहरण में, ग्राहक की स्थिति से जुड़े इवेंट को मैनेज करने के लिए, एक डेलिगेट को लागू करने का तरीका बताया गया है.
Swift
func mapViewDidInitialize(_ mapview: GMTCMapView) {
  // Handle the update to the state of the map view to browsing.
}

func mapView(_ mapView: GMSMapView, didTapConsumerMarker mapMarker: GMSMarker, markerType: GMTCMapViewMarkerType) -> Bool {
  // Handle the mapView marker was tapped.
}
Objective-C
/*

    *   MapViewController.m
 */
#pragma mark - GMTCMapViewDelegate implementation

// Handle state update of map view.

-   (void)mapViewDidInitializeCustomerState:(GMTCMapView *)mapview {
  // Handle the update to the state of the map view to browsing.
}

-   (void)mapView:(GMSMapView *)mapView
    didTapConsumerMarker:(nonnull GMSMarker *)mapMarker
              markerType:(GMTCMapViewMarkerType)markerType {
  // Handle the mapView marker was tapped.
}
गतिविधि शेयर करना
व्यू लोड होने पर नई यात्रा शुरू करें
यहां दिए गए उदाहरण में, व्यू लोड होने के तुरंत बाद यात्रा की जानकारी शेयर करने की सुविधा शुरू करने का तरीका बताया गया है. उपयोगकर्ताओं के सभी इनपुट इकट्ठा किए जा सकते हैं, जैसे कि ड्रॉप ऑफ़ और पिकअप की जगहों की जानकारी
ViewController से इकट्ठा की जा सकती है. इसके बाद, सीधे सफ़र की शेयरिंग शुरू करने के लिए एक नया ViewController बनाया जा सकता है.
Swift
/*

    *   MapViewController.swift
 */
override func viewDidLoad() {
  super.viewDidLoad()
  ...
  self.mapView = GMTCMapView(frame: UIScreen.main.bounds)
  self.mapView.delegate = self
  self.view.addSubview(self.mapView)
}

func mapViewDidInitializeCustomerState(_: GMTCMapView) {
  self.mapView.pickupLocation = self.selectedPickupLocation
  self.mapView.dropoffLocation = self.selectedDropoffLocation

  self.startConsumerMatchWithLocations(
    pickupLocation: self.mapView.pickupLocation!,
    dropoffLocation: self.mapView.dropoffLocation!
  ) { [weak self] (tripName, error) in
    guard let strongSelf = self else { return }
    if error != nil {
      // print error message.
      return
    }
    let tripService = GMTCServices.shared().tripService
    // Create a tripModel instance for listening the update of the trip
    // specified by this trip name.
    let tripModel = tripService.tripModel(forTripName: tripName)
    // Create a journeySharingSession instance based on the tripModel
    let journeySharingSession = GMTCJourneySharingSession(tripModel: tripModel)
    // Add the journeySharingSession instance on the mapView for UI updating.
    strongSelf.mapView.show(journeySharingSession)
    // Register for the trip update events.
    tripModel.register(strongSelf)

    strongSelf.currentTripModel = tripModel
    strongSelf.currentJourneySharingSession = journeySharingSession
    strongSelf.hideLoadingView()
  }

  self.showLoadingView()
}
Objective-C
/*

    *   MapViewController.m
 */
-   (void)viewDidLoad {
  [super viewDidLoad];
  ...
  self.mapView = [[GMTCMapView alloc] initWithFrame:CGRectZero];
  self.mapView.delegate = self;
  [self.view addSubview:self.mapView];
}

// Handle the callback when the GMTCMapView did initialized.

-   (void)mapViewDidInitializeCustomerState:(GMTCMapView *)mapview {
  self.mapView.pickupLocation = self.selectedPickupLocation;
  self.mapView.dropoffLocation = self.selectedDropoffLocation;

  __weak __typeof(self) weakSelf = self;
  [self startTripBookingWithPickupLocation:self.selectedPickupLocation
                           dropoffLocation:self.selectedDropoffLocation
                                completion:^(NSString *tripName, NSError *error) {
                                  __typeof(self) strongSelf = weakSelf;
                                  GMTCTripService *tripService = [GMTCServices sharedServices].tripService;
                                  // Create a tripModel instance for listening to updates to the trip specified by this trip name.
                                  GMTCTripModel *tripModel = [tripService tripModelForTripName:tripName];
                                  // Create a journeySharingSession instance based on the tripModel.
                                  GMTCJourneySharingSession *journeySharingSession =
                                    [[GMTCJourneySharingSession alloc] initWithTripModel:tripModel];
                                  // Add the journeySharingSession instance on the mapView for updating the UI.
                                  [strongSelf.mapView showMapViewSession:journeySharingSession];
                                  // Register for trip update events.
                                  [tripModel registerSubscriber:self];

                                  strongSelf.currentTripModel = tripModel;
                                  strongSelf.currentJourneySharingSession = journeySharingSession;
                                  [strongSelf hideLoadingView];
                                }];
    [self showLoadingView];
}
मौजूदा यात्रा रद्द करें
नीचे दिए गए उदाहरण में, चालू चालू यात्रा को रीसेट करने का तरीका बताया गया है.
Swift
/*

    *   MapViewController.swift
 */
func cancelCurrentActiveTrip() {
  // Stop the tripModel
  self.currentTripModel.unregisterSubscriber(self)

  // Remove the journey sharing session from the mapView's UI stack.
  self.mapView.hide(journeySharingSession)
}
Objective-C
/*

    *   MapViewController.m
 */
-   (void)cancelCurrentActiveTrip {
  // Stop the tripModel
  [self.currentTripModel unregisterSubscriber:self];

  // Remove the journey sharing session from the mapView's UI stack.
  [self.mapView hideMapViewSession:journeySharingSession];
}
यात्रा के अपडेट सुनें
नीचे दिए गए उदाहरण में, tripModel कॉलबैक को रजिस्टर करने का तरीका बताया गया है.
Swift
/*

    *   MapViewController.swift
 */
override func viewDidLoad() {
  super.viewDidLoad()
  // Register for trip update events.
  self.currentTripModel.register(self)
}
Objective-C
/*

    *   MapViewController.m
 */
-   (void)viewDidLoad {
  [super viewDidLoad];
  // Register for trip update events.
  [self.currentTripModel registerSubscriber:self];
  ...
}
नीचे दिए गए उदाहरण में, tripModel कॉलबैक का रजिस्ट्रेशन रद्द करने का तरीका बताया गया है.
Swift
/*

    *   MapViewController.swift
 */
deinit {
  self.currentTripModel.unregisterSubscriber(self)
}
Objective-C
/*

    *   MapViewController.m
 */
-   (void)dealloc {
  [self.currentTripModel unregisterSubscriber:self];
  ...
}
नीचे दिए गए उदाहरण में, यात्रा की स्थिति अपडेट होने पर कॉलबैक मैनेज करने के लिए, GMTCTripModelSubscriber प्रोटोकॉल लागू करने का तरीका दिखाया गया है.
Swift
/*

    *   MapViewController.swift
 */
func tripModel(_: GMTCTripModel, didUpdate trip: GMTSTrip?, updatedPropertyFields: GMTSTripPropertyFields) {
  // Update the UI with the new `trip` data.
  self.updateUI(with: trip)
}

func tripModel(_: GMTCTripModel, didUpdate tripStatus: GMTSTripStatus) {
  // Handle trip status did change.
}

func tripModel(_: GMTCTripModel, didUpdateActiveRouteRemainingDistance activeRouteRemainingDistance: Int32) {
  // Handle remaining distance of active route did update.
}

func tripModel(_: GMTCTripModel, didUpdateActiveRoute activeRoute: [GMTSLatLng]?) {
  // Handle trip active route did update.
}

func tripModel(_: GMTCTripModel, didUpdate vehicleLocation: GMTSVehicleLocation?) {
  // Handle vehicle location did update.
}

func tripModel(_: GMTCTripModel, didUpdatePickupLocation pickupLocation: GMTSTerminalLocation?) {
  // Handle pickup location did update.
}

func tripModel(_: GMTCTripModel, didUpdateDropoffLocation dropoffLocation: GMTSTerminalLocation?) {
  // Handle drop off location did update.
}

func tripModel(_: GMTCTripModel, didUpdatePickupETA pickupETA: TimeInterval) {
  // Handle the pickup ETA did update.
}

func tripModel(_: GMTCTripModel, didUpdateDropoffETA dropoffETA: TimeInterval) {
  // Handle the drop off ETA did update.
}

func tripModel(_: GMTCTripModel, didUpdateRemaining remainingWaypoints: [GMTSTripWaypoint]?) {
  // Handle updates to the pickup, dropoff or intermediate destinations of the trip.
}

func tripModel(_: GMTCTripModel, didFailUpdateTripWithError error: Error?) {
  // Handle the error.
}

func tripModel(_: GMTCTripModel, didUpdateIntermediateDestinations intermediateDestinations: [GMTSTerminalLocation]?) {
  // Handle the intermediate destinations being updated.
}

func tripModel(_: GMTCTripModel, didUpdateActiveRouteTraffic activeRouteTraffic: GMTSTrafficData?) {
  // Handle trip active route traffic being updated.
}
Objective-C
/*

    *   MapViewController.m
 */
#pragma mark - GMTCTripModelSubscriber implementation

-   (void)tripModel:(GMTCTripModel *)tripModel
            didUpdateTrip:(nullable GMTSTrip *)trip
    updatedPropertyFields:(enum GMTSTripPropertyFields)updatedPropertyFields {
  // Update the UI with the new `trip` data.
  [self updateUIWithTrip:trip];
  ...
}

-   (void)tripModel:(GMTCTripModel *)tripModel didUpdateTripStatus:(enum GMTSTripStatus)tripStatus {
  // Handle trip status did change.
}

-   (void)tripModel:(GMTCTripModel *)tripModel
    didUpdateActiveRouteRemainingDistance:(int32_t)activeRouteRemainingDistance {
   // Handle remaining distance of active route did update.
}

-   (void)tripModel:(GMTCTripModel *)tripModel
    didUpdateActiveRoute:(nullable NSArray<GMTSLatLng *> *)activeRoute {
  // Handle trip active route did update.
}

-   (void)tripModel:(GMTCTripModel *)tripModel
    didUpdateVehicleLocation:(nullable GMTSVehicleLocation *)vehicleLocation {
  // Handle vehicle location did update.
}

-   (void)tripModel:(GMTCTripModel *)tripModel
    didUpdatePickupLocation:(nullable GMTSTerminalLocation *)pickupLocation {
  // Handle pickup location did update.
}

-   (void)tripModel:(GMTCTripModel *)tripModel
    didUpdateDropoffLocation:(nullable GMTSTerminalLocation *)dropoffLocation {
  // Handle drop off location did update.
}

-   (void)tripModel:(GMTCTripModel *)tripModel didUpdatePickupETA:(NSTimeInterval)pickupETA {
  // Handle the pickup ETA did update.
}

-   (void)tripModel:(GMTCTripModel *)tripModel
    didUpdateRemainingWaypoints:(nullable NSArray<GMTSTripWaypoint *> *)remainingWaypoints {
  // Handle updates to the pickup, dropoff or intermediate destinations of the trip.
}

-   (void)tripModel:(GMTCTripModel *)tripModel didUpdateDropoffETA:(NSTimeInterval)dropoffETA {
  // Handle the drop off ETA did update.
}

-   (void)tripModel:(GMTCTripModel *)tripModel didFailUpdateTripWithError:(nullable NSError *)error {
  // Handle the error.
}

-   (void)tripModel:(GMTCTripModel *)tripModel
    didUpdateIntermediateDestinations:
        (nullable NSArray<GMTSTerminalLocation *> *)intermediateDestinations {
  // Handle the intermediate destinations being updated.
}

-   (void)tripModel:(GMTCTripModel *)tripModel
    didUpdateActiveRouteTraffic:(nullable GMTSTrafficData *)activeRouteTraffic {
  // Handle trip active route traffic being updated.
}
गड़बड़ी ठीक करना
अगर आपने TripleModel की सदस्यता ली है और कोई गड़बड़ी होती है, तो डेलिगेट तरीके को लागू करके
tripModel का कॉलबैक मिल सकता है
tripModel(_:didFailUpdateTripWithError:). Fleet Engine ने गड़बड़ी का मैसेज जनरेट किया, जो
Google Cloud की गड़बड़ी के स्टैंडर्ड के मुताबिक है. गड़बड़ी के मैसेज की ज़्यादा जानकारी और सभी गड़बड़ी कोड के लिए, Google Cloud की गड़बड़ियों का दस्तावेज़ देखें.
खास तौर पर, यात्रा पर निगरानी रखने के लिए, पुष्टि करने वाला मान्य टोकन देना ज़रूरी है. पुष्टि करने वाला कोई मान्य क्रेडेंशियल न होने पर, 401 UNAUTHENTICATED को बढ़ाया जाएगा, जैसे कि टोकन की समयसीमा खत्म हो गई है.403 PERMISSION_DENIED अगर कॉलर के पास किसी खास एपीआई को कॉल करने की अनुमति नहीं है (उदाहरण के लिए, उपभोक्ता की भूमिका वाला उपयोगकर्ता, अपडेटTrip को कॉल करने की कोशिश करता है) या अनुरोध के JWT में कोई मान्यvehicle_id/trip_id
नहीं है.
ज़्यादा जानकारी के लिए, उपभोक्ता SDK टूल की गड़बड़ी को मैनेज करना लेख पढ़ें.
यूज़र इंटरफ़ेस (यूआई) पसंद के मुताबिक बनाना
कस्टम पॉलीलाइन यूज़र इंटरफ़ेस (यूआई) के विकल्प पाएं और उन्हें सेट करें
नीचे दिए गए उदाहरण में, पॉलीलाइन के लिए कस्टम यूज़र इंटरफ़ेस (यूआई) के विकल्प सेट करने का तरीका बताया गया है.
Swift
/** MapViewController.swift */

func updatePolylineUIOptions() {
  // The polyline type that you would like to set custom UI options for.
  let customizablePolylineType = GMTCPolylineType.activeRoute

  let polylineStyleOptions = GMTCMutablePolylineStyleOptions()
  polylineStyleOptions.strokeWidth = 8.0
  polylineStyleOptions.strokeColor = .blue
  polylineStyleOptions.isVisible = true
  polylineStyleOptions.zIndex = 1000
  polylineStyleOptions.isGeodesic = true
  let coordinator = self.mapView.consumerMapStyleCoordinator
  coordinator.setPolylineStyleOptions(polylineStyleOptions, polylineType:customizablePolylineType)
}
Objective-C
/** MapViewController.m */

-   (void)updatePolylineUIOptions {
  // The polyline type that you would like to set custom UI options for.
  GMTCPolylineType customizablePolylineType = GMTCPolylineTypeActiveRoute;

  GMTCMutablePolylineStyleOptions *polylineStyleOptions =
      [[GMTCMutablePolylineStyleOptions alloc] init];
  polylineStyleOptions.strokeWidth = 8.0;
  polylineStyleOptions.strokeColor = [UIColor blueColor];
  polylineStyleOptions.isVisible = YES;
  polylineStyleOptions.zIndex = 1000;
  polylineStyleOptions.isGeodesic = YES;
  [[_mapView consumerMapStyleCoordinator] setPolylineStyleOptions:polylineStyleOptions
                                                polylineType:customizablePolylineType];
}
कस्टम मार्कर यूज़र इंटरफ़ेस (यूआई) के विकल्प पाएं और सेट करें
यहां दिए गए उदाहरण में, मार्कर के लिए कस्टम यूज़र इंटरफ़ेस (यूआई) के विकल्प सेट करने का तरीका बताया गया है.
Swift
/** MapViewController.swift */

func updateMarkerUIOptions() {
  let customizableMarkerType = GMTCCustomizableMarkerType.tripVehicle
  let markerStyleOptions = GMTCMutableMarkerStyleOptions()
  markerStyleOptions.groundAnchor = groundAnchor
  markerStyleOptions.isVisible = true
  markerStyleOptions.icon = icon
  markerStyleOptions.zIndex = 100
  markerStyleOptions.isFlat = false
  let coordinator = self.mapView.consumerMapStyleCoordinator
  coordinator.setMarkerStyleOptions(markerStyleOptions, markerType: customizableMarkerType)
}
Objective-C
/** MapViewController.m */

-   (void)updateMarkerUIOptions {
  // The marker type that you would like to set custom UI options for.
  GMTCCustomizableMarkerType customizableMarkerType = GMTCCustomizableMarkerTypeTripVehicle;

  GMTCMutableMarkerStyleOptions *markerStyleOptions =
      [[GMTCMutableMarkerStyleOptions alloc] init];
  markerStyleOptions.groundAnchor = groundAnchor;
  markerStyleOptions.isVisible = YES;
  markerStyleOptions.icon = icon;
  markerStyleOptions.zIndex = 100;
  markerStyleOptions.isFlat = NO;

  [[_mapView consumerMapStyleCoordinator] setMarkerStyleOptions:markerStyleOptions markerType:customizableMarkerType];
}
कैमरे का ज़ूम अडजस्ट किया जा रहा है
iOS के लिए Maps SDK टूल में मौजूद मेरी जगह की जानकारी का बटन, कैमरे को डिवाइस की जगह पर फ़ोकस करता है.
अगर गतिविधि शेयर करने वाला कोई सेशन चालू हो, तो कैमरे को बीच में फ़ोकस करने के लिए, सिर्फ़ डिवाइस की जगह की जानकारी पर फ़ोकस किया जा सकता है.
उपभोक्ता SDK टूल में, ऑटो कैमरा की सुविधा मिलती है, जो डिफ़ॉल्ट रूप से चालू रहती है. इससे कैमरा ज़ूम करके, सफ़र शेयर करने के रूट और अगली ट्रिप वेपॉइंट पर फ़ोकस करता है.
अगर आपको कैमरे के काम करने के तरीके पर ज़्यादा कंट्रोल चाहिए, तो isAllowCameraAutoUpdate प्रॉपर्टी का इस्तेमाल करके, ऑटो कैमरा की सुविधा को बंद या चालू किया जा सकता है.
कैमरा में अपनी पसंद के मुताबिक बदलाव करने के लिए, iOS के लिए Maps SDK टूल कैमरा ट्रांसफ़र करने का तरीका देखें.