如要開始使用 Google 相簿 API,請使用 Google API 控制台啟用所需的 Google 相簿 API,並設定 OAuth 2.0 用戶端 ID,藉此設定專案。
您的應用程式會代表 Google 相簿使用者與 Google 相簿互動。舉例來說,當您在使用者的 Google 相簿中建立相簿,或將媒體項目上傳至使用者的 Google 相簿帳戶時,使用者會使用 OAuth 2.0 通訊協定授權這些 API 要求。
OAuth 2.0 用戶端 ID 可讓應用程式使用者登入、驗證,進而使用相片 API。相片 API 不支援服務帳戶;使用者必須登入有效的 Google 帳戶,才能使用這些 API。
設定應用程式
請先啟用 API,然後要求 OAuth 2.0 用戶端 ID。
啟用 API
您必須先在專案中啟用相片 API,才能使用這些 API。
- 前往 Google API 控制台。
- 在選單列中選取專案或建立新專案。
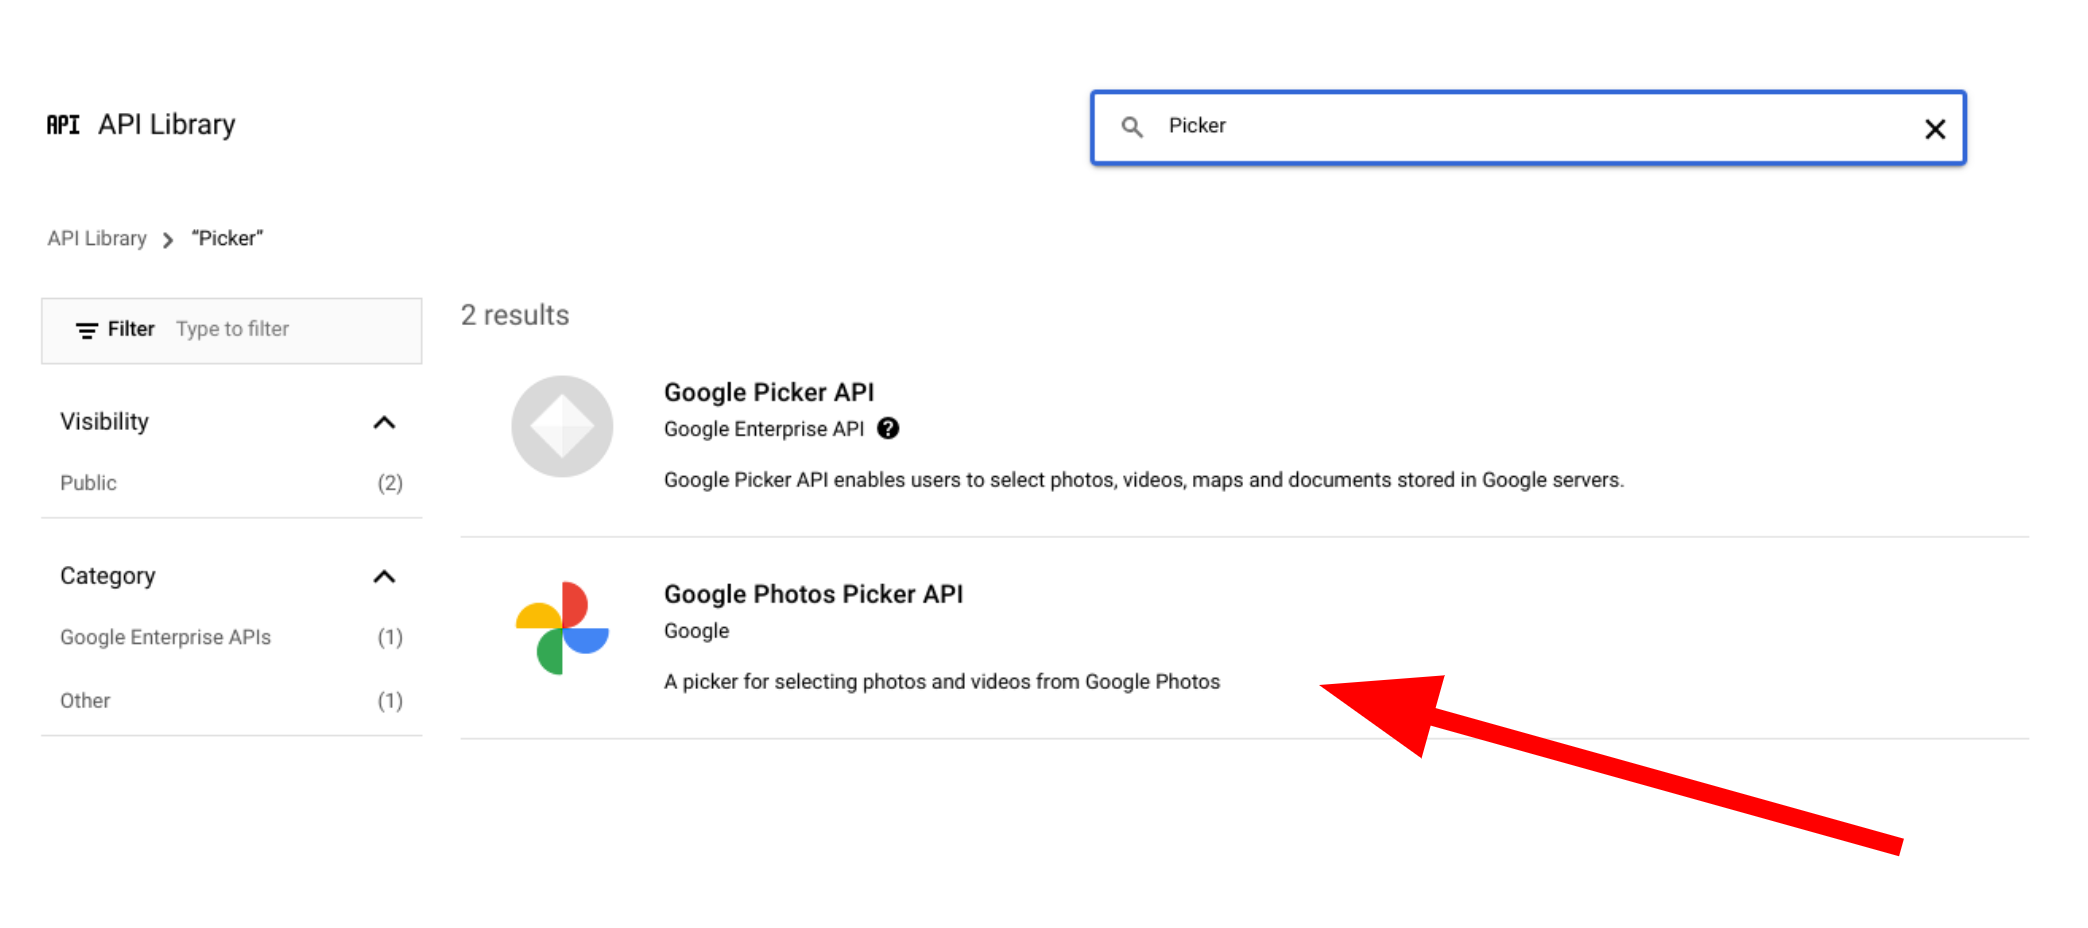
- 如要開啟 Google 相簿 API,請從導覽選單中依序選取「API 和服務」>「程式庫」。
- 搜尋「相片」。選取一或多個 Google 相簿 API,然後按一下「啟用」。
要求 OAuth 2.0 用戶端 ID
請按照下列步驟要求 OAuth 用戶端 ID,並為應用程式設定用戶端 ID。這個範例會使用整個 OAuth 流程皆由伺服器端處理的應用程式,例如範例中的應用程式。其他導入情境的設定程序可能會有所不同。
- 前往 Google API 控制台,然後選取您的專案。
- 在選單中,依序選取「API 和服務」>「憑證」。
在「憑證」頁面上,依序點選「建立憑證」>「OAuth 用戶端 ID」。
選取「應用程式類型」。在這個範例中,應用程式類型為「Web application」。
請註冊應用程式可存取 Google API 的來源,如下所示:
- 如要識別用戶端 ID,請輸入名稱。
在「授權的 JavaScript 來源」欄位中輸入應用程式的來源。這個欄位不支援萬用字元。
您可以輸入多個來源,讓應用程式在不同的通訊協定、網域或子網域上執行。您輸入的網址可用於啟動 OAuth 要求。
以下範例顯示本機開發網址 (我們的範例使用
localhost:8080) 和正式版網址。http://localhost:8080 https://myproductionurl.example.com「Authorized redirect URI」欄位是接收 OAuth 2.0 伺服器回應的端點。通常包括開發環境,並指向應用程式中的路徑。
http://localhost:8080/auth/google/callback https://myproductionurl.example.com/auth/google/callback按一下「建立」。
-
在隨後顯示的 OAuth 用戶端對話方塊中,複製下列內容:
- 用戶端 ID
- 用戶端密碼
應用程式可以使用這些值存取已啟用的 Google API。
您必須先讓 Google 審查應用程式,才能發布可存取 Google 相簿 API 的公開應用程式。在您測試應用程式之前,畫面上會顯示「未驗證的應用程式」訊息,直到應用程式通過驗證為止。
設定應用程式後,即可開始使用:
變更用戶端 ID
透過任何 Google 相簿 API 建立的資源,只能使用用於建立這些資源的原始用戶端 ID 存取或修改。舉例來說,如果您在 Picker API 中使用特定用戶端 ID 建立 session,之後又在應用程式中變更該用戶端 ID,應用程式就會失去使用先前用戶端 ID 建立的任何 API 資源的存取權。
請仔細規劃,並為所使用的 Google 相簿 API 選擇正確的用戶端 ID 類型。只有在絕對必要的情況下,才可以變更用戶端 ID,以免發生存取問題。