
从 Chrome 126 开始,开发者可以开始针对一组桌面版 Federated Credential Management API (FedCM) 功能运行源试用,这些功能支持某些授权用例。该软件包由 Continuation API 和 Parameters API 组成,可提供类似于 OAuth 授权流程的体验,其中涉及身份提供程序 (IdP) 提供的权限对话框。该软件包还包含其他更改,例如 Fields API、多个 config网址 和自定义账号标签。从 Chrome 126 开始,我们还将推出 Storage Access API (SAA) 的源代码试用版,如果用户过去曾成功使用 FedCM 登录,则会自动授予 SAA 请求。
源试用:FedCM 接续 API 软件包
FedCM 接续 API 软件包由多个 FedCM 扩展组成:
Continuation API
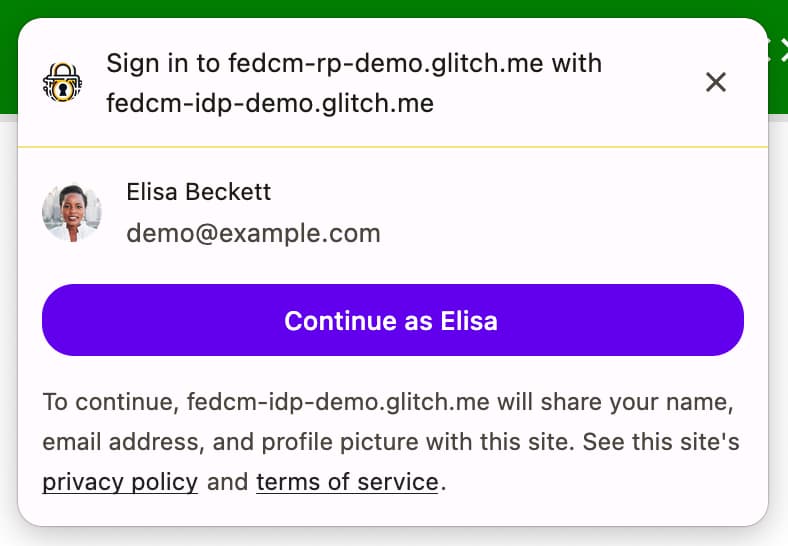
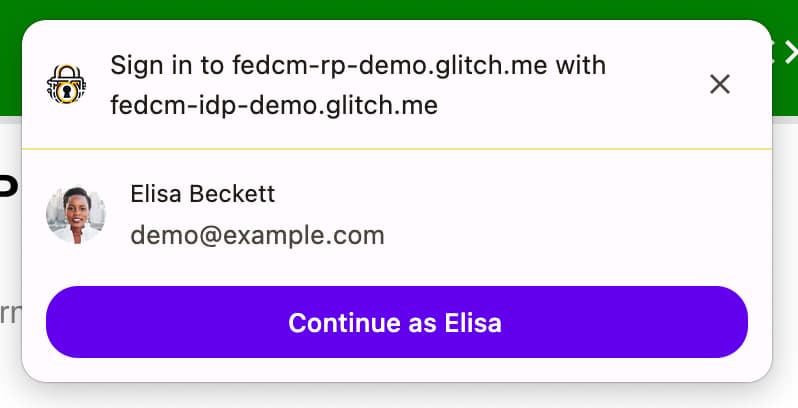
您可以查看 Glitch 上的 API 演示。
Continuation API 允许 IdP 的 ID 断言端点选择性地返回一个网址,FedCM 将呈现该网址,以便用户继续执行多步骤登录流程。这样一来,IdP 就可以请求用户授予现有 FedCM 界面中无法实现的信赖方 (RP) 权限,例如对用户服务器端资源的访问权限。
通常,ID 断言端点会返回身份验证所需的令牌。
{
  "token": "***********"
}
不过,使用 Continuation API 时,ID 断言端点可以返回一个 continue_on 属性,其中包含指向 ID 断言端点的绝对路径或相对路径。
{
  // In the id_assertion_endpoint, instead of returning a typical
  // "token" response, the IdP decides that it needs the user to
  // continue on a pop-up window:
  "continue_on": "/oauth/authorize?scope=..."
}
浏览器一收到 continue_on 响应,就会打开一个新的弹出式窗口,并将用户转到指定路径。
当用户与页面互动(例如,授予进一步权限以与 RP 共享额外信息)后,IdP 页面可以调用 IdentityProvider.resolve() 来解析原始 navigator.credentials.get() 调用并以参数形式返回令牌。
document.getElementById('allow_btn').addEventListener('click', async () => {
  let accessToken = await fetch('/generate_access_token.cgi');
  // Closes the window and resolves the promise (that is still hanging
  // in the relying party's renderer) with the value that is passed.
  IdentityProvider.resolve(accessToken);
});
然后,浏览器会自行关闭弹出式窗口,并将令牌返回给 API 调用方。
如果用户拒绝请求,您可以通过调用 IdentityProvider.close() 关闭窗口。
IdentityProvider.close();
如果用户出于某种原因更改了弹出式窗口中的账号(例如,IdP 提供了“切换用户”功能,或者在委托情况下),resolve 调用会接受一个可选的第二个参数,允许执行以下操作:
IdentityProvider.resolve(token, {accountId: '1234');
Parameters API
Parameters API 允许 RP 向 ID 断言端点提供其他参数。借助 Parameters API,RP 可以将其他参数传递给 IdP,以请求对基本登录以外的资源的权限。用户将通过由 IdP 控制的用户体验流程(该流程通过 Continuation API 启动)授权这些权限。
如需使用该 API,请在 navigator.credentials.get() 调用中将参数作为对象添加到 params 属性。
let {token} = await navigator.credentials.get({
  identity: {
    providers: [{
      clientId: '1234',
      configURL: 'https://idp.example/fedcm.json',
      // Key/value pairs that need to be passed from the
      // RP to the IdP but that don't really play any role with
      // the browser.
      params: {
        IDP_SPECIFIC_PARAM: '1',
        foo: 'BAR',
        ETC: 'MOAR',
        scope: 'calendar.readonly photos.write',
      }
    },
  }
});
params 对象中的属性名称会附加 param_。在上面的示例中,params 属性包含 IDP_SPECIFIC_PARAM('1')、foo('BAR')、ETC('MOAR')和 scope('calendar.readonly photos.write')。这将在请求的 HTTP 正文中转换为 param_IDP_SPECIFIC_PARAM=1¶m_foo=BAR¶m_ETC=MOAR¶m_scope=calendar.readonly%20photos.write:
POST /fedcm_assertion_endpoint HTTP/1.1
Host: idp.example
Origin: https://rp.example/
Content-Type: application/x-www-form-urlencoded
Cookie: 0x23223
Sec-Fetch-Dest: webidentity
account_id=123&client_id=client1234&nonce=234234&disclosure_text_shown=false¶m_IDP_SPECIFIC_PARAM=1¶m_foo=BAR¶m_ETC=MOAR¶m_scope=calendar.readonly%20photos.write
动态获取权限
一般来说,对于用户而言,在需要时(而不是在开发者认为它们最容易实现)时请求权限最为有用。例如,最好在用户即将拍照时请求相机使用权限,而不是在用户进入网站后立即请求权限。同样的做法也适用于服务器资源。仅在用户需要权限时请求权限。这称为“动态授权”。
如需使用 FedCM 动态请求授权,IdP 可以:
- 使用 IdP 可以理解的必需参数(例如
scope)调用navigator.credentials.get()。 - ID 断言端点用于确认用户已登录,并以
continue_on网址作为响应。 - 浏览器会打开一个弹出式窗口,其中包含 IdP 的权限页面,请求用户授予与请求的范围匹配的其他权限。
- 通过 IdP 通过
IdentityProvider.resolve()授权后,该窗口会关闭,并且 RP 的原始navigator.credentials.get()调用会获取相关令牌或授权代码,以便 RP 可以将其换取适当的访问令牌。
Fields API
借助 Fields API,RP 可以声明要从 IdP 请求的账号属性,以便浏览器能够在 FedCM 对话框中呈现适当的披露界面;IdP 有责任在返回的令牌中包含请求的字段。考虑这会在 OpenID Connect 中请求“基本配置文件”与在 OAuth 中请求“范围”。

如需使用 Fields API,请在 navigator.credentials.get() 调用中将参数作为数组添加到 fields 属性。这些字段目前可以包含 'name'、'email' 和 'picture',但将来可能会扩展为包含更多值。
包含 fields 的请求如下所示:
let { token } = await navigator.credentials.get({
  identity: {
    providers: [{
      fields: ['name', 'email', 'picture'],
      clientId: '1234',
      configURL: 'https://idp.example/fedcm.json',
      params: {
        scope: 'drive.readonly calendar.readonly',
      }
    },
  }
  mediation: 'optional',
});
发送到 ID 断言端点的 HTTP 请求包含 RP 指定的 fields 参数(如果这不是回访用户,则将 disclosure_text_shown 参数设为 true),以及浏览器在 disclosure_shown_for 参数中向用户披露的字段:
POST /id_assertion_endpoint HTTP/1.1
Host: idp.example
Origin: https://rp.example/
Content-Type: application/x-www-form-urlencoded
Cookie: 0x23223
Sec-Fetch-Dest: webidentity

account_id=123&client_id=client1234&nonce=234234&disclosure_text_shown=true&fields=email,name,picture&disclosure_shown_for=email,name,picture
如果 RP 需要从 IdP 访问任何其他数据(例如访问日历),则应使用上述自定义参数进行处理。IdP 会返回一个 continue_on 网址以请求权限。
如果 fields 为空数组,则请求如下所示:
let { token } = await navigator.credentials.get({
  identity: {
    providers: [{
      fields: [],
      clientId: '1234',
      configURL: 'https://idp.example/fedcm.json',
      params: {
        scope: 'drive.readonly calendar.readonly',
      }
    },
  }
  mediation: 'optional',
});
如果 fields 是空数组,用户代理将跳过披露界面。
即使 accounts 端点的响应不包含与 approved_clients 中的 RP 匹配的客户端 ID,也存在这种情况。
在这种情况下,发送到 ID 断言端点的 disclosure_text_shown 在 HTTP 正文中为 false:
POST /id_assertion_endpoint HTTP/1.1
Host: idp.example
Origin: https://rp.example/
Content-Type: application/x-www-form-urlencoded
Cookie: 0x23223
Sec-Fetch-Dest: webidentity

account_id=123&client_id=client1234&nonce=234234&disclosure_text_shown=false
多个 config网址
多个 config网址 允许 IdP 容纳 IdP 的多个配置文件,方法是在已知文件中指定与配置文件相同的 accounts_endpoint 和 login_url。
如果将 accounts_endpoint 和 login_url 添加到已知文件中,则 provider_urls 会被忽略,以便 IdP 可以支持多个配置文件。否则,provider_urls 会继续生效,以使其向后兼容。
支持多个 configURL 的 well-known 文件可能如下所示:
{
  "provider_urls": [ "https://idp.example/fedcm.json" ],
  "accounts_endpoint": "https://idp.example/accounts",
  "login_url": "https://idp.example/login"
}
这样一来,我们就可以:
- 保持对现有已知文件和已实际部署的早期版本的浏览器的向后和向前兼容性。
- 可以有任意数量的配置文件,只要它们都指向相同的
accounts_endpoint和login_url即可。 - 熵没有机会添加到向
accounts_endpoint发出的基于凭据的提取请求,因为必须在“.well-known”级别指定。
支持多个 config网址 并非强制性要求,并且现有 FedCM 实现可以保持不变。
自定义账号标签
借助自定义账号标签,FedCM IDP 可以为账号添加注释,以便 RP 通过在配置文件中指定标签来过滤账号。您可以使用 Domain Hint API 和 Login Hint API 通过在 navigator.credentials.get() 调用中指定它们来实现类似的过滤,但自定义账号标签可以通过指定配置文件来过滤用户,这在使用多个 configURL 时特别有用。自定义账号标签也有所不同,因为自定义账号标签由 IdP 服务器提供,而不是由 RP(如登录或网域提示)提供。
示例
IdP 分别针对消费者和企业支持两个 configURL。消费者配置文件具有 'consumer' 标签,企业配置文件具有 'enterprise' 标签。
采用这种设置时,well-known 文件包含 accounts_endpoint 和 login_url,以允许多个 configURL。
{
  "provider_urls": [ "https://idp.example/fedcm.json" ],
  "accounts_endpoint": "https://idp.example/accounts",
  "login_url": "https://idp.example/login"
}
在 well-known 文件中提供 accounts_endpoint 时,系统会忽略 provider_urls。RP 可以直接指向 navigator.credentials.get() 调用中的相应配置文件。
使用方配置文件位于 https://idp.example/fedcm.json,其中包含使用 include 指定 'consumer' 的 accounts 属性。
{
  "accounts_endpoint": "https://idp.example/accounts",
  "client_metadata_endpoint": "/client_metadata",
  "login_url": "https://idp.example/login",
  "id_assertion_endpoint": "/assertion",
  "accounts": {
    "include": "consumer"
  }
}
企业配置文件位于 https://idp.example/enterprise/fedcm.json,其中包含使用 include 指定 'enterprise' 的 accounts 属性。
{
  "accounts_endpoint": "https://idp.example/accounts",
  "client_metadata_endpoint": "/enterprise/client_metadata",
  "login_url": "https://idp.example/login",
  "id_assertion_endpoint": "/assertion",
  "accounts": {
    "include": "enterprise"
  }
}
通用 IdP 账号端点(在此示例中为 https://idp.example/accounts)会返回一个账号列表,其中包含标签属性,并且每个账号的数组中都分配有 labels。以下是拥有两个账号的用户的示例响应。一个面向消费者,另一个面向企业:
{
 "accounts": [{
   "id": "123",
   "given_name": "John",
   "name": "John Doe",
   "email": "john_doe@idp.example",
   "picture": "https://idp.example/profile/123",
   "labels": ["consumer"]
  }], [{
   "id": "4567",
   "given_name": "Jane",
   "name": "Jane Doe",
   "email": "jane_doe@idp.example",
   "picture": "https://idp.example/profile/4567",
   "labels": ["enterprise"]
  }]
}
当 RP 想要允许 'enterprise' 用户登录时,可以在 navigator.credentials.get() 调用中指定 'enterprise' configURL 'https://idp.example/enterprise/fedcm.json':
let { token } = await navigator.credentials.get({
  identity: {
    providers: [{
      clientId: '1234',
      nonce: '234234',
      configURL: 'https://idp.example/enterprise/fedcm.json',
    },
  }
});
因此,用户只能使用 '4567' 的账号 ID 进行登录。'123' 的账号 ID 会被浏览器以静默方式隐藏,这样就不会向用户提供此网站上 IdP 不支持的账号。
源试用:将 FedCM 用作 Storage Access API 的信任信号
Chrome 126 将开始试行将 FedCM 用作 Storage Access API 的信任信号。进行此更改后,通过 FedCM 事先授予的权限将成为 Storage Access API 自动批准存储空间访问请求的有效原因。
当嵌入的 iframe 想要访问个性化资源时,此属性非常有用:例如,如果 idp.example 嵌入在 rp.example 中,并且需要显示个性化资源。如果浏览器限制对第三方 Cookie 的访问权限,那么即使用户通过 FedCM 使用 idp.example 登录 rp.example,嵌入式 idp.example iframe 也无法请求个性化资源,因为请求不包含第三方 Cookie。
为此,idp.example 需要通过嵌入在网站上的 iframe 获取存储空间访问权限,而这只能通过权限提示获得。
将 FedCM 用作 Storage Access API 的信任信号后,Storage Access API 权限检查不仅接受存储空间访问提示授予的权限,还接受 FedCM 提示授予的权限。
// In top-level rp.example:

// Ensure FedCM permission has been granted.
const cred = await navigator.credentials.get({
  identity: {
    providers: [{
      configURL: 'https://idp.example/fedcm.json',
      clientId: '123',
    }],
  },
  mediation: 'optional',
});

// In an embedded IdP iframe:

// No user gesture is needed to call this, and the call will be auto-granted.
await document.requestStorageAccess();

// This returns `true`.
const hasAccess = await document.hasStorageAccess();
用户使用 FedCM 登录后,只要 FedCM 身份验证有效,系统就会自动授予相应权限。这意味着,当用户断开连接后,系统会在请求权限时显示提示。
参与源试用
通过在 Chrome 126 或更高版本上开启 Chrome 标志
chrome://flags#fedcm-authz,您可以在本地试用 FedCM Continuation API 软件包。您还可以尝试在 Chrome 126 或更高版本中启用 #fedcm-with-storage-access-api,以便在本地将 FedCM 用作 Storage Access API 的信任信号。
这些功能也以源试用的形式提供。通过源试用,您可以试用新功能,并就其易用性、实用性和有效性提供反馈。如需了解详情,请参阅开始试用。
如需试用 FedCM Continuation API 软件包源试用,请创建两个源试用令牌:
- 注册试用。将令牌嵌入到 IdP 源。
- 注册源试用,并选中“第三方匹配”复选框。 按照为 RP 注册第三方来源试用中的说明嵌入 RP 的令牌。
如果您有兴趣启用 Continuation API 以及按钮流程,请同时启用 Button Mode API 源试用:
- 以第三方身份注册源代码试用计划。按照为 RP 注册第三方来源试用中的说明嵌入 RP 的令牌。
如需尝试将 FedCM 用作 Storage Access API 源试用版的信任信号,请执行以下操作:
- 注册参加源试用。将令牌嵌入到 IdP 源。
Continuation API 软件包源试用以及将 FedCM 用作 Storage Access API 源试用的信任信号从 Chrome 126 开始提供。
为 RP 注册第三方来源试用
- 前往源试用注册页面。
- 点击 Register(注册)按钮,然后填写申请令牌的表单。
- 将 IdP 的来源输入为网站来源。
- 选中“第三方匹配”,以便使用 JavaScript 在其他来源上注入令牌。
- 点击提交。
- 将已发出的令牌嵌入到第三方网站上。
如需在第三方网站上嵌入令牌,请将以下代码添加到 IdP 的 JavaScript 库或从 IdP 源提供的 SDK。
const tokenElement = document.createElement('meta');
tokenElement.httpEquiv = 'origin-trial';
tokenElement.content = 'TOKEN_GOES_HERE';
document.head.appendChild(tokenElement);
将 TOKEN_GOES_HERE 替换为您自己的令牌。