
借助 Google 幻灯片 API,您可以在页面上创建和修改表格。本页中的示例展示了使用 presentations.batchUpdate 方法执行的一些常见表操作。
这些示例使用以下变量:
- PRESENTATION_ID - 表示您提供演示文稿 ID 的位置。您可以从演示文稿网址中找到此 ID 的值。
- PAGE_ID - 表示您在何处提供页面对象 ID。您可以从网址或通过使用 API 读取请求检索此值。
- TABLE_ID - 表示您在何处为所处理的表格提供页面元素对象 ID。您可以为自己创建的元素指定此 ID(存在一些限制),也可以允许 Google 幻灯片 API 自动创建此 ID。您可以通过 API 读取请求检索元素 ID。
这些示例以 HTTP 请求的形式呈现,不受语言限制。如需了解如何使用 Google API 客户端库以不同的语言实现批量更新,请参阅添加形状和文本。
创建表
以下 presentations.batchUpdate 代码示例展示了如何使用 CreateTableRequest 方法向 PAGE_ID 指定的幻灯片添加表格。
此表格包含 8 行和 5 列。请注意,Google 幻灯片 API 会忽略在 elementProperties 中提供的任何 size 或 transform 字段。而是会创建一个大致位于幻灯片中心且大小足以容纳指定行数和列数的表格(如果可能)。
以下是用于创建表的请求协议:
POST https://slides.googleapis.com/v1/presentations/PRESENTATION_ID:batchUpdate
{
  "requests": [
    {
      "createTable": {
        "objectId": TABLE_ID,
        "elementProperties": {
          "pageObjectId": PAGE_ID,
        },
        "rows": 8,
        "columns": 5
      }
    }
  ]
}
删除表格行或列
以下 presentations.batchUpdate 代码示例展示了如何使用 DeleteTableRowRequest 方法移除第六行。然后,它使用 DeleteTableColumnRequest 方法移除第四列。该表由 TABLE_ID 指定。cellLocation 中的 rowIndex 和 columnIndex 均从 0 开始编号。
以下是用于删除表行或列的请求协议:
POST https://slides.googleapis.com/v1/presentations/PRESENTATION_ID:batchUpdate
{
  "requests": [
    {
      "deleteTableRow": {
        "tableObjectId": TABLE_ID,
        "cellLocation": {
          "rowIndex": 5
        }
      }
    },
    {
      "deleteTableColumn": {
        "tableObjectId": TABLE_ID,
        "cellLocation": {
          "columnIndex": 3
        }
      }
    }
  ]
}
修改表数据
以下 presentations.batchUpdate 代码示例展示了如何使用 DeleteTextRequest 方法移除 textRange 中的单元格中的所有文本。然后,它使用 InsertTextRequest 方法将其替换为“Kangaroo”的新文本。
该表由 TABLE_ID 指定。受影响的单元格位于第五行和第三列。cellLocation 中的 rowIndex 和 columnIndex 均从 0 开始编号。
以下是用于修改表数据的请求协议:
POST https://slides.googleapis.com/v1/presentations/PRESENTATION_ID:batchUpdate
{
  "requests": [
    {
      "deleteText": {
        "objectId": TABLE_ID,
        "cellLocation": {
          "rowIndex": 4,
          "columnIndex": 2
        },
        "textRange": {
          "type": "ALL",
        }
      }
    },
    {
      "insertText": {
        "objectId": TABLE_ID,
        "cellLocation": {
          "rowIndex": 4,
          "columnIndex": 2
        },
        "text": "Kangaroo",
        "insertionIndex": 0
      }
    }
  ]
}
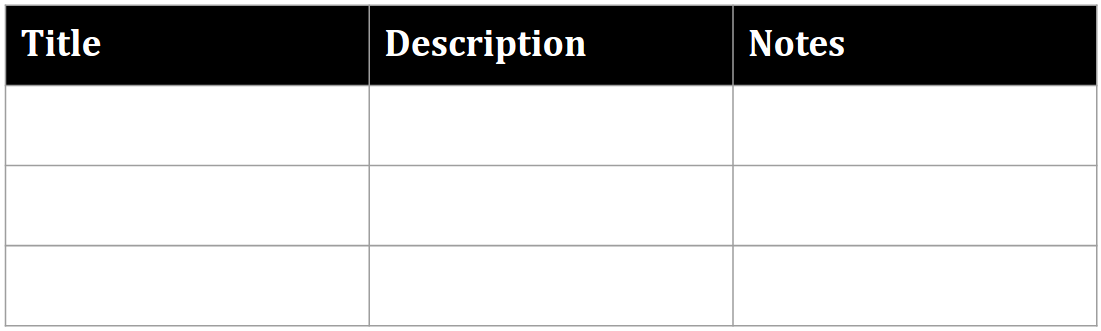
设置表格标题行的格式
以下 presentations.batchUpdate 代码示例展示了如何使用 UpdateTableCellPropertiesRequest 方法在由 TABLE_ID 指定的 tableRange 中设置表格元素的标题行格式。然后,它使用 TableCellProperties 方法将标题行的背景颜色设为黑色。
以下每个请求都使用 UpdateTextStyleRequest 方法将标题行中某个单元格的文本格式设置为 textRange 中的粗体白色 18 号 Cambria 字体。然后,您需要针对标题中的每个其他单元格重复此请求。
location 和 cellLocation 中的 rowIndex 和 columnIndex 均从 0 开始编号。
以下是用于设置表格标题行的请求协议:
POST https://slides.googleapis.com/v1/presentations/PRESENTATION_ID:batchUpdate
{
  "requests": [
    {
      "updateTableCellProperties": {
        "objectId": TABLE_ID,
        "tableRange": {
          "location": {
            "rowIndex": 0,
            "columnIndex": 0
          },
          "rowSpan": 1,
          "columnSpan": 3
        },
        "tableCellProperties": {
          "tableCellBackgroundFill": {
            "solidFill": {
              "color": {
                "rgbColor": {
                  "red": 0.0,
                  "green": 0.0,
                  "blue": 0.0
                }
              }
            }
          }
        },
        "fields": "tableCellBackgroundFill.solidFill.color"
      }
    },
    {
      "updateTextStyle": {
        "objectId": TABLE_ID,
        "cellLocation": {
          "rowIndex": 0,
          "columnIndex": 0
        },
        "style": {
          "foregroundColor": {
            "opaqueColor": {
              "rgbColor": {
                "red": 1.0,
                "green": 1.0,
                "blue": 1.0
              }
            }
          },
          "bold": true,
          "fontFamily": "Cambria",
          "fontSize": {
            "magnitude": 18,
            "unit": "PT"
          }
        },
        "textRange": {
          "type": "ALL"
        },
        "fields": "foregroundColor,bold,fontFamily,fontSize"
      }
    },
    // Repeat the above request for each additional cell in the header row....
  ]
}
更新后,设置了格式的标题行如下所示:
插入表格行或列
以下 presentations.batchUpdate 代码示例展示了如何使用 InsertTableRowsRequest 方法在第六行下方添加三行。然后,它使用 InsertTableColumnsRequest 方法在同一表格中的第四列左侧添加两列。
该表由 TABLE_ID 指定。cellLocation 中的 rowIndex 和 columnIndex 均从零开始计数。
以下是用于插入表行或列的请求协议:
POST https://slides.googleapis.com/v1/presentations/PRESENTATION_ID:batchUpdate
{
  "requests": [
    {
      "insertTableRows": {
        "tableObjectId": TABLE_ID,
        "cellLocation": {
          "rowIndex": 5
        },
        "insertBelow": true,
        "number": 3
      }
    },
    {
      "insertTableColumns": {
        "tableObjectId": TABLE_ID,
        "cellLocation": {
          "columnIndex": 3
        },
        "insertRight": false,
        "number": 2
      }
    }
  ]
}