Google Chat API'yi kullanarak mesaj gönderme

Bu kılavuzda, Google Chat API'nin nasıl çağrılacağı açıklanmaktadır. messages.create() yöntemini kullanabilirsiniz:

  • Metin, kart ve etkileşimli widget'lar içeren iletiler gönderin.
  • Belirli bir Chat kullanıcısına gizli olarak mesaj gönderebilirsiniz.
  • Bir mesaj dizisi başlatın veya bir mesaj dizisini yanıtlayın.
  • Diğer Chat API'lerinde belirtebilmek için bir mesajı adlandırın kabul edersiniz.

Maksimum ileti boyutu (metin ve kartlar dahil) 32.000 bayttır. Bu boyutu aşan bir mesaj göndermek için Chat uygulamanız birden fazla ileti göndermesi gerekir.

Chat uygulamaları, messages.create() yönteminin çağrılmasının yanı sıra kullanıcı etkileşimlerine yanıt vermek için mesaj oluşturabilir ve gönderebilir (örneğin, bir karşılama mesajı, kullanıcının Chat uygulamasını boşluk oluşturur. Chat uygulamaları etkileşimlere yanıt verirken etkileşimli iletişim kutuları ve bağlantı önizleme de dahil mesajlaşma özelliklerinin türleri kullanır. Chat uygulaması, bir kullanıcıya yanıt vermek için Chat API'yi çağırmadan mesajı eşzamanlı olarak gönderir. Öğrenmek için etkileşimlere yanıt vermek için mesaj gönderme hakkında Google Chat uygulamanızla olan etkileşimleri alın ve yanıtlayın.

Chat'in, Chat API ile oluşturulan mesajları görüntüleme ve ilişkilendirme şekli

messages.create() yöntemini şunu kullanarak çağırabilirsiniz: uygulama kimlik doğrulaması ve kullanıcı kimlik doğrulaması. Chat, mesajı göndereni farklı şekilde ilişkilendirir değişiklik gösterir.

Chat uygulaması olarak kimlik doğrulaması yaptığınızda Chat uygulaması bu mesajı gönderir.

Uygulama kimlik doğrulamasıyla messages.create() yöntemini çağırma.
Şekil 1: Uygulama kimlik doğrulamasıyla Chat uygulaması mesajı alırsınız. Chat, gönderenin bir kişi olmadığını belirtmek için kişinin adının yanında App simgesini gösterir.

Kullanıcı olarak kimliğinizi doğruladığınızda Chat uygulaması, kullanıcı adına bir mesaj alırsınız. Chat ayrıca Chat uygulamasında mesajın adını görüntüleyin.

Kullanıcı kimlik doğrulamasıyla messages.create() yöntemini çağırma.
Şekil 2: Kullanıcı kimlik doğrulamasıyla kullanıcı mesajı gönderir ve Chat, Kullanıcı adının yanında Chat uygulaması adı.

Kimlik doğrulama türü, hangi mesajlaşma özelliklerini ve arayüzleri birçok bilgi var. Uygulama kimlik doğrulaması sayesinde Chat uygulamaları, zengin metin içeren mesajlar gönderebilir. kart tabanlı arayüzler ve etkileşimli widget'lar. Chat kullanıcıları yalnızca mesajlarında metin gönderebildiğinden, şunları yapabilirsiniz: Kullanıcı kimlik doğrulamasını kullanarak mesaj oluştururken yalnızca metin ekleyin. Mesajlaşma hakkında daha fazla bilgi edinmek için özellikleri hakkında daha fazla bilgi için Google Chat mesajlarına genel bakış

Bu kılavuzda, bir ileti göndermek için kimlik doğrulama türlerinden herhangi birinin nasıl kullanılacağı .

Ön koşullar

Node.js

Python

Java

Apps Komut Dosyası

Chat uygulaması olarak mesaj gönderme

Bu bölümde metin, kart ve etkileşimli aksesuar widget'ları uygulama kimlik doğrulaması.

Uygulama kimlik doğrulamasıyla gönderilen mesaj
Şekil 4. Bir Chat uygulaması metin, kart ve aksesuar düğmesi bulunuyor.

Uygulama kimlik doğrulamasını kullanarak messages.create() işlevini çağırmak için şu alanları kullanabilirsiniz:

  • chat.bot yetkilendirme kapsamı.
  • İçinde bulunduğu Space kaynağı mesajı yayınlayabilirsiniz. Chat uygulaması alanın bir üyesi olur.
  • Message bir kaynaktır. İletinin içeriğini tanımlamak için zengin metin (text), Bir veya daha fazla kart arayüzü (cardsV2), veya her ikisini birden seçebilirsiniz.

İsteğe bağlı olarak aşağıdakileri ekleyebilirsiniz:

Aşağıdaki kodda, bir Chat uygulamasının Chat uygulaması olarak yayınlanan bir mesaj gönderebilirsiniz: bir metin, bir kart ve iletinin alt kısmındaki tıklanabilir bir düğme:

Node.js

chat/client-libraries/cloud/create-message-app-cred.js
import {createClientWithAppCredentials} from './authentication-utils.js';

// This sample shows how to create message with app credential
async function main() {
  // Create a client
  const chatClient = createClientWithAppCredentials();

  // Initialize request argument(s)
  const request = {
    // Replace SPACE_NAME here.
    parent: 'spaces/SPACE_NAME',
    message: {
      text: '👋🌎 Hello world! I created this message by calling ' +
            'the Chat API\'s `messages.create()` method.',
      cardsV2 : [{ card: {
        header: {
          title: 'About this message',
          imageUrl: 'https://fonts.gstatic.com/s/i/short-term/release/googlesymbols/info/default/24px.svg'
        },
        sections: [{
          header: 'Contents',
          widgets: [{ textParagraph: {
              text: '🔡 <b>Text</b> which can include ' +
                    'hyperlinks 🔗, emojis 😄🎉, and @mentions 🗣️.'
            }}, { textParagraph: {
              text: '🖼️ A <b>card</b> to display visual elements' +
                    'and request information such as text 🔤, ' +
                    'dates and times 📅, and selections ☑️.'
            }}, { textParagraph: {
              text: '👉🔘 An <b>accessory widget</b> which adds ' +
                    'a button to the bottom of a message.'
            }}
          ]}, {
            header: "What's next",
            collapsible: true,
            widgets: [{ textParagraph: {
                text: "❤️ <a href='https://developers.google.com/workspace/chat/api/reference/rest/v1/spaces.messages.reactions/create'>Add a reaction</a>."
              }}, { textParagraph: {
                text: "🔄 <a href='https://developers.google.com/workspace/chat/api/reference/rest/v1/spaces.messages/patch'>Update</a> " +
                      "or  <a href='https://developers.google.com/workspace/chat/api/reference/rest/v1/spaces.messages/delete'>delete</a> " +
                      "the message."
              }
            }]
          }
        ]
      }}],
      accessoryWidgets: [{ buttonList: { buttons: [{
        text: 'View documentation',
        icon: { materialIcon: { name: 'link' }},
        onClick: { openLink: {
          url: 'https://developers.google.com/workspace/chat/create-messages'
        }}
      }]}}]
    }
  };

  // Make the request
  const response = await chatClient.createMessage(request);

  // Handle the response
  console.log(response);
}

main().catch(console.error);

Python

chat/client-libraries/cloud/create_message_app_cred.py
from authentication_utils import create_client_with_app_credentials
from google.apps import chat_v1 as google_chat

# This sample shows how to create message with app credential
def create_message_with_app_cred():
    # Create a client
    client = create_client_with_app_credentials()

    # Initialize request argument(s)
    request = google_chat.CreateMessageRequest(
        # Replace SPACE_NAME here.
        parent = "spaces/SPACE_NAME",
        message = {
            "text": '👋🌎 Hello world! I created this message by calling ' +
                    'the Chat API\'s `messages.create()` method.',
            "cards_v2" : [{ "card": {
                "header": {
                    "title": 'About this message',
                    "image_url": 'https://fonts.gstatic.com/s/i/short-term/release/googlesymbols/info/default/24px.svg'
                },
                "sections": [{
                    "header": "Contents",
                    "widgets": [{ "text_paragraph": {
                            "text": '🔡 <b>Text</b> which can include ' +
                                    'hyperlinks 🔗, emojis 😄🎉, and @mentions 🗣️.'
                        }}, { "text_paragraph": {
                            "text": '🖼️ A <b>card</b> to display visual elements' +
                                    'and request information such as text 🔤, ' +
                                    'dates and times 📅, and selections ☑️.'
                        }}, { "text_paragraph": {
                            "text": '👉🔘 An <b>accessory widget</b> which adds ' +
                                    'a button to the bottom of a message.'
                        }}
                    ]}, {
                        "header": "What's next",
                        "collapsible": True,
                        "widgets": [{ "text_paragraph": {
                                "text": "❤️ <a href='https://developers.google.com/workspace/chat/api/reference/rest/v1/spaces.messages.reactions/create'>Add a reaction</a>."
                            }}, { "text_paragraph": {
                                "text": "🔄 <a href='https://developers.google.com/workspace/chat/api/reference/rest/v1/spaces.messages/patch'>Update</a> " +
                                        "or  <a href='https://developers.google.com/workspace/chat/api/reference/rest/v1/spaces.messages/delete'>delete</a> " +
                                        "the message."
                            }
                        }]
                    }
                ]
            }}],
            "accessory_widgets": [{ "button_list": { "buttons": [{
                "text": 'View documentation',
                "icon": { "material_icon": { "name": 'link' }},
                "on_click": { "open_link": {
                    "url": 'https://developers.google.com/workspace/chat/create-messages'
                }}
            }]}}]
        }
    )

    # Make the request
    response = client.create_message(request)

    # Handle the response
    print(response)

create_message_with_app_cred()

Java

chat/client-libraries/cloud/src/main/java/com/google/workspace/api/chat/samples/CreateMessageAppCred.java
import com.google.apps.card.v1.Button;
import com.google.apps.card.v1.ButtonList;
import com.google.apps.card.v1.Card;
import com.google.apps.card.v1.Icon;
import com.google.apps.card.v1.MaterialIcon;
import com.google.apps.card.v1.OnClick;
import com.google.apps.card.v1.OpenLink;
import com.google.apps.card.v1.TextParagraph;
import com.google.apps.card.v1.Widget;
import com.google.apps.card.v1.Card.CardHeader;
import com.google.apps.card.v1.Card.Section;
import com.google.chat.v1.AccessoryWidget;
import com.google.chat.v1.CardWithId;
import com.google.chat.v1.ChatServiceClient;
import com.google.chat.v1.CreateMessageRequest;
import com.google.chat.v1.Message;

// This sample shows how to create message with app credential.
public class CreateMessageAppCred {

  public static void main(String[] args) throws Exception {
    try (ChatServiceClient chatServiceClient =
        AuthenticationUtils.createClientWithAppCredentials()) {
      CreateMessageRequest.Builder request = CreateMessageRequest.newBuilder()
        // Replace SPACE_NAME here.
        .setParent("spaces/SPACE_NAME")
        .setMessage(Message.newBuilder()
          .setText( "👋🌎 Hello world! I created this message by calling " +
                    "the Chat API\'s `messages.create()` method.")
          .addCardsV2(CardWithId.newBuilder().setCard(Card.newBuilder()
            .setHeader(CardHeader.newBuilder()
              .setTitle("About this message")
              .setImageUrl("https://fonts.gstatic.com/s/i/short-term/release/googlesymbols/info/default/24px.svg"))
            .addSections(Section.newBuilder()
              .setHeader("Contents")
              .addWidgets(Widget.newBuilder().setTextParagraph(TextParagraph.newBuilder().setText(
                "🔡 <b>Text</b> which can include " +
                "hyperlinks 🔗, emojis 😄🎉, and @mentions 🗣️.")))
              .addWidgets(Widget.newBuilder().setTextParagraph(TextParagraph.newBuilder().setText(
                "🖼️ A <b>card</b> to display visual elements " +
                "and request information such as text 🔤, " +
                "dates and times 📅, and selections ☑️.")))
              .addWidgets(Widget.newBuilder().setTextParagraph(TextParagraph.newBuilder().setText(
                "👉🔘 An <b>accessory widget</b> which adds " +
                "a button to the bottom of a message."))))
            .addSections(Section.newBuilder()
              .setHeader("What's next")
              .setCollapsible(true)
              .addWidgets(Widget.newBuilder().setTextParagraph(TextParagraph.newBuilder().setText(
                "❤️ <a href='https://developers.google.com/workspace/chat/api/reference/rest/v1/spaces.messages.reactions/create'>Add a reaction</a>.")))
              .addWidgets(Widget.newBuilder().setTextParagraph(TextParagraph.newBuilder().setText(
                "🔄 <a href='https://developers.google.com/workspace/chat/api/reference/rest/v1/spaces.messages/patch'>Update</a> " +
                "or  <a href='https://developers.google.com/workspace/chat/api/reference/rest/v1/spaces.messages/delete'>delete</a> " +
                "the message."))))))
          .addAccessoryWidgets(AccessoryWidget.newBuilder()
            .setButtonList(ButtonList.newBuilder()
              .addButtons(Button.newBuilder()
                .setText("View documentation")
                .setIcon(Icon.newBuilder()
                  .setMaterialIcon(MaterialIcon.newBuilder().setName("link")))
                .setOnClick(OnClick.newBuilder()
                  .setOpenLink(OpenLink.newBuilder()
                    .setUrl("https://developers.google.com/workspace/chat/create-messages")))))));
      Message response = chatServiceClient.createMessage(request.build());

      System.out.println(JsonFormat.printer().print(response));
    }
  }
}

Apps Komut Dosyası

sohbet/gelişmiş-hizmet/Main.gs
/**
 * This sample shows how to create message with app credential
 * 
 * It relies on the OAuth2 scope 'https://www.googleapis.com/auth/chat.bot'
 * used by service accounts.
 */
function createMessageAppCred() {
  // Initialize request argument(s)
  // TODO(developer): Replace SPACE_NAME here.
  const parent = 'spaces/SPACE_NAME';
  const message = {
    text: '👋🌎 Hello world! I created this message by calling ' +
          'the Chat API\'s `messages.create()` method.',
    cardsV2 : [{ card: {
      header: {
        title: 'About this message',
        imageUrl: 'https://fonts.gstatic.com/s/i/short-term/release/googlesymbols/info/default/24px.svg'
      },
      sections: [{
        header: 'Contents',
        widgets: [{ textParagraph: {
            text: '🔡 <b>Text</b> which can include ' +
                  'hyperlinks 🔗, emojis 😄🎉, and @mentions 🗣️.'
          }}, { textParagraph: {
            text: '🖼️ A <b>card</b> to display visual elements' +
                  'and request information such as text 🔤, ' +
                  'dates and times 📅, and selections ☑️.'
          }}, { textParagraph: {
            text: '👉🔘 An <b>accessory widget</b> which adds ' +
                  'a button to the bottom of a message.'
          }}
        ]}, {
          header: "What's next",
          collapsible: true,
          widgets: [{ textParagraph: {
              text: "❤️ <a href='https://developers.google.com/workspace/chat/api/reference/rest/v1/spaces.messages.reactions/create'>Add a reaction</a>."
            }}, { textParagraph: {
              text: "🔄 <a href='https://developers.google.com/workspace/chat/api/reference/rest/v1/spaces.messages/patch'>Update</a> " +
                    "or  <a href='https://developers.google.com/workspace/chat/api/reference/rest/v1/spaces.messages/delete'>delete</a> " +
                    "the message."
            }
          }]
        }
      ]
    }}],
    accessoryWidgets: [{ buttonList: { buttons: [{
      text: 'View documentation',
      icon: { materialIcon: { name: 'link' }},
      onClick: { openLink: {
        url: 'https://developers.google.com/workspace/chat/create-messages'
      }}
    }]}}]
  };
  const parameters = {};

  // Make the request
  const response = Chat.Spaces.Messages.create(
    message, parent, parameters, getHeaderWithAppCredentials()
  );

  // Handle the response
  console.log(response);
}

Bu örneği çalıştırmak için SPACE_NAME değerini şuna ait kimlikle değiştirin: alanın name alanına ait bilgileri girin. Kimliği öğrenmek için spaces.list() yöntem veya alanın URL'sini kullanabilirsiniz.

İletinin alt kısmına etkileşimli widget'lar ekleme

Bu kılavuzun ilk kod örneğinde Chat uygulaması mesajında, ekranın en üstünde tıklanabilir bir düğme gösteriliyor aksesuar widget'ı olarak bilinen reklam öğesinin alt kısmına bir öğe ekler. Aksesuar widget'ları bir mesajdaki metin veya kartlardan sonra görünür. Bu widget'ları kullanarak kullanıcıların iletinizle pek çok şekilde etkileşim kurmasına olanak tanır. Örneğin:

  • Bir mesajın doğruluğunu veya memnuniyetini değerlendirin.
  • Mesajla veya Chat uygulamasıyla ilgili bir sorunu bildirin.
  • Dokümanlar gibi ilgili içeriklerin bağlantısını açın.
  • Benzer mesajları Chat uygulamasında kapatma veya erteleme belirli bir süre boyunca geçerli.

Aksesuar widget'ları eklemek için accessoryWidgets[] alanına giriş yapın ve istediğiniz bir veya daha fazla widget'ı dahil edilir.

Aşağıdaki resimde, Kullanıcıların deneyimlerini değerlendirebilmeleri için aksesuar widget'ları içeren bir kısa mesaj .
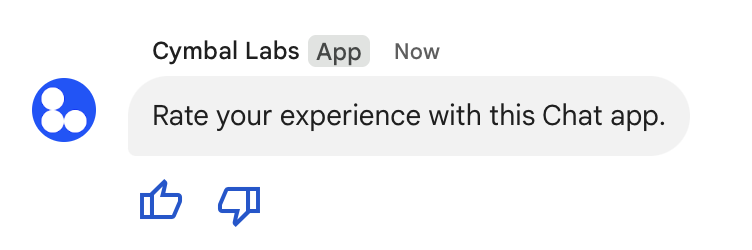
Aksesuar widget&#39;ı.
Şekil 5: metin ve aksesuar widget'ları.

Aşağıda, iki aksesuar düğmesi. Bir kullanıcı bir düğmeyi tıkladığında ilgili düğme işlevi (doUpvote gibi) etkileşimi işler:

{
  text: "Rate your experience with this Chat app.",
  accessoryWidgets: [{ buttonList: { buttons: [{
    icon: { material_icon: {
      name: "thumb_up"
    }},
    color: { red: 0, blue: 255, green: 0 },
    onClick: { action: {
      function: "doUpvote"
    }}
  }, {
    icon: { material_icon: {
      name: "thumb_down"
    }},
    color: { red: 0, blue: 255, green: 0 },
    onClick: { action: {
      function: "doDownvote"
    }}
  }]}}]
}

Gizli olarak ileti gönderme

Chat uygulamaları mesajları gizli olarak gönderebilir. Böylece Mesaj, yalnızca alandaki belirli bir kullanıcıya görünür. Bir Chat uygulaması bir özel mesaj gönderir, kullanıcıya iletinin yalnızca kendisi tarafından görülebildiğini bildiren bir etiket gösterir.

Chat API'yi kullanarak gizli olarak mesaj göndermek için privateMessageViewer alanına girebilirsiniz. Kullanıcıyı belirtmek için değeri User kaynağını Chat kullanıcısını temsil eder. Ayrıca şunu da kullanabilirsiniz: name Aşağıdaki örnekte gösterildiği gibi User kaynağı:

{
  text: "Hello private world!",
  privateMessageViewer: {
    name: "users/USER_ID"
  }
}

Bu örneği kullanmak için USER_ID değerini değiştirin benzersiz bir kimlikle (ör. 12345678987654321 veya hao@cymbalgroup.com. Kullanıcıları belirtme hakkında daha fazla bilgi edinmek için bkz. Google Chat kullanıcılarını belirleyin ve belirtin.

Gizli olarak ileti göndermek için isteğinizde aşağıdakileri atlamanız gerekir:

Bir kullanıcının adına kısa mesaj gönderme

Bu bölümde, kullanıcı kimlik doğrulaması. Kullanıcı kimlik doğrulamasıyla iletinin içeriği yalnızca metin içerebilir ve yalnızca şu kullanıcılara sunulan mesajlaşma özelliklerini Kart arayüzleri ve etkileşimli widget'lar gibi Chat uygulamaları

İleti, kullanıcı kimlik doğrulamasıyla gönderildi
Şekil 3. Bir Chat uygulaması bir uyarı alırsınız.

Kullanıcı kimlik doğrulamasını kullanarak messages.create() çağrısı yapmak için şu alanları kullanabilirsiniz:

  • Bir yetkilendirme kapsamı bu yöntem için kullanıcı kimlik doğrulamasını destekleyen bir fonksiyona sahiptir. Aşağıdaki örneklerde chat.messages.create kapsamı.
  • İçinde bulunduğu Space kaynağı mesajı yayınlayabilirsiniz. Kimliği doğrulanan kullanıcı boşluk oluşturur.
  • Message bir kaynaktır. İletinin içeriğini tanımlamak için text girin.

İsteğe bağlı olarak aşağıdakileri ekleyebilirsiniz:

Aşağıdaki kodda, bir Chat uygulamasının kimliği doğrulanmış bir kullanıcı adına belirli bir alanda kısa mesaj gönderebilir:

Node.js

chat/client-libraries/cloud/create-message-user-cred.js
import {createClientWithUserCredentials} from './authentication-utils.js';

const USER_AUTH_OAUTH_SCOPES = ['https://www.googleapis.com/auth/chat.messages.create'];

// This sample shows how to create message with user credential
async function main() {
  // Create a client
  const chatClient = await createClientWithUserCredentials(USER_AUTH_OAUTH_SCOPES);

  // Initialize request argument(s)
  const request = {
    // Replace SPACE_NAME here.
    parent: 'spaces/SPACE_NAME',
    message: {
      text: '👋🌎 Hello world!' +
            'Text messages can contain things like:\n\n' +
            '* Hyperlinks 🔗\n' +
            '* Emojis 😄🎉\n' +
            '* Mentions of other Chat users `@` \n\n' +
            'For details, see the ' +
            '<https://developers.google.com/workspace/chat/format-messages' +
            '|Chat API developer documentation>.'
    }
  };

  // Make the request
  const response = await chatClient.createMessage(request);

  // Handle the response
  console.log(response);
}

main().catch(console.error);

Python

chat/client-libraries/cloud/create_message_user_cred.py
from authentication_utils import create_client_with_user_credentials
from google.apps import chat_v1 as google_chat

SCOPES = ["https://www.googleapis.com/auth/chat.messages.create"]

def create_message_with_user_cred():
    # Create a client
    client = create_client_with_user_credentials(SCOPES)

    # Initialize request argument(s)
    request = google_chat.CreateMessageRequest(
        # Replace SPACE_NAME here.
        parent = "spaces/SPACE_NAME",
        message = {
            "text": '👋🌎 Hello world!' +
                    'Text messages can contain things like:\n\n' +
                    '* Hyperlinks 🔗\n' +
                    '* Emojis 😄🎉\n' +
                    '* Mentions of other Chat users `@` \n\n' +
                    'For details, see the ' +
                    '<https://developers.google.com/workspace/chat/format-messages' +
                    '|Chat API developer documentation>.'
        }
    )

    # Make the request
    response = client.create_message(request)

    # Handle the response
    print(response)

create_message_with_user_cred()

Java

chat/client-libraries/cloud/src/main/java/com/google/workspace/api/chat/samples/CreateMessageUserCred.java
import com.google.chat.v1.ChatServiceClient;
import com.google.chat.v1.CreateMessageRequest;
import com.google.chat.v1.Message;

// This sample shows how to create message with user credential.
public class CreateMessageUserCred {

  private static final String SCOPE =
    "https://www.googleapis.com/auth/chat.messages.create";

  public static void main(String[] args) throws Exception {
    try (ChatServiceClient chatServiceClient =
        AuthenticationUtils.createClientWithUserCredentials(
          ImmutableList.of(SCOPE))) {
      CreateMessageRequest.Builder request = CreateMessageRequest.newBuilder()
        // Replace SPACE_NAME here.
        .setParent("spaces/SPACE_NAME")
        .setMessage(Message.newBuilder()
          .setText( "👋🌎 Hello world!" +
                    "Text messages can contain things like:\n\n" +
                    "* Hyperlinks 🔗\n" +
                    "* Emojis 😄🎉\n" +
                    "* Mentions of other Chat users `@` \n\n" +
                    "For details, see the " +
                    "<https://developers.google.com/workspace/chat/format-messages" +
                    "|Chat API developer documentation>."));
      Message response = chatServiceClient.createMessage(request.build());

      System.out.println(JsonFormat.printer().print(response));
    }
  }
}

Apps Komut Dosyası

sohbet/gelişmiş-hizmet/Main.gs
/**
 * This sample shows how to create message with user credential
 * 
 * It relies on the OAuth2 scope 'https://www.googleapis.com/auth/chat.messages.create'
 * referenced in the manifest file (appsscript.json).
 */
function createMessageUserCred() {
  // Initialize request argument(s)
  // TODO(developer): Replace SPACE_NAME here.
  const parent = 'spaces/SPACE_NAME';
  const message = {
    text: '👋🌎 Hello world!' +
          'Text messages can contain things like:\n\n' +
          '* Hyperlinks 🔗\n' +
          '* Emojis 😄🎉\n' +
          '* Mentions of other Chat users `@` \n\n' +
          'For details, see the ' +
          '<https://developers.google.com/workspace/chat/format-messages' +
          '|Chat API developer documentation>.'
  };

  // Make the request
  const response = Chat.Spaces.Messages.create(message, parent);

  // Handle the response
  console.log(response);
}

Bu örneği çalıştırmak için SPACE_NAME değerini şuna ait kimlikle değiştirin: alanın name girin. Kimliği öğrenmek için spaces.list() yöntem veya alanın URL'sini kullanabilirsiniz.

Bir mesaj dizisi başlatın veya bir mesaj dizisinde yanıt verin

Mesaj dizisi kullanan alanlarda yeni bir mesajın mesaj dizisi mi başlatacağını yoksa yanıt mı başlatacağını belirleyebilirsiniz mevcut bir ileti dizisinde.

Chat API'yi kullanarak oluşturduğunuz mesajlar varsayılan olarak yeni bir ileti dizisi. İleti dizisini tanımlamanıza ve daha sonra yanıtlamanıza yardımcı olması için isteğinizdeki iş parçacığı anahtarı:

Mevcut bir mesaj dizisine yanıt veren bir mesaj oluşturmak için:

  • İsteğinizin gövdesine thread alanını ekleyin. Ayarlandığında şunları yapabilirsiniz: belirtin threadKey öğrenebilirsiniz. Aksi takdirde name yardımcı oluyorum.
  • messageReplyOption sorgu parametresini belirtin.

Aşağıdaki kodda, bir Chat uygulamasının tarafından tanımlanan belirli bir ileti dizisini başlatan veya anahtarı:

Node.js

chat/client-libraries/cloud/create-message-user-cred-thread-key.js
import {createClientWithUserCredentials} from './authentication-utils.js';
const {MessageReplyOption} = require('@google-apps/chat').protos.google.chat.v1.CreateMessageRequest;

const USER_AUTH_OAUTH_SCOPES = ['https://www.googleapis.com/auth/chat.messages.create'];

// This sample shows how to create message with user credential with thread key
async function main() {
  // Create a client
  const chatClient = await createClientWithUserCredentials(USER_AUTH_OAUTH_SCOPES);

  // Initialize request argument(s)
  const request = {
    // Replace SPACE_NAME here.
    parent: 'spaces/SPACE_NAME',
    // Creates the message as a reply to the thread specified by thread_key
    // If it fails, the message starts a new thread instead
    messageReplyOption: MessageReplyOption.REPLY_MESSAGE_FALLBACK_TO_NEW_THREAD,
    message: {
      text: 'Hello with user credential!',
      thread: {
        // Thread key specifies a thread and is unique to the chat app
        // that sets it
        threadKey: 'THREAD_KEY'
      }
    }
  };

  // Make the request
  const response = await chatClient.createMessage(request);

  // Handle the response
  console.log(response);
}

main().catch(console.error);

Python

chat/client-libraries/cloud/create_message_user_cred_thread_key.py
from authentication_utils import create_client_with_user_credentials
from google.apps import chat_v1 as google_chat

import google.apps.chat_v1.CreateMessageRequest.MessageReplyOption

SCOPES = ["https://www.googleapis.com/auth/chat.messages.create"]

# This sample shows how to create message with user credential with thread key
def create_message_with_user_cred_thread_key():
    # Create a client
    client = create_client_with_user_credentials(SCOPES)

    # Initialize request argument(s)
    request = google_chat.CreateMessageRequest(
        # Replace SPACE_NAME here
        parent = "spaces/SPACE_NAME",
        # Creates the message as a reply to the thread specified by thread_key.
        # If it fails, the message starts a new thread instead.
        message_reply_option = MessageReplyOption.REPLY_MESSAGE_FALLBACK_TO_NEW_THREAD,
        message = {
            "text": "Hello with user credential!",
            "thread": {
                # Thread key specifies a thread and is unique to the chat app
                # that sets it.
                "thread_key": "THREAD_KEY"
            }
        }
    )

    # Make the request
    response = client.create_message(request)

    # Handle the response
    print(response)

create_message_with_user_cred_thread_key()

Java

chat/client-libraries/cloud/src/main/java/com/google/workspace/api/chat/samples/CreateMessageUserCredThreadKey.java
import com.google.chat.v1.ChatServiceClient;
import com.google.chat.v1.CreateMessageRequest;
import com.google.chat.v1.CreateMessageRequest.MessageReplyOption;
import com.google.chat.v1.Message;
import com.google.chat.v1.Thread;

// This sample shows how to create message with a thread key with user
// credential.
public class CreateMessageUserCredThreadKey {

  private static final String SCOPE =
    "https://www.googleapis.com/auth/chat.messages.create";

  public static void main(String[] args) throws Exception {
    try (ChatServiceClient chatServiceClient =
        AuthenticationUtils.createClientWithUserCredentials(
          ImmutableList.of(SCOPE))) {
      CreateMessageRequest.Builder request = CreateMessageRequest.newBuilder()
        // Replace SPACE_NAME here.
        .setParent("spaces/SPACE_NAME")
        // Creates the message as a reply to the thread specified by thread_key.
        // If it fails, the message starts a new thread instead.
        .setMessageReplyOption(
          MessageReplyOption.REPLY_MESSAGE_FALLBACK_TO_NEW_THREAD)
        .setMessage(Message.newBuilder()
          .setText("Hello with user credentials!")
          // Thread key specifies a thread and is unique to the chat app
          // that sets it.
          .setThread(Thread.newBuilder().setThreadKey("THREAD_KEY")));
      Message response = chatServiceClient.createMessage(request.build());

      System.out.println(JsonFormat.printer().print(response));
    }
  }
}

Apps Komut Dosyası

sohbet/gelişmiş-hizmet/Main.gs
/**
 * This sample shows how to create message with user credential with thread key
 * 
 * It relies on the OAuth2 scope 'https://www.googleapis.com/auth/chat.messages.create'
 * referenced in the manifest file (appsscript.json).
 */
function createMessageUserCredThreadKey() {
  // Initialize request argument(s)
  // TODO(developer): Replace SPACE_NAME here.
  const parent = 'spaces/SPACE_NAME';
  // Creates the message as a reply to the thread specified by thread_key
  // If it fails, the message starts a new thread instead
  const messageReplyOption = 'REPLY_MESSAGE_FALLBACK_TO_NEW_THREAD';
  const message = {
    text: 'Hello with user credential!',
    thread: {
      // Thread key specifies a thread and is unique to the chat app
      // that sets it
      threadKey: 'THREAD_KEY'
    }
  };

  // Make the request
  const response = Chat.Spaces.Messages.create(message, parent, {
    messageReplyOption: messageReplyOption
  });

  // Handle the response
  console.log(response);
}

Bu örneği çalıştırmak için aşağıdaki kodu değiştirin:

  • THREAD_KEY: Alanda mevcut bir mesaj dizisi anahtarı veya tıklayın.
  • SPACE_NAME: alanın kimliği name girin. Kimliği öğrenmek için spaces.list() yöntem veya alanın URL'sini kullanabilirsiniz.

İletiyi adlandırma

Gelecekteki API çağrılarında bir mesaj almak veya belirtmek için mesaja ad verebilirsiniz messages.create() isteğinizdeki messageId alanını ayarlayarak bu işlemi yapabilirsiniz. İletinizi adlandırmak, mesajın kaynak adından sistem tarafından atanan kimlik ( name alanı) ekleyebilirsiniz.

Örneğin, get() yöntemini kullanarak bir iletiyi almak için kaynak adı. Kaynak adı: spaces/{space}/messages/{message} olarak biçimlendirilir (burada {message}, temsil eder). veya dosyayı oluştururken ayarladığınız özel ad, sistem tarafından atanan kimliğin mesajını alırsınız.

Bir iletiyi adlandırmak için messageId alanına girin. messageId alanı, clientAssignedMessageId Message kaynağının

Bir mesajı yalnızca mesajı oluştururken adlandırabilirsiniz. Adlarınızı, e-posta Mevcut mesajlar için özel bir kimlik değiştirme. Özel kimlik aşağıdaki özelliklere sahip olmalıdır: koşullar:

  • client- ile başlar. Örneğin, client-custom-name geçerli bir özeldir Kimlik ancak custom-name değil.
  • En fazla 63 karakterden oluşur ve yalnızca küçük harf, rakam ve kısa çizgilerle gösterilir.
  • Bir alan içinde benzersiz olmalıdır. Bir Chat uygulaması farklı mesajlar için aynı özel kimliği kullanın.

Aşağıdaki kodda, bir Chat uygulamasının belirli bir alan adına kimliği içeren bir kısa mesaj gönderebilir kimliği doğrulanmış kullanıcı:

Node.js

chat/client-libraries/cloud/create-message-user-cred-message-id.js
import {createClientWithUserCredentials} from './authentication-utils.js';

const USER_AUTH_OAUTH_SCOPES = ['https://www.googleapis.com/auth/chat.messages.create'];

// This sample shows how to create message with user credential with message id
async function main() {
  // Create a client
  const chatClient = await createClientWithUserCredentials(USER_AUTH_OAUTH_SCOPES);

  // Initialize request argument(s)
  const request = {
    // Replace SPACE_NAME here.
    parent: 'spaces/SPACE_NAME',
    // Message id lets chat apps get, update or delete a message without needing
    // to store the system assigned ID in the message's resource name
    messageId: 'client-MESSAGE-ID',
    message: { text: 'Hello with user credential!' }
  };

  // Make the request
  const response = await chatClient.createMessage(request);

  // Handle the response
  console.log(response);
}

main().catch(console.error);

Python

chat/client-libraries/cloud/create_message_user_cred_message_id.py
from authentication_utils import create_client_with_user_credentials
from google.apps import chat_v1 as google_chat

SCOPES = ["https://www.googleapis.com/auth/chat.messages.create"]

# This sample shows how to create message with user credential with message id
def create_message_with_user_cred_message_id():
    # Create a client
    client = create_client_with_user_credentials(SCOPES)

    # Initialize request argument(s)
    request = google_chat.CreateMessageRequest(
        # Replace SPACE_NAME here
        parent = "spaces/SPACE_NAME",
        # Message id let chat apps get, update or delete a message without needing
        # to store the system assigned ID in the message's resource name.
        message_id = "client-MESSAGE-ID",
        message = {
            "text": "Hello with user credential!"
        }
    )

    # Make the request
    response = client.create_message(request)

    # Handle the response
    print(response)

create_message_with_user_cred_message_id()

Java

chat/client-libraries/cloud/src/main/java/com/google/workspace/api/chat/samples/CreateMessageUserCredMessageId.java
import com.google.chat.v1.ChatServiceClient;
import com.google.chat.v1.CreateMessageRequest;
import com.google.chat.v1.Message;

// This sample shows how to create message with message id specified with user
// credential.
public class CreateMessageUserCredMessageId {

  private static final String SCOPE =
    "https://www.googleapis.com/auth/chat.messages.create";

  public static void main(String[] args) throws Exception {
    try (ChatServiceClient chatServiceClient =
        AuthenticationUtils.createClientWithUserCredentials(
          ImmutableList.of(SCOPE))) {
      CreateMessageRequest.Builder request = CreateMessageRequest.newBuilder()
        // Replace SPACE_NAME here.
        .setParent("spaces/SPACE_NAME")
        .setMessage(Message.newBuilder()
          .setText("Hello with user credentials!"))
        // Message ID lets chat apps get, update or delete a message without
        // needing to store the system assigned ID in the message's resource
        // name.
        .setMessageId("client-MESSAGE-ID");
      Message response = chatServiceClient.createMessage(request.build());

      System.out.println(JsonFormat.printer().print(response));
    }
  }
}

Apps Komut Dosyası

sohbet/gelişmiş-hizmet/Main.gs
/**
 * This sample shows how to create message with user credential with message id
 * 
 * It relies on the OAuth2 scope 'https://www.googleapis.com/auth/chat.messages.create'
 * referenced in the manifest file (appsscript.json).
 */
function createMessageUserCredMessageId() {
  // Initialize request argument(s)
  // TODO(developer): Replace SPACE_NAME here.
  const parent = 'spaces/SPACE_NAME';
  // Message id lets chat apps get, update or delete a message without needing
  // to store the system assigned ID in the message's resource name
  const messageId = 'client-MESSAGE-ID';
  const message = { text: 'Hello with user credential!' };

  // Make the request
  const response = Chat.Spaces.Messages.create(message, parent, {
    messageId: messageId
  });

  // Handle the response
  console.log(response);
}

Bu örneği çalıştırmak için aşağıdaki kodu değiştirin:

  • SPACE_NAME: alanın kimliği name girin. Kimliği öğrenmek için spaces.list() yöntem veya alanın URL'sini kullanabilirsiniz.
  • MESSAGE-ID: başlayan mesajın adı custom- ile. Belirtilen alandaki Chat uygulaması.

Sorun giderme

Bir Google Chat uygulaması veya card bir hata döndürürse Chat arayüzünde "Bir sorun oluştu" mesajı gösteriliyor. veya "İsteğiniz işlenemiyor." Chat kullanıcı arayüzü herhangi bir hata mesajı görüntülenmiyor ancak Chat uygulaması veya kart beklenmeyen bir sonuç veriyorsa; Örneğin karttaki bir mesajda görünür.

Chat kullanıcı arayüzünde hata mesajı görüntülenmese de Hataları düzeltmenize yardımcı olmak için açıklayıcı hata mesajları ve günlük verileri sunulur Chat uygulamaları için hata günlük kaydı etkinleştirildiğinde. Görüntüleme konusunda yardım için ve hataları düzeltme ile ilgili daha fazla bilgi edinmek için Google Chat hatalarını giderme ve düzeltme