
Page Summary
-
This tutorial guides you through creating a Google Chat app using Apps Script to manage contacts with details like name, birthdate, and type.
-
The app utilizes slash commands (e.g.,
/addContact), cards, and dialogs for user interaction and data collection. -
You'll need a Google Workspace account and a Google Cloud project to build and deploy this app.
-
Key concepts covered include cards, dialogs, interaction events, slash commands, and form widgets for building interactive user interfaces.
-
The app handles user interactions, processes data, and sends confirmation messages within the Google Chat environment.
This tutorial shows how to build a Google Chat app that helps Google Chat users manage their personal and business contacts. To collect information, the Chat app prompts users to complete a contact form in card messages and dialogs.
See the Chat app in action:
-
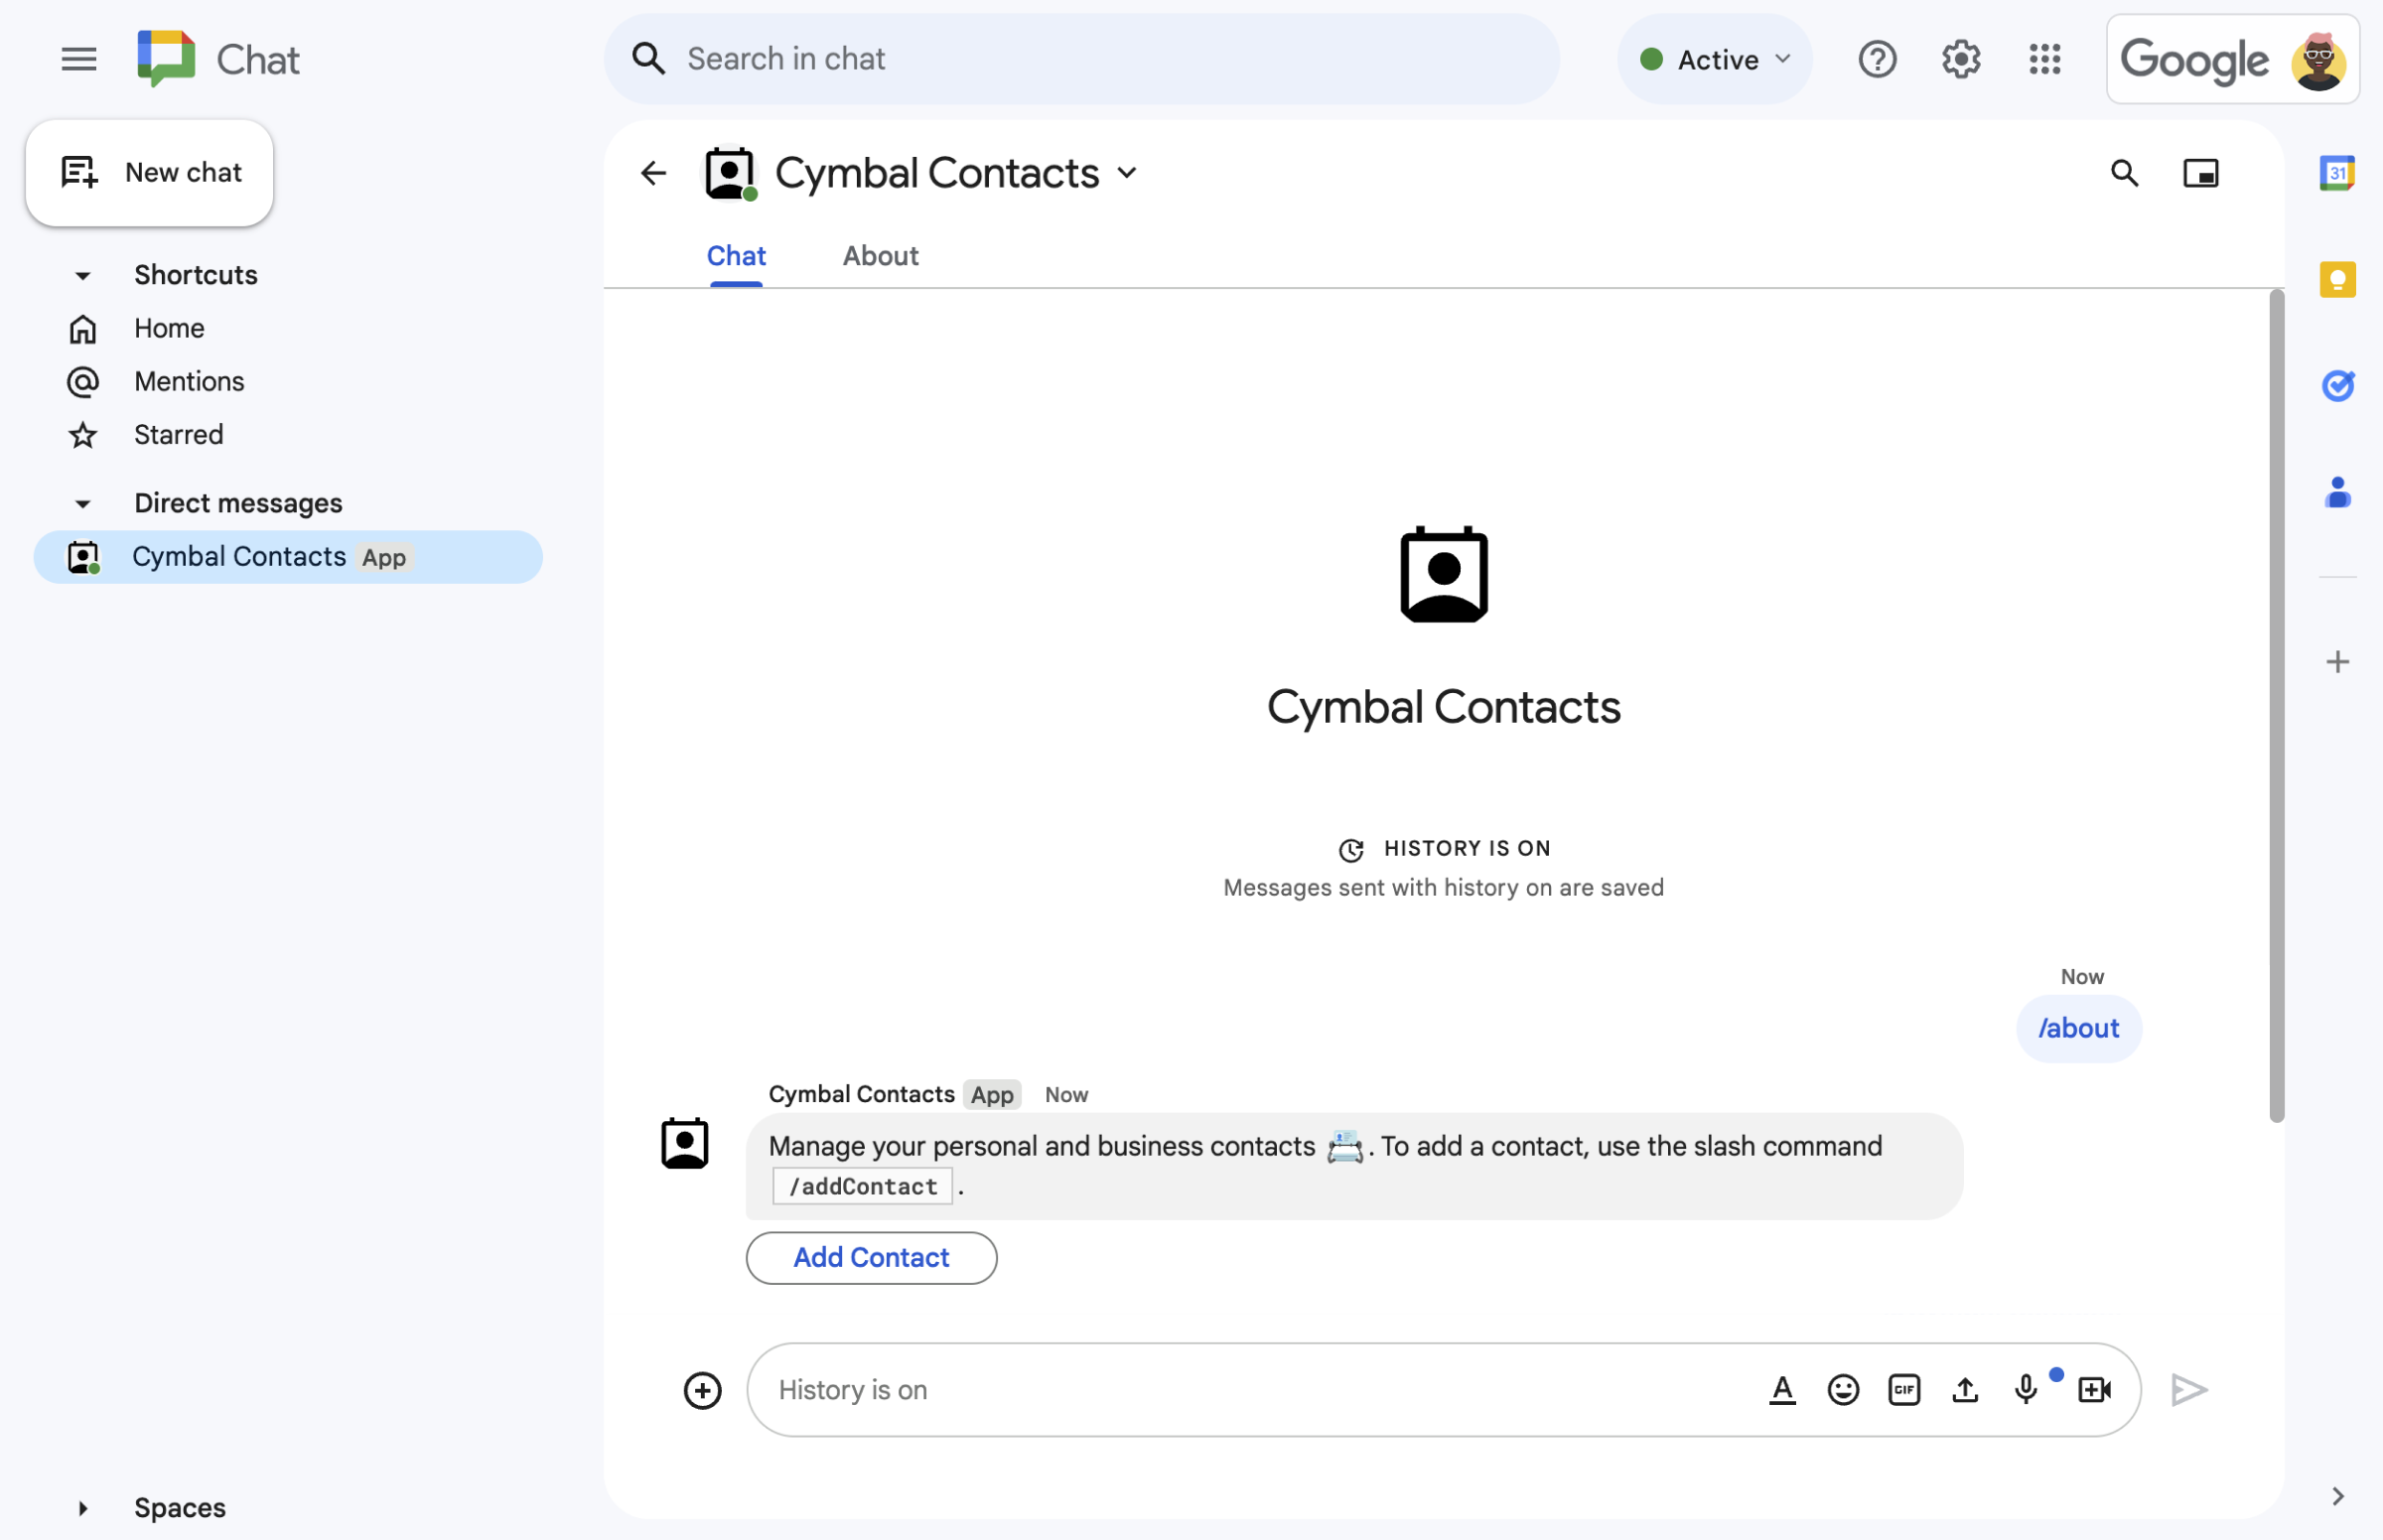
Figure 1. The Chat app responds to the slash command /aboutwith a text message and button that opens a contact form. -
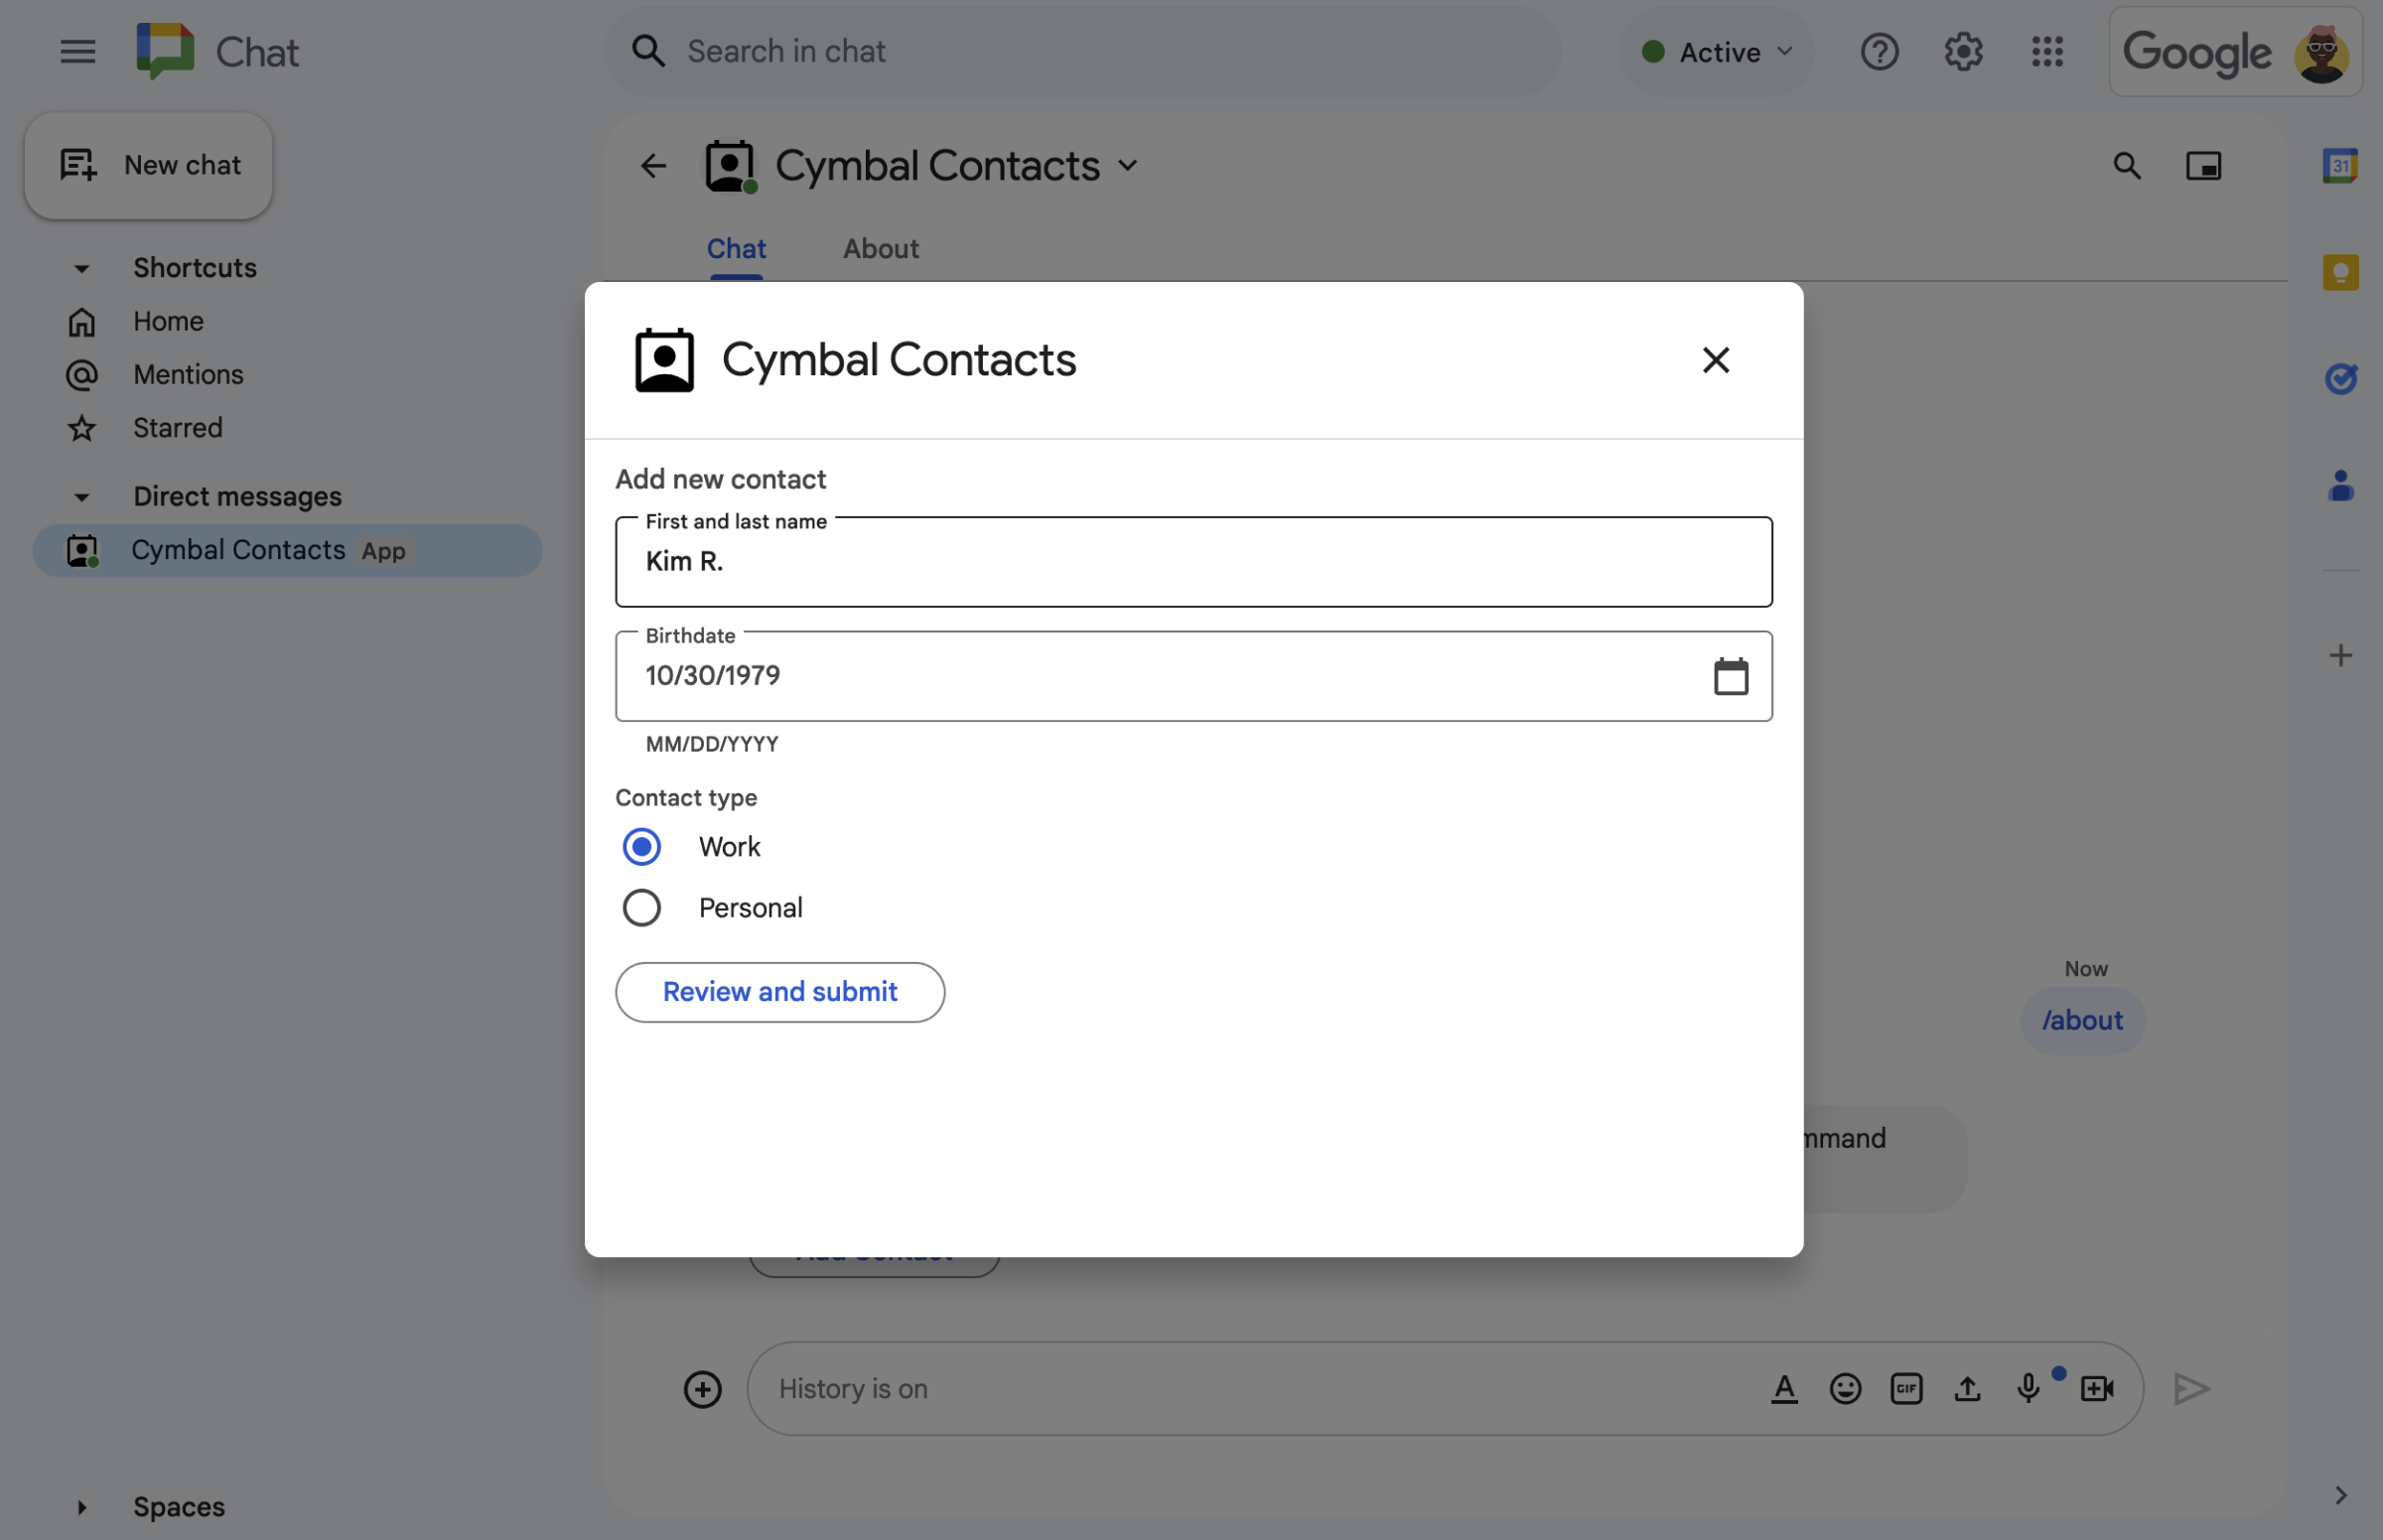
Figure 2. The Chat app opens a dialog where users can input information about a contact. -
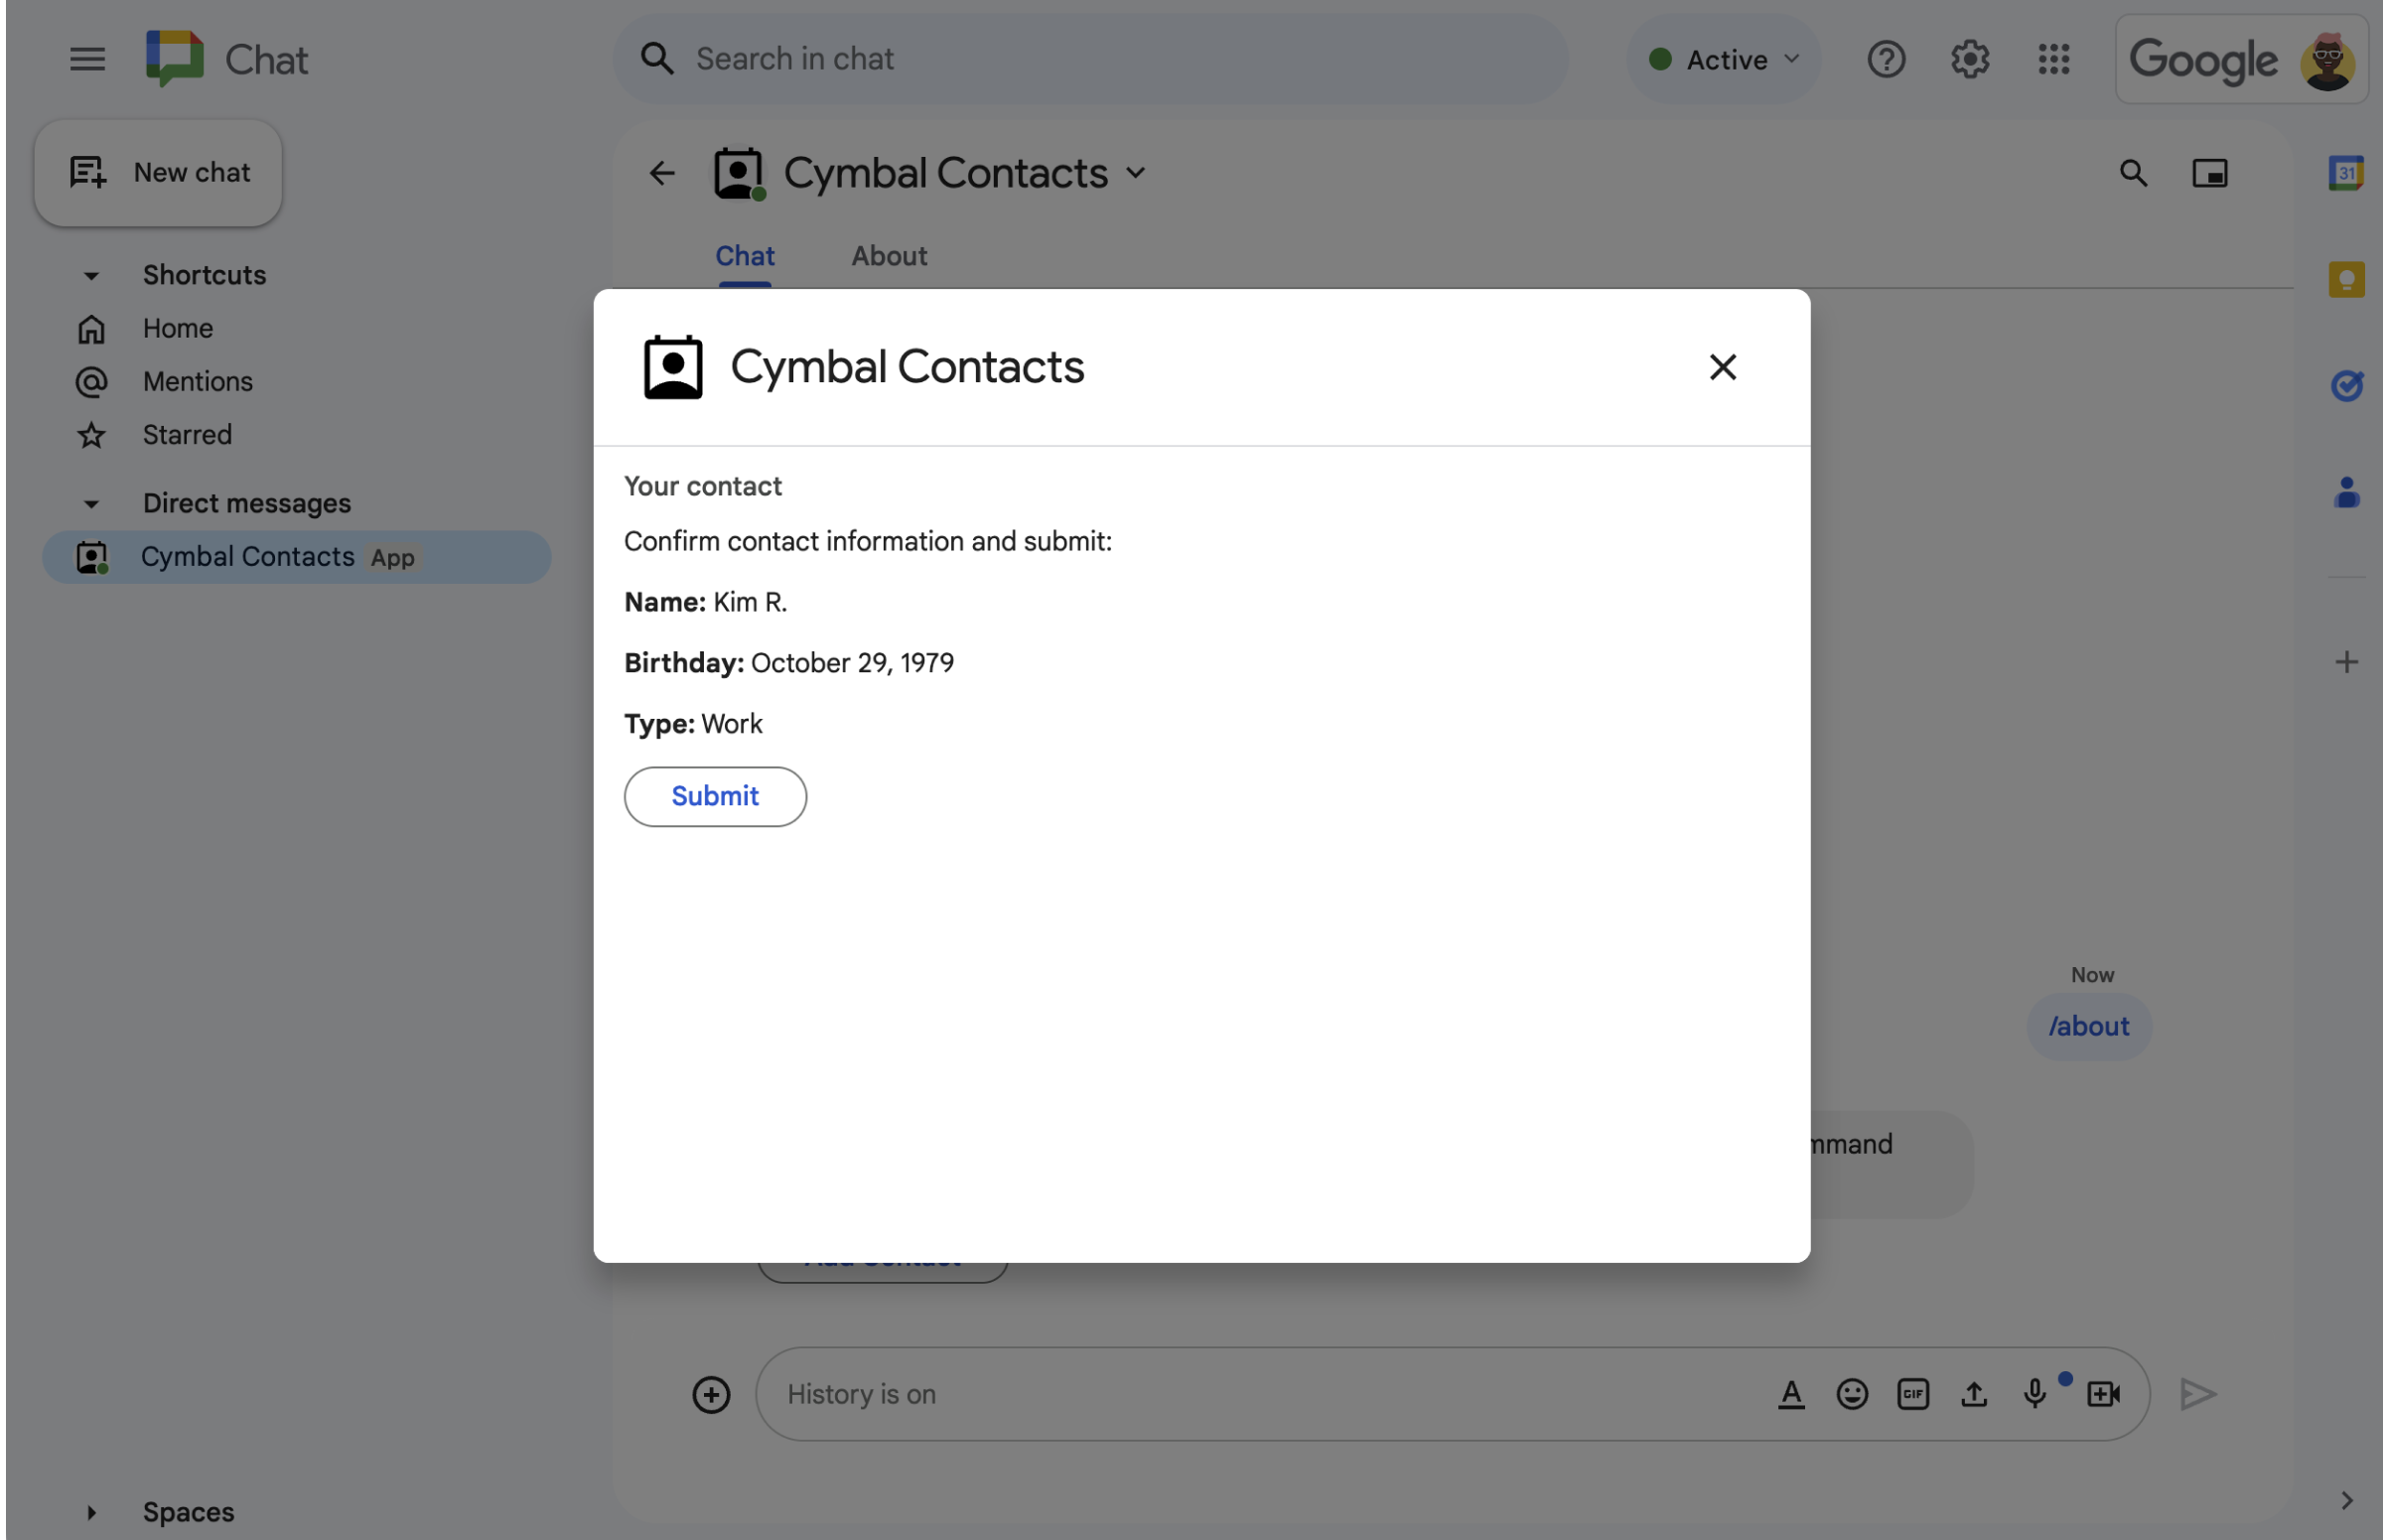
Figure 3. The Chat app returns a confirmation dialog so that users can review and confirm the information before submitting. -
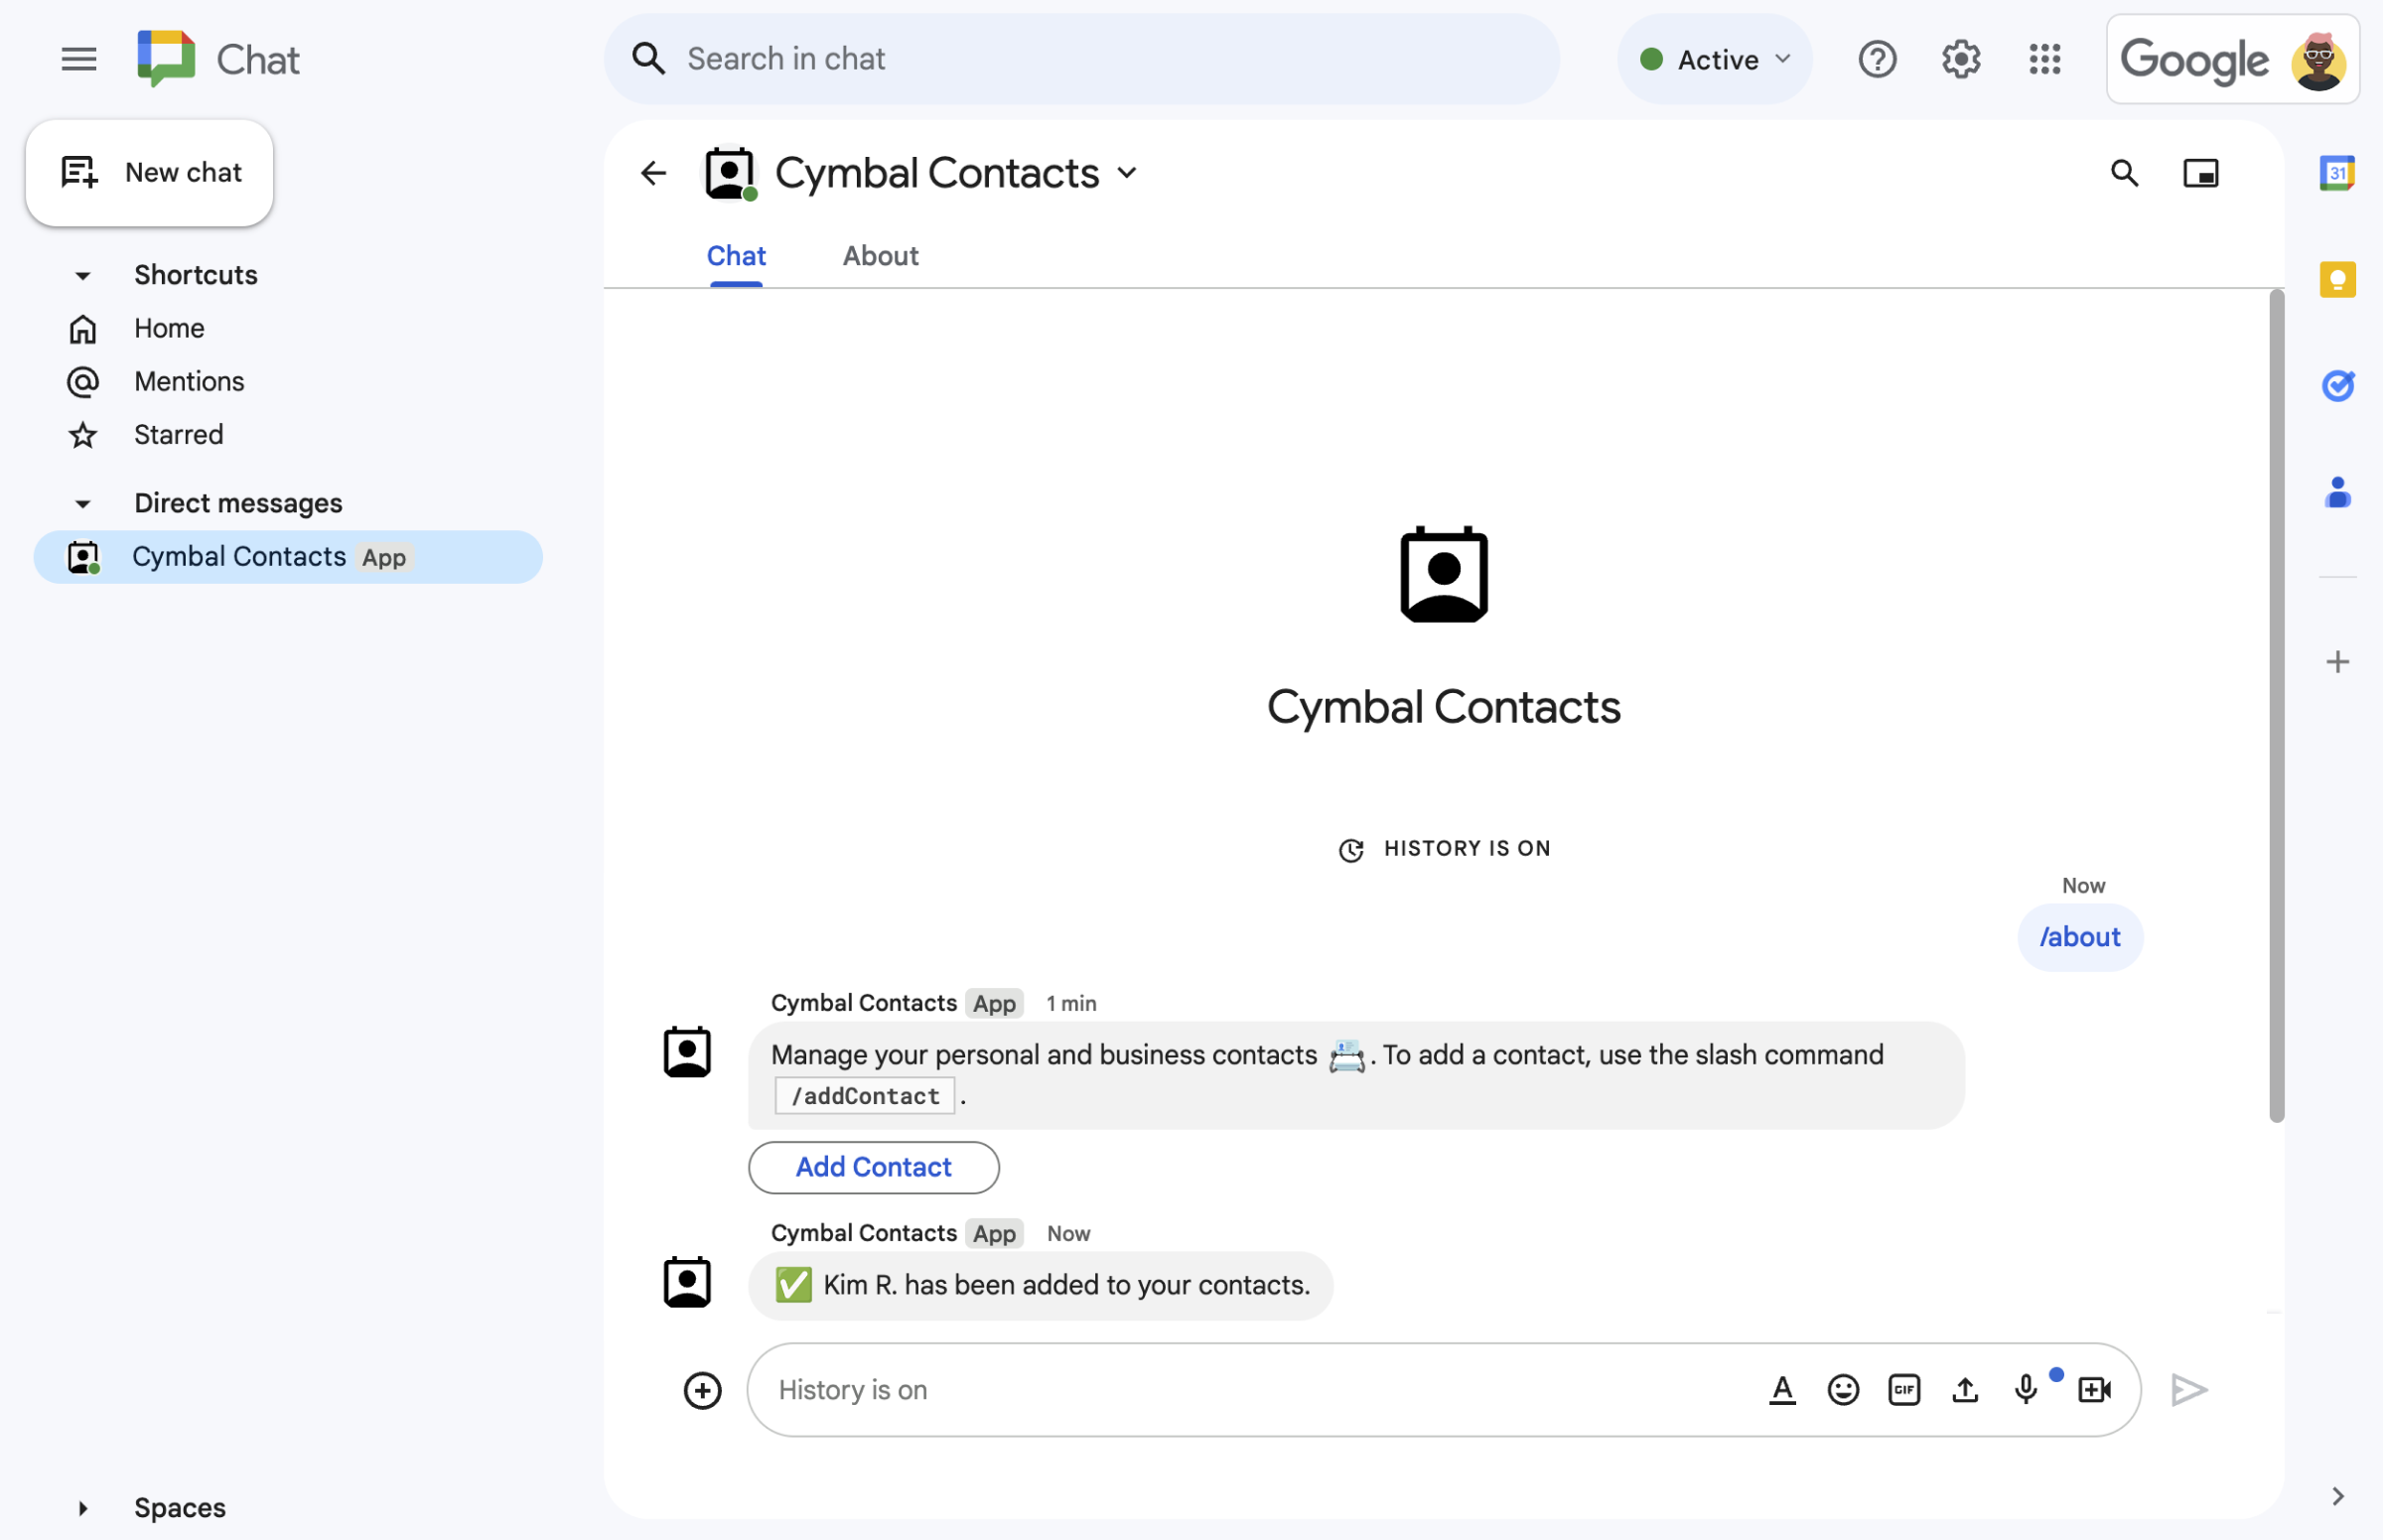
Figure 4. After the user submits the form, the Chat app sends a private text message to confirm the submission. -

Figure 5. The Chat app also prompts users to add a contact from a card in a message.
Prerequisites
- A Business or Enterprise Google Workspace account with access to Google Chat.
- Create a Google Cloud project.
Objectives
- Design and build user interfaces (UIs)
as
cardobjects, and display the UIs in messages and dialogs. - Receive and process information that users submit using form input widgets.
- Respond to commands with messages that contain text, cards, and accessory widgets.
Architecture
The Chat app is built in Google Apps Script and uses interaction events to process and respond to Chat users.
The following shows how a user might typically interact with the Chat app:
A user opens a direct message with the Chat app, or adds the Chat app to an existing space.
The Chat app prompts the user to add a contact by building and displaying a contact form as a
cardobject. To present the contact form, the Chat app responds to users in the following ways:- Responds to @mentions and direct messages with a card message that contains the contact form.
- Responds to the slash command
/addContactby opening a dialog with the contact form. - Responds to the slash command
/aboutwith a text message that has a Add a contact button that users can click to open a dialog with the contact form.
When presented with the contact form, the user inputs contact information into the following fields and widgets:
- First and last name: a
textInputwidget that accepts strings. - Birthdate: a
dateTimePickerwidget that accepts only dates. - Contact type: a
selectionInputwidget of radio buttons that lets users select and submit a single string value (eitherPersonalorWork). - Review and submit button: a
buttonListarray withbuttonwidget that the user clicks to submit the values that they input.
- First and last name: a
The Google Chat app handles a
CARD_CLICKEDinteraction event to process the values that the user inputs, and displays the values in a confirmation card.The user reviews the confirmation card and clicks the Submit button to finalize the contact information.
The Google Chat app sends a private text message that confirms the submission.
Prepare the environment
This section shows how to configure a Google Cloud project for the Chat app.
Open your Cloud project in the Google API Console
If it's not open already, open the Cloud project that you intend to use for this sample:
- In the Google API Console, go to the Select a project page.
- Select the Google Cloud project you want to use. Or, click Create project and follow the on-screen instructions. If you create a Google Cloud project, you might need to turn on billing for the project.
Set up authentication and authorization
Google Chat apps require you to configure an OAuth consent screen so that users can authorize your app in Google Workspace applications, including Google Chat.
In this tutorial, you deploy a Chat app that's only for testing and internal use, so it's OK to use placeholder information for the consent screen. Before publishing the Chat app, replace any placeholder information with real information.
In the Google API Console, go to Menu > Google Auth platform > Branding.
If you have already configured the Google Auth platform, you can configure the following OAuth Consent Screen settings in Branding, Audience, and Data Access. If you see a message that says Google Auth platform not configured yet, click Get Started:
- Under App Information, in App name, type
Contact Manager. - In User support email, select your email address or an appropriate Google group.
- Click Next.
- Under Audience, select Internal. If you can't select Internal, select External.
- Click Next.
- Under Contact Information, enter an Email address where you can be notified about any changes to your project.
- Click Next.
- Under Finish, review the Google API Services User Data Policy and if you agree, select I agree to the Google API Services: User Data Policy.
- Click Continue.
- Click Create.
- If you selected External for user type, add test users:
- Click Audience.
- Under Test users, click Add users.
- Enter your email address and any other authorized test users, then click Save.
- Under App Information, in App name, type
Create and deploy the Chat app
In the following section, you copy and update an entire Apps Script project that contains all the required application code for your Chat app, so there's no need to copy and paste each file.
Optionally, you can view the entire project on GitHub.
Here's an overview of each file:
main.gsHandles all app logic, including interaction events about when users send messages to the Chat app, click buttons from a Chat app message, or open and close dialogs.
View
main.gscodecontactForm.gsContains the widgets that receive form data from users. These form input widgets are displayed in cards that appear in messages and dialogs.
View
contactForm.gscodeappsscript.jsonThe Apps Script manifest that defines and configures the Apps Script project for the Chat app.
View
appsscript.jsoncode
Create the Apps Script project
To create an Apps Script project:
- Click the following button to open the Manage contacts in Google Chat Apps Script project.
Open the project - Click Overview.
- On the overview page, click
 Make a copy.
 Name your copy of the Apps Script project:
Click Copy of Manage contacts in Google Chat.
In Project title, type
Contact Manager - Google Chat appClick Rename.
In the future, if you want to use certain Google APIs or publish your app, you must associate your Cloud project with your Apps Script project. For this guide, you don't need to do so. To learn more, see the Google Cloud projects guide.
Create an Apps Script deployment
Now that all the code is in place, deploy the Apps Script project. You use the deployment ID when you configure the Chat app in the Google Cloud.
In Apps Script, open the Chat app's project.
Click Deploy > New deployment.
If Add-on isn't already selected, next to Select type, click deployment types
 and select Add-on.
In Description, enter a description for this version, like
Test of Contact Manager.Click Deploy. Apps Script reports successful deployment and provides a deployment ID.
Click Copy to copy the deployment ID and then click Done.
Configure the Chat app in the Google API Console
This section shows how to configure the Google Chat API in the Google API Console with information about your Chat app, including the ID of the deployment that you just created from your Apps Script project.
In the Google API Console, click Menu > APIs & Services > Enabled APIs & Services > Google Chat API > Configuration.
Clear Build this Chat app as a Google Workspace add-on. A dialog opens asking you to confirm. In the dialog, click Disable.
In App name, type
Contact Manager.In Avatar URL, type
https://developers.google.com/chat/images/contact-icon.png.In Description, type
Manage your personal and business contacts.Click the Enable Interactive features toggle to the on position.
Under Functionality, select Join spaces and group conversations.
Under Connection settings, select Apps Script.
In Deployment ID, paste the Apps Script Deployment ID that you copied in the previous section when you created the Apps Script deployment.
Under Commands, set up the slash commands
/aboutand/addContact:- Click Add a slash command to set up the first slash command.
- In Name, type
About. - In Command ID, type
1. - In Description, type
Learn how to use this Chat app to manage your contacts. - Under Command type, select
Slash command. - In Slash command name, type
/about. - Select Opens a dialog.
- Click Done.
- Click Add a command to set up another slash command.
- In Name, type
Add a contact. - In Command ID, type
2. - In Description, type
Submit information about a contact. - Under Command type, select
Slash command. - In Slash command name, type
/addContact. - Select Opens a dialog.
- Click Done.
Under Visibility, select the Make this Chat app available to specific people and groups in YOUR DOMAIN checkbox and enter your email address.
Under Logs, select Log errors to Logging.
Click Save. A configuration saved message appears.
The Chat app is ready to install and test in Chat.
Test the Chat app
To test your Chat app, open a direct message space with the Chat app and send a message:
Open Google Chat using the Google Workspace account that you provided when you added yourself as a trusted tester.
- Click New chat.
- In the Add 1 or more people field, type the name of your Chat app.
Select your Chat app from the results. A direct message opens.
In the new direct message with the Chat app, type
/addContactand press enter.In the dialog that opens, enter contact information:
- In the First and last name text field, enter a name.
- In the Birthdate date picker, select a date.
- Under Contact type, select the Work or Personal radio button.
Click Review and submit.
In the confirmation dialog, review the information that you submitted and click Submit. The Chat app replies with a text message that says
✅ CONTACT NAME has been added to your contacts..Optionally, you can also test and submit the contact form in the following ways:
- Use the
/aboutslash command. Chat app replies with a text message and an accessory widget button that saysAdd a contact. You can click the button to open a dialog with the contact form. - Send the Chat app a direct message without a
slash command, such as
Hello. The Chat app replies with a text and card that contains the contact form.
- Use the
Clean up
To avoid incurring charges to your Google Cloud account for the resources used in this tutorial, we recommend that you delete the Cloud project.
- In the Google API Console, go to the Manage resources page. Click Menu > IAM & Admin > Manage Resources.
- In the project list, select the project you want to delete and then click Delete .
- In the dialog, type the project ID and then click Shut down to delete the project.
Related topics
- Respond to commands
- Collect and process information from Google Chat users
- Open interactive dialogs
- Explore other Google Chat app samples