
Tutorial ini menunjukkan cara membuat aplikasi Google Chat yang membantu pengguna Google Chat mengelola kontak pribadi dan bisnis mereka. Untuk mengumpulkan informasi, aplikasi Chat akan meminta pengguna untuk melengkapi formulir kontak dalam pesan kartu dan dialog.
Lihat cara kerja aplikasi Chat:
-
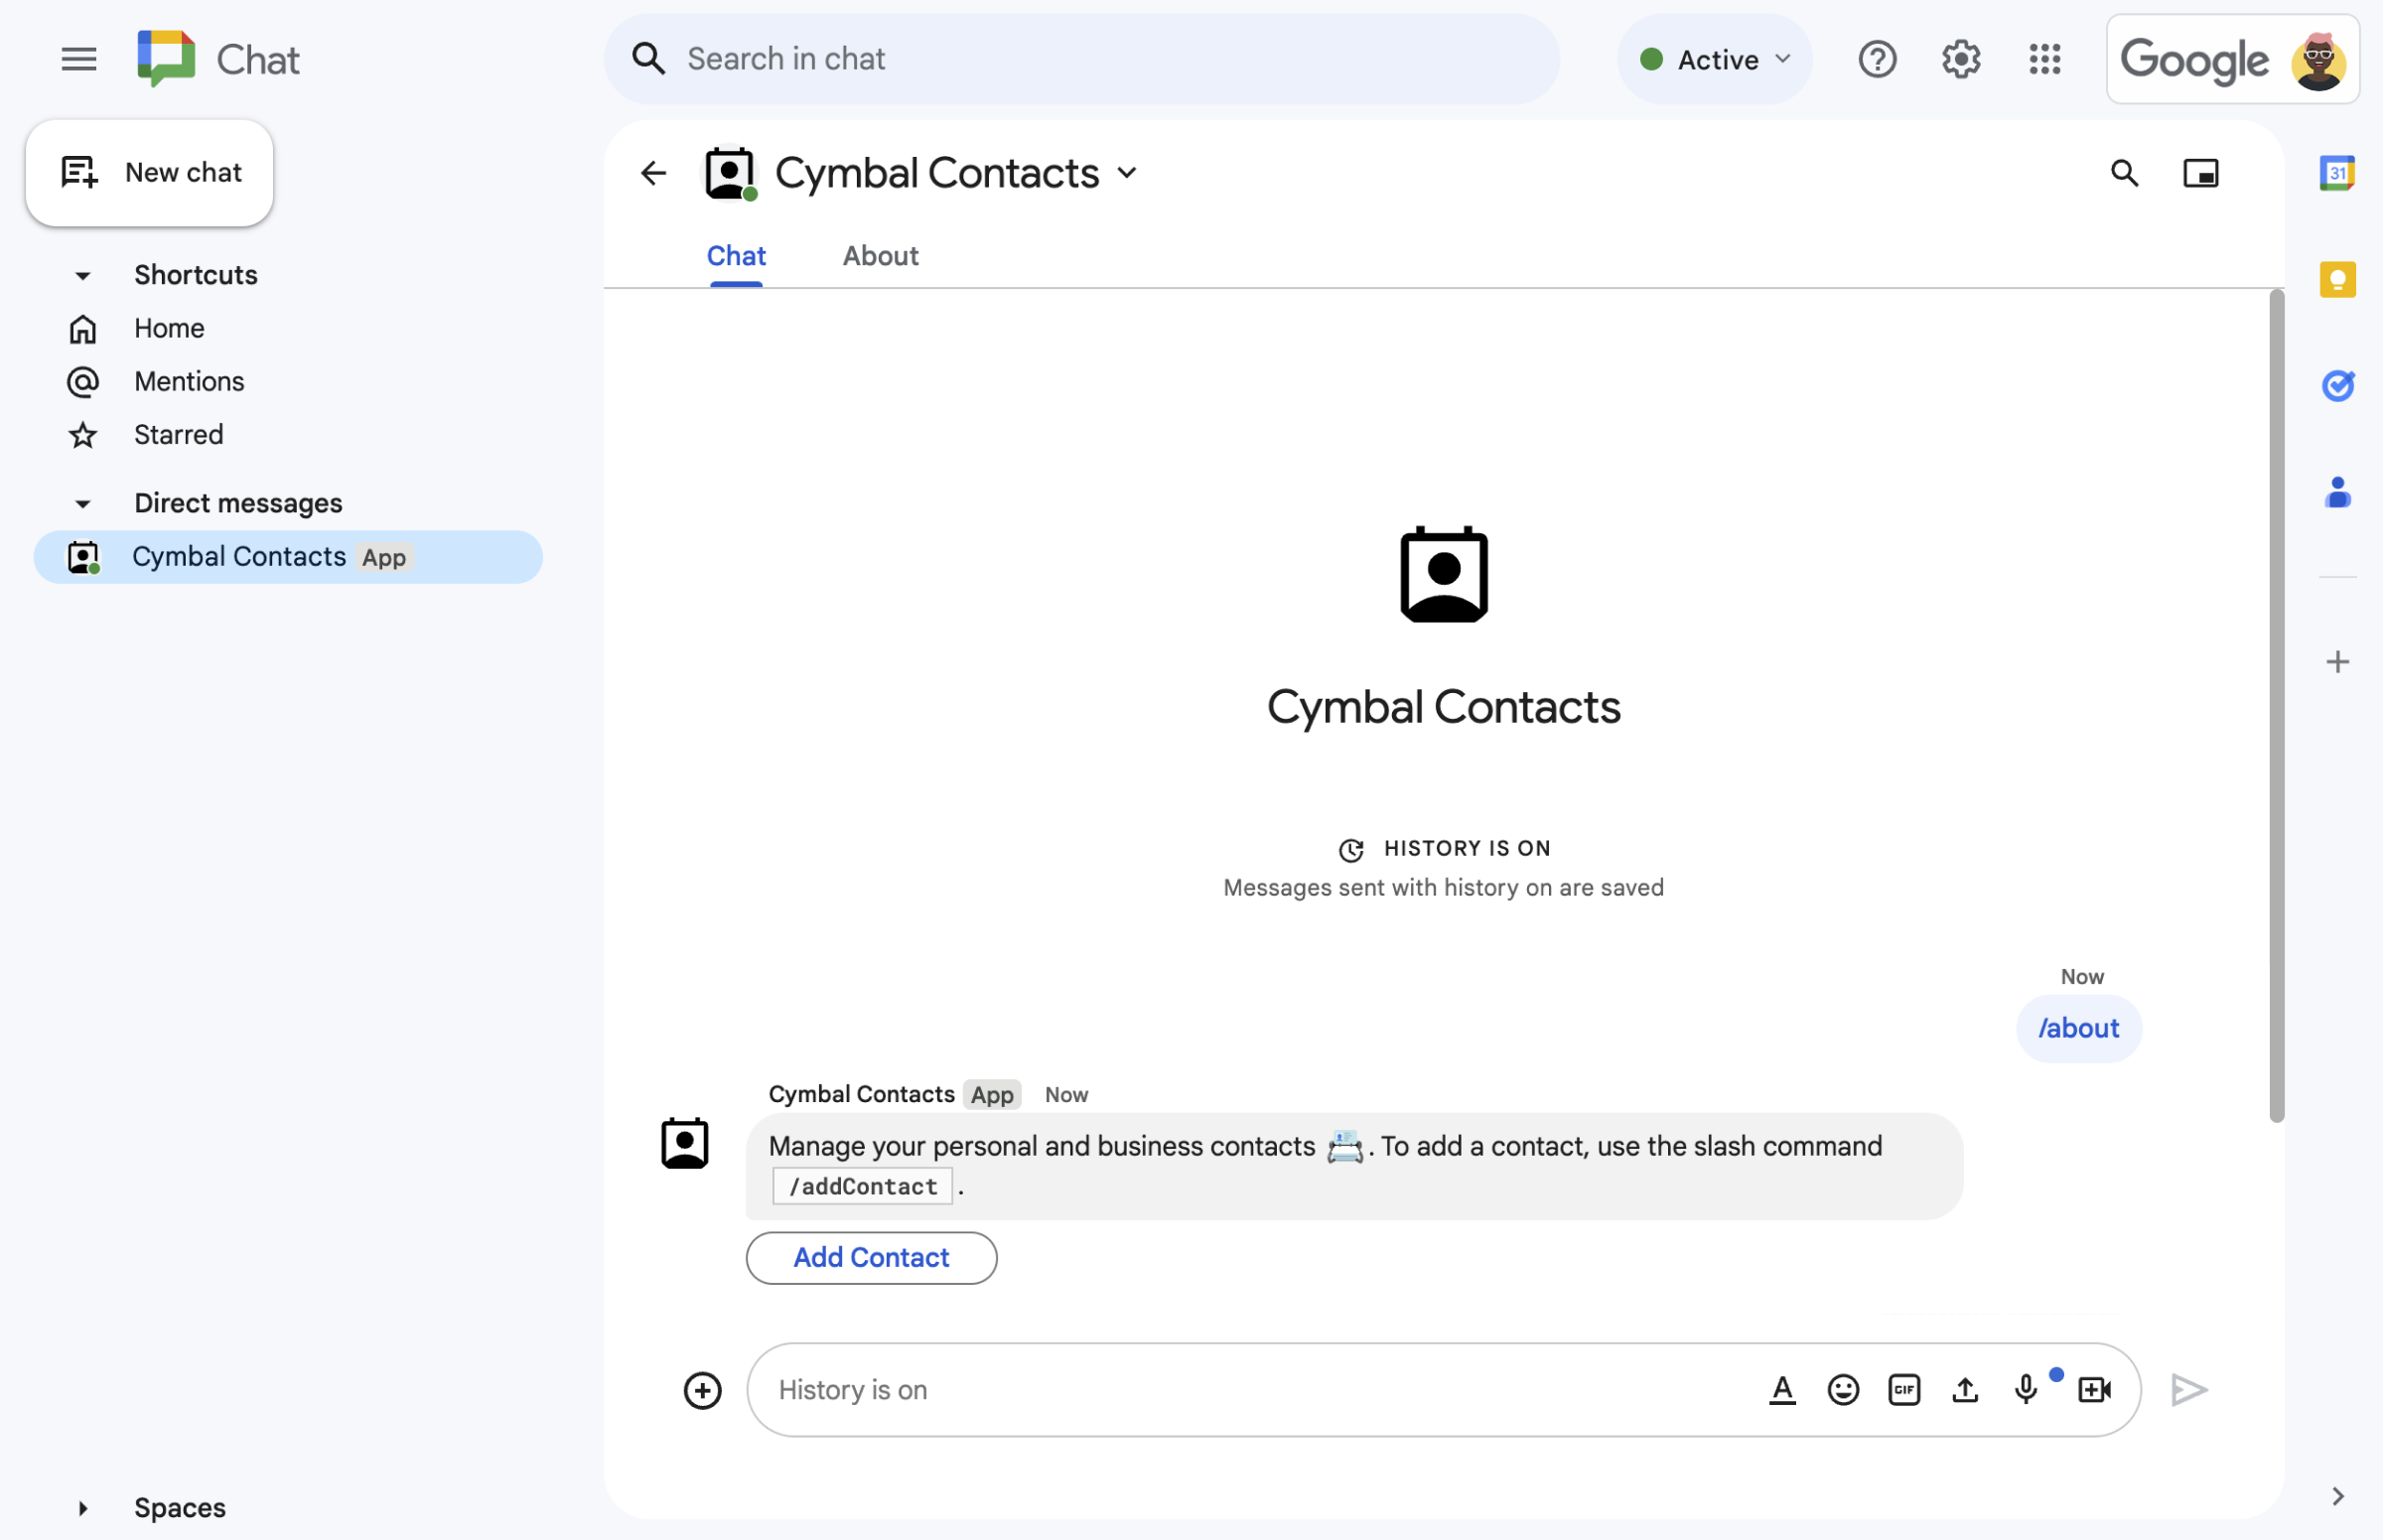
Gambar 1. Aplikasi Chat merespons perintah garis miring /aboutdengan pesan teks dan tombol yang membuka formulir kontak. -
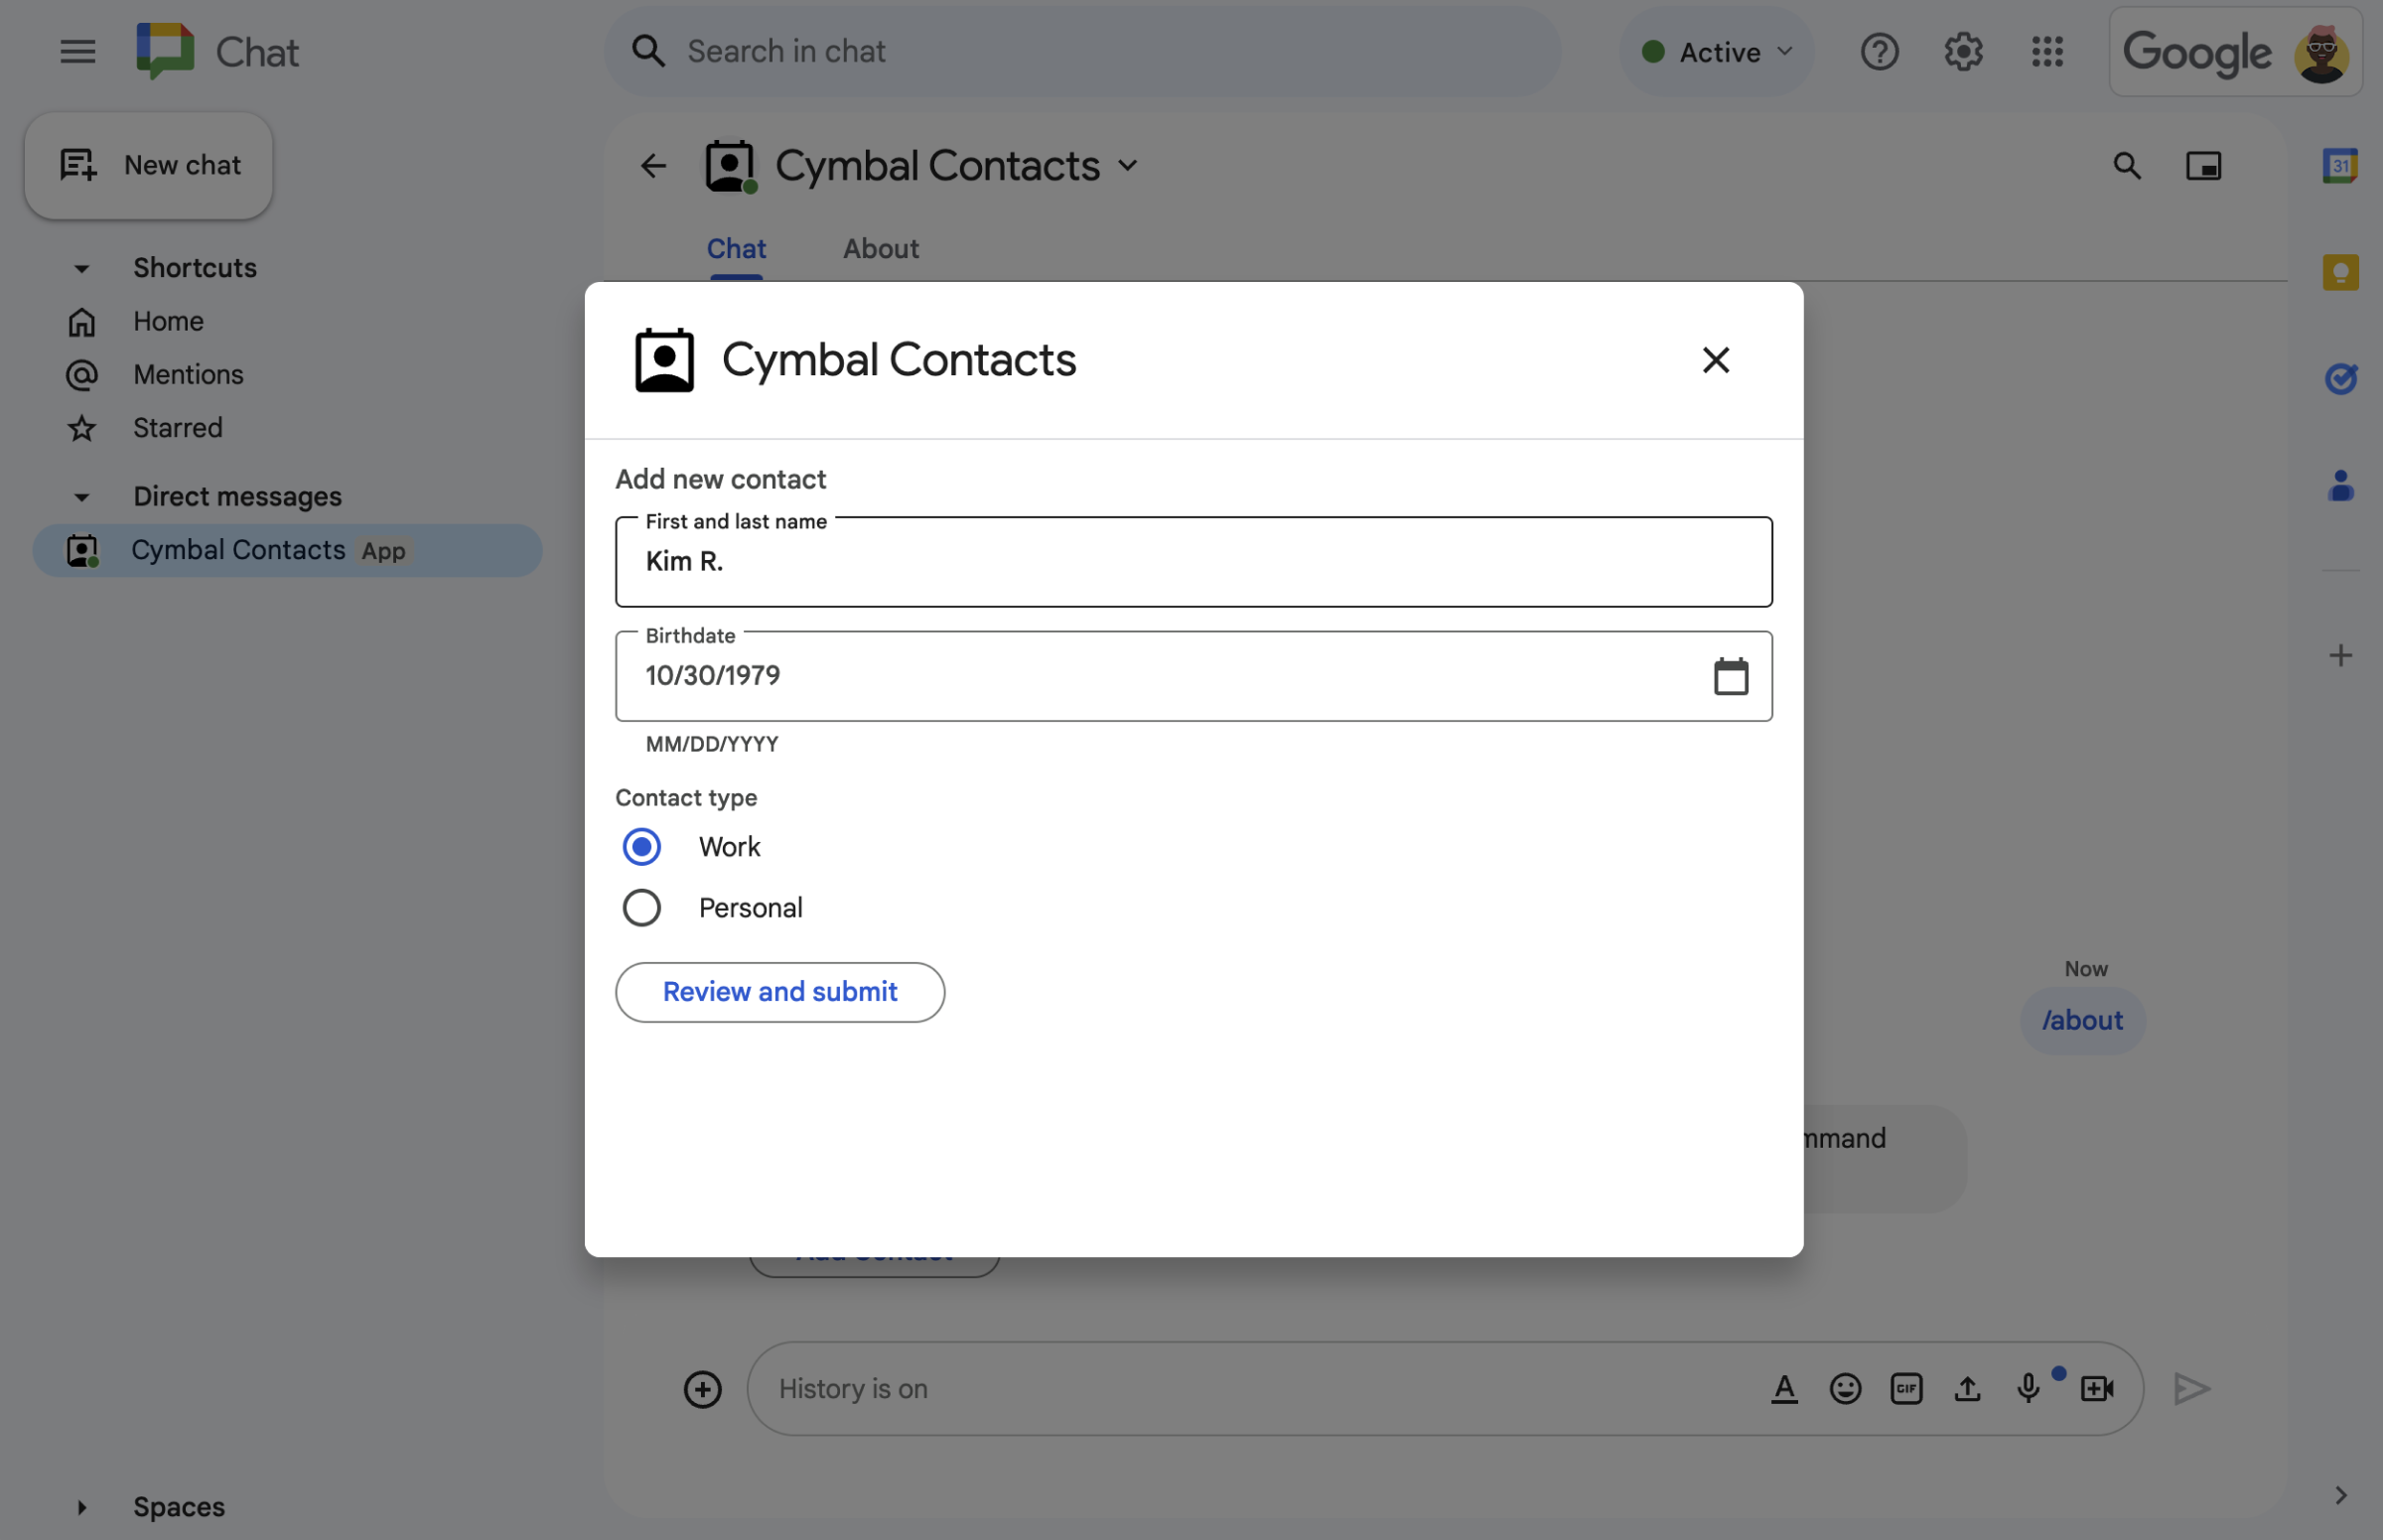
Gambar 2. Aplikasi Chat membuka dialog tempat pengguna dapat memasukkan informasi tentang kontak. -
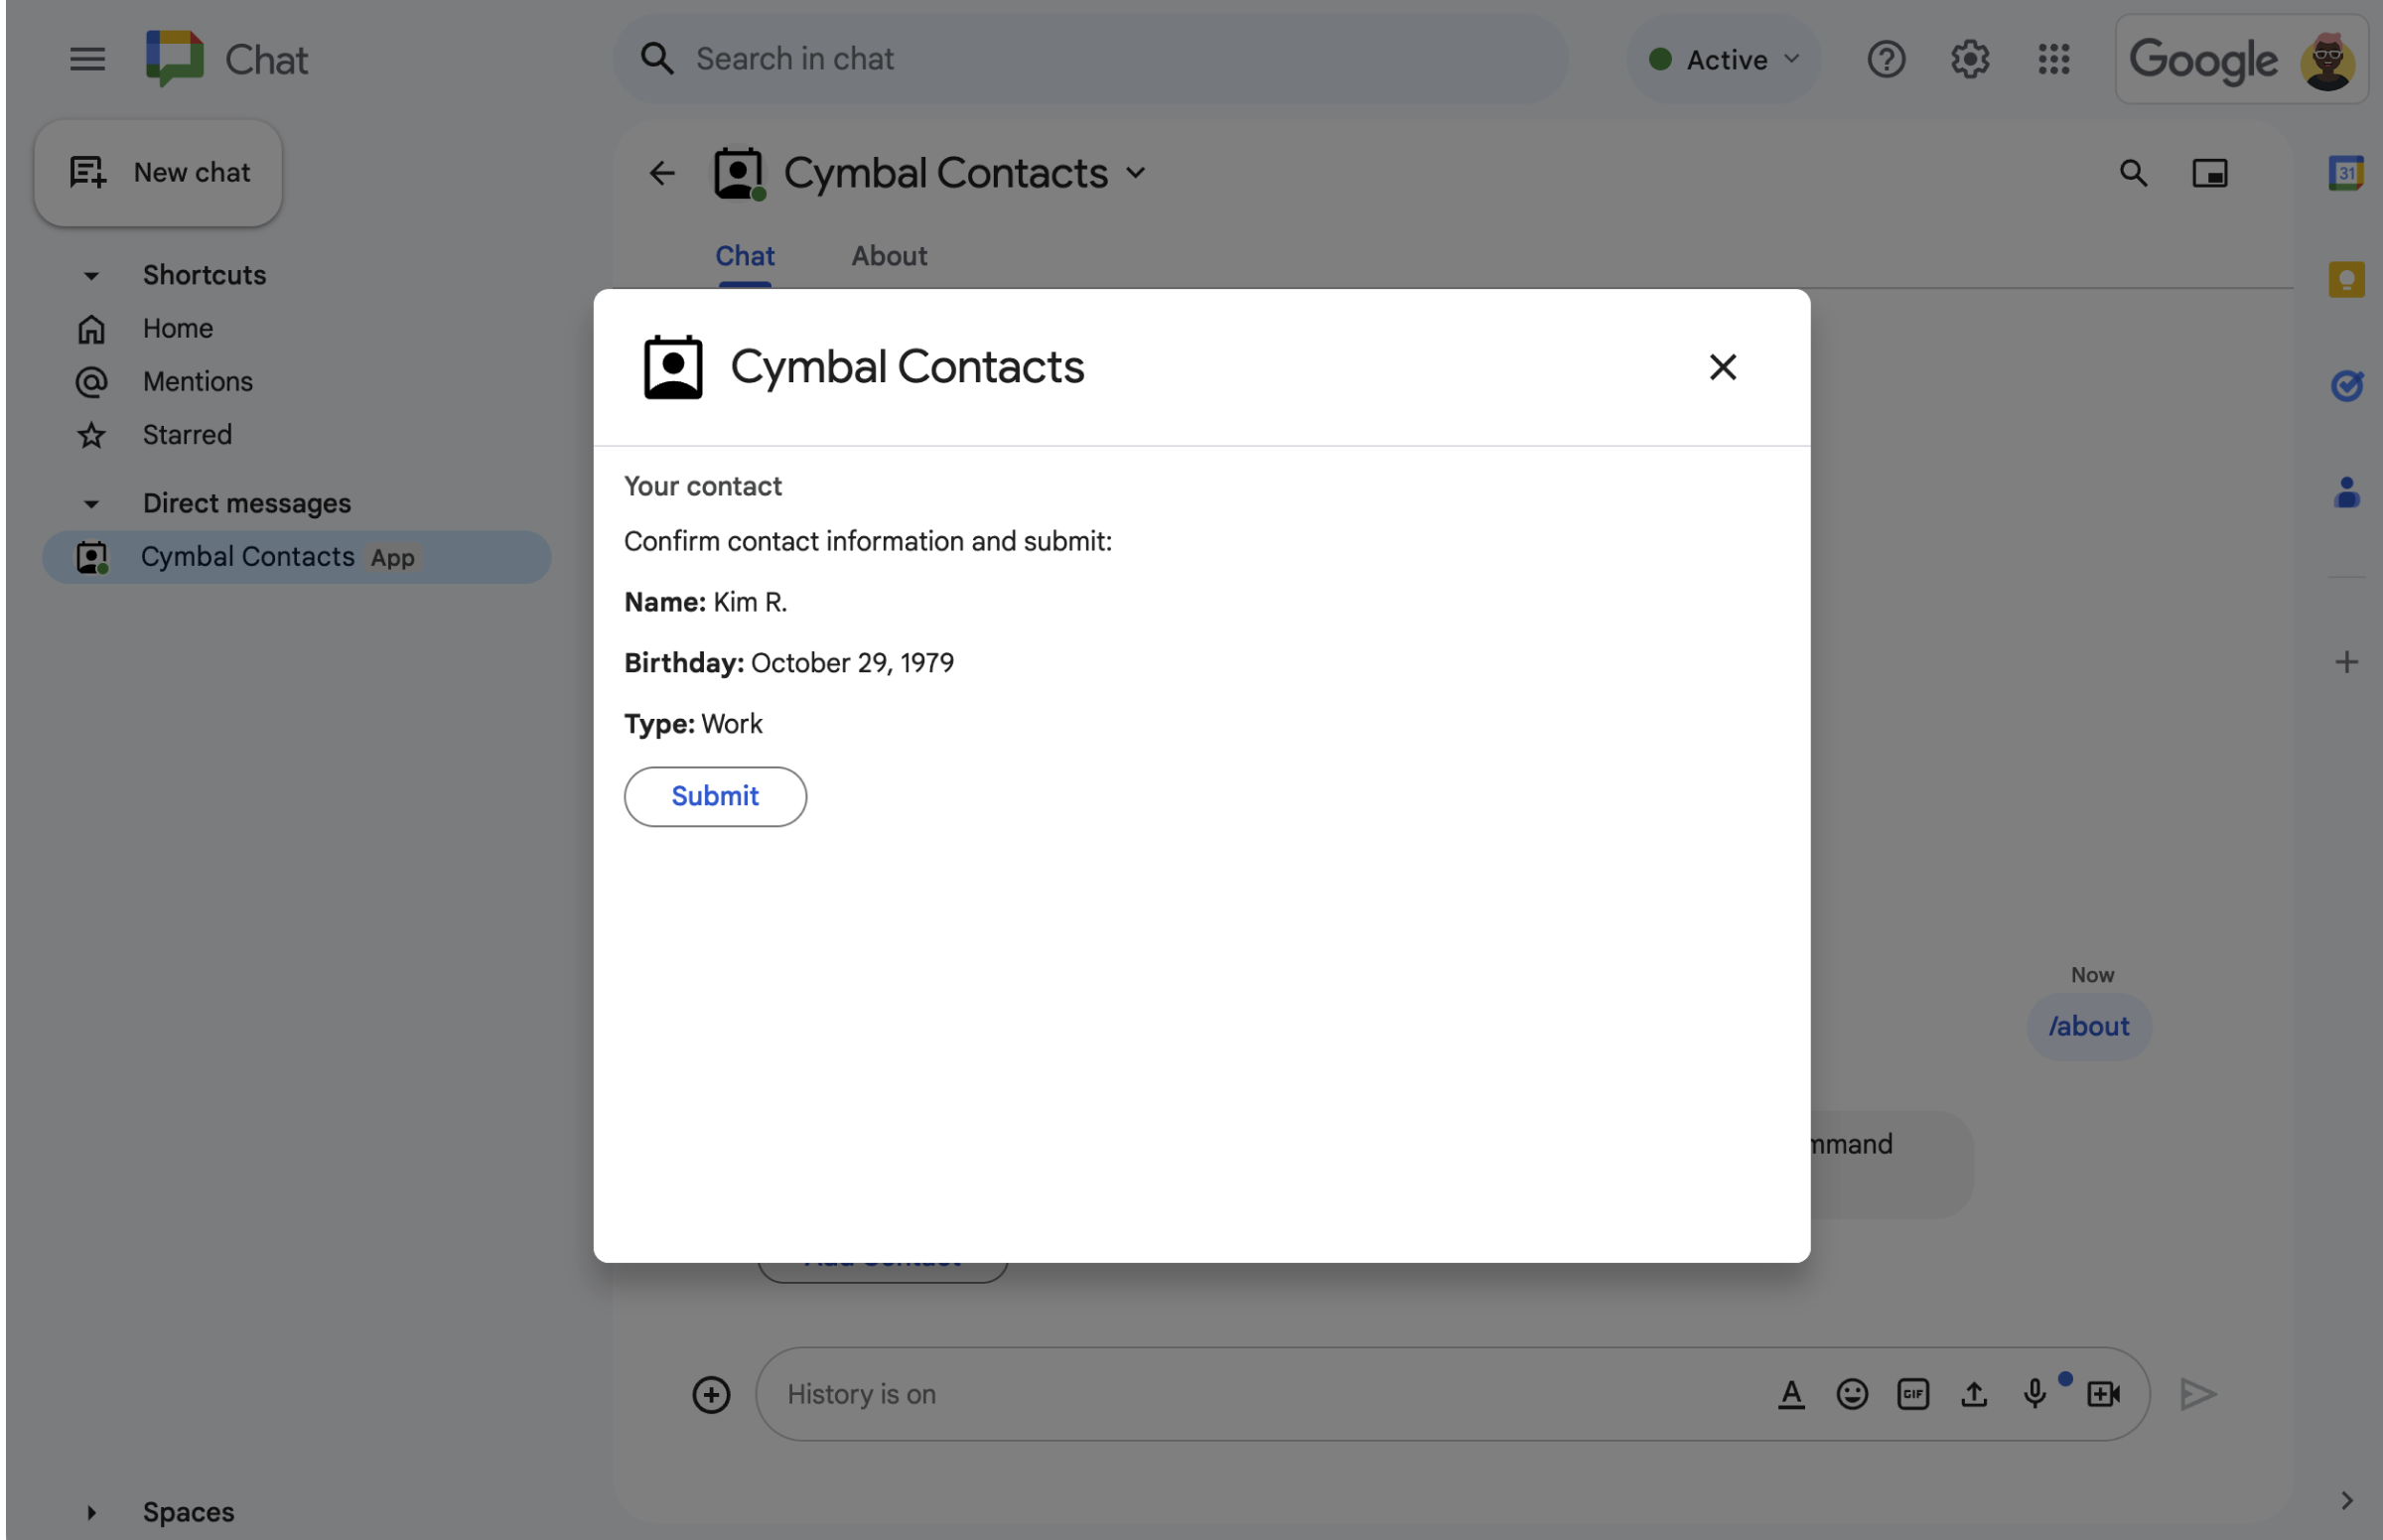
Gambar 3. Aplikasi Chat menampilkan dialog konfirmasi sehingga pengguna dapat meninjau dan mengonfirmasi informasi sebelum mengirimkannya. -
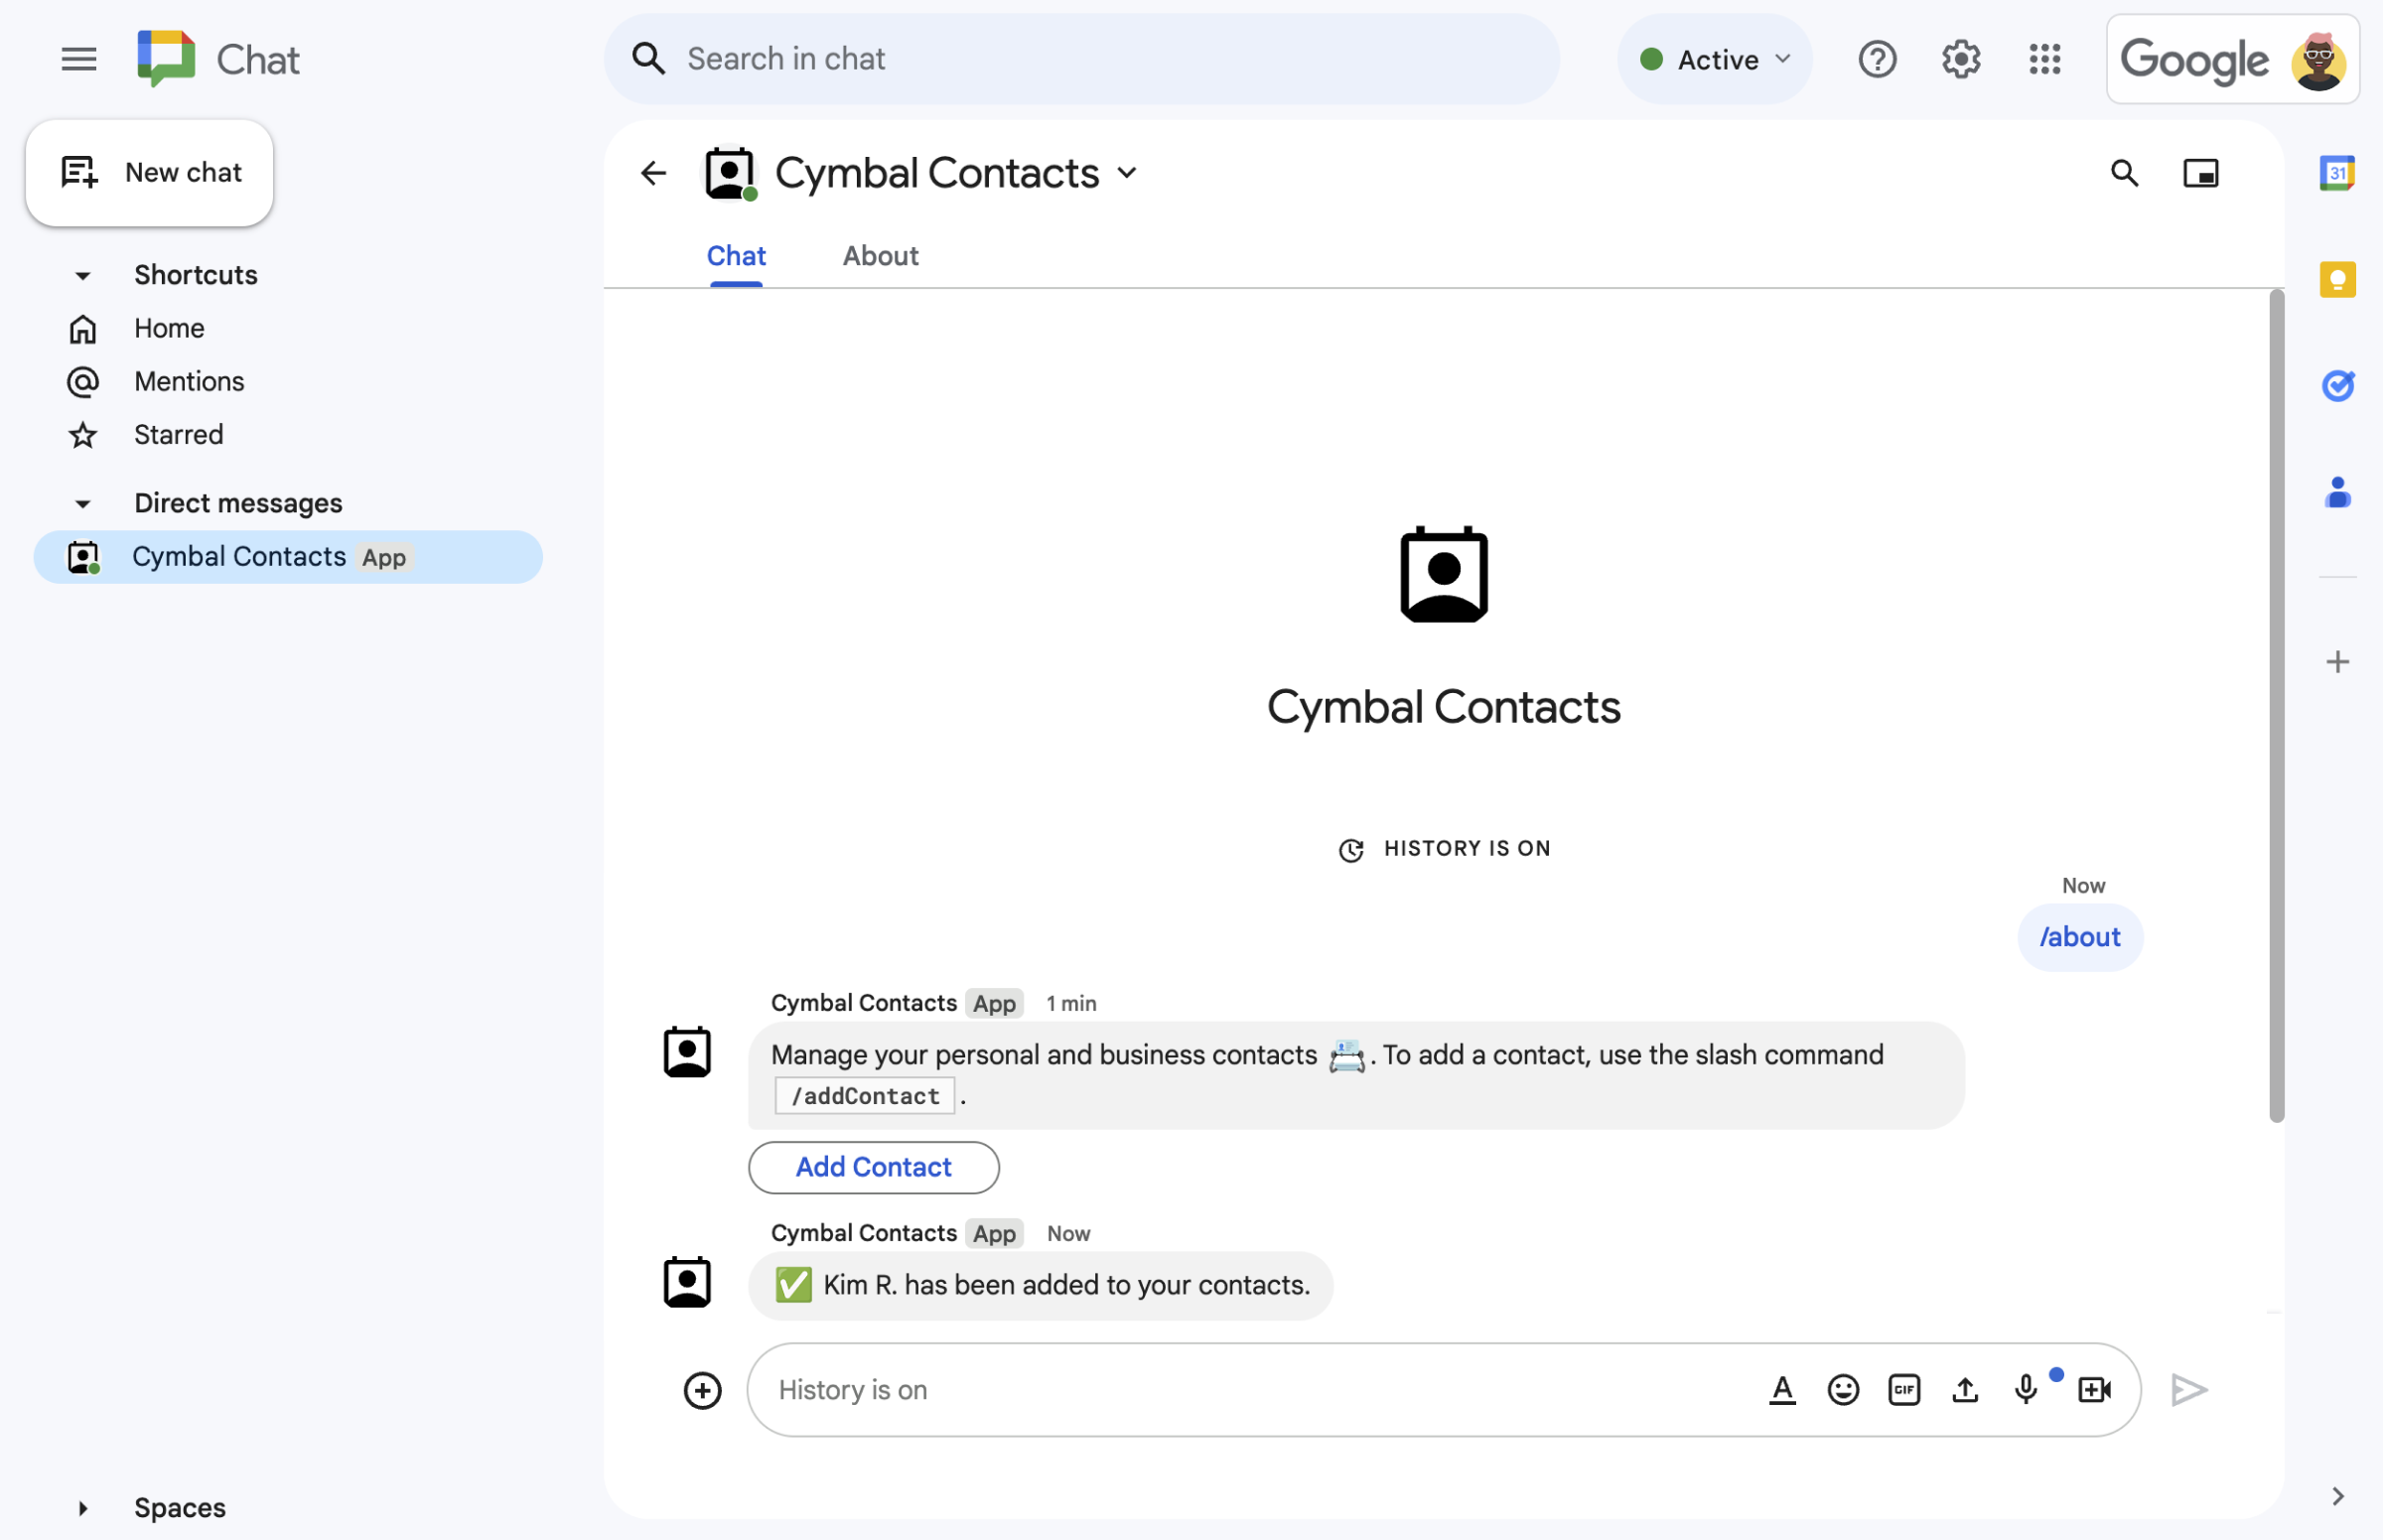
Gambar 4. Setelah pengguna mengirimkan formulir, aplikasi Chat akan mengirimkan pesan teks pribadi untuk mengonfirmasi pengiriman. -
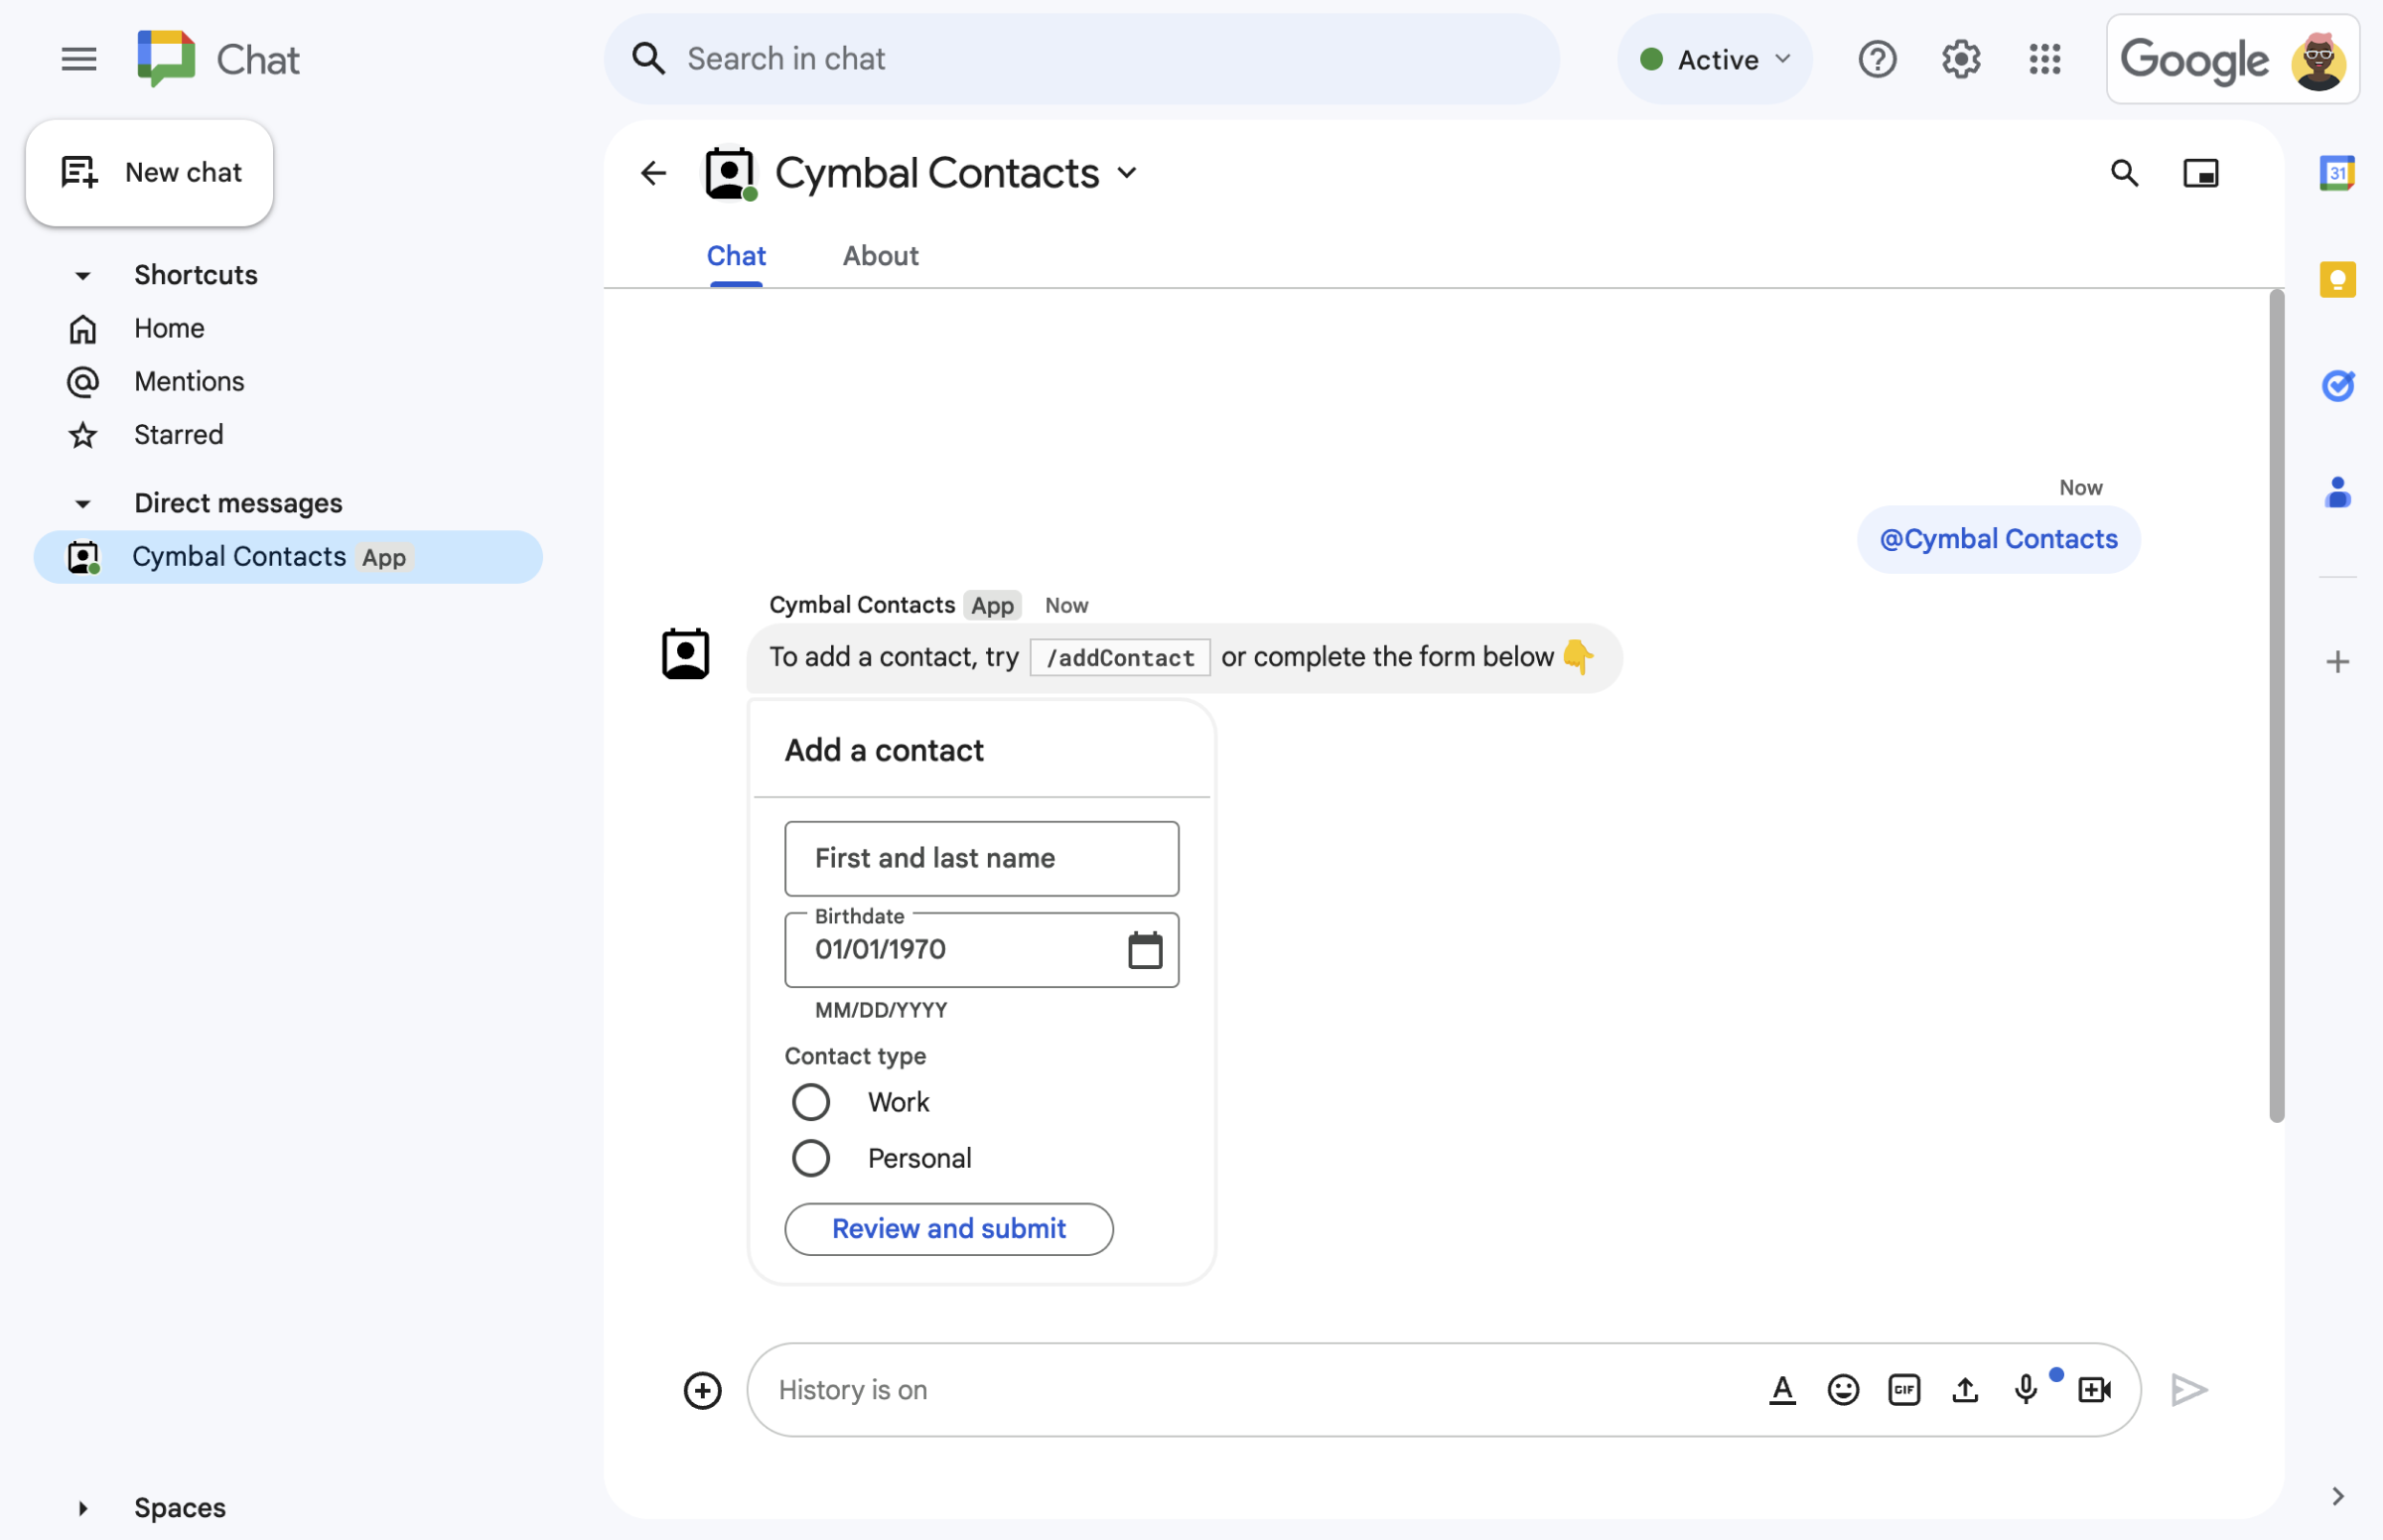
Gambar 5. Aplikasi Chat juga meminta pengguna untuk menambahkan kontak dari kartu dalam pesan.
Prasyarat
- Akun Google Workspace Business atau Enterprise dengan akses ke Google Chat.
- Buat project Google Cloud.
Tujuan
- Mendesain dan membangun antarmuka pengguna (UI)
sebagai objek
card, dan menampilkan UI dalam pesan dan dialog. - Menerima dan memproses informasi yang dikirimkan pengguna menggunakan widget input formulir.
- Merespons perintah dengan pesan yang berisi teks, kartu, dan widget aksesori.
Arsitektur
Aplikasi Chat dibuat di Google Apps Script dan menggunakan peristiwa interaksi untuk memproses dan merespons pengguna Chat.
Berikut ini menunjukkan cara pengguna biasanya berinteraksi dengan aplikasi Chat:
Pengguna membuka pesan langsung dengan aplikasi Chat, atau menambahkan aplikasi Chat ke ruang yang ada.
Aplikasi Chat akan meminta pengguna untuk menambahkan kontak dengan membuat dan menampilkan formulir kontak sebagai objek
card. Untuk menampilkan formulir kontak, aplikasi Chat merespons pengguna dengan cara berikut:- Merespons sebutan @dan pesan langsung dengan pesan kartu yang berisi formulir kontak.
- Merespons perintah garis miring
/addContactdengan membuka dialog yang berisi formulir kontak. - Merespons perintah garis miring
/aboutdengan pesan teks yang memiliki tombol Tambahkan kontak yang dapat diklik pengguna untuk membuka dialog dengan formulir kontak.
Saat melihat formulir kontak, pengguna memasukkan informasi kontak ke dalam kolom dan widget berikut:
- Nama depan dan nama belakang: widget
textInputyang menerima string. - Tanggal lahir: widget
dateTimePickeryang hanya menerima tanggal. - Jenis kontak: widget
selectionInputtombol pilihan yang memungkinkan pengguna memilih dan mengirimkan satu nilai string (baikPersonalmaupunWork). - Tombol Tinjau dan kirim: array
buttonListdengan widgetbuttonyang diklik pengguna untuk mengirimkan nilai yang mereka masukkan.
- Nama depan dan nama belakang: widget
Aplikasi Google Chat menangani peristiwa interaksi
CARD_CLICKEDuntuk memproses nilai yang dimasukkan pengguna, dan menampilkan nilai dalam kartu konfirmasi.Pengguna meninjau kartu konfirmasi dan mengklik tombol Kirim untuk menyelesaikan informasi kontak.
Aplikasi Google Chat akan mengirimkan pesan teks pribadi yang mengonfirmasi pengiriman.
Menyiapkan lingkungan
Bagian ini menunjukkan cara mengonfigurasi project Google Cloud untuk aplikasi Chat.
Buka project Cloud Anda di Konsol Google API
Jika belum terbuka, buka project Cloud yang ingin Anda gunakan untuk contoh ini:
- Di Konsol API Google, buka halaman Pilih project.
- Pilih project Google Cloud yang ingin Anda gunakan. Atau, klik Buat project dan ikuti petunjuk di layar. Jika membuat project Google Cloud, Anda mungkin perlu mengaktifkan penagihan untuk project tersebut.
Menyiapkan autentikasi dan otorisasi
Aplikasi Google Chat mengharuskan Anda mengonfigurasi layar izin OAuth agar pengguna dapat memberikan otorisasi ke aplikasi Anda di aplikasi Google Workspace, termasuk Google Chat.
Dalam tutorial ini, Anda men-deploy aplikasi Chat yang hanya untuk pengujian dan penggunaan internal, jadi Anda boleh menggunakan informasi pengganti untuk layar izin. Sebelum memublikasikan aplikasi Chat, ganti informasi placeholder dengan informasi yang sebenarnya.
Di Konsol Google API, buka Menu > Google Auth platform > Branding.
Jika sudah mengonfigurasi platform Google Auth, Anda dapat mengonfigurasi setelan Layar Izin OAuth berikut di Branding, Audiens, dan Akses Data. Jika Anda melihat pesan yang menyatakan Google Auth platform not configured yet, klik Get Started:
- Di bagian App Information, pada App name, ketik
Contact Manager. - Di bagian User support email, pilih alamat email Anda atau grup Google yang sesuai.
- Klik Berikutnya.
- Di bagian Audiens, pilih Internal. Jika Anda tidak dapat memilih Internal, pilih Eksternal.
- Klik Berikutnya.
- Di bagian Informasi Kontak, masukkan Alamat email tempat Anda dapat menerima notifikasi tentang perubahan apa pun pada project Anda.
- Klik Berikutnya.
- Di bagian Selesai, tinjau Kebijakan Data Pengguna Layanan Google API dan jika Anda setuju, pilih Saya menyetujui Layanan Google API: Kebijakan Data Pengguna.
- Klik Lanjutkan.
- Klik Buat.
- Jika Anda memilih Eksternal untuk jenis pengguna, tambahkan pengguna penguji:
- Klik Audiens.
- Di bagian Pengguna pengujian, klik Tambahkan pengguna.
- Masukkan alamat email Anda dan pengguna uji resmi lainnya, lalu klik Simpan.
- Di bagian App Information, pada App name, ketik
Membuat dan men-deploy aplikasi Chat
Di bagian berikut, Anda akan menyalin dan memperbarui seluruh project Apps Script yang berisi semua kode aplikasi yang diperlukan untuk aplikasi Chat Anda, sehingga Anda tidak perlu menyalin dan menempelkan setiap file.
Atau, Anda dapat melihat seluruh project di GitHub.
Berikut ringkasan setiap file:
main.gsMenangani semua logika aplikasi, termasuk peristiwa interaksi tentang kapan pengguna mengirim pesan ke aplikasi Chat, mengklik tombol dari pesan aplikasi Chat, atau membuka dan menutup dialog.
Lihat kode
main.gscontactForm.gsBerisi widget yang menerima data formulir dari pengguna. Widget input formulir ini ditampilkan dalam kartu yang muncul di pesan dan dialog.
Lihat kode
contactForm.gsappsscript.jsonManifes Apps Script yang menentukan dan mengonfigurasi project Apps Script untuk aplikasi Chat.
Lihat kode
appsscript.json
Buat project Apps Script
Untuk membuat project Apps Script:
- Klik tombol berikut untuk membuka project Apps Script Mengelola kontak di Google Chat.
Membuka project - Klik Ringkasan.
- Di halaman ringkasan, klik
 Buat salinan.
 Beri nama salinan project Apps Script Anda:
Klik Salinan Mengelola kontak di Google Chat.
Di Project title, ketik
Contact Manager - Google Chat appKlik Ganti nama.
Pada masa mendatang, jika ingin menggunakan API Google tertentu atau memublikasikan aplikasi, Anda harus mengaitkan project Cloud dengan project Apps Script. Untuk panduan ini, Anda tidak perlu melakukannya. Untuk mempelajari lebih lanjut, lihat panduan project Google Cloud.
Membuat deployment Apps Script
Setelah semua kode tersedia, deploy project Apps Script. Anda menggunakan ID deployment saat mengonfigurasi aplikasi Chat di Google Cloud.
Di Apps Script, buka project aplikasi Chat.
Klik Deploy > New deployment.
Jika Add-on belum dipilih, di samping Pilih jenis, klik jenis deployment
 , lalu pilih Add-on.
Di Deskripsi, masukkan deskripsi untuk versi ini, seperti
Test of Contact Manager.Klik Deploy. Apps Script melaporkan keberhasilan deployment dan memberikan ID deployment.
Klik Salin untuk menyalin ID deployment, lalu klik Selesai.
Mengonfigurasi aplikasi Chat di Konsol API Google
Bagian ini menunjukkan cara mengonfigurasi Google Chat API di Konsol API Google dengan informasi tentang aplikasi Chat Anda, termasuk ID deployment yang baru saja Anda buat dari project Apps Script.
Di Konsol Google API, klik Menu > APIs & Services > Enabled APIs & Services > Google Chat API > Configuration.
Hapus Bangun aplikasi Chat ini sebagai add-on Google Workspace. Dialog akan terbuka untuk meminta Anda mengonfirmasi. Pada dialog, klik Nonaktifkan.
Di App name, ketik
Contact Manager.Di Avatar URL, ketik
https://developers.google.com/chat/images/contact-icon.png.Di Deskripsi, ketik
Manage your personal and business contacts.Klik tombol Aktifkan fitur Interaktif ke posisi aktif.
Di bagian Functionality, pilih Join spaces and group conversations.
Di bagian Connection settings, pilih Apps Script.
Di Deployment ID, tempelkan ID Deployment Apps Script yang Anda salin di bagian sebelumnya saat membuat deployment Apps Script.
Di bagian Commands, siapkan perintah garis miring
/aboutdan/addContact:- Klik Tambahkan perintah garis miring untuk menyiapkan perintah garis miring pertama.
- Di Name, ketik
About. - Di Command ID, ketik
1. - Di Deskripsi, ketik
Learn how to use this Chat app to manage your contacts. - Di bagian Jenis perintah, pilih
Slash command. - Di Slash command name, ketik
/about. - Pilih Opens a dialog.
- Klik Selesai.
- Klik Tambahkan perintah untuk menyiapkan perintah garis miring lain.
- Di Name, ketik
Add a contact. - Di Command ID, ketik
2. - Di Deskripsi, ketik
Submit information about a contact. - Di bagian Jenis perintah, pilih
Slash command. - Di Slash command name, ketik
/addContact. - Pilih Opens a dialog.
- Klik Selesai.
Di bagian Visibilitas, centang kotak Jadikan aplikasi Chat ini tersedia untuk orang dan grup tertentu di YOUR DOMAIN, lalu masukkan alamat email Anda.
Di bagian Logs, pilih Log errors to Logging.
Klik Simpan. Pesan konfigurasi disimpan akan muncul.
Aplikasi Chat siap diinstal dan diuji di Chat.
Menguji aplikasi Chat
Untuk menguji aplikasi Chat Anda, buka ruang pesan langsung dengan aplikasi Chat dan kirim pesan:
Buka Google Chat menggunakan akun Google Workspace yang Anda berikan saat menambahkan diri Anda sebagai penguji tepercaya.
- Klik Chat baru.
- Di kolom Tambahkan 1 orang atau lebih, ketik nama aplikasi Chat Anda.
Pilih aplikasi Chat Anda dari hasil. Pesan langsung akan terbuka.
Di pesan langsung baru dengan aplikasi Chat, ketik
/addContact, lalu tekan enter.Pada dialog yang terbuka, masukkan informasi kontak:
- Di kolom teks Nama depan dan nama belakang, masukkan nama.
- Di pemilih tanggal Tanggal lahir, pilih tanggal.
- Di bagian Jenis kontak, pilih tombol pilihan Kantor atau Pribadi.
Klik Tinjau dan kirim.
Pada dialog konfirmasi, tinjau informasi yang Anda kirimkan, lalu klik Kirim. Aplikasi Chat membalas dengan pesan teks yang mengatakan
✅ CONTACT NAME has been added to your contacts..Secara opsional, Anda juga dapat menguji dan mengirimkan formulir kontak dengan cara berikut:
- Gunakan perintah garis miring
/about. Aplikasi chat membalas dengan pesan teks dan tombol widget aksesori yang bertuliskanAdd a contact. Anda dapat mengklik tombol untuk membuka dialog dengan formulir kontak. - Kirim pesan langsung ke aplikasi Chat tanpa perintah garis miring, seperti
Hello. Aplikasi Chat membalas dengan teks dan kartu yang berisi formulir kontak.
- Gunakan perintah garis miring
Pembersihan
Agar tidak menimbulkan biaya pada akun Google Cloud Anda untuk resource yang digunakan dalam tutorial ini, sebaiknya hapus project Cloud tersebut.
- Di Konsol API Google, buka halaman Kelola resource. Klik Menu > IAM & Admin > Kelola Resource.
- Dalam daftar project, pilih project yang ingin Anda hapus, lalu klik Hapus .
- Pada dialog, ketik project ID, lalu klik Shut down untuk menghapus project.
Topik terkait
- Merespons perintah
- Mengumpulkan dan memproses informasi dari pengguna Google Chat
- Membuka dialog interaktif
- Menjelajahi contoh aplikasi Google Chat lainnya