
บทแนะนำนี้แสดงวิธีสร้างแอป Google Chat ที่ช่วยให้ผู้ใช้ Google Chat จัดการรายชื่อติดต่อส่วนตัวและรายชื่อติดต่อทางธุรกิจได้ หากต้องการรวบรวมข้อมูล แอป Chat จะแจ้งให้ผู้ใช้กรอกแบบฟอร์มติดต่อในข้อความการ์ดและกล่องโต้ตอบ
ดูการทำงานของแอป Chat
-

รูปที่ 1 แอปแชทจะตอบกลับ คำสั่งเครื่องหมายทับ /aboutด้วยข้อความและปุ่มที่ เปิดแบบฟอร์มติดต่อ -
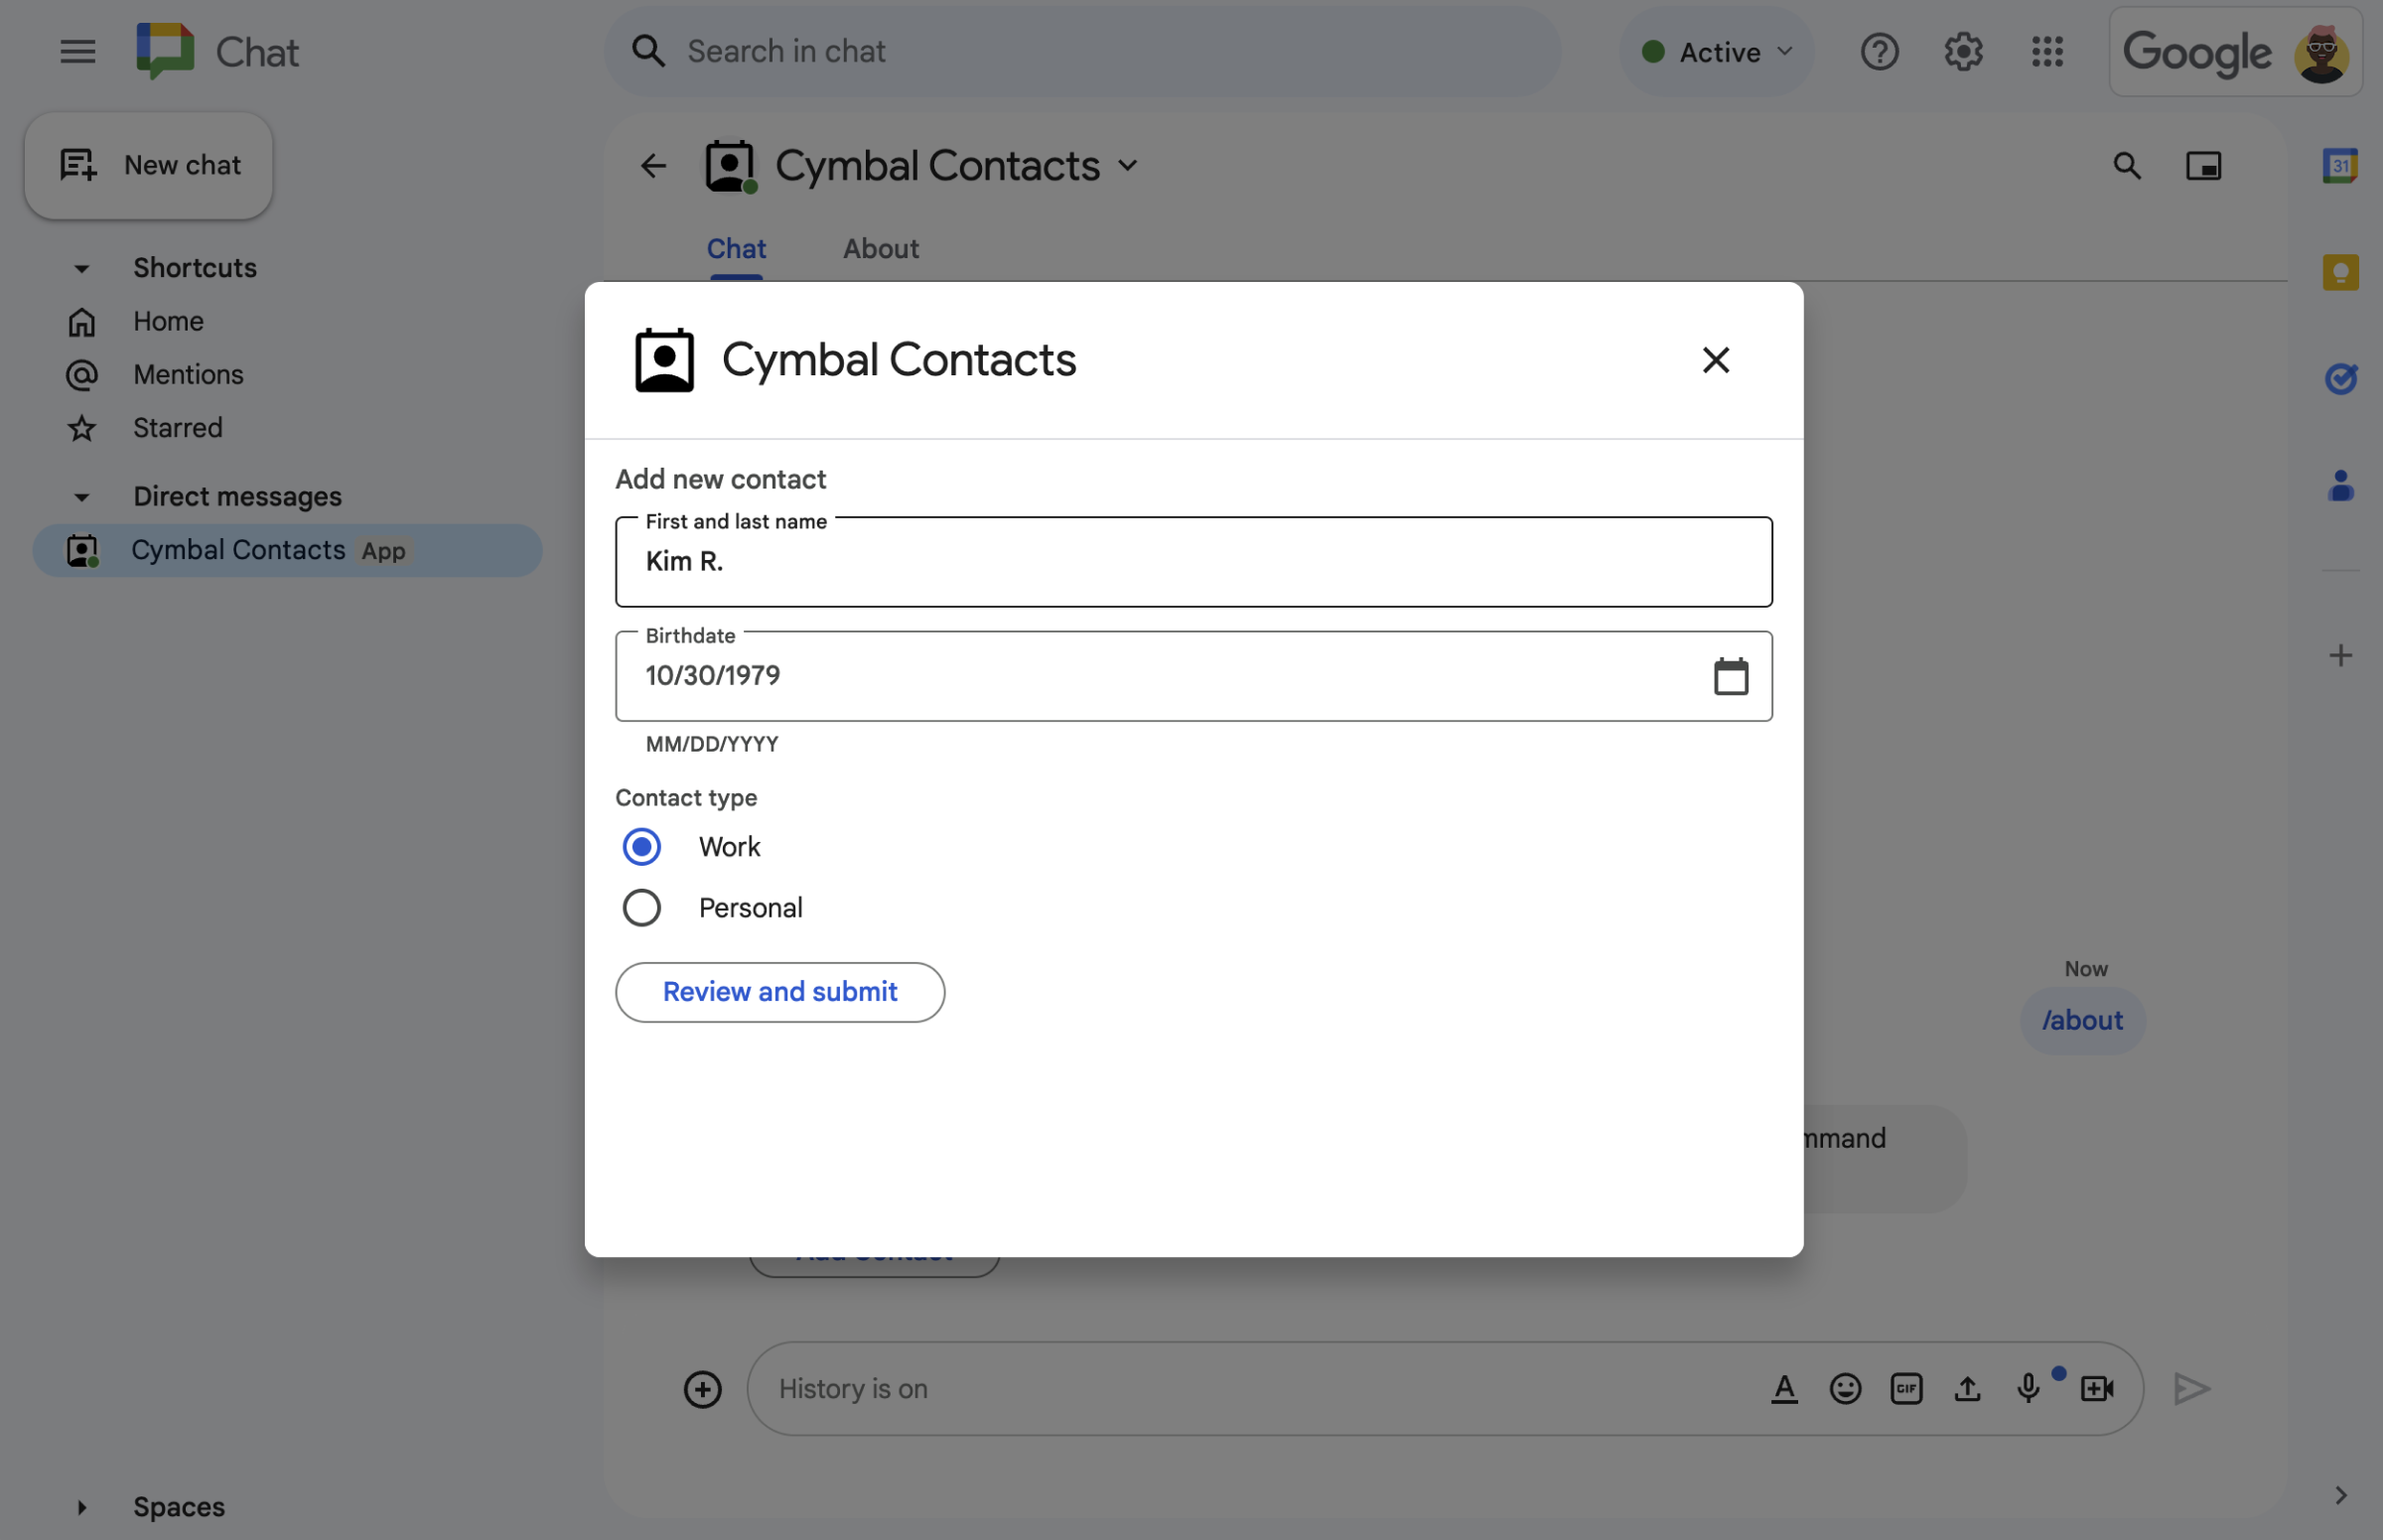
รูปที่ 2 แอป Chat จะเปิดกล่องโต้ตอบที่ผู้ใช้สามารถ ป้อนข้อมูลเกี่ยวกับรายชื่อติดต่อได้ -
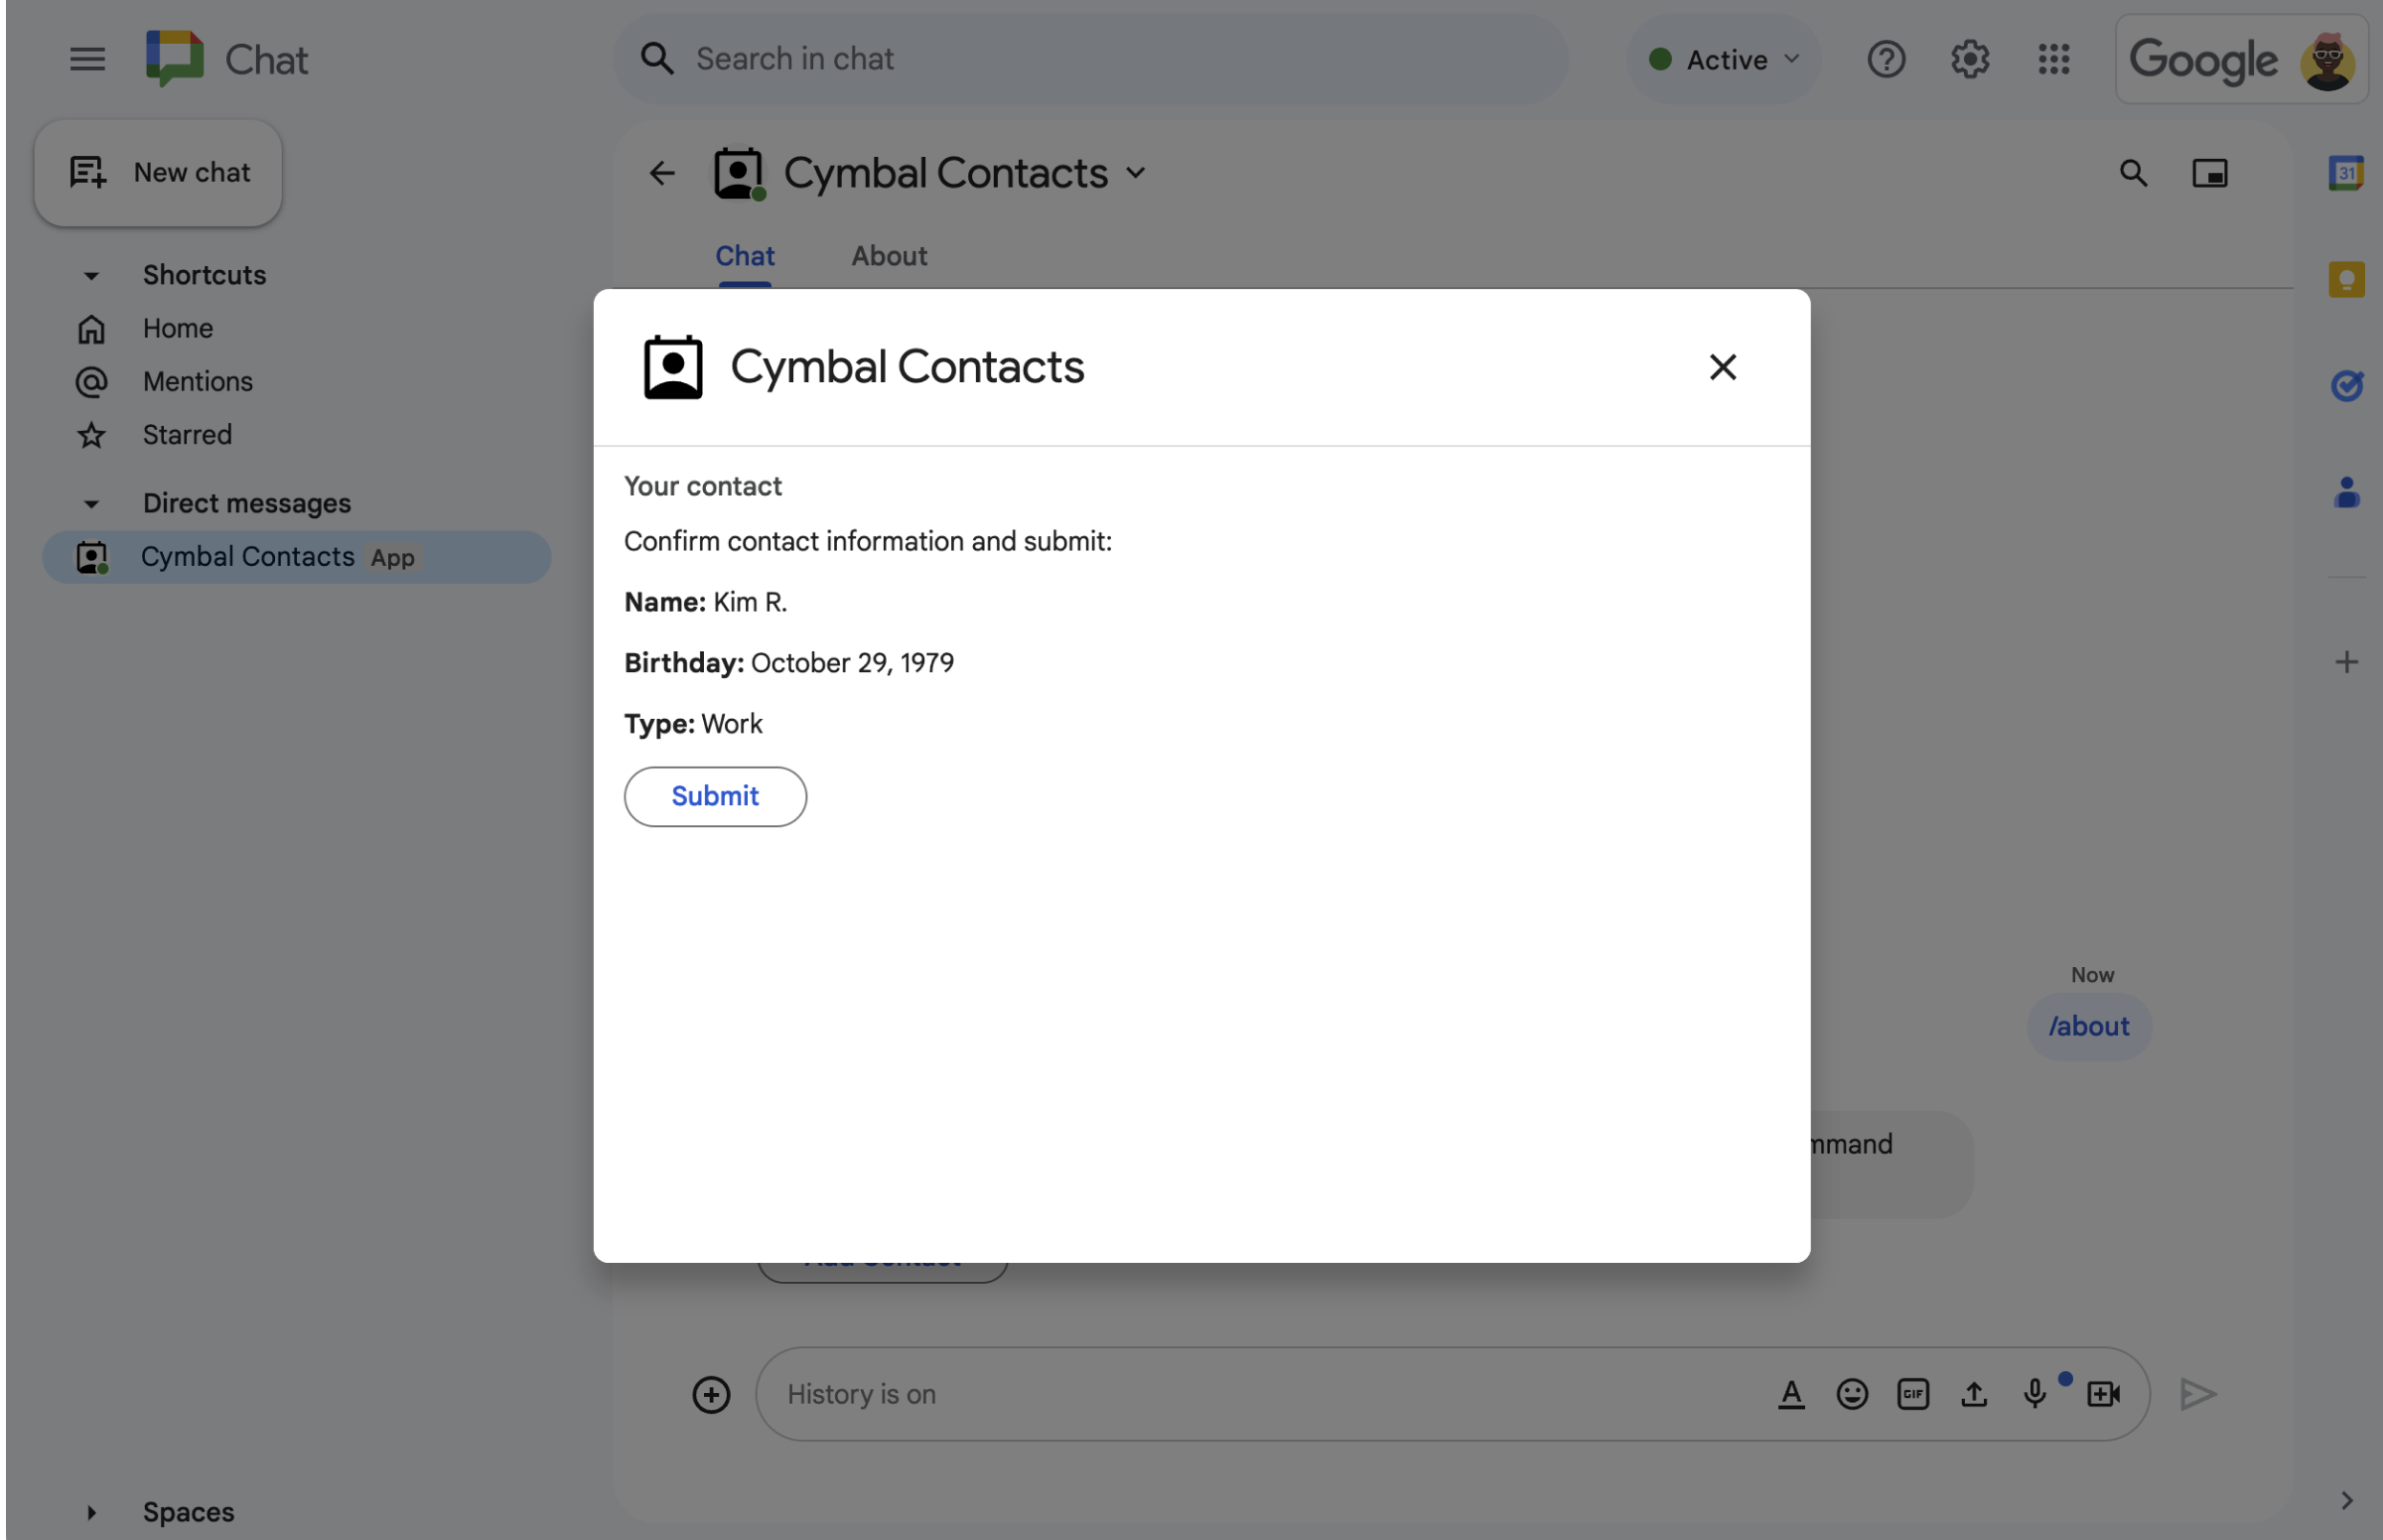
รูปที่ 3 แอป Chat จะแสดงกล่องโต้ตอบการยืนยันเพื่อให้ ผู้ใช้ตรวจสอบและยืนยันข้อมูลก่อน ส่ง -
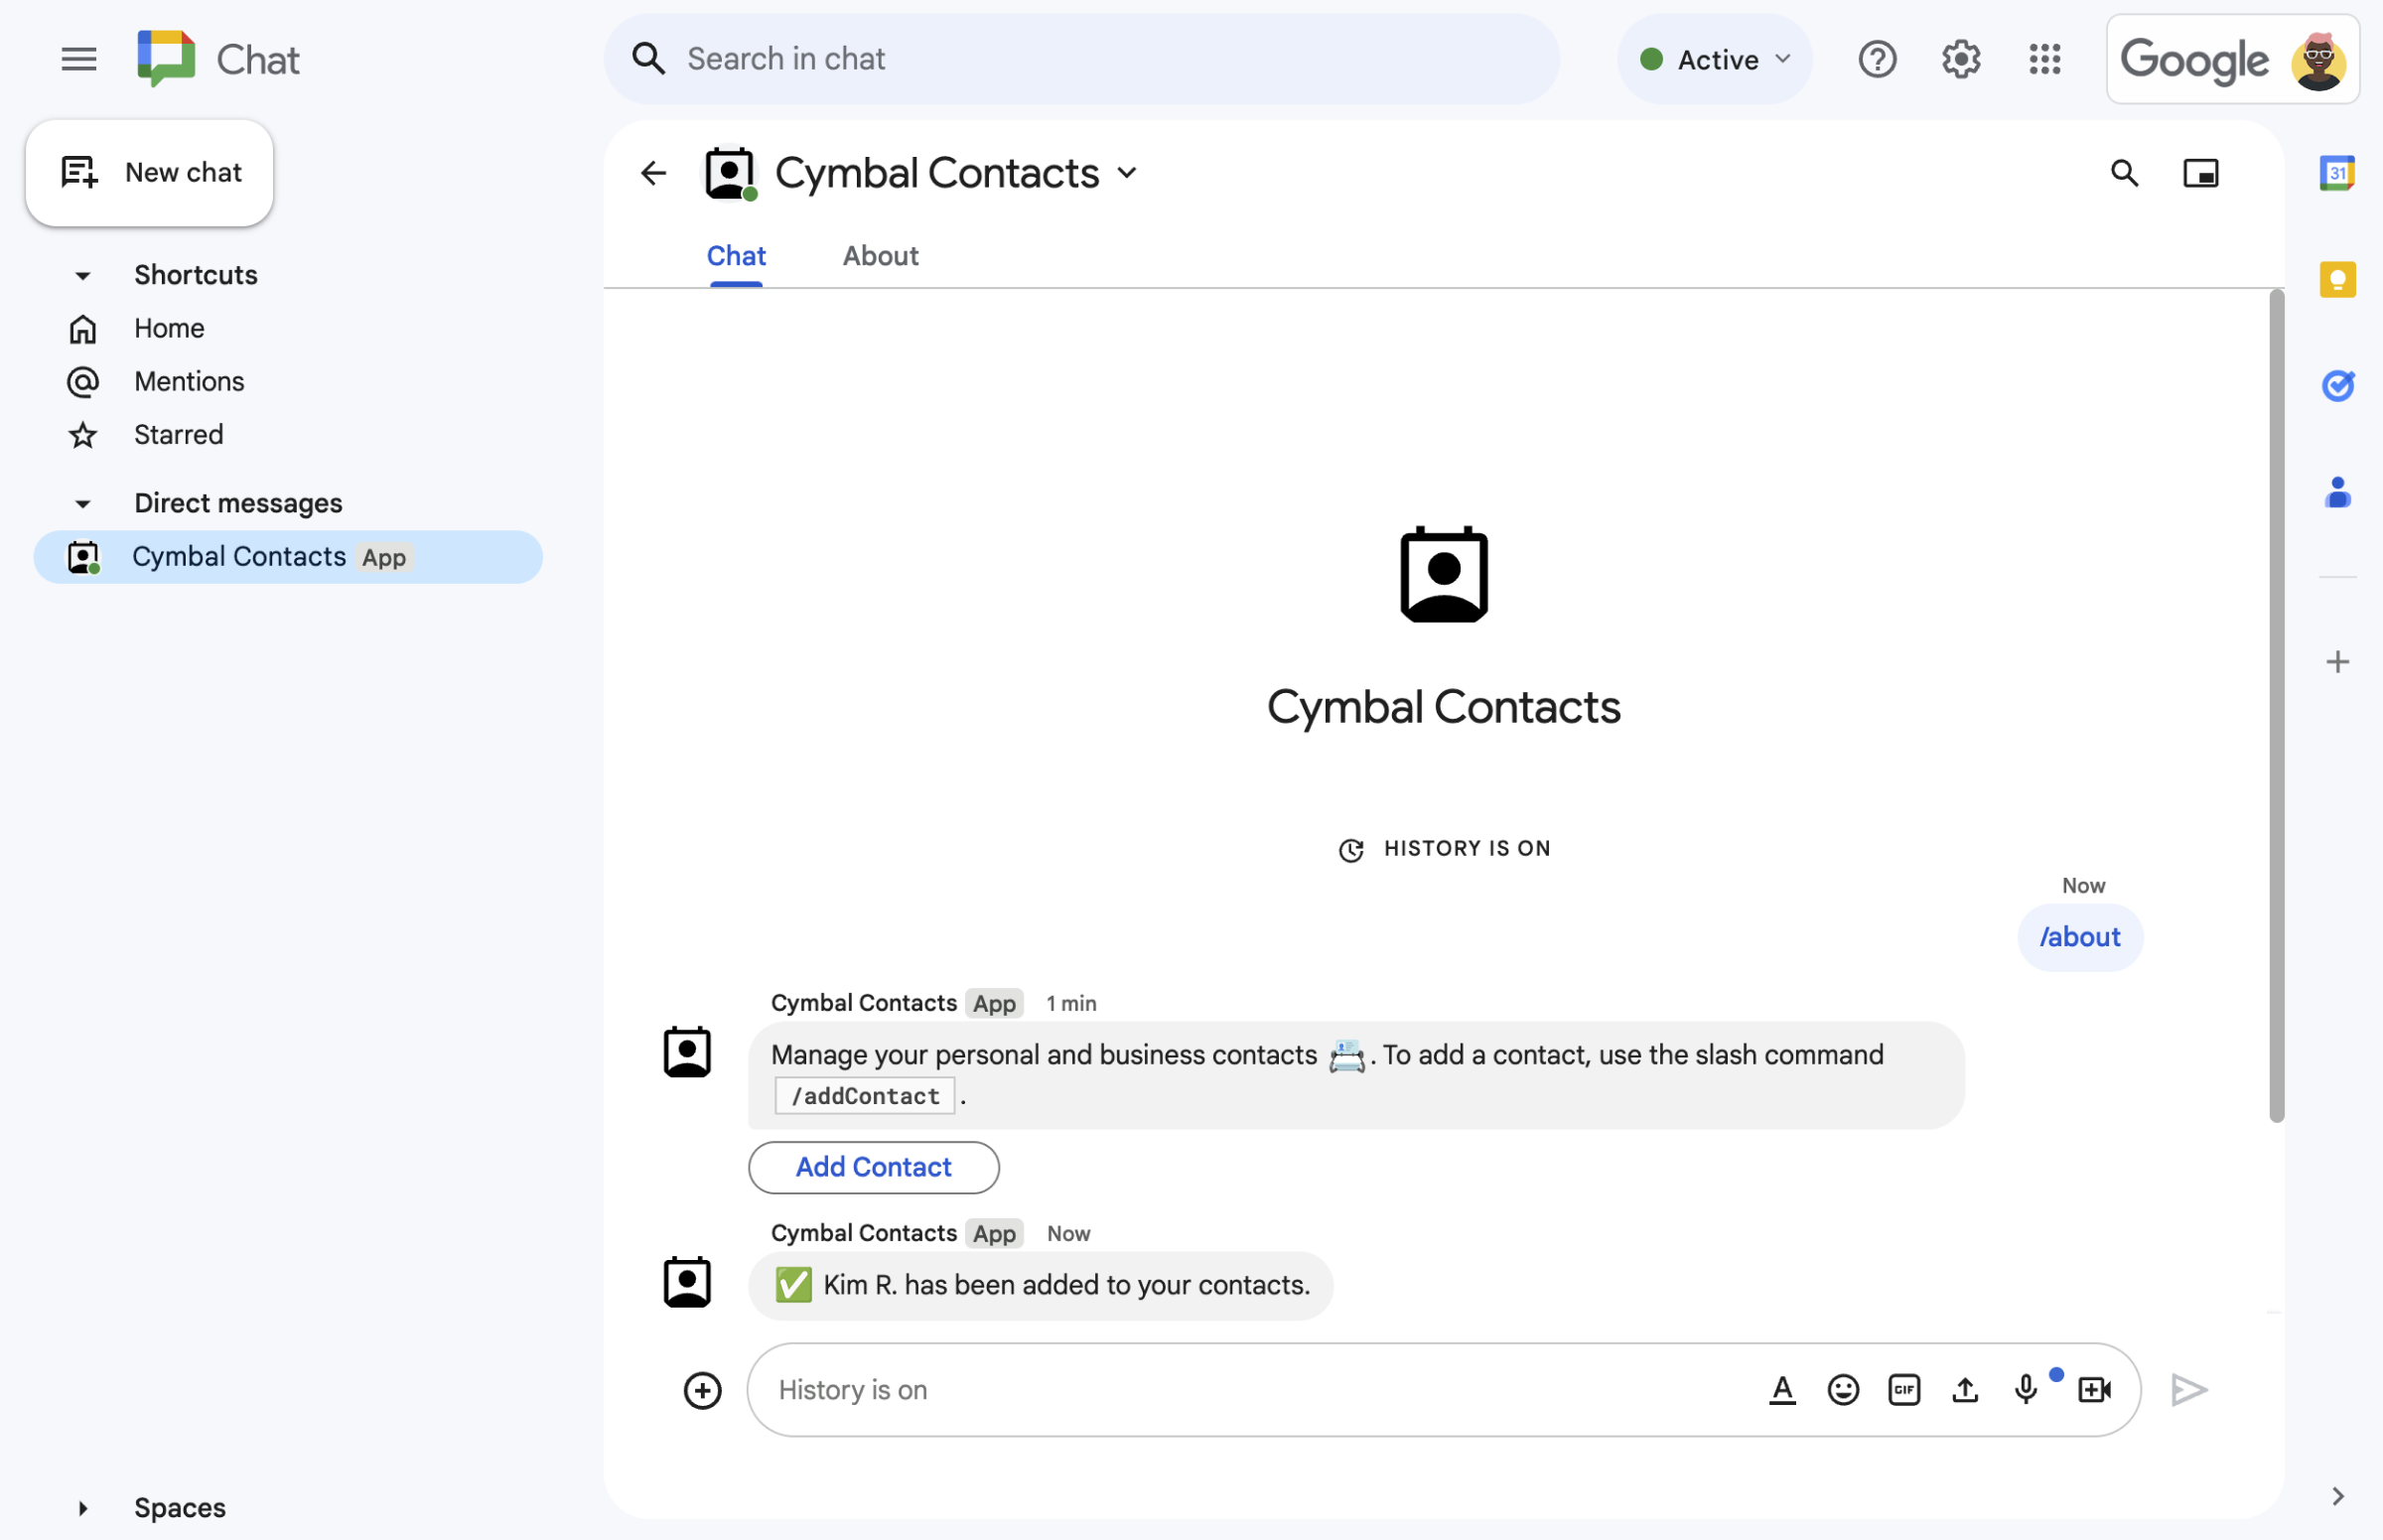
รูปที่ 4 หลังจากที่ผู้ใช้ส่ง แบบฟอร์มแล้ว แอป Chat จะส่งข้อความ ส่วนตัวเพื่อยืนยันการส่ง -
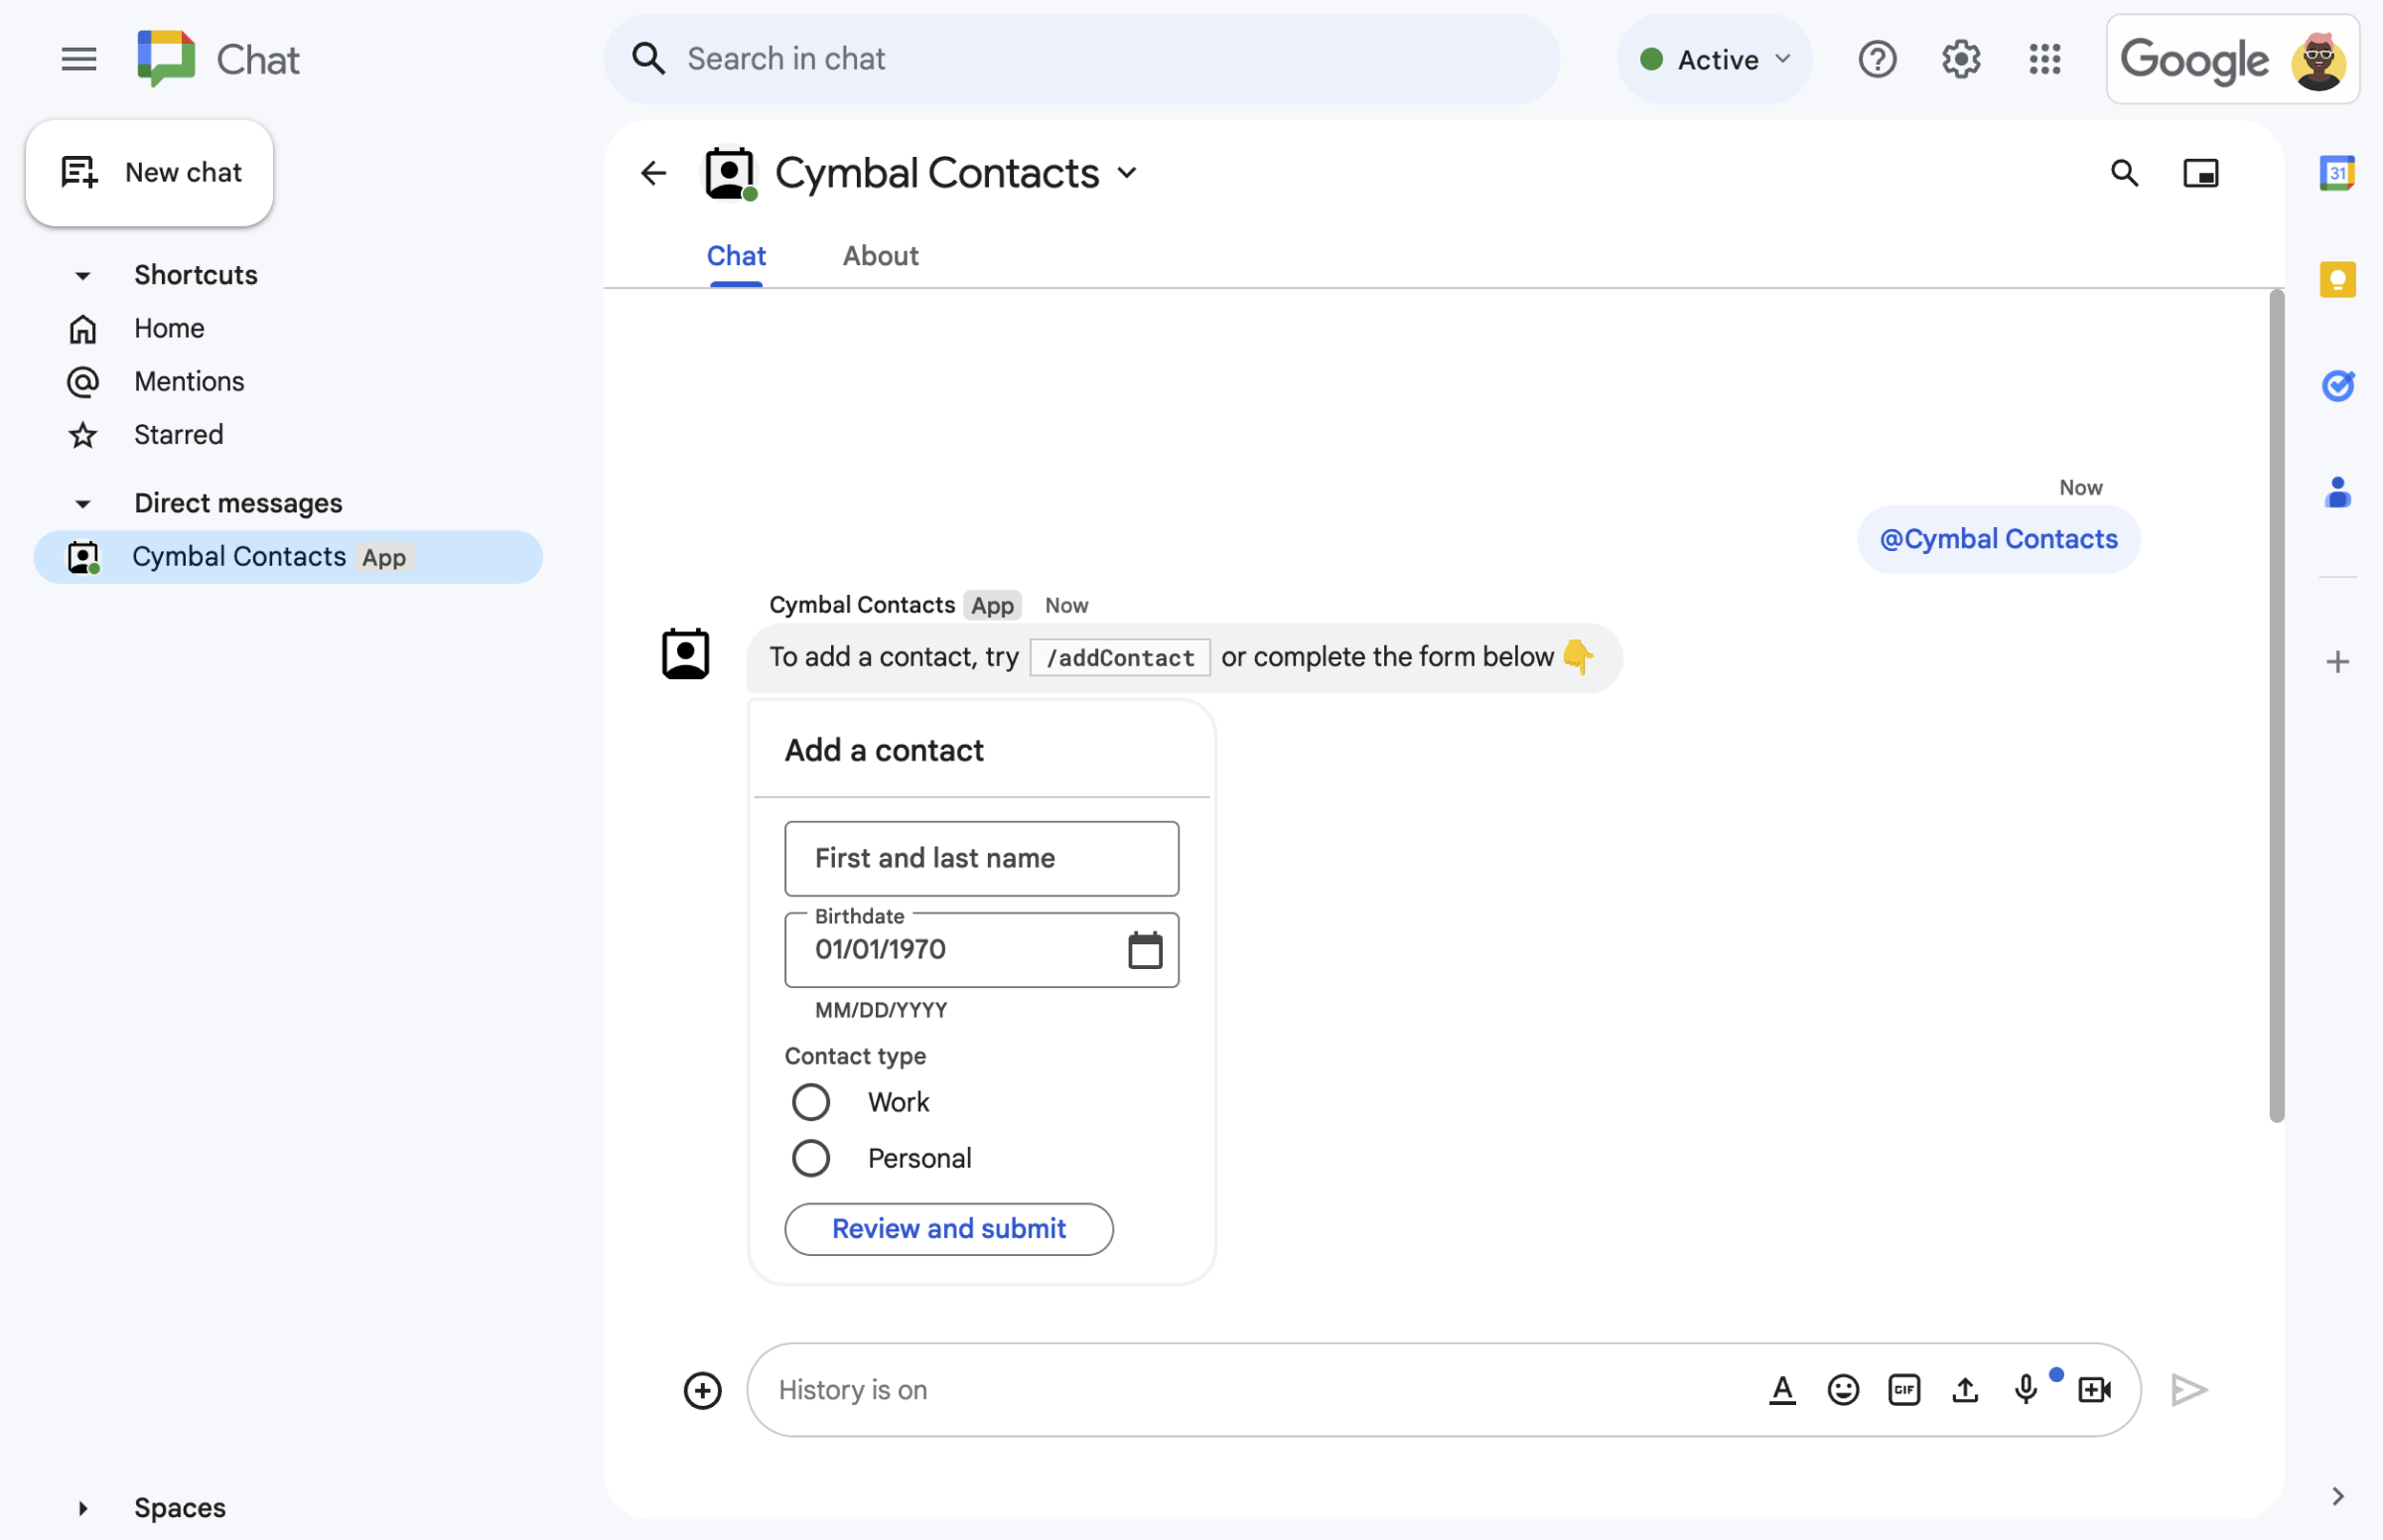
รูปที่ 5 แอป Chat ยังแจ้งให้ผู้ใช้เพิ่มรายชื่อติดต่อ จากการ์ดในข้อความด้วย
ข้อกำหนดเบื้องต้น
- บัญชี Google Workspace สำหรับธุรกิจหรือองค์กร ที่มีสิทธิ์เข้าถึง Google Chat
- สร้างโปรเจ็กต์ Google Cloud
วัตถุประสงค์
- ออกแบบและสร้างอินเทอร์เฟซผู้ใช้ (UI)
เป็นออบเจ็กต์
cardและแสดง UI ในข้อความและกล่องโต้ตอบ - รับและประมวลผลข้อมูลที่ผู้ใช้ส่งโดยใช้ วิดเจ็ตอินพุตแบบฟอร์ม
- ตอบกลับคำสั่งด้วยข้อความที่มีข้อความ การ์ด และวิดเจ็ตอุปกรณ์เสริม
สถาปัตยกรรม
แอป Chat สร้างขึ้นใน Google Apps Script และใช้เหตุการณ์การโต้ตอบเพื่อประมวลผลและตอบกลับผู้ใช้ Chat
ต่อไปนี้เป็นวิธีที่ผู้ใช้อาจโต้ตอบกับแอป Chat โดยทั่วไป
ผู้ใช้เปิดข้อความส่วนตัวด้วยแอป Chat หรือ เพิ่มแอป Chat ลงในพื้นที่ทำงานที่มีอยู่
แอป Chat จะแจ้งให้ผู้ใช้เพิ่มรายชื่อติดต่อโดย สร้างและแสดงแบบฟอร์มรายชื่อติดต่อเป็นออบเจ็กต์
cardหากต้องการแสดงแบบฟอร์มติดต่อ แอป Chat จะตอบกลับผู้ใช้ด้วยวิธีต่อไปนี้- ตอบกลับ @การพูดถึงและข้อความส่วนตัวด้วยข้อความการ์ดที่มีแบบฟอร์มติดต่อ
- ตอบกลับคำสั่งเครื่องหมายทับ
/addContactโดยเปิดกล่องโต้ตอบพร้อม แบบฟอร์มติดต่อ - ตอบกลับคำสั่งเครื่องหมายทับ
/aboutด้วยข้อความที่มีปุ่มเพิ่มรายชื่อติดต่อ ซึ่งผู้ใช้คลิกเพื่อเปิดกล่องโต้ตอบที่มี แบบฟอร์มติดต่อได้
เมื่อเห็นแบบฟอร์มติดต่อ ผู้ใช้จะป้อนข้อมูลติดต่อ ลงในช่องและวิดเจ็ตต่อไปนี้
- ชื่อและนามสกุล: วิดเจ็ต
textInputที่รับสตริง - วันเกิด: วิดเจ็ต a
dateTimePickerที่ยอมรับเฉพาะวันที่ - ประเภทการติดต่อ: วิดเจ็ต
selectionInputปุ่มตัวเลือกที่ช่วยให้ผู้ใช้เลือกและส่งค่าสตริงเดียว (PersonalหรือWork) - ปุ่มตรวจสอบและส่ง: อาร์เรย์ a
buttonListที่มีวิดเจ็ตbuttonซึ่งผู้ใช้คลิกเพื่อส่งค่าที่ ป้อน
- ชื่อและนามสกุล: วิดเจ็ต
แอป Google Chat จะจัดการ
CARD_CLICKEDเหตุการณ์การโต้ตอบ เพื่อประมวลผลค่าที่ผู้ใช้ป้อน และแสดงค่าใน การ์ดการยืนยันผู้ใช้ตรวจสอบการ์ดยืนยันและคลิกปุ่มส่ง เพื่อสรุปข้อมูลติดต่อ
แอป Google Chat จะส่งข้อความส่วนตัวเพื่อยืนยันการส่ง
เตรียมสภาพแวดล้อม
ส่วนนี้แสดงวิธีกำหนดค่าโปรเจ็กต์ที่อยู่ในระบบคลาวด์ของ Google สำหรับ แอป Chat
เปิดโปรเจ็กต์ที่อยู่ในระบบคลาวด์ในคอนโซล Google API
หากยังไม่ได้เปิด ให้เปิดโปรเจ็กต์ที่อยู่ในระบบคลาวด์ที่คุณต้องการใช้ สำหรับตัวอย่างนี้
- ในคอนโซล Google API ให้ไปที่หน้าเลือกโปรเจ็กต์
- เลือกโปรเจ็กต์ Google Cloud ที่ต้องการใช้ หรือคลิกสร้างโปรเจ็กต์ แล้วทำตามวิธีการบนหน้าจอ หากสร้างโปรเจ็กต์ Google Cloud คุณอาจต้องเปิดการเรียกเก็บเงินสำหรับโปรเจ็กต์
ตั้งค่าการตรวจสอบสิทธิ์และการให้สิทธิ์
แอป Google Chat กำหนดให้คุณต้องกำหนดค่าหน้าจอขอความยินยอม OAuth เพื่อให้ผู้ใช้สามารถให้สิทธิ์แอปของคุณในแอปพลิเคชัน Google Workspace ซึ่งรวมถึง Google Chat ได้
ในบทแนะนำนี้ คุณจะติดตั้งใช้งานแอป Chat ที่มีไว้สำหรับ การทดสอบและการใช้งานภายในเท่านั้น ดังนั้นจึงใช้ข้อมูลตัวยึดตำแหน่งสำหรับ หน้าจอขอความยินยอมได้ ก่อนเผยแพร่แอป Chat ให้แทนที่ข้อมูลตัวยึดตำแหน่งด้วยข้อมูลจริง
ในคอนโซล Google API ให้ไปที่เมนู > แพลตฟอร์มการตรวจสอบสิทธิ์ของ Google > การสร้างแบรนด์
หากกำหนดค่าแพลตฟอร์มการตรวจสอบสิทธิ์ของ Google แล้ว คุณสามารถกำหนดค่าการตั้งค่าหน้าจอขอความยินยอม OAuth ต่อไปนี้ได้ในการสร้างแบรนด์ กลุ่มเป้าหมาย และการเข้าถึงข้อมูล หากเห็นข้อความที่ระบุว่า ยังไม่ได้กำหนดค่าแพลตฟอร์ม Google Auth ให้คลิกเริ่มต้นใช้งาน
- ในส่วนข้อมูลแอป ในชื่อแอป ให้พิมพ์
Contact Manager - ในอีเมลสนับสนุนสำหรับผู้ใช้ ให้เลือกอีเมลหรือกลุ่ม Google ที่เหมาะสม
- คลิกถัดไป
- ในส่วนกลุ่มเป้าหมาย ให้เลือกภายใน หากเลือกภายในไม่ได้ ให้เลือกภายนอก
- คลิกถัดไป
- ในส่วนข้อมูลติดต่อ ให้ป้อนอีเมลที่คุณต้องการ รับการแจ้งเตือนเกี่ยวกับการเปลี่ยนแปลงในโปรเจ็กต์
- คลิกถัดไป
- ในส่วนเสร็จสิ้น ให้อ่าน นโยบายข้อมูลผู้ใช้ของบริการ Google API และหากยอมรับ ให้เลือก ฉันยอมรับบริการ Google API: นโยบายข้อมูลผู้ใช้
- คลิกต่อไป
- คลิกสร้าง
- หากเลือกภายนอกสำหรับประเภทผู้ใช้ ให้เพิ่มผู้ใช้ทดสอบโดยทำดังนี้
- คลิกกลุ่มเป้าหมาย
- ในส่วนผู้ใช้ทดสอบ ให้คลิกเพิ่มผู้ใช้
- ป้อนอีเมลและผู้ใช้ทดสอบที่ได้รับอนุญาตอื่นๆ แล้วคลิกบันทึก
- ในส่วนข้อมูลแอป ในชื่อแอป ให้พิมพ์
สร้างและติดตั้งใช้งานแอป Chat
ในส่วนต่อไปนี้ คุณจะคัดลอกและอัปเดตทั้งโปรเจ็กต์ Apps Script ที่มีโค้ดแอปพลิเคชันที่จำเป็นทั้งหมดสำหรับแอป Chat จึงไม่จำเป็นต้องคัดลอกและวางแต่ละไฟล์
คุณเลือกดูทั้งโปรเจ็กต์ได้ใน GitHub
ภาพรวมของแต่ละไฟล์มีดังนี้
main.gsจัดการตรรกะของแอปทั้งหมด รวมถึงเหตุการณ์การโต้ตอบเกี่ยวกับเวลาที่ผู้ใช้ส่งข้อความไปยังแอป Chat, คลิกปุ่มจากข้อความแอป Chat หรือเปิดและปิดกล่องโต้ตอบ
ดูรหัส
main.gscontactForm.gsมีวิดเจ็ตที่รับข้อมูลแบบฟอร์มจากผู้ใช้ วิดเจ็ตอินพุตแบบฟอร์มเหล่านี้จะแสดงในการ์ดที่ปรากฏในข้อความและกล่องโต้ตอบ
ดูรหัส
contactForm.gsappsscript.jsonไฟล์ Manifest ของ Apps Script ที่กำหนดและกำหนดค่าโปรเจ็กต์ Apps Script สำหรับ แอป Chat
ดูรหัส
appsscript.json
สร้างโปรเจ็กต์ Apps Script
วิธีสร้างโปรเจ็กต์ Apps Script
- คลิกปุ่มต่อไปนี้เพื่อเปิดโปรเจ็กต์ Apps Script Manage contacts in Google Chat
เปิดโปรเจ็กต์ - คลิก ภาพรวม
- ในหน้าภาพรวม ให้คลิก
 ทำสำเนา
 ตั้งชื่อสำเนาโปรเจ็กต์ Apps Script ดังนี้
คลิกสำเนาของจัดการรายชื่อติดต่อใน Google Chat
ในชื่อโปรเจ็กต์ ให้พิมพ์
Contact Manager - Google Chat appคลิกเปลี่ยนชื่อ
ในอนาคต หากต้องการใช้ Google API บางอย่างหรือเผยแพร่แอป คุณต้องเชื่อมโยงโปรเจ็กต์ที่อยู่ในระบบคลาวด์กับโปรเจ็กต์ Apps Script สำหรับคำแนะนำนี้ คุณไม่จำเป็นต้องดำเนินการดังกล่าว ดูข้อมูลเพิ่มเติมได้ที่คำแนะนำเกี่ยวกับโปรเจ็กต์ Google Cloud
สร้างการทำให้ใช้งานได้ของ Apps Script
เมื่อโค้ดทั้งหมดพร้อมแล้ว ให้ทำให้โปรเจ็กต์ Apps Script ใช้งานได้ คุณใช้รหัสการติดตั้งใช้งานเมื่อกำหนดค่า แอป Chat ใน Google Cloud
ใน Apps Script ให้เปิดโปรเจ็กต์ของแอป Chat
คลิกทำให้ใช้งานได้ > การทำให้ใช้งานได้ใหม่
หากยังไม่ได้เลือกส่วนเสริม ให้คลิกประเภทการติดตั้งใช้งาน
 ข้างเลือกประเภท แล้วเลือกส่วนเสริม
ในคำอธิบาย ให้ป้อนคำอธิบายสำหรับเวอร์ชันนี้ เช่น
Test of Contact Managerคลิกทำให้ใช้งานได้ Apps Script จะรายงานการติดตั้งใช้งานที่สำเร็จ และระบุรหัสการติดตั้งใช้งาน
คลิก คัดลอกเพื่อคัดลอก รหัสการติดตั้งใช้งาน แล้วคลิกเสร็จสิ้น
กำหนดค่าแอป Chat ในคอนโซล Google API
ส่วนนี้จะแสดงวิธีกำหนดค่า Google Chat API ในคอนโซล Google API พร้อมข้อมูลเกี่ยวกับแอป Chat รวมถึง รหัสของการทำให้ใช้งานได้ที่คุณเพิ่งสร้างจากโปรเจ็กต์ Apps Script
ในคอนโซล Google API ให้คลิกเมนู > API และบริการ > API และบริการที่เปิดใช้ > Google Chat API > การกำหนดค่า
เลือกสร้างแอป Chat นี้เป็นส่วนเสริมของ Google Workspace กล่องโต้ตอบจะเปิดขึ้นเพื่อขอให้คุณยืนยัน คลิกปิดใช้ในกล่องโต้ตอบ
ในส่วนชื่อแอป ให้พิมพ์
Contact Managerใน URL ของรูปโปรไฟล์ ให้พิมพ์
https://developers.google.com/chat/images/contact-icon.pngในคำอธิบาย ให้พิมพ์
Manage your personal and business contactsคลิกปุ่มเปิด/ปิดเปิดใช้ฟีเจอร์แบบอินเทอร์แอกทีฟไปที่ตำแหน่งเปิด
ในส่วนฟังก์ชันการทำงาน ให้เลือกเข้าร่วมพื้นที่ทำงานและการสนทนากลุ่ม
เลือก Apps Script ในส่วนการตั้งค่าการเชื่อมต่อ
ในรหัสการทำให้ใช้งานได้ ให้วางรหัสการทำให้ใช้งานได้ของ Apps Script ที่คัดลอกไว้ในส่วนก่อนหน้าเมื่อสร้าง การทำให้ใช้งานได้ของ Apps Script
ในส่วนคำสั่ง ให้ตั้งค่าคำสั่งเครื่องหมายทับ
/aboutและ/addContactดังนี้- คลิกเพิ่มคำสั่งเครื่องหมายทับเพื่อตั้งค่าคำสั่งเครื่องหมายทับแรก
- ในส่วนชื่อ ให้พิมพ์
About - ในรหัสคำสั่ง ให้พิมพ์
1 - ในส่วนคำอธิบาย ให้พิมพ์
Learn how to use this Chat app to manage your contacts - ในส่วนประเภทคำสั่ง ให้เลือก
Slash command - ในชื่อคำสั่งเครื่องหมายทับ ให้พิมพ์
/about - เลือกเปิดกล่องโต้ตอบ
- คลิกเสร็จสิ้น
- คลิกเพิ่มคำสั่งเพื่อตั้งค่าคำสั่งเครื่องหมายทับอีกรายการ
- ในส่วนชื่อ ให้พิมพ์
Add a contact - ในรหัสคำสั่ง ให้พิมพ์
2 - ในคำอธิบาย ให้พิมพ์
Submit information about a contact - ในส่วนประเภทคำสั่ง ให้เลือก
Slash command - ในชื่อคำสั่งเครื่องหมายทับ ให้พิมพ์
/addContact - เลือกเปิดกล่องโต้ตอบ
- คลิกเสร็จสิ้น
ในส่วนระดับการเข้าถึง ให้เลือกช่องทําเครื่องหมาย ทําให้แอป Chat นี้พร้อมใช้งานสําหรับบุคคลและกลุ่มที่เฉพาะเจาะจงใน YOUR DOMAIN แล้วป้อนอีเมลของคุณ
ในส่วนบันทึก ให้เลือกบันทึกข้อผิดพลาดไปยังการบันทึก
คลิกบันทึก ข้อความ "บันทึกการกำหนดค่าแล้ว" จะปรากฏขึ้น
แอป Chat พร้อมให้ติดตั้งและทดสอบใน Chat แล้ว
ทดสอบแอป Chat
หากต้องการทดสอบแอป Chat ให้เปิดพื้นที่ข้อความส่วนตัวด้วย แอป Chat แล้วส่งข้อความโดยทำดังนี้
เปิด Google Chat โดยใช้บัญชี Google Workspace ที่คุณ ระบุเมื่อเพิ่มตัวเองเป็นผู้ทดสอบที่เชื่อถือได้
- คลิก แชทใหม่
- ในช่องเพิ่มบุคคลอย่างน้อย 1 คน ให้พิมพ์ชื่อแอป Chat
เลือกแอป Chat จากผลการค้นหา ข้อความส่วนตัวจะเปิดขึ้น
ในข้อความส่วนตัวใหม่กับแอป Chat ให้พิมพ์
/addContactแล้วกด Enterในกล่องโต้ตอบที่เปิดขึ้น ให้ป้อนข้อมูลติดต่อดังนี้
- ป้อนชื่อในช่องข้อความชื่อและนามสกุล
- เลือกวันที่ในเครื่องมือเลือกวันที่วันเกิด
- ในส่วนประเภทรายชื่อติดต่อ ให้เลือกปุ่มตัวเลือกที่ทำงานหรือส่วนตัว
คลิกตรวจสอบและส่ง
ในกล่องโต้ตอบการยืนยัน ให้ตรวจสอบข้อมูลที่คุณส่ง แล้วคลิกส่ง แอป Chat จะตอบกลับด้วยข้อความ ที่ระบุว่า
✅ CONTACT NAME has been added to your contacts.นอกจากนี้ คุณยังทดสอบและส่งแบบฟอร์มติดต่อได้ด้วยวิธีต่อไปนี้ (ไม่บังคับ)
- ใช้คำสั่งเครื่องหมายทับ
/aboutแอปแชทจะตอบกลับ ด้วยข้อความและปุ่มวิดเจ็ตอุปกรณ์เสริมที่ระบุว่าAdd a contactคุณคลิกปุ่มดังกล่าวเพื่อเปิดกล่องโต้ตอบที่มี แบบฟอร์มติดต่อได้ - ส่งข้อความส่วนตัวถึงแอป Chat โดยไม่ต้องใช้
คำสั่งเครื่องหมายทับ เช่น
Helloแอป Chat จะตอบกลับด้วยข้อความและการ์ดที่มีแบบฟอร์มติดต่อ
- ใช้คำสั่งเครื่องหมายทับ
ล้างข้อมูล
เราขอแนะนำให้ลบโปรเจ็กต์ที่อยู่ในระบบคลาวด์เพื่อหลีกเลี่ยงการเรียกเก็บเงินจากบัญชี Google Cloud สำหรับทรัพยากรที่ใช้ในบทแนะนำนี้
- ในคอนโซล Google API ให้ไปที่หน้าจัดการทรัพยากร คลิก เมนู > IAM และผู้ดูแลระบบ > จัดการทรัพยากร
- ในรายการโปรเจ็กต์ ให้เลือกโปรเจ็กต์ที่ต้องการลบ แล้วคลิก ลบ
- ในกล่องโต้ตอบ ให้พิมพ์รหัสโปรเจ็กต์ แล้วคลิกปิดเพื่อลบ โปรเจ็กต์
หัวข้อที่เกี่ยวข้อง
- ตอบสนองต่อคำสั่ง
- รวบรวมและประมวลผลข้อมูลจากผู้ใช้ Google Chat
- เปิดกล่องโต้ตอบแบบอินเทอร์แอกทีฟ
- สำรวจตัวอย่างแอป Google Chat อื่นๆ