你的 Action 可以适时向用户推送通知,例如在快到任务截止日期时发送提醒。
本指南介绍了如何为 Action 设置推送通知。
支持的表面
推送通知适用于 Android 和 iOS 设备(iOS 设备必须安装 Google 助理应用才能接收推送通知)。声控音箱、智能显示屏或其他途径目前不支持此功能。
前提条件
您的项目必须包含至少一个全局 intent,当用户点按从 Google 助理收到的推送通知时,系统会调用该 intent。
开始使用
以下部分介绍了如何在 Action 中设置推送通知。
创建用于触发的 intent
您在此部分创建的 intent 会触发通知流程。要创建 请按照下列步骤操作:
- 前往 Actions 控制台,然后点击顶部菜单中的 Develop。
- 点击左侧菜单中的意图 (Intents) 以展开该部分。
- 点击列表底部的 ,然后为新 intent 输入一个名称。
- 按
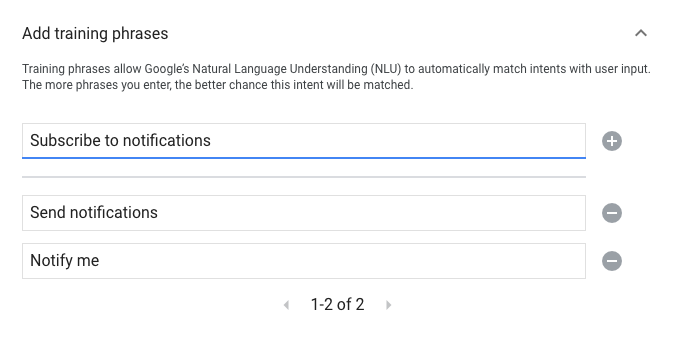
Enter/Return以创建新 intent。 添加用于触发通知流的训练短语。以下是一些示例:
Notify meSend notificationsSubscribe to notifications
点击保存。
转换为系统 intent
如需设置向 Notifications 系统场景的过渡,请按以下步骤操作:
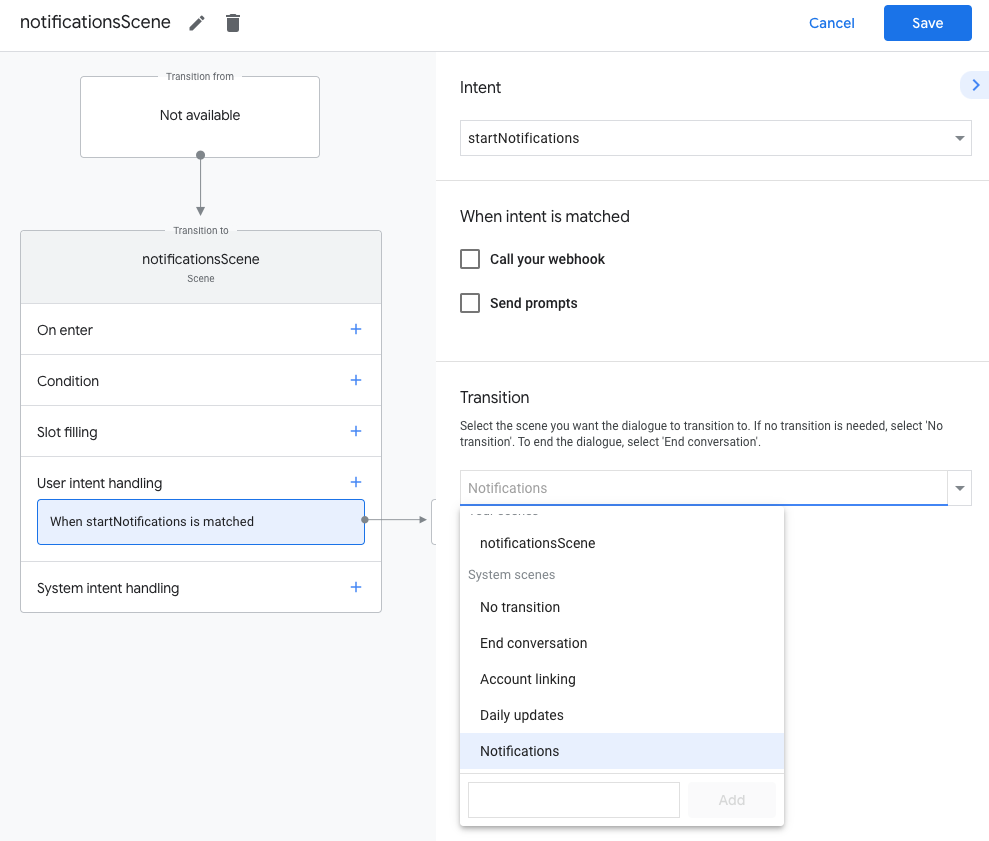
- 在左侧菜单中的 Scenes(场景)下,点击您要添加通知订阅流程的场景。
- 在场景的用户 intent 处理部分下,点击 + 以添加新的 intent 处理程序。
- 在 Intent 下,选择您在上一部分中创建的 intent。
在 Transition 下,选择 Notifications 系统场景。
点击保存。
配置系统场景
如需配置 Notifications 系统场景,请按以下步骤操作:
- 在左侧菜单中的 Scenes 下,选择新的 Notifications 系统场景。
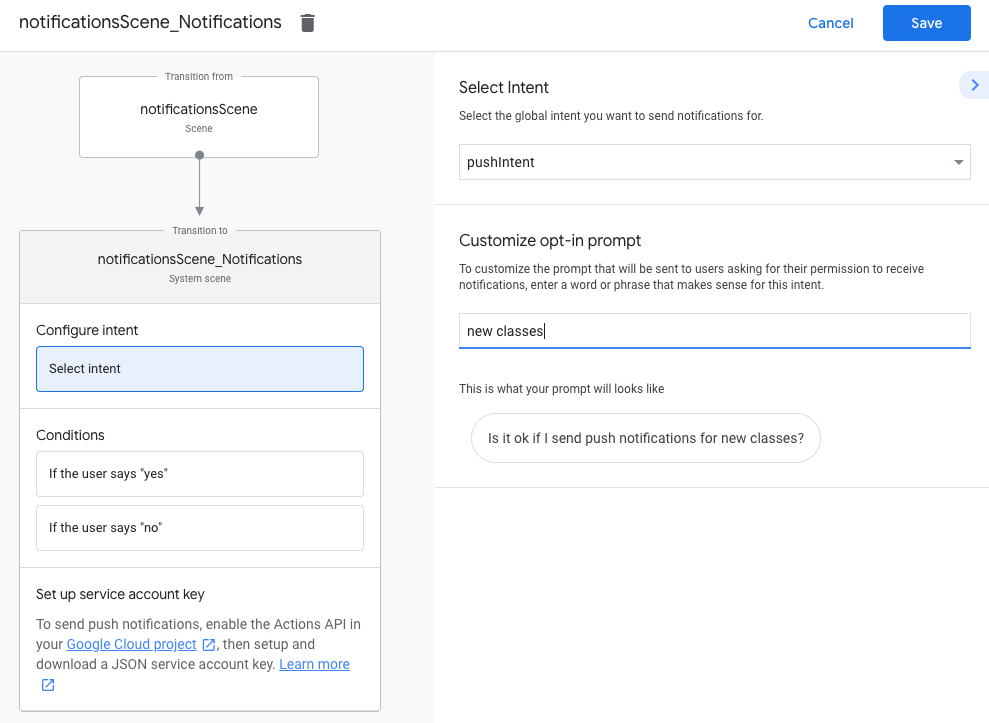
- 在 Configure intent 部分下,点击 Select intent。
在选择 intent 部分下,选择要在用户点按推送通知时匹配的 intent。
在自定义选择启用提示部分,输入在系统要求用户订阅推送通知时向用户显示的提示。该提示的格式为“Is it ok if I send push notifications for $prompt”。
点击保存。
配置“选择启用”
如需配置选择接收推送通知,请按以下步骤操作:
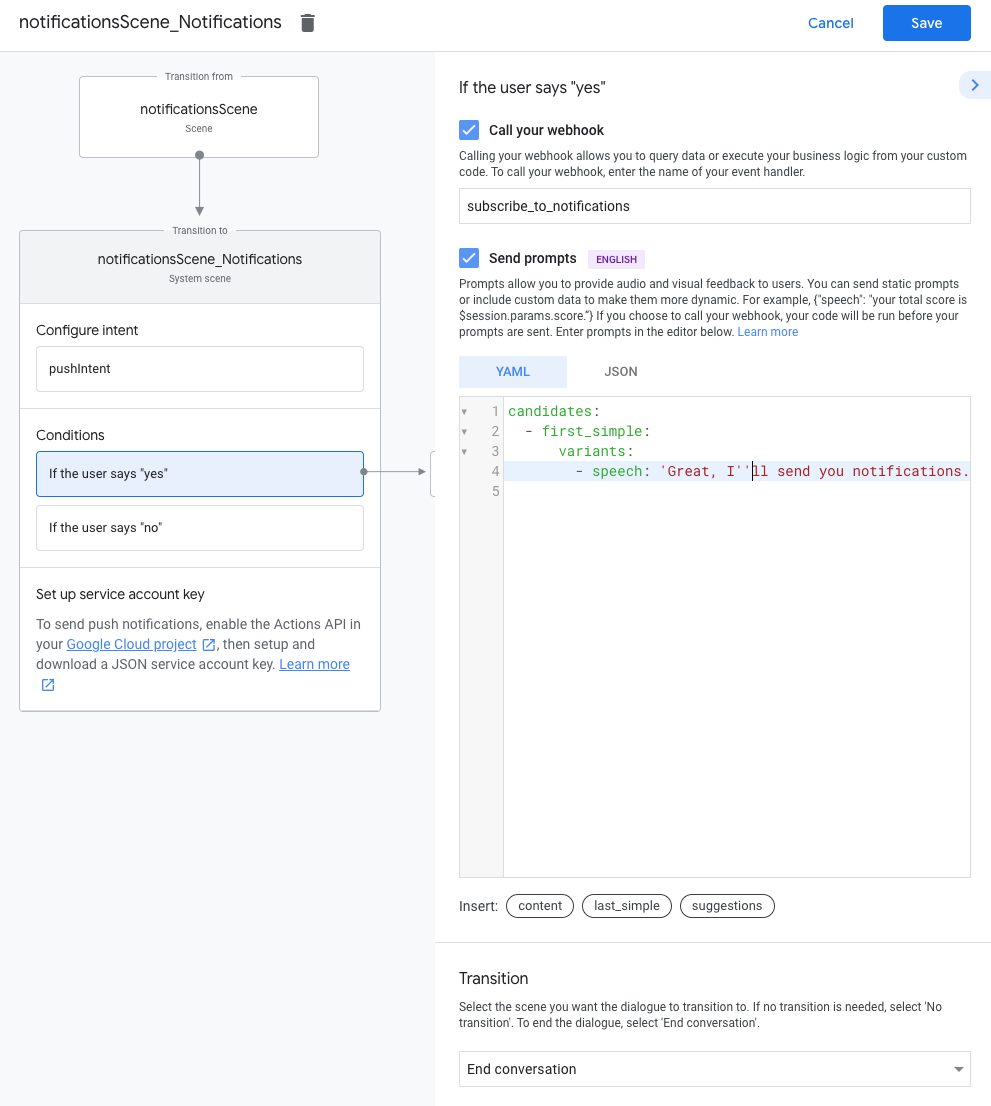
- 在 Scenes 下,选择 Notifications 系统场景。
- 在条件下,选择如果用户说“是”。
- 启用 Call your webhook,并提供事件处理脚本名称,例如
subscribe_to_notifications。 启用发送提示,并提供一个简单的提示,让用户知道他们将收到通知:
candidates: - first simple: variants: - speech: 'Great, I'll send you notifications.'在转换下,选择结束对话,以便在用户订阅通知后结束对话。
配置“选择停用”
如需配置停止接收推送通知,请按以下步骤操作:
- 在条件下,选择如果用户说“否”。
启用发送提示,并提供一个简单的提示,让用户知道他们不会收到通知:
candidates: - first simple: variants: - speech: Okay, I won't send you notifications.在转换下,选择结束对话,以便在用户选择停用通知后结束对话。
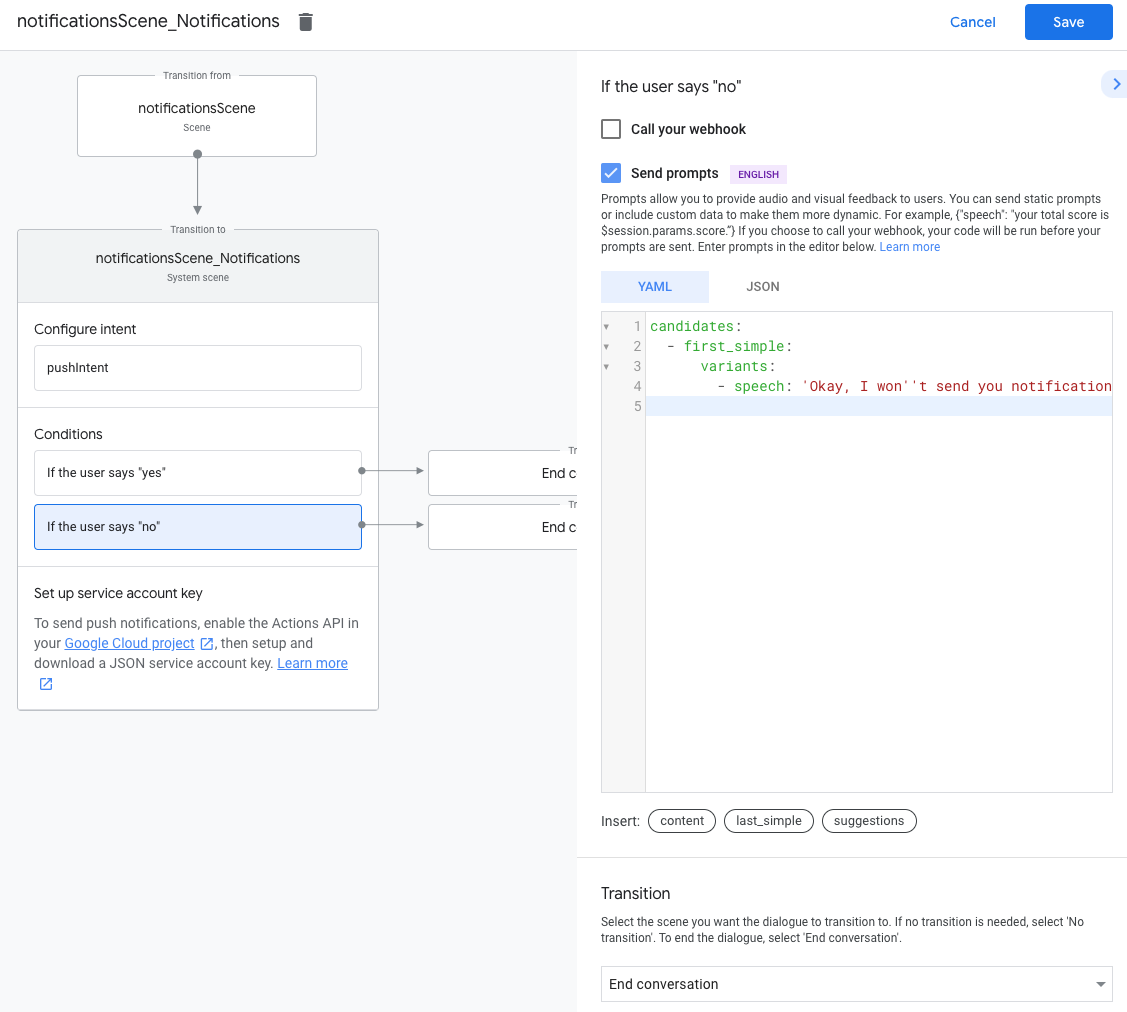
配置网络钩子
如需配置网络钩子,请按以下步骤操作:
在 webhook 中,添加一个用于存储
updatesUserId的 intent 处理程序:app.handle('subscribe_to_notifications', conv => { const intentName = '<name_of_intent_to_trigger>'; const notificationsSlot = conv.session.params['NotificationSlot_${intentName}']; if(notificationsSlot.permissionStatus == 'PERMISSION_GRANTED') { const updateUserId = notificationsSlot.additionalUserData.updateUserId; // Store the user ID and the notification's target intent for later use. // (Use a database, like Firestore, for best practice.) } });
发送通知
推送通知使用 Actions API 发送给用户。如需使用此 API,您需要在 Google Cloud 项目中激活此 API,并设置和下载 JSON 服务账号密钥。
然后,您可以使用 Google OAuth2 客户端库用服务账号密钥换取访问令牌,并使用此令牌验证您对 Actions API 的请求。
获取服务账号密钥
- 前往 Google API 控制台,然后从选择项目下拉列表中选择您的项目。
- 点击启用,为您的项目启用 Actions API。
- 前往 Google Cloud 控制台凭据页面,从选择项目下拉列表中选择您的项目。
- 点击创建凭据 > 服务账号。
- 输入服务账号名称,然后点击创建。
- 从选择角色下拉列表中,选择项目 >所有者。
- 点击继续。
- 点击创建密钥以下载服务账号 JSON 文件。
用密钥交换访问令牌并发送通知
如需通过 Actions API 发送推送通知,您需要将服务账号密钥换成访问令牌。我们建议使用 Google API 客户端库执行此操作。在接下来的一系列代码段中,我们使用 Google API Node.js 客户端库。
安装 Google API 客户端库并请求:
npm install googleapis request --save使用以下代码从服务账号密钥获取访问令牌并发送推送通知:
// Use the Actions API to send a Google Assistant push notification.
let client = auth.fromJSON(require('./service-account.json'));
client.scopes = ['https://www.googleapis.com/auth/actions.fulfillment.conversation'];
let notification = {
  userNotification: {
    title: 'Example notification title',
  },
  target: {
    userId: '<UPDATES_USER_ID>',
    intent: 'Notifications Intent',
  },
};
client.authorize((err, tokens) => {
  if (err) {
    throw new Error('Auth error: ${err}');
  }
  request.post('https://actions.googleapis.com/v2/conversations:send', {
    'auth': {
      'bearer': tokens.access_token,
    },
    'json': true,
    'body': {'customPushMessage': notification, 'isInSandbox': true},
  }, (err, httpResponse, body) => {
    if (err) {
      throw new Error('API request error: ${err}');
    }
    console.log('${httpResponse.statusCode}: ' + '${httpResponse.statusMessage}');
    console.log(JSON.stringify(body));
  });
});

