
Spring Integration מספקת לכם מנגנון העברת הודעות להחלפת Messages דרך MessageChannels. הוא משתמש במתאמי ערוצים כדי לתקשר עם מערכות חיצוניות.
בתרגיל הזה ניצור שתי אפליקציות שמתקשרות באמצעות מתאמי הערוצים של Spring Integration שסופקו על ידי Spring Cloud GCP. המתאמים האלה מאפשרים ל-Spring Integration להשתמש ב-Google Cloud Pub/Sub כקצה העורפי של חילופי ההודעות.
תלמדו איך להשתמש ב-Cloud Shell ובפקודה gcloud של Cloud SDK.
המדריך הזה משתמש בקוד לדוגמה ממדריך תחילת העבודה עם Spring Boot.
מה תלמדו
- איך להחליף הודעות בין אפליקציות באמצעות Google Cloud Pub/Sub באמצעות Spring Integration ו-Spring Cloud GCP
מה צריך להכין
- פרויקט ב-Google Cloud Platform
- דפדפן, כמו Chrome או Firefox
- היכרות עם כלים לעריכת טקסט של Linux, כמו Vim, EMACs או Nano
איך תשתמשו במדריך הזה?
מה מידת שביעות הרצון שלך מחוויית הפיתוח של אפליקציות אינטרנט ב-HTML/CSS?
איזה דירוג מגיע לדעתך לחוויית השימוש שלך בשירותים של Google Cloud Platform?
הגדרת סביבה בקצב אישי
אם עדיין אין לכם חשבון Google (Gmail או Google Apps), אתם צריכים ליצור חשבון. נכנסים ל-Google Cloud Platform Console (console.cloud.google.com) ויוצרים פרויקט חדש:


חשוב לזכור את מזהה הפרויקט, שהוא שם ייחודי בכל הפרויקטים ב-Google Cloud (השם שמופיע למעלה כבר תפוס ולא יתאים לכם, מצטערים!). בהמשך ה-codelab הזה, נתייחס אליו כאל PROJECT_ID.
בשלב הבא, תצטרכו להפעיל את החיוב ב-Cloud Console כדי להשתמש במשאבים של Google Cloud.
העלות של התרגיל הזה לא אמורה להיות גבוהה, אבל היא יכולה להיות גבוהה יותר אם תחליטו להשתמש ביותר משאבים או אם תשאירו אותם פועלים (ראו את הקטע 'ניקוי' בסוף המסמך הזה).
משתמשים חדשים ב-Google Cloud Platform זכאים לתקופת ניסיון בחינם בשווי 300$.
Google Cloud Shell
אפשר להפעיל את Google Cloud מרחוק מהמחשב הנייד, אבל ב-codelab הזה נשתמש ב-Google Cloud Shell, סביבת שורת פקודה שפועלת ב-Cloud.
הפעלת Google Cloud Shell
ב-GCP Console, לוחצים על סמל Cloud Shell בסרגל הכלים שבפינה השמאלית העליונה:

לאחר מכן לוחצים על 'הפעלת Cloud Shell':

יחלפו כמה רגעים עד שההקצאה והחיבור לסביבת העבודה יושלמו:

המכונה הווירטואלית הזו כוללת את כל הכלים הדרושים למפתחים. יש בה ספריית בית בנפח מתמיד של 5GB והיא פועלת ב-Google Cloud, מה שמשפר מאוד את הביצועים והאימות ברשת. את רוב העבודה במעבדה הזו, אם לא את כולה, אפשר לבצע באמצעות דפדפן או Google Chromebook.
אחרי שמתחברים ל-Cloud Shell, אמור להופיע אימות שכבר בוצע ושהפרויקט כבר הוגדר לפי PROJECT_ID.
מריצים את הפקודה הבאה ב-Cloud Shell כדי לוודא שהאימות בוצע:
gcloud auth list
פלט הפקודה
Credentialed accounts:
 - <myaccount>@<mydomain>.com (active)
gcloud config list project
פלט הפקודה
[core]
project = <PROJECT_ID>
אם הוא לא מוגדר, אפשר להגדיר אותו באמצעות הפקודה הבאה:
gcloud config set project <PROJECT_ID>
פלט הפקודה
Updated property [core/project].
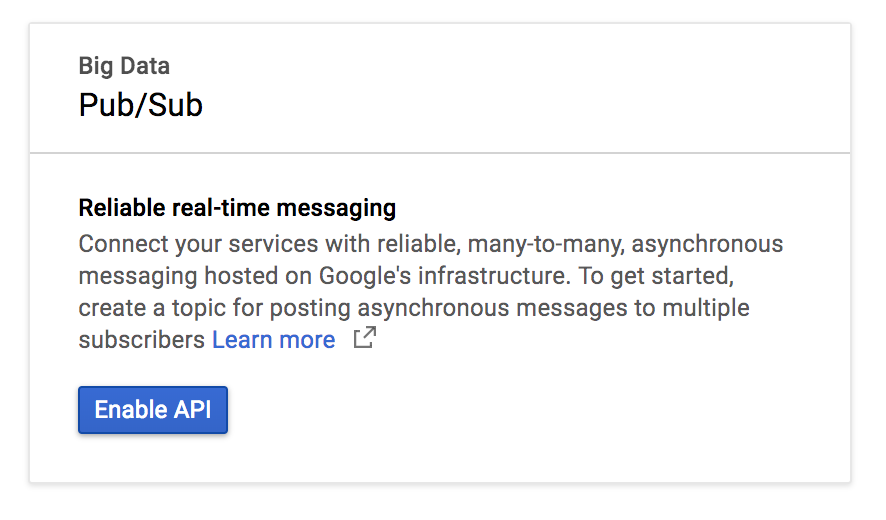
עוברים אל הדף של נושאי Google Cloud Pub/Sub ומפעילים את ה-API.
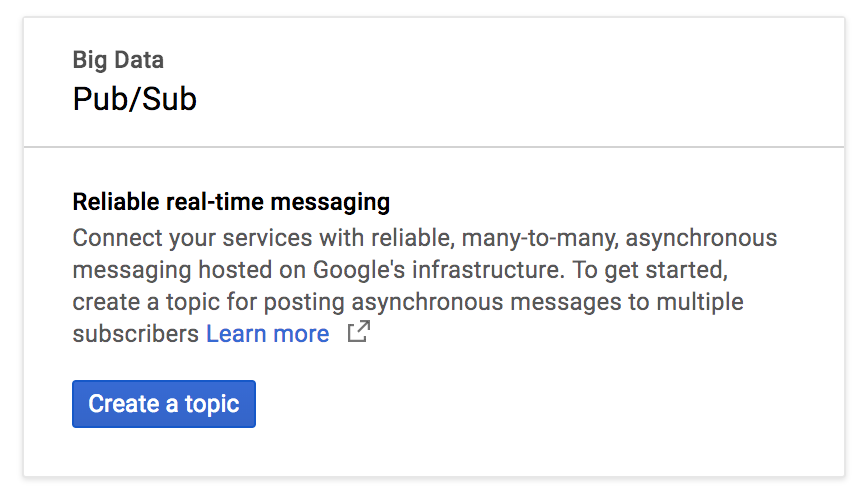
לוחצים על יצירת נושא.
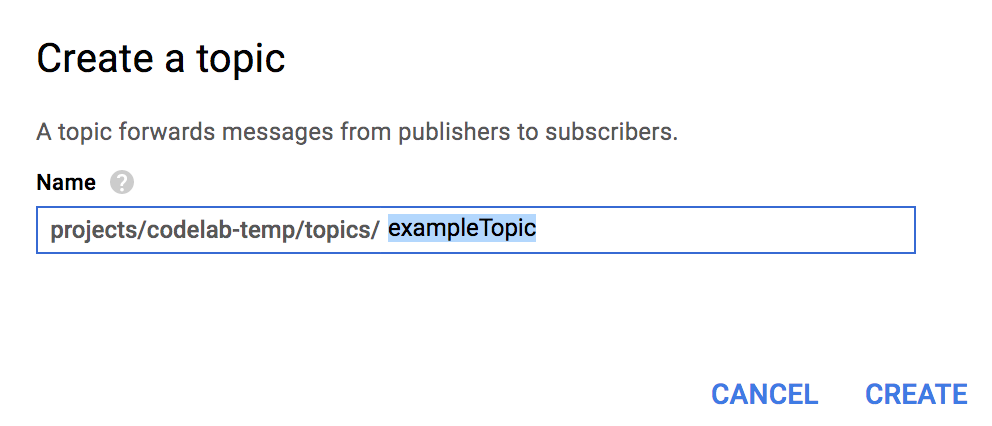
מקלידים exampleTopic בתור שם הנושא ולוחצים על יצירה.
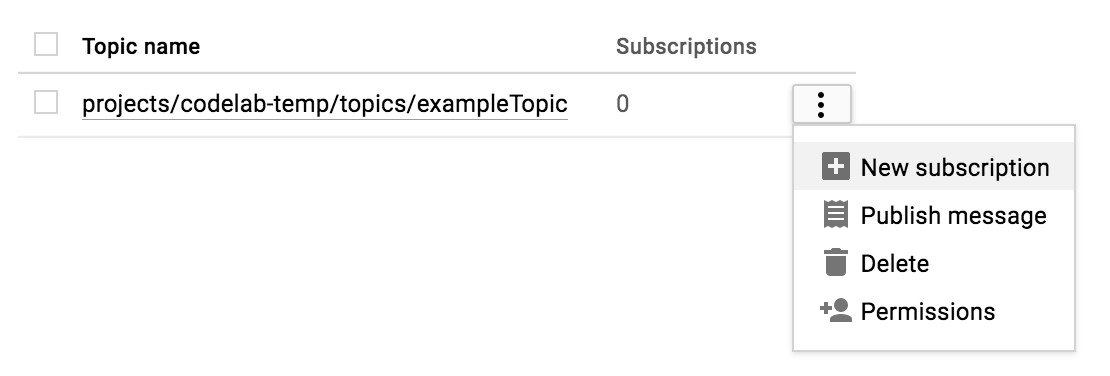
אחרי שיוצרים את הנושא, נשארים בדף הנושאים. מחפשים את הנושא שיצרתם, לוחצים על סמל שלוש הנקודות האנכיות בסוף השורה ולוחצים על New Subscription (מינוי חדש).
מקלידים exampleSubscription בתיבת הטקסט של שם המינוי ולוחצים על Create.

אחרי ההפעלה של Cloud Shell, אפשר להשתמש בשורת הפקודה כדי ליצור שתי אפליקציות חדשות של Spring Boot באמצעות Spring Initializr:
$ curl https://start.spring.io/starter.tgz \
  -d bootVersion=2.0.6.RELEASE \
  -d dependencies=web \
  -d baseDir=spring-integration-sender | tar -xzvf -
$ curl https://start.spring.io/starter.tgz \
  -d bootVersion=2.0.6.RELEASE \
  -d baseDir=spring-integration-receiver | tar -xzvf -
עכשיו ניצור את האפליקציה לשליחת הודעות. עוברים לספרייה של האפליקציה לשליחה.
$ cd spring-integration-senderאנחנו רוצים שהאפליקציה שלנו תכתוב הודעות בערוץ. אחרי שההודעה מגיעה לערוץ, היא נאספת על ידי מתאם הערוץ היוצא, שממיר אותה מהודעת Spring כללית להודעת Google Cloud Pub/Sub ומפרסם אותה בנושא Google Cloud Pub/Sub.
כדי שהאפליקציה שלנו תוכל לכתוב לערוץ, אנחנו יכולים להשתמש בשער העברת הודעות של Spring Integration. באמצעות עורך טקסט מ-vim, emacs או nano, מכריזים על ממשק PubsubOutboundGateway בתוך המחלקה DemoApplication.
src/main/java/com/example/demo/DemoApplication.java
...
import org.springframework.integration.annotation.MessagingGateway;

@SpringBootApplication
public class DemoApplication {

        ...

        @MessagingGateway(defaultRequestChannel = "pubsubOutputChannel")
        public interface PubsubOutboundGateway {

                void sendToPubsub(String text);
        }
}
עכשיו יש לנו מנגנון לשליחת הודעות לערוץ, אבל לאן ההודעות האלה מגיעות אחרי שהן בערוץ?
אנחנו צריכים מתאם של ערוץ יוצא כדי לצרוך הודעות חדשות בערוץ ולפרסם אותן בנושא Google Cloud Pub/Sub.
src/main/java/com/example/demo/DemoApplication.java
...
import org.springframework.cloud.gcp.pubsub.core.PubSubTemplate;
import org.springframework.context.annotation.Bean;
import org.springframework.integration.annotation.ServiceActivator;
import org.springframework.cloud.gcp.pubsub.integration.outbound.PubSubMessageHandler;
import org.springframework.messaging.MessageHandler;

@SpringBootApplication
public class DemoApplication {

        ...

        @Bean
        @ServiceActivator(inputChannel = "pubsubOutputChannel")
        public MessageHandler messageSender(PubSubTemplate pubsubTemplate) {
                return new PubSubMessageHandler(pubsubTemplate, "exampleTopic");
        }
}
ההערה @ServiceActivator גורמת לכך שההגדרה MessageHandler תחול על כל ההודעות החדשות ב-inputChannel. במקרה הזה, אנחנו קוראים למתאם של הערוץ היוצא, PubSubMessageHandler, כדי לפרסם את ההודעה בנושא exampleTopic של Google Cloud Pub/Sub.
אחרי שמוסיפים את מתאם הערוץ, אפשר לחבר אוטומטית אובייקט PubsubOutboundGateway ולהשתמש בו כדי לכתוב הודעה לערוץ.
src/main/java/com/example/demo/DemoApplication.java
...
import org.springframework.beans.factory.annotation.Autowired;
import org.springframework.web.bind.annotation.PostMapping;
import org.springframework.web.bind.annotation.RequestParam;
import org.springframework.web.servlet.view.RedirectView;

@SpringBootApplication
public class DemoApplication {

...

        @Autowired
        private PubsubOutboundGateway messagingGateway;

        @PostMapping("/postMessage")
        public RedirectView postMessage(@RequestParam("message") String message) {
                this.messagingGateway.sendToPubsub(message);
                return new RedirectView("/");
        }
}
בגלל ההערה @PostMapping, יש לנו עכשיו נקודת קצה (endpoint) שמקשיבה לבקשות HTTP POST, אבל רק אחרי שמוסיפים גם את ההערה @RestController למחלקה DemoApplication כדי לסמן אותה כבקר REST.
src/main/java/com/example/demo/DemoApplication.java
import org.springframework.web.bind.annotation.RestController;

@SpringBootApplication
@RestController
public class DemoApplication {
  ...
}
כדי שהאפליקציה תפעל, צריך להוסיף את התלות הנדרשת.
pom.xml
<project>
  ...
  <!-- Add Spring Cloud GCP Dependency BOM -->
  <dependencyManagement>
        <dependencies>
                <dependency>
                        <groupId>org.springframework.cloud</groupId>
                        <artifactId>spring-cloud-gcp-dependencies</artifactId>
                        <version>1.0.0.RELEASE</version>
                        <type>pom</type>
                        <scope>import</scope>
                </dependency>
        </dependencies>
  </dependencyManagement>

  <dependencies>
        ...
        <!-- Add Pub/Sub Starter -->
        <dependency>
                <groupId>org.springframework.cloud</groupId>
                <artifactId>spring-cloud-gcp-starter-pubsub</artifactId>
        </dependency>

        <!-- Add Spring Integration -->
        <dependency>
                <groupId>org.springframework.integration</groupId>
                <artifactId>spring-integration-core</artifactId>
        </dependency>

  </dependencies>

</project>
מפעילים את האפליקציה של השולח.
# Set the Project ID in environmental variable
$ export GOOGLE_CLOUD_PROJECT=`gcloud config list \
  --format 'value(core.project)'`
$ ./mvnw spring-boot:run
האפליקציה מאזינה לבקשות POST שמכילות הודעה ביציאה 8080 ובנקודת הקצה /postMessage, אבל נגיע לזה בהמשך.
הרגע יצרנו אפליקציה ששולחת הודעות דרך Google Cloud Pub/Sub. עכשיו ניצור אפליקציה נוספת שתקבל את ההודעות האלה ותעבד אותן.
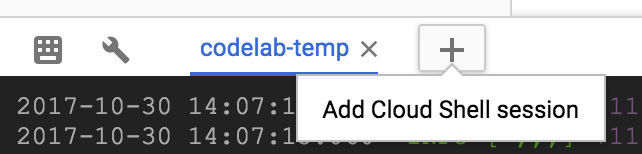
לוחצים על + כדי לפתוח סשן חדש ב-Cloud Shell.
לאחר מכן, בסשן החדש של Cloud Shell, משנים את הספרייה לספרייה של אפליקציית המקלט:
$ cd spring-integration-receiverבאפליקציה הקודמת, ההצהרה על שער ההודעות יצרה בשבילנו את הערוץ להודעות יוצאות. מכיוון שאנחנו לא משתמשים בשער הודעות כדי לקבל הודעות, אנחנו צריכים להצהיר על MessageChannel משלנו, שאליו יגיעו הודעות נכנסות.
src/main/java/com/example/demo/DemoApplication.java
...
import org.springframework.context.annotation.Bean;
import org.springframework.integration.channel.DirectChannel;
import org.springframework.messaging.MessageChannel;

@SpringBootApplication
public class DemoApplication {

        ...

        @Bean
        public MessageChannel pubsubInputChannel() {
                return new DirectChannel();
        }
}
נצטרך את מתאם הערוץ הנכנס כדי לקבל הודעות מ-Google Cloud Pub/Sub ולהעביר אותן אל pubsubInputChannel.
src/main/java/com/example/demo/DemoApplication.java
...
import org.springframework.beans.factory.annotation.Qualifier;
import org.springframework.cloud.gcp.pubsub.core.PubSubTemplate;
import org.springframework.cloud.gcp.pubsub.integration.inbound.PubSubInboundChannelAdapter;

@SpringBootApplication
public class DemoApplication {
        ...

        @Bean
        public PubSubInboundChannelAdapter messageChannelAdapter(
                        @Qualifier("pubsubInputChannel") MessageChannel inputChannel,
                        PubSubTemplate pubSubTemplate) {
                PubSubInboundChannelAdapter adapter =
                                new PubSubInboundChannelAdapter(pubSubTemplate, "exampleSubscription");
                adapter.setOutputChannel(inputChannel);

                return adapter;
        }
}
המתאם הזה נקשר ל-pubsubInputChannel ומקשיב להודעות חדשות מהמינוי exampleSubscription של Google Cloud Pub/Sub.
יש לנו ערוץ שבו מתפרסמות הודעות נכנסות, אבל מה עושים עם ההודעות האלה?
בואו נשתמש ב-@ServiceActivator שמופעל כשמגיעות הודעות חדשות לכתובת pubsubInputChannel.
src/main/java/com/example/demo/DemoApplication.java
...
import org.apache.commons.logging.Log;
import org.apache.commons.logging.LogFactory;
import org.springframework.integration.annotation.ServiceActivator;

@SpringBootApplication
public class DemoApplication {

        ...

        private static final Log LOGGER = LogFactory.getLog(DemoApplication.class);

        @ServiceActivator(inputChannel = "pubsubInputChannel")
        public void messageReceiver(String payload) {
                LOGGER.info("Message arrived! Payload: " + payload);
        }
}
במקרה כזה, נתעד רק את מטען הנתונים של ההודעה.
צריך להוסיף את יחסי התלות הנדרשים.
pom.xml
<project>
  ...
  <!-- Add Spring Cloud GCP Dependency BOM -->
  <dependencyManagement>
        <dependencies>
                <dependency>
                        <groupId>org.springframework.cloud</groupId>
                        <artifactId>spring-cloud-gcp-dependencies</artifactId>
                        <version>1.0.0.RELEASE</version>
                        <type>pom</type>
                        <scope>import</scope>
                </dependency>
        </dependencies>
  </dependencyManagement>

  <dependencies>
        ...
        <!-- Add Pub/Sub Starter -->
        <dependency>
                <groupId>org.springframework.cloud</groupId>
                <artifactId>spring-cloud-gcp-starter-pubsub</artifactId>
        </dependency>

        <!-- Add Spring Integration -->
        <dependency>
                <groupId>org.springframework.integration</groupId>
                <artifactId>spring-integration-core</artifactId>
        </dependency>

  </dependencies>

</project>
מפעילים את אפליקציית המקלט.
$ ./mvnw spring-boot:runמעכשיו, כל ההודעות שתשלחו לאפליקציית השולח יתועדו באפליקציית המקבל. כדי לבדוק את זה, פותחים סשן חדש ב-Cloud Shell ושולחים בקשת HTTP POST לאפליקציית השולח.
$ curl --data "message=Hello world!" localhost:8080/postMessageלאחר מכן, מוודאים שהאפליקציה של הנמען רשמה ביומן את ההודעה ששלחתם.
INFO: Message arrived! Payload: Hello world!מוחקים את המינוי ואת הנושא שנוצרו כחלק מהתרגיל הזה.
$ gcloud beta pubsub subscriptions delete exampleSubscription
$ gcloud beta pubsub topics delete exampleTopic
הגדרתם שתי אפליקציות Spring Boot שמשתמשות במתאמי ערוצים של Spring Integration ל-Google Cloud Pub/Sub. הם מחליפים ביניהם הודעות בלי ליצור אינטראקציה עם Google Cloud Pub/Sub API.
למדתם איך להשתמש במתאמי הערוצים של Spring Integration בשביל Google Cloud Pub/Sub.
מידע נוסף
- Google Cloud Pub/Sub: https://cloud.google.com/pubsub/
- פרויקט Spring ב-GCP: http://cloud.spring.io/spring-cloud-gcp/
- מאגר GitHub של Spring ב-GCP: https://github.com/spring-cloud/spring-cloud-gcp
- Java ב-Google Cloud Platform: https://cloud.google.com/java/
רישיון
העבודה הזו בשימוש במסגרת רישיון Creative Commons כללי מגרסה 2.0 המותנה בייחוס.