Java 快速入门
使用集合让一切井井有条
根据您的偏好保存内容并对其进行分类。
本项目将展示如何实现简单的
Glassware 中演示了 Google Mirror API 的主要功能。
要查看快速入门项目的功能完备的演示,请访问
https://glass-python-starter-demo.appspot.com.
否则,请继续阅读以了解如何部署您自己的版本。
在 GitHub 上下载
前提条件
确保您的系统满足快速入门项目的以下前提条件:
创建 Google API 控制台项目
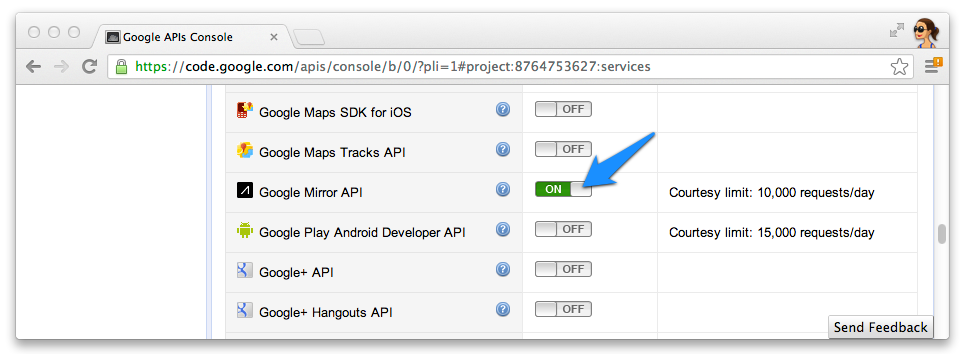
接下来,启用对 Google Mirror API 的访问权限:
- 转至 Google API 控制台并新建一个 API 项目。
- 点击服务,然后为新项目启用 Google Mirror API。

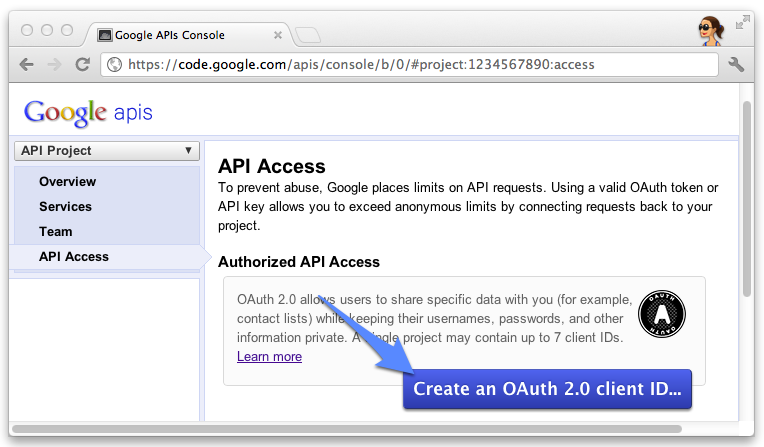
- 点击 API 访问权限,然后为 Web 应用创建 OAuth 2.0 客户端 ID。

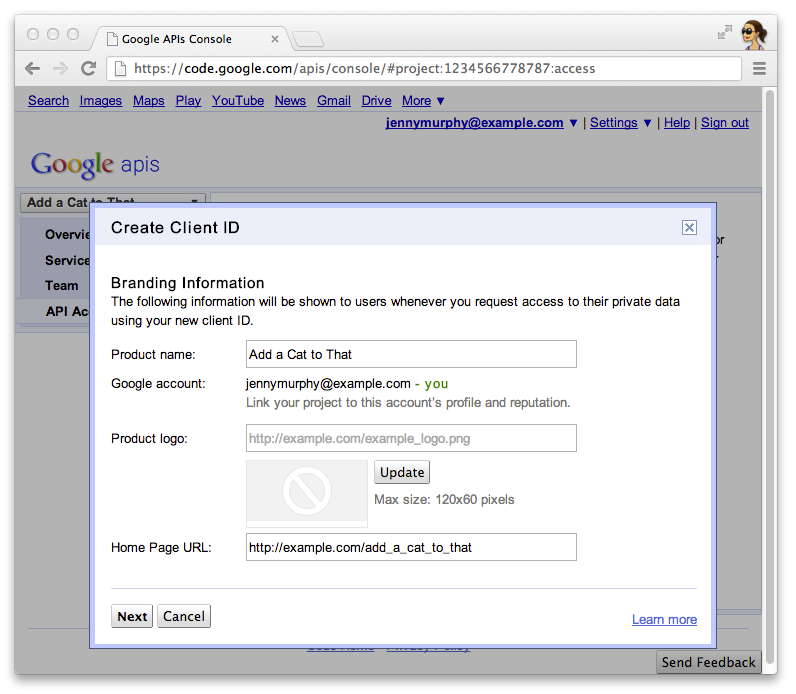
- 指定 Glassware 的产品名称和图标。这些字段显示在 OAuth 授权中
呈现给用户的屏幕

- 选择 Web 应用,然后为主机名指定任意值,例如
localhost

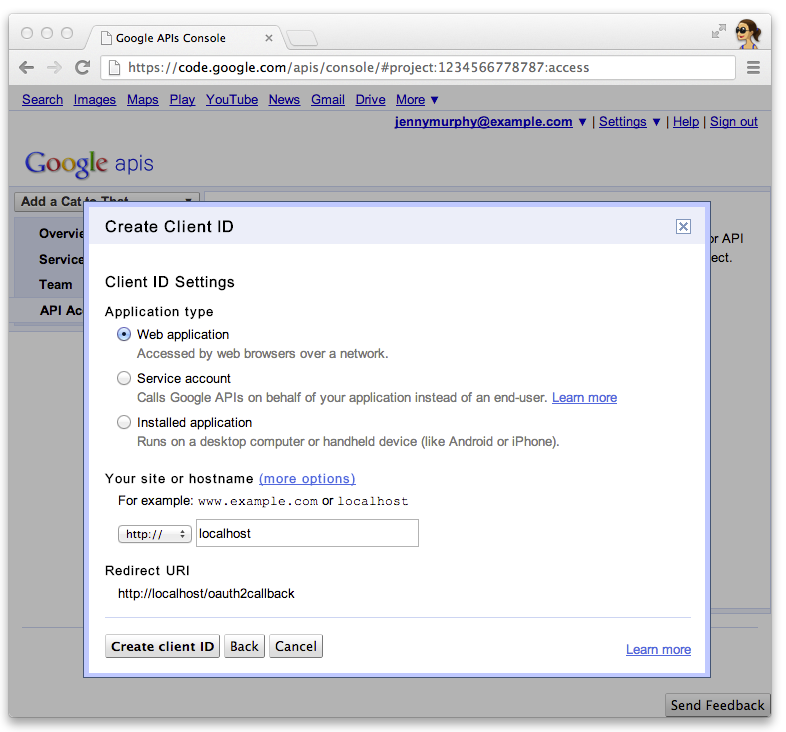
- 点击客户端 ID 对应的 Edit settings... 可指定重定向 URI。指定回调网址
(例如
http://localhost:8080/oauth2callback
),以及
例如 https://example.com/oauth2callback
。

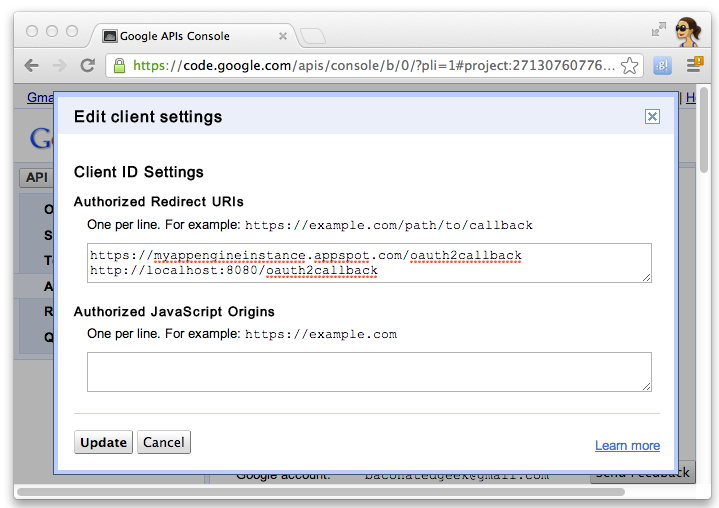
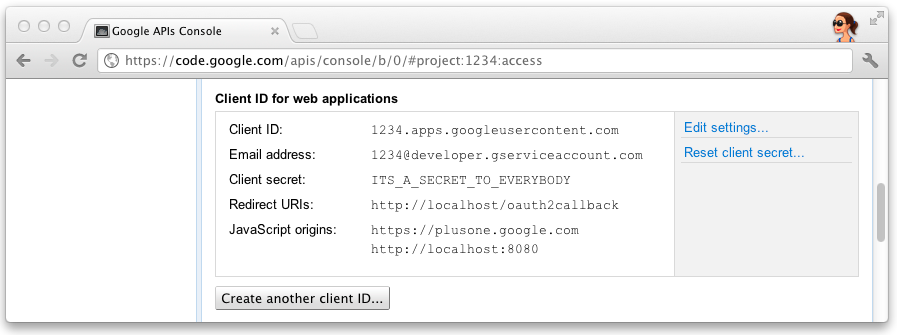
- 记下 Google API 控制台中的客户端 ID 和密钥。所需设备
以配置快速入门项目。

输入您的客户端 ID 和
Secret 导入 src/main/resources/oauth.properties
:
# Replace these with values for your project from the Google API Console:
# https://developers.google.com/console
client_id=3141592653589793238462643383279
client_secret=ITS_A_SECRET_TO_EVERYBODY
导入项目
以下说明介绍了如何将快速入门项目源代码导入 IntelliJ,并
Eclipse。
IntelliJ
- 点击文件 >Import Project...。
- 指向解压缩的目录。
- 选择从现有模型导入 >Maven
Eclipse
- 安装
m2e
插件以启用从 Maven pom 文件导入。
- 点击文件 >导入...>Maven >“Existing Maven Project”。
- 指向解压缩的目录并导入项目。
运行本地开发服务器
您可以在本地开发服务器上运行快速入门项目以进行测试:
$ mvn jetty:run
部署快速入门项目
您可以使用 Maven 为此项目构建一个 war 文件:
$ mvn war:war
如未另行说明,那么本页面中的内容已根据知识共享署名 4.0 许可获得了许可,并且代码示例已根据 Apache 2.0 许可获得了许可。有关详情,请参阅 Google 开发者网站政策。Java 是 Oracle 和/或其关联公司的注册商标。
最后更新时间 (UTC):2025-07-25。
[null,null,["最后更新时间 (UTC):2025-07-25。"],[[["\u003cp\u003eThis project provides a simple implementation of Glassware demonstrating core Google Mirror API functionality.\u003c/p\u003e\n"],["\u003cp\u003eIt requires Java 1.6, Apache Maven, and a Google APIs Console project with the Google Mirror API enabled and OAuth 2.0 client ID created.\u003c/p\u003e\n"],["\u003cp\u003eThe project can be configured using your API client information, imported into IntelliJ or Eclipse, and run on a local development server using Maven.\u003c/p\u003e\n"],["\u003cp\u003eA deployable WAR file can be built using Maven for production deployment.\u003c/p\u003e\n"],["\u003cp\u003eA fully-working demo is available at \u003ca href=\"https://glass-java-starter-demo.appspot.com\"\u003ehttps://glass-java-starter-demo.appspot.com\u003c/a\u003e.\u003c/p\u003e\n"]]],[],null,["# Java Quick Start\n\nThis project shows you how to implement a simple\npiece of Glassware that demos the major functionality of the Google Mirror API.\n\nTo see a fully-working demo of the quick start project, go to\n[https://glass-python-starter-demo.appspot.com](https://glass-java-starter-demo.appspot.com).\nOtherwise, read on to see how to deploy your own version.\n\n[Download on GitHub](https://github.com/googleglass/mirror-quickstart-java)\n\nPrerequisites\n-------------\n\nEnsure your system meets the following prerequisites for the quick start project:\n\n- Java 1.6\n- [Apache Maven](http://maven.apache.org/) - used for part of the build process.\n\nCreating a Google APIs Console project\n--------------------------------------\n\nNext, enable access to the Google Mirror API:\n\n1. Go to the [Google APIs console](https://code.google.com/apis/console/) and create a new API project.\n2. Click **Services** and enable the Google Mirror API for your new project.\n3. Click **API Access** and create an OAuth 2.0 client ID for a web application.\n4. Specify the product name and icon for your Glassware. These fields appear on the OAuth grant screen presented to your users.\n5. Select **Web application** and specify any value for the hostname, such as `localhost`\n6. Click **Edit settings...** for the client ID to specify redirect URIs. Specify the callback URLs for your local development web server, for example `http://localhost:8080/oauth2callback`, and for your deployed web server, for example `https://example.com/oauth2callback`.\n7. Make note of the client ID and secret from the Google APIs Console. You'll need it to configure the quick start project.\n\nConfiguring the Quick Start project\n-----------------------------------\n\nConfigure the Quick Start project to use your API client information by entering your client ID and\nsecret into `src/main/resources/oauth.properties`: \n\n # Replace these with values for your project from the Google API Console:\n # https://developers.google.com/console\n\n client_id=3141592653589793238462643383279\n client_secret=ITS_A_SECRET_TO_EVERYBODY\n\nImporting the project\n---------------------\n\nThe following instructions show you to import the Quick Start project source into IntelliJ and\nEclipse.\n\n### IntelliJ\n\n1. Click **File \\\u003e Import Project...**.\n2. Point to the extracted directory.\n3. Select **Import from existing model \\\u003e Maven**\n\n### Eclipse\n\n1. Install the [`m2e`](http://eclipse.org/m2e/) plugin to enable import from a maven pom file.\n2. Click **File \\\u003e Import... \\\u003e Maven \\\u003e Existing Maven Project**.\n3. Point to the extracted directory and import the project.\n\nRunning a local development server\n----------------------------------\n\nYou can run the Quick Start project on a local development server for testing: \n\n $ mvn jetty:run\n\nDeploying the Quick Start project\n---------------------------------\n\nYou can build a war file for this project using Maven: \n\n $ mvn war:war"]]