يوضح لك هذا المشروع كيفية تنفيذ طريقة Glassware الذي يعرض الوظيفة الرئيسية لواجهة برمجة تطبيقات Google Mirror.
للاطّلاع على عرض توضيحي يعمل بشكل كامل لمشروع البدء السريع، انتقِل إلى https://glass-python-starter-demo.appspot.com. أو يمكنك متابعة القراءة لمعرفة كيفية نشر الإصدار الخاص بك.
المتطلبات الأساسية
- PHP 5.3.x أو أعلى
- خادم الويب: تحتاج إلى مكان لاستضافة ملفاتك. عمل Apache httpd وnginx عظيم.
- لاستخدام الاشتراكات، يجب أيضًا الاستعانة بمضيف يمكن الوصول إليه عبر الإنترنت تحتوي على شهادة طبقة مقابس آمنة (SSL) صالحة وموقّعة من خلال شهادة موثوق بها والسلطة.
إنشاء مشروع على Google APIs Console
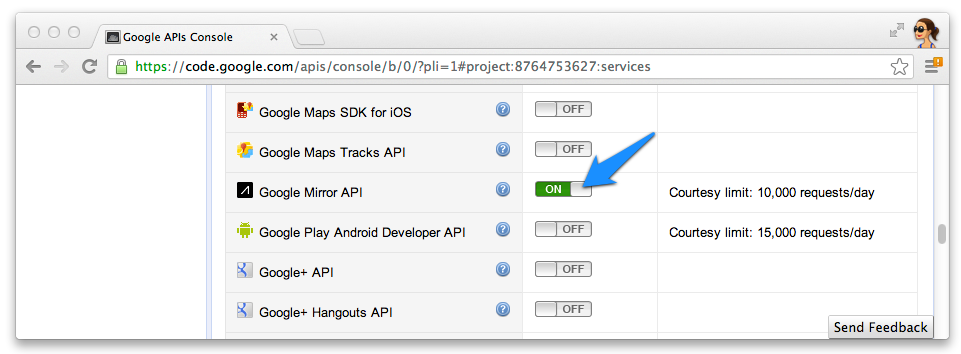
بعد ذلك، فعِّل الوصول إلى Google Mirror API:
- انتقِل إلى وحدة تحكُّم Google APIs وأنشئ مشروع واجهة برمجة تطبيقات جديدًا.
- انقر على الخدمات وفعِّل Google Mirror API لمشروعك الجديد.
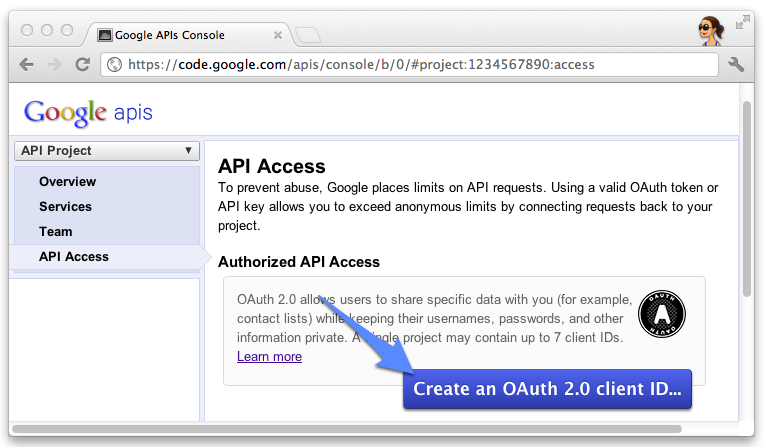
- انقر على الوصول إلى واجهة برمجة التطبيقات وأنشِئ معرِّف عميل OAuth 2.0 لتطبيق ويب.
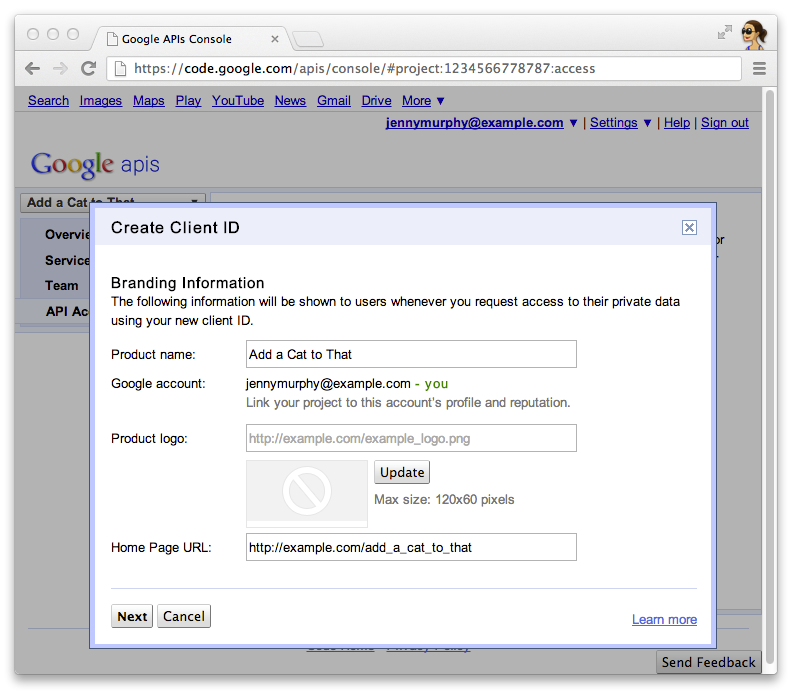
- حدد اسم المنتج ورمزه لـ Glassware. تظهر هذه الحقول في طلب منح بروتوكول OAuth.
الشاشة المقدمة للمستخدمين.
- اختَر تطبيق الويب وحدِّد أي قيمة لاسم المضيف، مثل
localhost.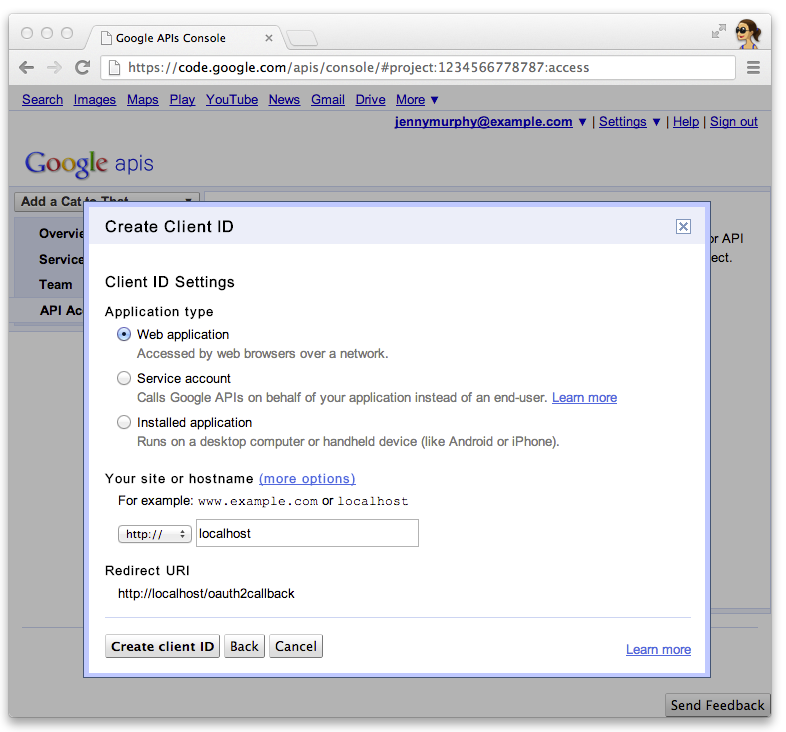
- انقر على تعديل الإعدادات... لمعرِّف العميل لتحديد معرِّفات الموارد المنتظمة (URI) لإعادة التوجيه. تحديد عناوين URL لمعاودة الاتصال
لخادم الويب الخاص بالتطوير المحلي، على سبيل المثال
http://localhost:8080/oauth2callbackلخادم الويب المنشور، على سبيل المثالhttps://example.com/oauth2callback.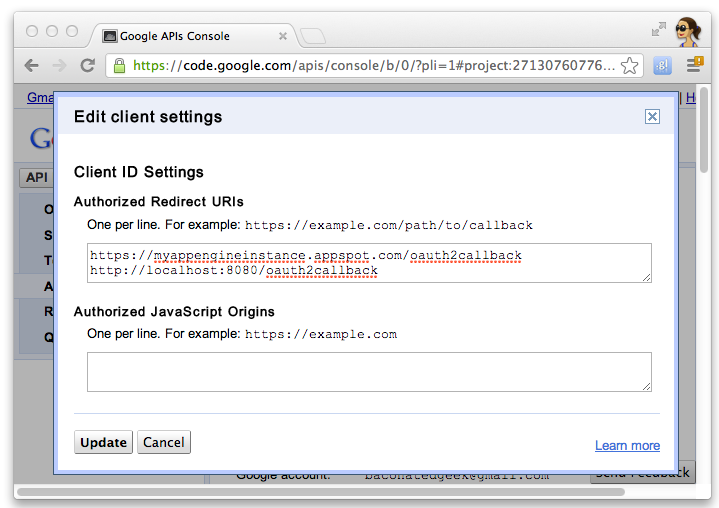
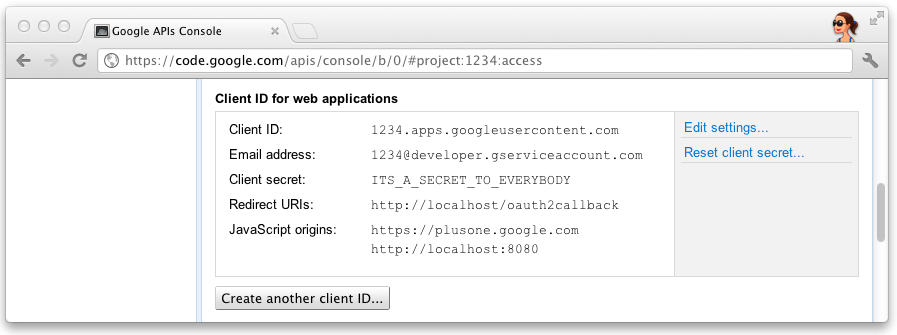
- دوِّن معرِّف العميل وسره من وحدة تحكُّم Google APIs. ستحتاج إلى
لتهيئة مشروع البدء السريع.
ضبط المشروع
يُرجى إدخال معرِّف العميل، والسر، ومفتاح واجهة برمجة التطبيقات البسيط، وعنوان URL الأساسي، والموقع الجغرافي
يمكن إنشاء قاعدة بيانات SQLite في config.php:
$api_client_id = "1234.apps.googleusercontent.com";
$api_client_secret = "ITS_A_SECRET_TO_EVERYBODY";
$api_simple_key = "AIzaSyCCbHcqDeb0oycQ9niV8P3n0F0qM";

$base_url = "http://example.com/starter-project";

$sqlite_database = "/tmp/database.sqlite";
نشر المشروع
انشر مشروع البدء السريع على الخادم المضيف:
- انسخ دليل البدء السريع بلغة PHP إلى دليل المستندات لخادم الويب HTTP.
اعتمادًا على إعدادات النظام لديك، قد تحتاج إلى إنشاء واجهة برمجة تطبيقات لقاعدة بيانات SQLite:
$ touch /tmp/database.sqlite
$ chmod 777 /tmp/database.sqlite