با مجموعهها، منظم بمانید
ذخیره و طبقهبندی محتوا براساس اولویتهای شما.
این پروژه به شما نشان می دهد که چگونه یک قطعه ساده از Glassware را پیاده سازی کنید که عملکرد اصلی Google Mirror API را نشان می دهد.
برای دیدن یک نسخه نمایشی کاملاً کارآمد از پروژه شروع سریع، به https://glass-python-starter-demo.appspot.com بروید. در غیر این صورت، برای مشاهده نحوه استقرار نسخه خود به ادامه مطلب بروید.
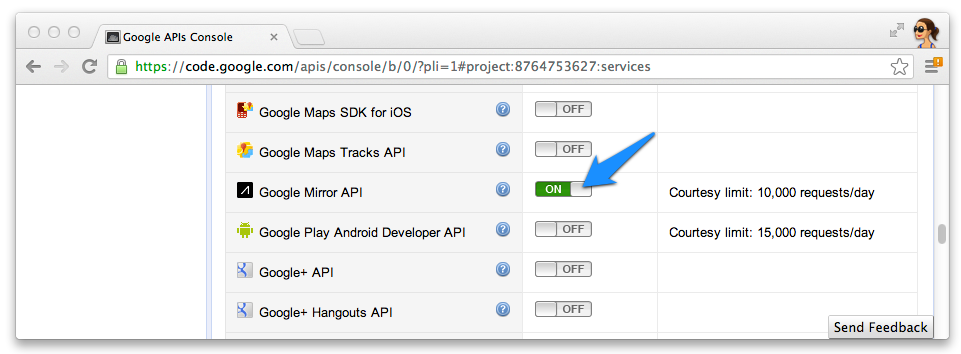
روی Services کلیک کنید و Google Mirror API را برای پروژه جدید خود فعال کنید.
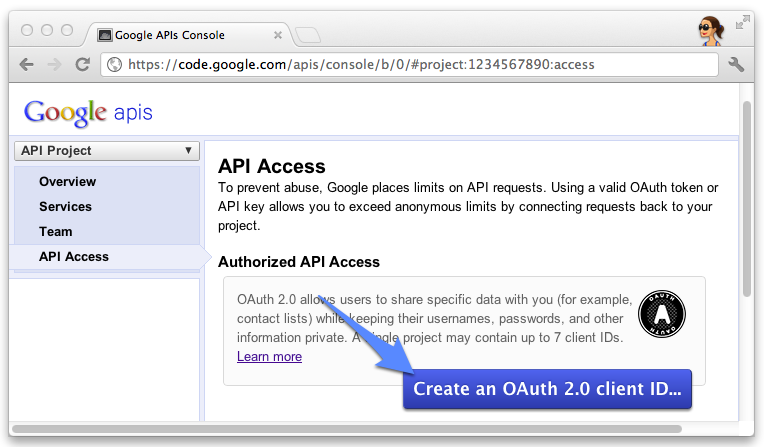
روی API Access کلیک کنید و یک شناسه مشتری OAuth 2.0 برای یک برنامه وب ایجاد کنید.
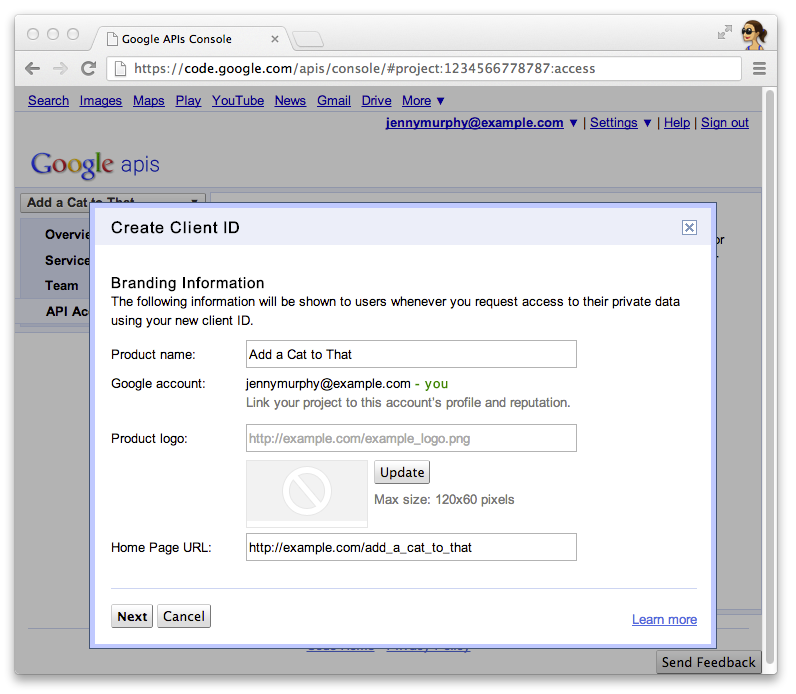
نام محصول و نماد را برای Glassware خود مشخص کنید. این فیلدها در صفحه اعطای OAuth که به کاربران شما ارائه می شود ظاهر می شوند.
برنامه وب را انتخاب کنید و هر مقداری را برای نام میزبان مشخص کنید، مانند localhost
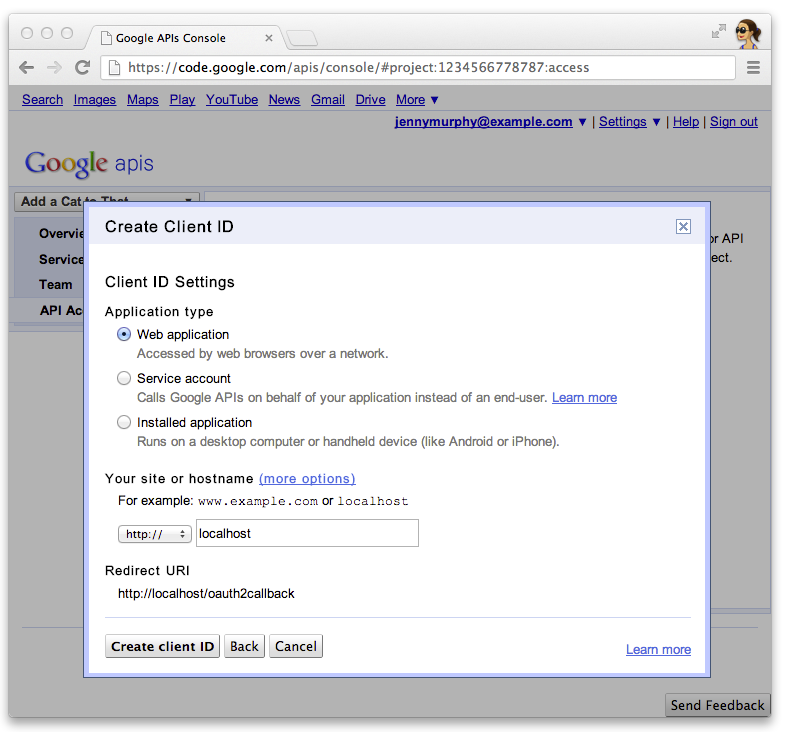
روی ویرایش تنظیمات... کلیک کنید تا شناسه کلاینت URI های تغییر مسیر را مشخص کند. URL های پاسخ به تماس را برای سرور وب توسعه محلی خود، به عنوان مثال http://localhost:8080/oauth2callback و برای وب سرور مستقر شده خود، برای مثال https://example.com/oauth2callback مشخص کنید.
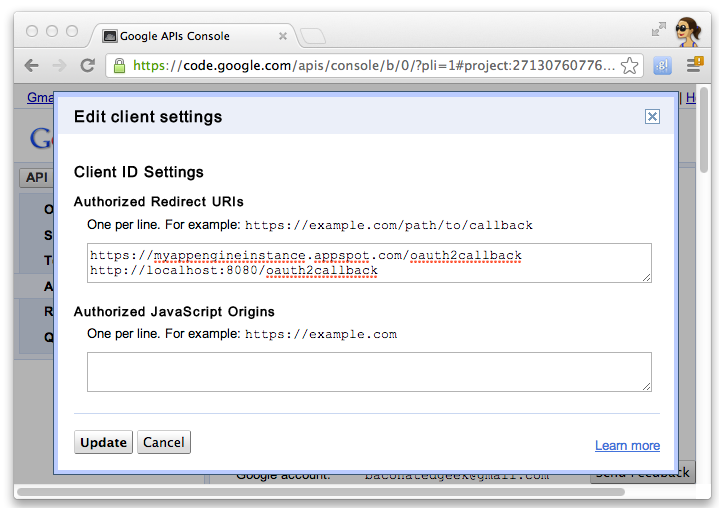
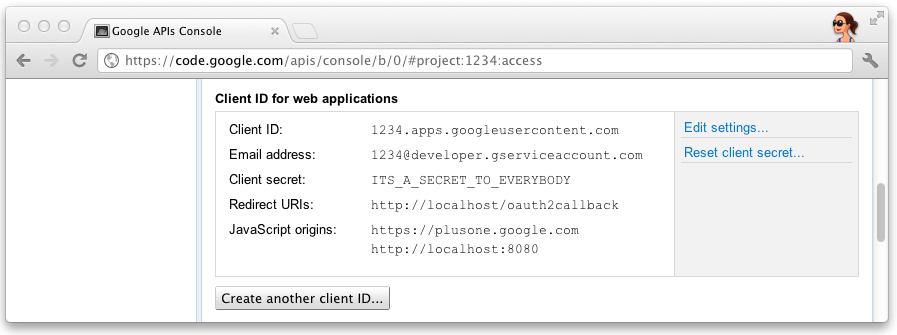
شناسه سرویس گیرنده و مخفی بودن کنسول APIs Google را یادداشت کنید. برای پیکربندی پروژه شروع سریع به آن نیاز دارید.
پیکربندی پروژه
شناسه مشتری، کلید مخفی، API ساده، یک URL پایه و مکانی را که می توان پایگاه داده SQLite را در config.php ایجاد کرد، وارد کنید:
تاریخ آخرین بهروزرسانی 2025-07-24 بهوقت ساعت هماهنگ جهانی.
[null,null,["تاریخ آخرین بهروزرسانی 2025-07-24 بهوقت ساعت هماهنگ جهانی."],[[["\u003cp\u003eThis project demonstrates how to implement a basic Google Glassware application using the Google Mirror API.\u003c/p\u003e\n"],["\u003cp\u003eUsers need PHP 5.3.x or higher, a web server like Apache or Nginx, and potentially an SSL certificate for subscriptions to utilize the project.\u003c/p\u003e\n"],["\u003cp\u003eDevelopers need to create a Google APIs Console project, enable the Google Mirror API, and set up OAuth 2.0 credentials for their application.\u003c/p\u003e\n"],["\u003cp\u003eThe project requires configuration with client ID, secret, API key, base URL, and SQLite database location in a \u003ccode\u003econfig.php\u003c/code\u003e file.\u003c/p\u003e\n"],["\u003cp\u003eDeployment involves copying the project directory to the web server and potentially setting up the SQLite database file.\u003c/p\u003e\n"]]],[],null,["# PHP Quick Start\n\nThis project shows you how to implement a simple\npiece of Glassware that demos the major functionality of the Google Mirror API.\n\nTo see a fully-working demo of the quick start project, go to\n[https://glass-python-starter-demo.appspot.com](https://glass-java-starter-demo.appspot.com).\nOtherwise, read on to see how to deploy your own version.\n\n[Download on GitHub](https://github.com/googleglass/mirror-quickstart-php)\n\nPrerequisites\n-------------\n\n- PHP 5.3.x or higher\n- A web server - You need a place to host your files. [Apache httpd](http://httpd.apache.org/) and [nginx](http://nginx.org/) work great.\n- To use subscriptions you also need an Internet accessible hosting environment with a valid SSL certificate signed by a trusted certificate authority.\n\n| **Note:** You can start developing with a localhost instance of your HTTP server, but you must have an Internet accessible host to use the subscription features of the API.\n\nCreating a Google APIs Console project\n--------------------------------------\n\nNext, enable access to the Google Mirror API:\n\n1. Go to the [Google APIs console](https://code.google.com/apis/console/) and create a new API project.\n2. Click **Services** and enable the Google Mirror API for your new project.\n3. Click **API Access** and create an OAuth 2.0 client ID for a web application.\n4. Specify the product name and icon for your Glassware. These fields appear on the OAuth grant screen presented to your users.\n5. Select **Web application** and specify any value for the hostname, such as `localhost`\n6. Click **Edit settings...** for the client ID to specify redirect URIs. Specify the callback URLs for your local development web server, for example `http://localhost:8080/oauth2callback`, and for your deployed web server, for example `https://example.com/oauth2callback`.\n7. Make note of the client ID and secret from the Google APIs Console. You'll need it to configure the quick start project.\n\n| **Note:** You also need the simple API key for the PHP starter project.\n\nConfiguring the project\n-----------------------\n\nEnter your client ID, secret, simple API key, a base URL and a location where a\nSQLite database can be created in `config.php`: \n\n $api_client_id = \"1234.apps.googleusercontent.com\";\n $api_client_secret = \"ITS_A_SECRET_TO_EVERYBODY\";\n $api_simple_key = \"AIzaSyCCbHcqDeb0oycQ9niV8P3n0F0qM\";\n\n $base_url = \"http://example.com/starter-project\";\n\n $sqlite_database = \"/tmp/database.sqlite\";\n\nDeploying the project\n---------------------\n\nDeploy the Quick Start project to your host server:\n\n1. Copy the PHP Quick Start directory to the documents directory of your HTTP web server.\n2. Depending on your system configuration, you may need to pre-create a writable\n file for the SQLite database:\n\n $ touch /tmp/database.sqlite\n $ chmod 777 /tmp/database.sqlite"]]