Mulai Cepat Python
Tetap teratur dengan koleksi
Simpan dan kategorikan konten berdasarkan preferensi Anda.
Proyek ini menunjukkan cara mengimplementasikan
Glassware yang mendemonstrasikan fungsi utama Google Mirror API.
Untuk melihat demo yang berfungsi sepenuhnya dari proyek memulai cepat, buka
https://glass-python-starter-demo.appspot.com.
Jika tidak, baca terus untuk mengetahui cara men-deploy versi Anda sendiri.
Download di GitHub
Prasyarat
App Engine SDK untuk Python -
Project mulai cepat Python diimplementasikan menggunakan App Engine. Anda perlu
Python App Engine SDK untuk mengembangkan dan men-deploy project Anda.
Jalankan penginstal jika sesuai dengan platform Anda, atau ekstrak file ZIP
di tempat yang nyaman.
Membuat instance Google App Engine
Anda harus menghosting project mulai cepat pada instance Google App Engine:
- Buka http://appspot.com.
- Klik Create Application dan buat instance Google App Engine publik yang dihosting di
appspot.com
.
- Berikan ID Aplikasi ke aplikasi dan biarkan autentikasi Terbuka untuk semua Google
Pengguna akun. Anda akan memerlukan ID aplikasi tersebut untuk mengonfigurasi project mulai cepat.
Membuat project Konsol API Google
Selanjutnya, aktifkan akses ke Google Mirror API:
- Buka konsol API Google dan buat project API baru.
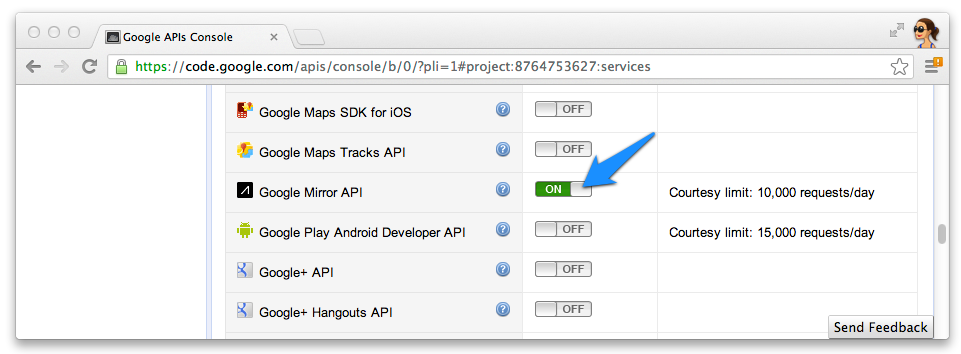
- Klik Services, lalu aktifkan Google Mirror API untuk project baru Anda.

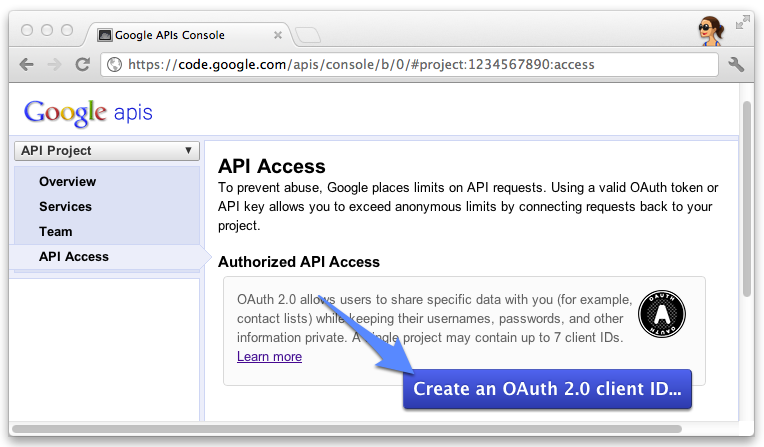
- Klik Akses API dan buat client ID OAuth 2.0 untuk aplikasi web.

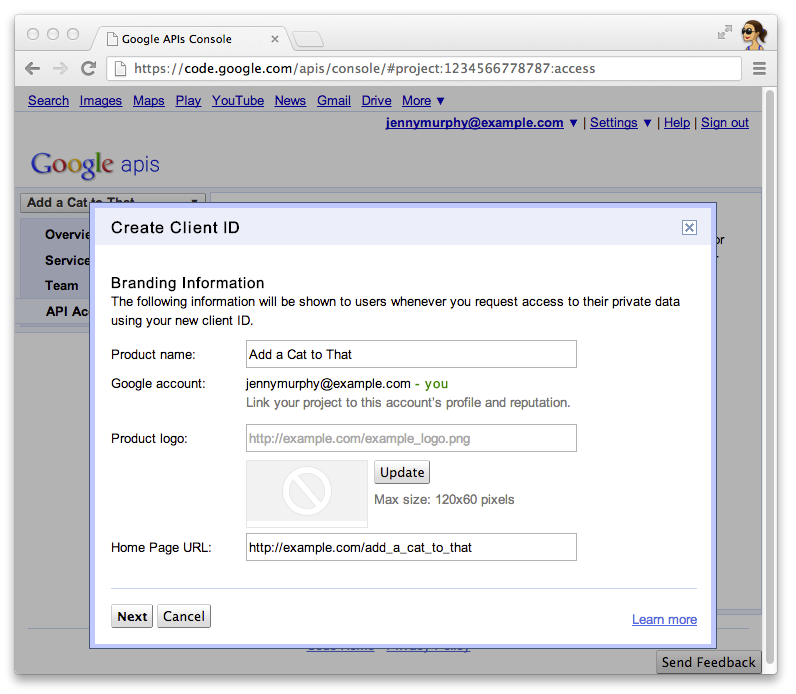
- Tentukan nama dan ikon produk untuk Gelas Anda. Kolom ini muncul di pemberian izin OAuth
yang ditampilkan
kepada pengguna Anda.

- Pilih Web application dan tentukan nilai apa pun untuk nama host, seperti
localhost

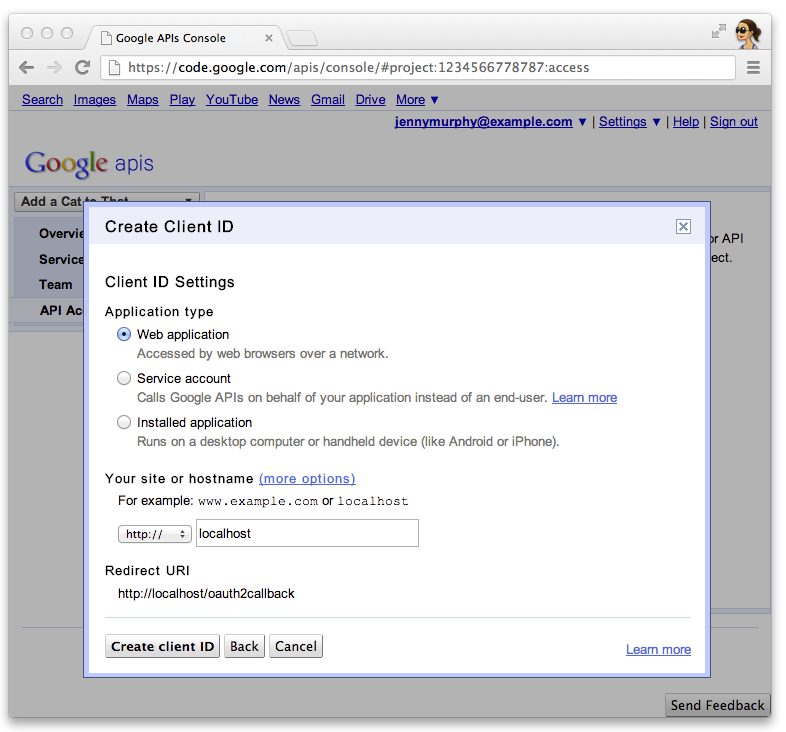
- Klik Edit settings... untuk client ID guna menentukan URI pengalihan. Menentukan
http://localhost:8080/oauth2callback
dan URL callback untuk App Engine Anda
Misalnya, https://myappengineinstance.appspot.com/oauth2callback
.

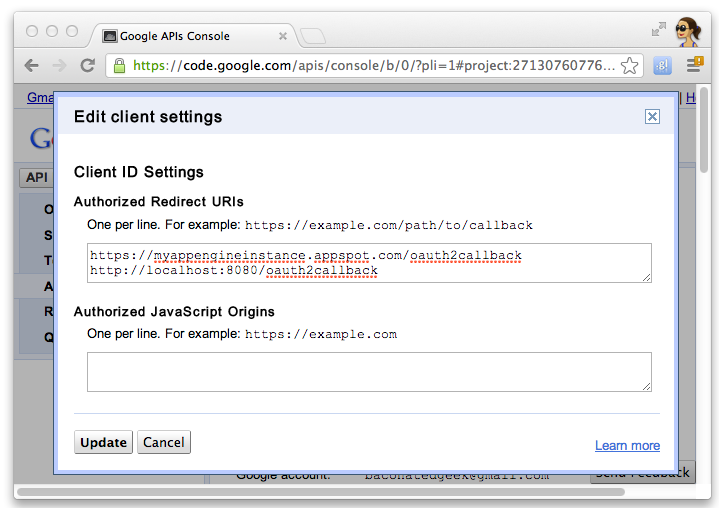
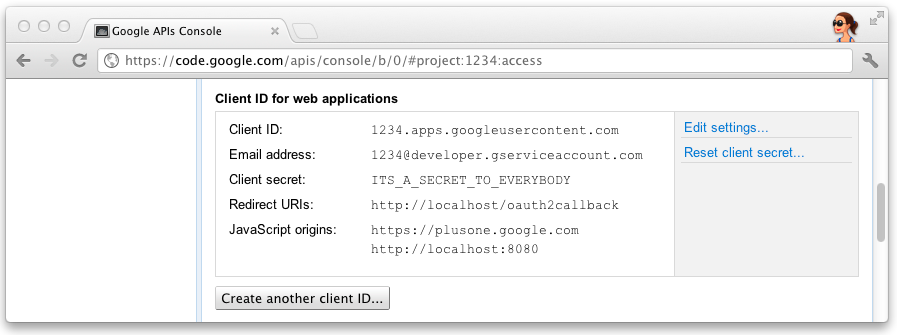
- Catat ID dan rahasia klien dari Konsol API Google. Anda akan memerlukan
untuk mengkonfigurasi proyek mulai cepat.

Mengonfigurasi project
Konfigurasikan project Mulai Cepat untuk menggunakan informasi klien API Anda:
- Masukkan client ID dan rahasia klien Anda di
client_secrets.json
:
{
"web": {
"client_id": "1234.apps.googleusercontent.com",
"client_secret": "ITS_A_SECRET_TO_EVERYBODY",
"redirect_uris": [
],
"auth_uri": "https://accounts.google.com/o/oauth2/auth",
"token_uri": "https://accounts.google.com/o/oauth2/token"
}
}
- Buat file
session.secret
untuk menyimpan cookie sesi:
$ python -c "import os; print os.urandom(64)" > session.secret
- Edit
app.yaml
untuk memasukkan ID aplikasi App Engine Anda:
application: your_app_engine_application_id
version: 1
runtime: python27
api_version: 1
threadsafe: true
...
Men-deploy project
Tekan tombol Deploy berwarna biru di antarmuka GUI Peluncuran App Engine atau jalankan shell ini
untuk men-deploy kode Anda:
$ appcfg.py --oauth2 update .
Kecuali dinyatakan lain, konten di halaman ini dilisensikan berdasarkan Lisensi Creative Commons Attribution 4.0, sedangkan contoh kode dilisensikan berdasarkan Lisensi Apache 2.0. Untuk mengetahui informasi selengkapnya, lihat Kebijakan Situs Google Developers. Java adalah merek dagang terdaftar dari Oracle dan/atau afiliasinya.
Terakhir diperbarui pada 2025-07-25 UTC.
[null,null,["Terakhir diperbarui pada 2025-07-25 UTC."],[[["\u003cp\u003eThis project provides a simple implementation of Glassware demonstrating the core functionality of the Google Mirror API.\u003c/p\u003e\n"],["\u003cp\u003eTo run the project, you need the App Engine SDK for Python, a Google App Engine instance, and a Google APIs Console project with the Google Mirror API enabled.\u003c/p\u003e\n"],["\u003cp\u003eConfiguration involves setting up your client ID and secret, generating a session secret file, and updating the \u003ccode\u003eapp.yaml\u003c/code\u003e with your App Engine application ID.\u003c/p\u003e\n"],["\u003cp\u003eDeploy the project using the App Engine Launcher GUI or the \u003ccode\u003eappcfg.py\u003c/code\u003e command-line tool.\u003c/p\u003e\n"]]],[],null,["# Python Quick Start\n\nThis project shows you how to implement a simple\npiece of Glassware that demos the major functionality of the Google Mirror API.\n\nTo see a fully-working demo of the quick start project, go to\n[https://glass-python-starter-demo.appspot.com](https://glass-java-starter-demo.appspot.com).\nOtherwise, read on to see how to deploy your own version.\n\n[Download on GitHub](https://github.com/googleglass/mirror-quickstart-python)\n\nPrerequisites\n-------------\n\n[The App Engine SDK for Python](/appengine/downloads#Google_App_Engine_SDK_for_Python) -\nThe Python quick start project is implemented using App Engine. You need\nthe Python App Engine SDK to develop and deploy your project.\nRun the installer if appropriate for your platform, or extract the zip file\nin a convenient place.\n\nCreating a Google App Engine instance\n-------------------------------------\n\nYou'll need to host the quick start project on an instance of Google App Engine:\n\n1. Go to \u003chttp://appspot.com\u003e.\n2. Click **Create Application** and create a public Google App Engine instance hosted on `appspot.com`.\n3. Give the application an **Application Identifier** and leave the authentication **Open to all Google\n Accounts users**. You'll need the application identifier later to configure the quick start project.\n\nCreating a Google APIs Console project\n--------------------------------------\n\nNext, enable access to the Google Mirror API:\n\n1. Go to the [Google APIs console](https://code.google.com/apis/console/) and create a new API project.\n2. Click **Services** and enable the Google Mirror API for your new project.\n3. Click **API Access** and create an OAuth 2.0 client ID for a web application.\n4. Specify the product name and icon for your Glassware. These fields appear on the OAuth grant screen presented to your users.\n5. Select **Web application** and specify any value for the hostname, such as `localhost`\n6. Click **Edit settings...** for the client ID to specify redirect URIs. Specify `http://localhost:8080/oauth2callback` and the callback URL for your App Engine instance, for example, `https://myappengineinstance.appspot.com/oauth2callback`.\n7. Make note of the client ID and secret from the Google APIs Console. You'll need it to configure the quick start project.\n\nConfiguring the project\n-----------------------\n\nConfigure the Quick Start project to use your API client information:\n\n1. Enter your client ID and secret in `client_secrets.json`: \n\n ```python\n {\n \"web\": {\n \"client_id\": \"1234.apps.googleusercontent.com\",\n \"client_secret\": \"ITS_A_SECRET_TO_EVERYBODY\",\n \"redirect_uris\": [\n ],\n \"auth_uri\": \"https://accounts.google.com/o/oauth2/auth\",\n \"token_uri\": \"https://accounts.google.com/o/oauth2/token\"\n }\n }\n ```\n2. Generate a `session.secret` file to store session cookies: \n\n ```python\n $ python -c \"import os; print os.urandom(64)\" \u003e session.secret\n ```\n3. Edit `app.yaml` to enter your App Engine application ID: \n\n ```python\n application: your_app_engine_application_id\n version: 1\n runtime: python27\n api_version: 1\n threadsafe: true\n ...\n ```\n\nDeploying the project\n---------------------\n\nPress the blue **Deploy** button in the App Engine Launch GUI interface or run this shell\ncommand to deploy your code: \n\n $ appcfg.py --oauth2 update ."]]