Python クイック スタート
コレクションでコンテンツを整理
必要に応じて、コンテンツの保存と分類を行います。
このプロジェクトでは、Terraform で簡単な
Google Mirror API の主要な機能のデモを行います
クイック スタート プロジェクトの完全デモ版を見るには、次のページにアクセスしてください:
https://glass-python-starter-demo.appspot.com.
それ以外の場合は、この後、独自のバージョンをデプロイする方法を説明します。
GitHub でダウンロード
前提条件
App Engine SDK for Python -
Python クイックスタート プロジェクトは、App Engine を使用して実装されています。必要な
Python App Engine SDK を使用して、プロジェクトを開発、デプロイします。
プラットフォームに応じてインストーラを実行するか、zip ファイルを解凍します。
便利です。
Google App Engine インスタンスの作成
クイック スタート プロジェクトを Google App Engine のインスタンス上でホストする必要があります。
- http://appspot.com に移動します。
- [アプリケーションを作成] をクリックし、
appspot.com
でホストされる一般公開の Google App Engine インスタンスを作成します。
- アプリケーションにアプリケーション識別子を与え、認証はすべての Google に対して公開したままにします
アカウント ユーザー。アプリケーション ID は、後でクイック スタート プロジェクトを構成するために必要になります。
Google API Console プロジェクトを作成する
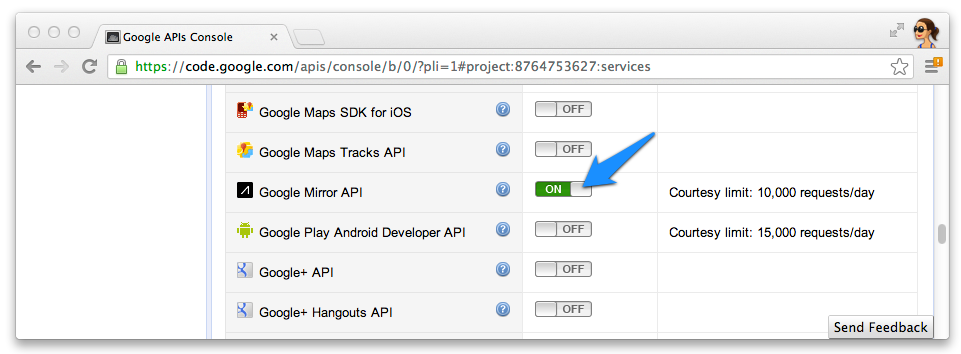
次に、Google Mirror API へのアクセスを有効にします。
- Google API Console に移動して、新しい API プロジェクトを作成します。
- [サービス] をクリックし、新しいプロジェクトで Google Mirror API を有効にします。

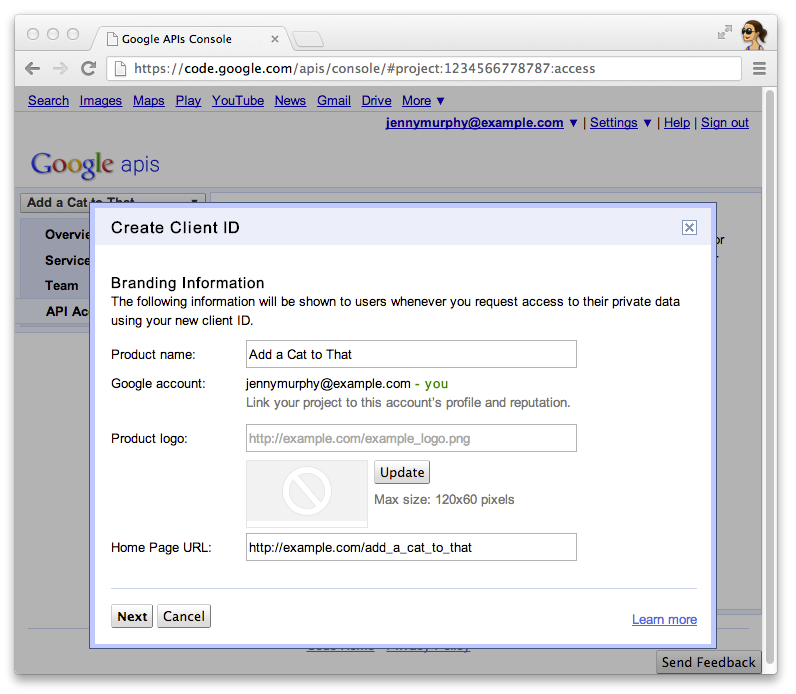
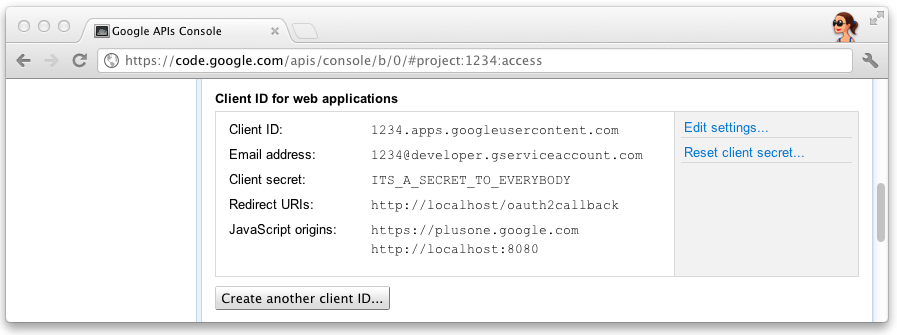
- [API Access] をクリックして、ウェブ アプリケーション用の OAuth 2.0 クライアント ID を作成します。
![Google API Console の [API Access] セクション](https://developers.google.cn/static/glass/images/api-console-client-id.png?hl=ja)
- Glassware の製品名とアイコンを指定します。これらのフィールドは OAuth 権限付与に表示される
画面に表示されます

- [ウェブ アプリケーション] を選択し、ホスト名に任意の値(
localhost
など)を指定します。

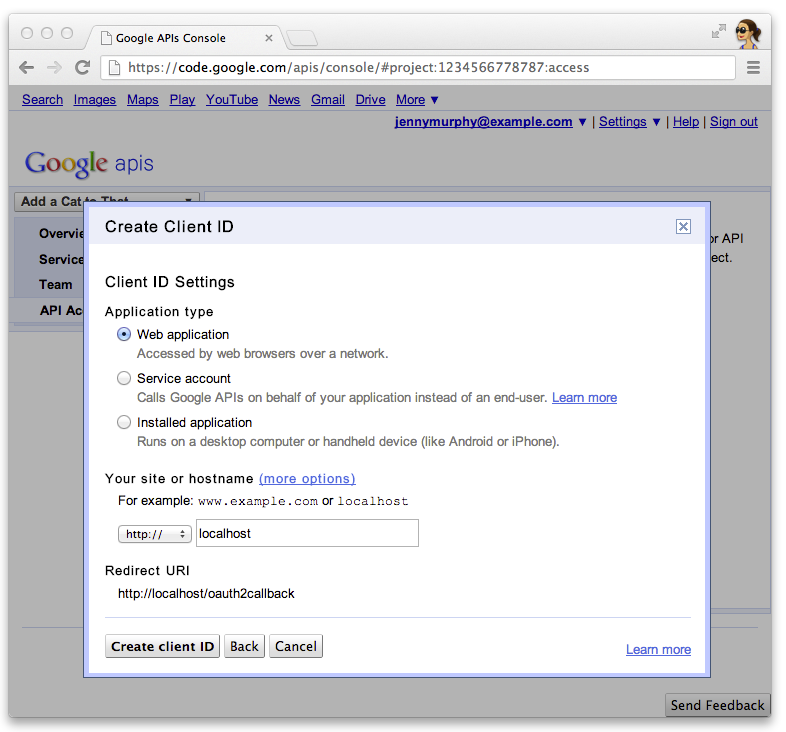
- クライアント ID の [設定を編集...] をクリックして、リダイレクト URI を指定します。具体的にご記入ください
http://localhost:8080/oauth2callback
と App Engine のコールバック URL
たとえば、https://myappengineinstance.appspot.com/oauth2callback
のようにします。

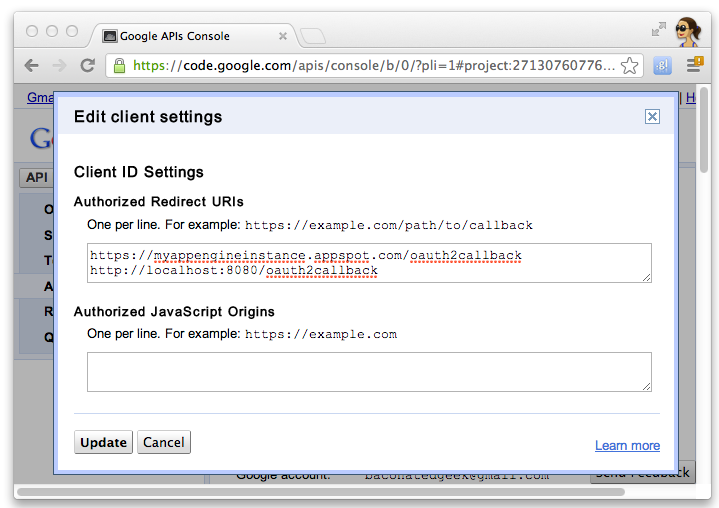
- Google API コンソールのクライアント ID とシークレットをメモします。必要なもの
クイック スタート プロジェクトを構成します。

プロジェクトの構成
API クライアント情報を使用するようにクイック スタート プロジェクトを構成します。
client_secrets.json
にクライアント ID とシークレットを入力します。
{
"web": {
"client_id": "1234.apps.googleusercontent.com",
"client_secret": "ITS_A_SECRET_TO_EVERYBODY",
"redirect_uris": [
],
"auth_uri": "https://accounts.google.com/o/oauth2/auth",
"token_uri": "https://accounts.google.com/o/oauth2/token"
}
}
- セッション Cookie を格納する
session.secret
ファイルを生成します。
$ python -c "import os; print os.urandom(64)" > session.secret
app.yaml
を編集して App Engine アプリケーション ID を入力します。
application: your_app_engine_application_id
version: 1
runtime: python27
api_version: 1
threadsafe: true
...
プロジェクトをデプロイする
App Engine Launch GUI インターフェースで青色の [Deploy] ボタンをクリックするか、このシェルを実行します
コマンドを使用してコードをデプロイします。
$ appcfg.py --oauth2 update .
特に記載のない限り、このページのコンテンツはクリエイティブ・コモンズの表示 4.0 ライセンスにより使用許諾されます。コードサンプルは Apache 2.0 ライセンスにより使用許諾されます。詳しくは、Google Developers サイトのポリシーをご覧ください。Java は Oracle および関連会社の登録商標です。
最終更新日 2025-07-25 UTC。
[null,null,["最終更新日 2025-07-25 UTC。"],[[["\u003cp\u003eThis project provides a simple implementation of Glassware demonstrating the core functionality of the Google Mirror API.\u003c/p\u003e\n"],["\u003cp\u003eTo run the project, you need the App Engine SDK for Python, a Google App Engine instance, and a Google APIs Console project with the Google Mirror API enabled.\u003c/p\u003e\n"],["\u003cp\u003eConfiguration involves setting up your client ID and secret, generating a session secret file, and updating the \u003ccode\u003eapp.yaml\u003c/code\u003e with your App Engine application ID.\u003c/p\u003e\n"],["\u003cp\u003eDeploy the project using the App Engine Launcher GUI or the \u003ccode\u003eappcfg.py\u003c/code\u003e command-line tool.\u003c/p\u003e\n"]]],[],null,["# Python Quick Start\n\nThis project shows you how to implement a simple\npiece of Glassware that demos the major functionality of the Google Mirror API.\n\nTo see a fully-working demo of the quick start project, go to\n[https://glass-python-starter-demo.appspot.com](https://glass-java-starter-demo.appspot.com).\nOtherwise, read on to see how to deploy your own version.\n\n[Download on GitHub](https://github.com/googleglass/mirror-quickstart-python)\n\nPrerequisites\n-------------\n\n[The App Engine SDK for Python](/appengine/downloads#Google_App_Engine_SDK_for_Python) -\nThe Python quick start project is implemented using App Engine. You need\nthe Python App Engine SDK to develop and deploy your project.\nRun the installer if appropriate for your platform, or extract the zip file\nin a convenient place.\n\nCreating a Google App Engine instance\n-------------------------------------\n\nYou'll need to host the quick start project on an instance of Google App Engine:\n\n1. Go to \u003chttp://appspot.com\u003e.\n2. Click **Create Application** and create a public Google App Engine instance hosted on `appspot.com`.\n3. Give the application an **Application Identifier** and leave the authentication **Open to all Google\n Accounts users**. You'll need the application identifier later to configure the quick start project.\n\nCreating a Google APIs Console project\n--------------------------------------\n\nNext, enable access to the Google Mirror API:\n\n1. Go to the [Google APIs console](https://code.google.com/apis/console/) and create a new API project.\n2. Click **Services** and enable the Google Mirror API for your new project.\n3. Click **API Access** and create an OAuth 2.0 client ID for a web application.\n4. Specify the product name and icon for your Glassware. These fields appear on the OAuth grant screen presented to your users.\n5. Select **Web application** and specify any value for the hostname, such as `localhost`\n6. Click **Edit settings...** for the client ID to specify redirect URIs. Specify `http://localhost:8080/oauth2callback` and the callback URL for your App Engine instance, for example, `https://myappengineinstance.appspot.com/oauth2callback`.\n7. Make note of the client ID and secret from the Google APIs Console. You'll need it to configure the quick start project.\n\nConfiguring the project\n-----------------------\n\nConfigure the Quick Start project to use your API client information:\n\n1. Enter your client ID and secret in `client_secrets.json`: \n\n ```python\n {\n \"web\": {\n \"client_id\": \"1234.apps.googleusercontent.com\",\n \"client_secret\": \"ITS_A_SECRET_TO_EVERYBODY\",\n \"redirect_uris\": [\n ],\n \"auth_uri\": \"https://accounts.google.com/o/oauth2/auth\",\n \"token_uri\": \"https://accounts.google.com/o/oauth2/token\"\n }\n }\n ```\n2. Generate a `session.secret` file to store session cookies: \n\n ```python\n $ python -c \"import os; print os.urandom(64)\" \u003e session.secret\n ```\n3. Edit `app.yaml` to enter your App Engine application ID: \n\n ```python\n application: your_app_engine_application_id\n version: 1\n runtime: python27\n api_version: 1\n threadsafe: true\n ...\n ```\n\nDeploying the project\n---------------------\n\nPress the blue **Deploy** button in the App Engine Launch GUI interface or run this shell\ncommand to deploy your code: \n\n $ appcfg.py --oauth2 update ."]]