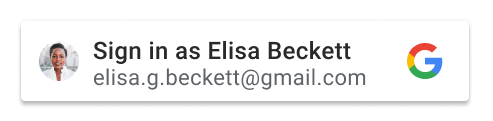
<html>
<body>
<scriptsrc="https://accounts.google.com/gsi/client"async></script>
<script>
functionhandleCredentialResponse(response){console.log("Encoded JWT ID token: "+response.credential);}window.onload=function(){google.accounts.id.initialize({client_id:"YOUR_GOOGLE_CLIENT_ID"callback:handleCredentialResponse});google.accounts.id.renderButton(document.getElementById("buttonDiv"),{theme:"outline",size:"large"}// customization attributes);google.accounts.id.prompt();// also display the One Tap dialog}</script>
<divid="buttonDiv"></div>
</body>
</html>
指定為 renderButton 第一個參數的元素會顯示為「使用 Google 帳戶登入」按鈕。在這個範例中,buttonDiv 用於在頁面上轉譯按鈕。按鈕會使用 renderButton 的第二個參數中指定的屬性進行自訂。
為了盡量減少使用者摩擦,系統會呼叫 google.accounts.id.prompt(),以便顯示 One Tap,做為使用按鈕註冊或登入的第二種替代方式。
GIS 程式庫會剖析 HTML 文件,找出 ID 屬性設為 g_id_onload 的元素,或是包含 g_id_signin 的類別屬性。無論您是否在 JavaScript 中轉譯按鈕,只要找到相符的元素,系統就會使用 HTML 轉譯按鈕。為避免顯示兩個按鈕 (可能會出現衝突的參數),請勿在 HTML 網頁中加入這些名稱的 HTML 元素。
按鈕語言
按鈕語言會根據瀏覽器的預設語言或 Google 工作階段使用者的偏好設定自動決定。您也可以在載入程式庫時,將 hl 參數和語言代碼新增至 src 指示詞,並在 HTML 中新增選用的 data-locale 或 locale 參數 data-locale,或在 JavaScript 中新增 locale。
[null,null,["上次更新時間:2025-05-01 (世界標準時間)。"],[[["\u003cp\u003eEasily add a "Sign In With Google" button to your website for user sign-up and sign-in, customizable with HTML or JavaScript.\u003c/p\u003e\n"],["\u003cp\u003eGoogle securely shares user profiles using a JWT (JSON Web Token) after consent.\u003c/p\u003e\n"],["\u003cp\u003eBefore implementation, set up your OAuth Consent Screen, obtain a Client ID, and load the client library.\u003c/p\u003e\n"],["\u003cp\u003eHandle the JWT credential either on the client-side using a callback or server-side with a designated login endpoint.\u003c/p\u003e\n"],["\u003cp\u003eChoose between popup or redirect UX modes, considering user experience and security trade-offs for credential handling.\u003c/p\u003e\n"]]],[],null,["# Display the Sign In With Google button\n\nAdd a Sign In With Google button to your site to enable users to sign-up or\nsign-in to your web app. Use either HTML or JavaScript to render the button and\nattributes to customize the button shape, size, text, and theme.\n\nAfter a user selects a Google Account and provides their consent, Google shares\nthe user profile using a JSON Web Token (JWT). For an overview of the steps\ninvolved during sign-in and user experience see [How it works](/identity/gsi/web/guides/overview#how_it_works).\n[Understand the personalized button](/identity/gsi/web/guides/personalized-button) reviews the different conditions and\nstates affecting how the button is displayed to users.\n| **Key Point:** Our [Code Generator](/identity/gsi/web/tools/configurator) helps you to interactively design your Sign In With Google button and generates the code needed to add it to your web page.\n\nPrerequisites\n-------------\n\nFollow the steps described in [Setup](/identity/gsi/web/guides/get-google-api-clientid) to configure your OAuth Consent\nScreen, obtain a client ID, and load the client library.\n\nButton rendering\n----------------\n\nTo display the Sign In With Google button, you may choose either HTML or\nJavaScript to render the button on your login page: \n\n### HTML\n\nRender the sign-in button using HTML, returning the JWT to your platform's\nlogin endpoint. \n\n \u003chtml\u003e\n \u003cbody\u003e\n \u003cscript src=\"https://accounts.google.com/gsi/client\" async\u003e\u003c/script\u003e\n \u003cdiv id=\"g_id_onload\"\n data-client_id=\"\u003cvar translate=\"no\"\u003eYOUR_GOOGLE_CLIENT_ID\u003c/var\u003e\"\n data-login_uri=\"\u003cvar translate=\"no\"\u003ehttps://your.domain/your_login_endpoint\u003c/var\u003e\"\n data-auto_prompt=\"false\"\u003e\n \u003c/div\u003e\n \u003cdiv class=\"g_id_signin\"\n data-type=\"standard\"\n data-size=\"large\"\n data-theme=\"outline\"\n data-text=\"sign_in_with\"\n data-shape=\"rectangular\"\n data-logo_alignment=\"left\"\u003e\n \u003c/div\u003e\n \u003cbody\u003e\n \u003c/html\u003e\n\nAn element with a `g_id_signin` class renders as a Sign In With Google button.\nThe button is customized by the parameters provided in the data attributes.\n\nTo display a Sign In With Google button and Google One Tap on the same page,\nremove `data-auto_prompt=\"false\"`. This is recommended to reduce friction and\nimprove sign-in rates.\n\nFor the full list of data attributes, see the [`g_id_signin` reference](/identity/gsi/web/reference/html-reference#element_with_class_g_id_signin)\npage\n\n### JavaScript\n\nRender the sign-in button using JavaScript, returning the JWT to the\nbrowser's JavaScript callback handler. \n\n \u003chtml\u003e\n \u003cbody\u003e\n \u003cscript src=\"https://accounts.google.com/gsi/client\" async\u003e\u003c/script\u003e\n \u003cscript\u003e\n function handleCredentialResponse(response) {\n console.log(\"Encoded JWT ID token: \" + response.credential);\n }\n window.onload = function () {\n google.accounts.id.initialize({\n client_id: \"\u003cvar translate=\"no\"\u003eYOUR_GOOGLE_CLIENT_ID\u003c/var\u003e\"\n callback: handleCredentialResponse\n });\n google.accounts.id.renderButton(\n document.getElementById(\"buttonDiv\"),\n { theme: \"outline\", size: \"large\" } // customization attributes\n );\n google.accounts.id.prompt(); // also display the One Tap dialog\n }\n \u003c/script\u003e\n \u003cdiv id=\"buttonDiv\"\u003e\u003c/div\u003e\n \u003c/body\u003e\n \u003c/html\u003e\n\nThe element specified as the first parameter to `renderButton` displays as a\nSign In With Google button. In this example `buttonDiv` is used to render\nthe button on the page. The button is customized using the attributes\nspecified in the second parameter to `renderButton`.\n\nTo minimize user friction `google.accounts.id.prompt()` is called to display\nOne Tap as a second alternative to using the button to sign-up or sign-in.\n\nThe GIS library parses the HTML doc for elements with an ID attribute set to\n`g_id_onload`, or class attributes containing `g_id_signin`. If a matching\nelement is found, the button is rendered using HTML, regardless if you've\nalso rendered the button in JavaScript. To avoid displaying the button\ntwice, possibly with conflicting parameters don't include HTML elements\nmatching these names in your HTML pages.\n| **Warning:** When using the JavaScript API, avoid using `g_id_onload` or `g_id_signin` in your HTML code.\n\n### Button Language\n\nThe button language is automatically determined by the browser's default\nlanguage or the Google session user's preference. You can also choose the\nlanguage manually by adding the `hl` parameter and language code to the src\ndirective when loading the library and by adding the optional data-locale or\nlocale parameter [data-locale](/identity/gsi/web/reference/html-reference#data-locale) in HTML or [locale](/identity/gsi/web/reference/html-reference#data-locale) in JavaScript. \n\n### HTML\n\nThe following code snippet shows how to display the button language in French\nby adding the `hl` parameter to the client library URL and by setting the\n`data-locale` attribute to French: \n\n \u003cscript src=\"https://accounts.google.com/gsi/client?hl=fr\" async\u003e\u003c/script\u003e\n \u003cdiv class=\"g_id_signin\" data-locale=\"fr\"\u003e\n \u003c/div\u003e\n\n### JavaScript\n\nThe following code snippet shows how to display the button language in French\nby adding the `hl` parameter to the client library URL and calling the\n`google.accounts.id.renderButton` method with the `locale` parameter set to\nFrench: \n\n \u003cscript src=\"https://accounts.google.com/gsi/client?hl=fr\" async\u003e\u003c/script\u003e\n \u003cscript\u003e\n google.accounts.id.renderButton(\n document.getElementById(\"buttonDiv\"),\n { locale: \"fr\" }\n );\n \u003c/script\u003e\n\nCredential handling\n-------------------\n\nAfter user consent is given, Google returns a JSON Web Token (JWT) credential\nknown as an ID token to either the user's browser, or directly to a login\nendpoint hosted by your platform.\n\nWhere you choose to receive the JWT depends upon if you render the button using\nHTML or JavaScript and if popup or redirect UX mode is used.\n\n### Popup mode\n\nUsing `popup` UX mode performs the sign-in UX flow in a pop-up window. This is\ngenerally a less intrusive experience for users and is the default UX mode.\n\nWhen rendering the button using: \n\n### HTML\n\nYou can set either:\n\n- `data-callback` to return the JWT to your callback handler, or\n- `data-login_uri` for Google to send the JWT directly to your login endpoint using a [POST request](/identity/gsi/web/reference/html-reference#server-side).\n\nIf both values are set, `data-callback` takes precedence over\n`data-login_uri`. Setting both values may be helpful when using a callback\nhandler for debugging.\n\n### JavaScript\n\nYou must specify a `callback`, popup mode does not support redirects\nwhen rending the button in JavaScript. If set, `login_uri` is ignored.\n\nSee [handle the returned credential response](/identity/gsi/web/guides/handle-credential-responses-js-functions) for more on decoding the\nJWT within your JS callback handler.\n\n### Redirect mode\n\nUsing `redirect` UX mode performs the sign-in UX flow using full page\nredirection of the user's browser, and Google returns the JWT directly to your\nlogin endpoint using a [POST request](/identity/gsi/web/reference/html-reference#server-side).\nThis is generally a more intrusive experience for users, but is considered to\nbe the most secure sign-in method.\n\nWhen rendering the button using:\n\n- **HTML** optionally set `data-login_uri` to the URI of your login endpoint.\n- **JavaScript** optionally set `login_uri` to the URI of your login endpoint.\n\nIf you don't provide a value, Google returns the JWT to the URI of the current\npage.\n\n### Your login endpoint URI\n\nUse HTTPS and an absolute URI when setting `data-login_uri` or `login_uri`.\nFor example, `https://example.com/path`.\n\nHTTP is only allowed when using localhost during development:\n`http://localhost/path`.\n\nRefer to [Use secure JavaScript origins and redirect URIs](/identity/protocols/oauth2/policies#secure-response-handling)\nfor a full description of Google's requirements and validation rules."]]