소개
Google 매시업 에디터 (GME)는 매시업 개발자가 가장 오랫동안 기다려 온 유용한 도구 중 하나입니다. GME는 개발자가 외부 데이터와의 연결을 기반으로 지도, 표, 목록, 기타 요소와 같은 웹페이지의 동적 구성요소를 만들고 수정하는 데 도움이 됩니다. 그런 다음 이러한 요소를 iframe을 사용하여 웹페이지와 블로그에 포함할 수 있습니다.이 튜토리얼에서는 GME로 만든 지도에 KML 파일을 통합하는 방법을 보여줍니다.
Google Mashup Editor에 대한 첫인상
- 대부분의 Google 제품과 마찬가지로 깔끔하고 명확한 인터페이스로 최대한 단순하게 설계되었습니다.
- 코드 예시가 계속 증가하는 컬렉션과 저자의 코드가 포함된 편리한 프로젝트 색인이 있습니다.
- 이를 통해 이미지 파일과 같은 추가 리소스를 프로젝트에 쉽게 저장할 수 있습니다.
- 사용하기 쉬운 XML 디버거가 있습니다.
- 사용하기 쉬운 샘플 애플리케이션이 많이 있습니다.
KML 개발자를 위한 GME
인터넷이 등장하기 전에는 공간 데이터를 공유하기가 어려웠습니다. 하지만 인터넷이 발전하면서 매핑 애플리케이션은 지리 정보 시스템(GIS) 데이터를 전 세계와 쉽게 공유하는 표준 방법이 되었습니다. KML은 간결하고 개발하기 쉬우며 Google 어스 및 Google 지도와 같은 인기 애플리케이션에서 지원되므로 GIS 데이터의 표시 및 교환을 위한 표준이 되고 있습니다.
최근까지 JavaScript를 기반으로 페이지를 만들고 수정하는 과정은 KML 개발자에게 큰 문제였습니다. 매시업을 만들고 디버그하려면 많은 추가 단계가 필요했습니다. GME를 사용하면 몇 가지 기본 구성요소로 KML 기반 매시업을 매우 빠르게 만들 수 있습니다. 생성 프로세스에는 HTML이나 JavaScript에 대한 특별한 지식이 필요하지 않습니다. GME 샘플 프로젝트는 시작하기에 충분한 정보를 제공합니다.
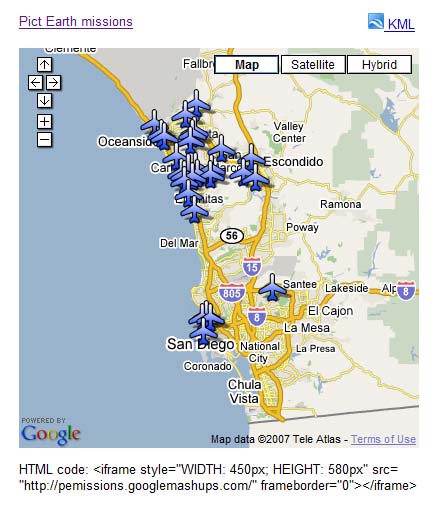
다음 예에서는 Pict Earth USA 비행 중에 촬영한 사진 모음을 가리키는 KML 파일을 사용합니다.
다음은 Pict Earth 지도 매시업의 스냅샷입니다.
Google Maps API를 사용하여 KML 파일을 GME 프로젝트에 통합하는 단계는 다음과 같습니다.
1단계: KML 파일 선택
2단계: 새 GME 프로젝트 만들기
3단계: KML을 추가하는 함수 만들기
4단계: 지도 추가
5단계: 매시업 테스트
6단계: 매시업 게시
7단계: 웹페이지에 매시업 추가
8단계: GME 갤러리에 넣기
1단계: KML 파일 선택
지도에 추가할 KML 파일을 선택합니다. Google 지도에서 지원되는 기능이 있는 모든 항목이 될 수 있습니다. 공개적으로 사용 가능한 서버에서 호스팅되어야 합니다.
2단계: 새 GME 프로젝트 만들기
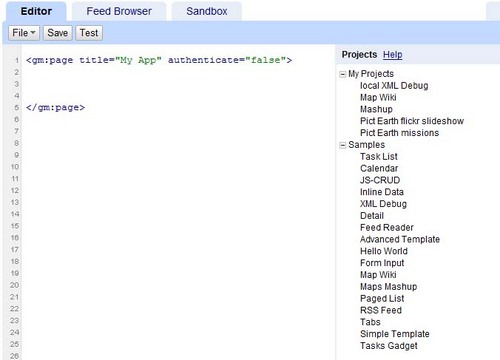
새 빈 GME 프로젝트를 만듭니다.
빈 GME 프로젝트는 다음과 같습니다.
함수의 제목과 이름을 추가합니다.
<gm:page title="Pict Earth missions" authenticate="false" onload="kmlPE()"></gm:page>
3단계: KML을 추가하는 함수 만들기
지도에 추가할 KML 파일의 경로를 사용하여 JavaScript 함수를 만듭니다.
<script>
  function kmlPE()
  {
    <!-- Get map -->
    var myMap = google.mashups.getObjectById('map').getMap();
    <!-- Get KML -->
    var geoXml = new GGeoXml("http://pictearthusa.com/kml/missions.kml");
    <!--Place KML on Map -->
    myMap.addOverlay(geoXml);
    <!--Set zoom on double click -->
    myMap.enableDoubleClickZoom();
  }
</script>
4단계: 지도 추가
지도와 매개변수를 추가합니다.
<gm:map id="map" height="400px" width="400px" lat="32.9393" lng="-117.206" zoom="9" maptypes="true"/>
5단계: 매시업 테스트
테스트 버튼 (F4)을 누릅니다.
샌드박스에서 테스트한 Pict Earth 매시업의 이미지입니다.

이제 애플리케이션의 텍스트를 확인하고 첫 번째 결과를 볼 수 있습니다. 제목과 링크를 추가하고 다시 테스트할 수 있습니다.
6단계: 매시업 게시
프로젝트 이름을 설정한 다음 게시합니다. 이렇게 하면 매시업에 대한 영구 링크가 제공되며, 이 링크를 사용하여 웹페이지에 매시업을 통합할 수 있습니다. 내 예시를 사용하면 GME 프로젝트 홈페이지로 연결되는 링크는 다음과 같습니다. 프로젝트의 소스 코드도 확인할 수 있습니다.
7단계: 웹페이지에 매시업 추가
iframe을 사용하여 웹페이지에 매시업을 추가합니다. 예를 들어 샘플 프로젝트를 삽입하려면 다음을 추가합니다.
<iframe style="WIDTH: 439px; HEIGHT: 491px" src="http://pemissions.googlemashups.com/" frameborder="0"></iframe>
Google 애널리틱스 코드를 프로젝트에 추가하여 페이지를 보는 사용자에 관한 통계를 추적할 수도 있습니다. 다음은 이를 추가하는 간단한 스크립트입니다.
<script src="http://www.google-analytics.com/urchin.js" type="text/javascript"></script>
<script type="text/javascript">uacct = "youraccountnumber";urchinTracker();</script>
8단계: GME 갤러리에 넣기
GME 매시업 갤러리에 매시업을 게시합니다. 이렇게 하면 다른 사용자가 내 매시업을 볼 수 있습니다.
추가 정보:
Google 매시업 편집기 시작 가이드에서 매시업 생성 과정을 자세히 알아보세요. 예와 함께 모든 gm 태그에 대한 간단한 설명이 포함된 태그 목록도 확인하세요.
코드:
다음은 GME에서 Pict Earth KML을 사용하는 전체 코드입니다.
<gm:page title="Pict Earth missions" authenticate="false" onload="kmlPE()>

<!-- Map definition -->
<gm:mapid="map" height="400px" width="400px" lat="32.9393" lng="-117.206" zoom="9" maptypes="true"/>

<script>
  function kmlPE(){

    <!-- Get map -->
    var myMap = google.mashups.getObjectById('map').getMap();

    <!-- Get KML -->
    var geoXml = new GGeoXml("http://pictearthusa.com/kml/missions.kml");

    <!-- Place KML on Map -->
    myMap.addOverlay(geoXml);

    <!-- Set zoom on double click -->
    myMap.enableDoubleClickZoom();
  }
</script>
</gm:page>
다음 단계
매시업을 게시한 후에는 매시업의 KML 파일을 다른 애플리케이션에 포함할 매개변수로 사용하거나 지도에 직접 로드할 수 있습니다. 예를 들어 이 페이지는 다음을 충족해야 합니다.
http://param.googlemashups.com GME 매시업입니다. 다음과 같이 URL에 kml= 을 매개변수로 추가하여 KML 파일을 매시업에 직접 참조할 수 있습니다. http://param.googlemashups.com/?kml=http://mapgadgets.googlepages.com/cta.kml프로젝트에서 가젯을 만들 수도 있습니다. 제출한 후 파일 메뉴로 이동하여 'Submit Gadget'(가젯 제출)을 클릭하고 안내를 따릅니다. 이를 통해 Google 개인 맞춤 홈페이지, 다른 웹페이지에 애플리케이션을 쉽게 추가하고 다른 사용자와 공유할 수 있습니다.