本文面向希望将 Floodlight 代码从跟踪代码管理器网站容器移至服务器容器的开发者。
通过服务器端跟踪代码管理器,您可以将 Google Floodlight 销售和计数器代码从网页移至服务器。将这些代码移至服务器可减少要在网页中运行的代码,并且有助于缩短网页加载时间。
准备工作
在将代码移到服务器之前,请确保您已完成以下操作:
- 拥有对 Google 跟踪代码管理器和 Floodlight 的管理员访问权限
- 设置并安装 Google 跟踪代码管理器
- 设置服务器容器
- 设置 Google Analytics(分析):GA4 客户端
第 1 步:设置转化链接器代码
您的 Floodlight 账号只有在设置了转化链接器代码后,才能将转化数据发送到 Google 跟踪代码管理器。
如果您已在服务器容器中配置了转化链接器代码,则可以跳过此步骤。
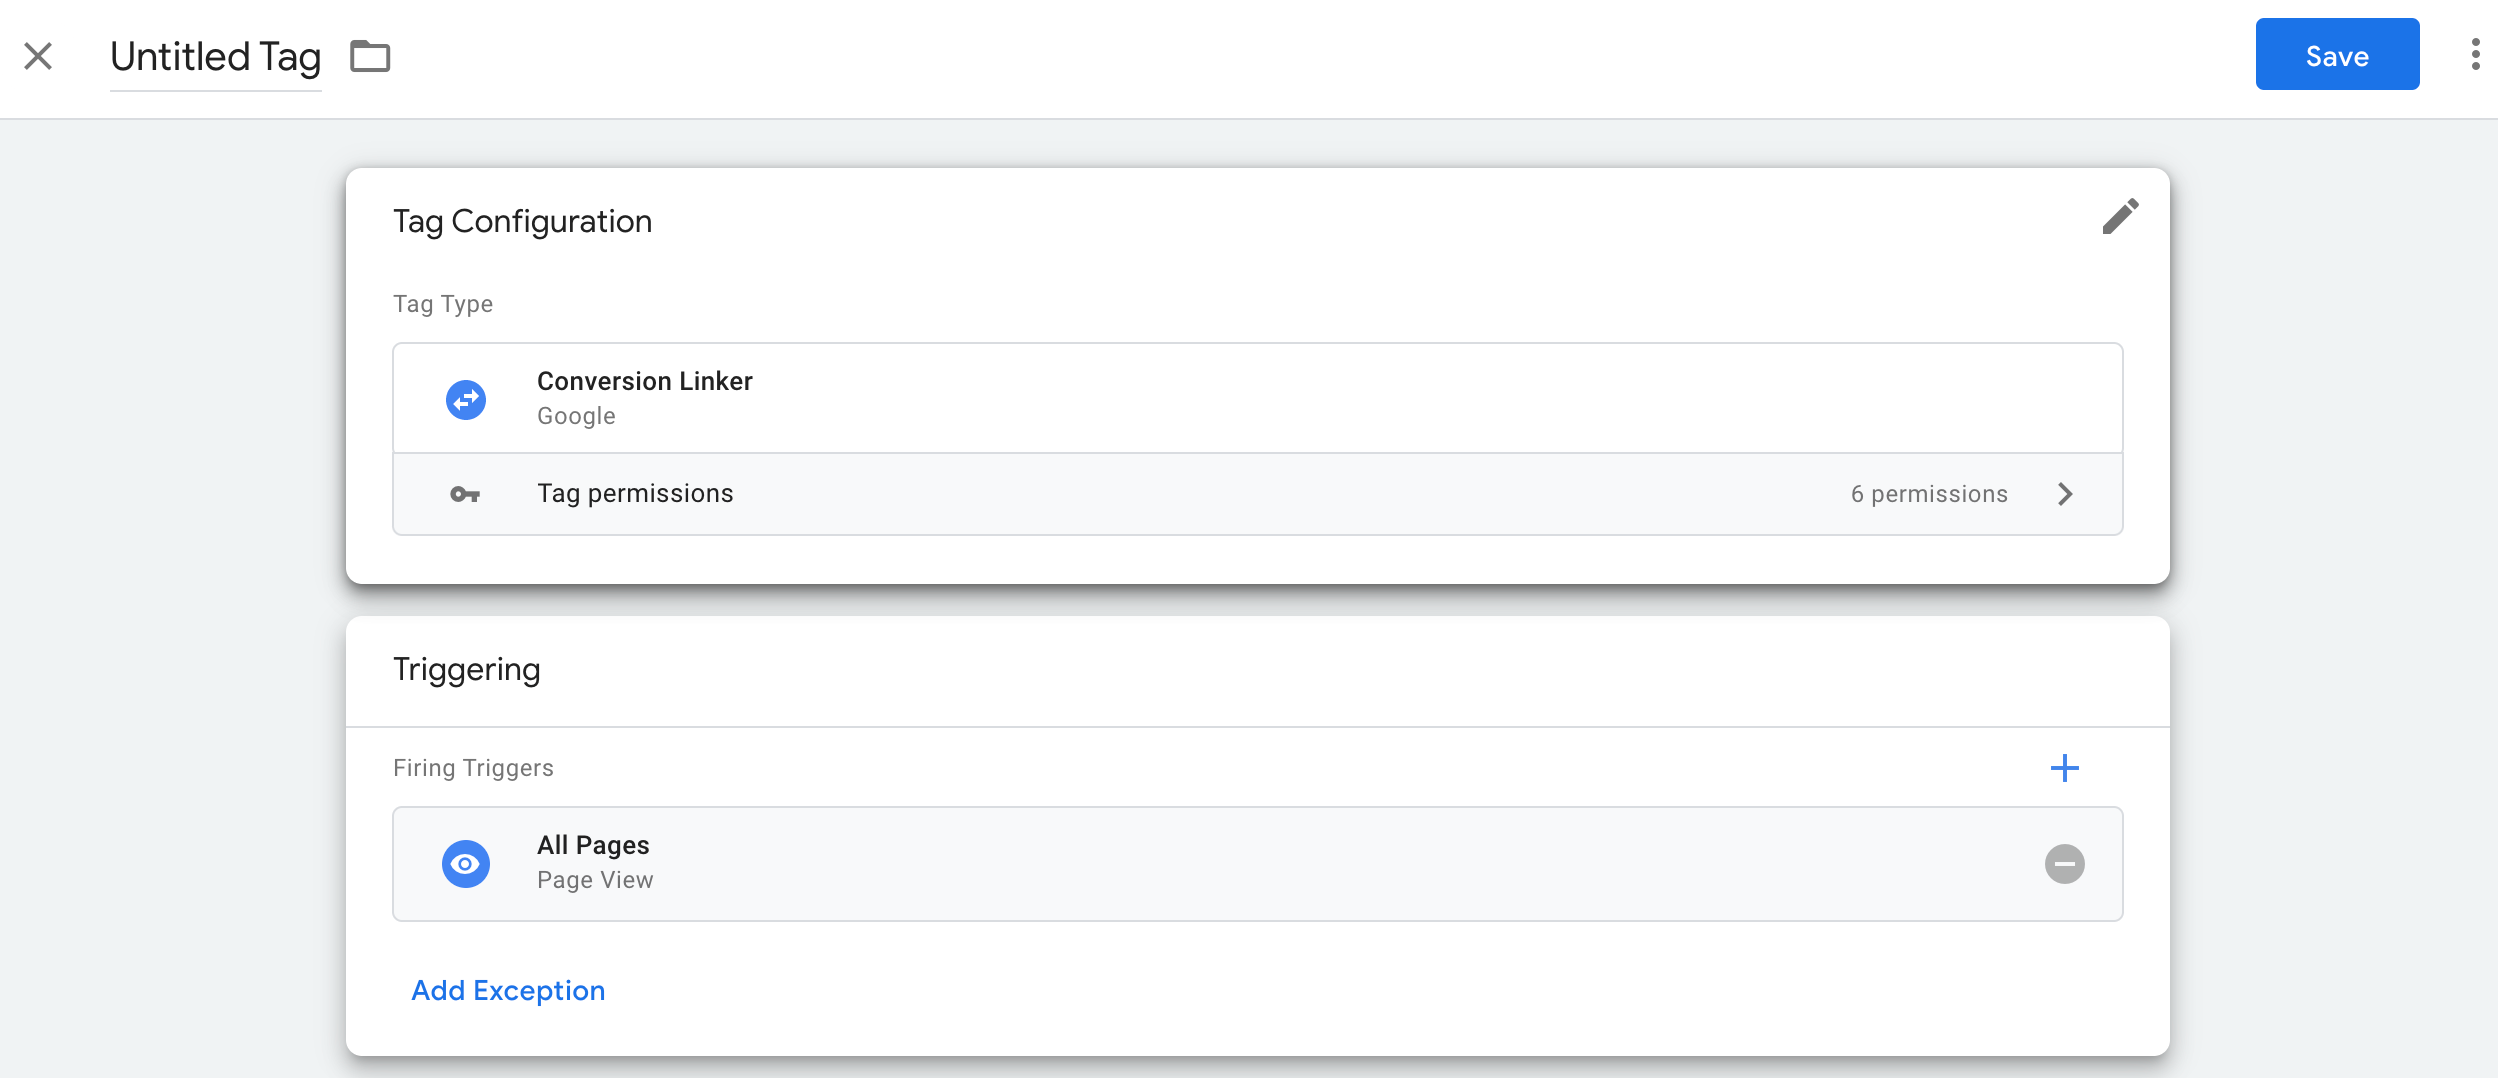
若要设置转化链接器代码,请执行以下操作:
- 在您的服务器容器工作区中,打开页面左侧的代码菜单。
- 点击新建以添加新的代码。
- 选择转化链接器代码类型。
- 设置可触发转化链接器服务器端代码的触发器。
在大多数情况下,所有网页触发器是最佳选项。 - 为代码命名,然后点击保存。
第 2 步:设置 Floodlight 代码
Google 跟踪代码管理器支持服务器容器中的 Floodlight 计数器代码和 Floodlight 销售代码。
Floodlight 计数器
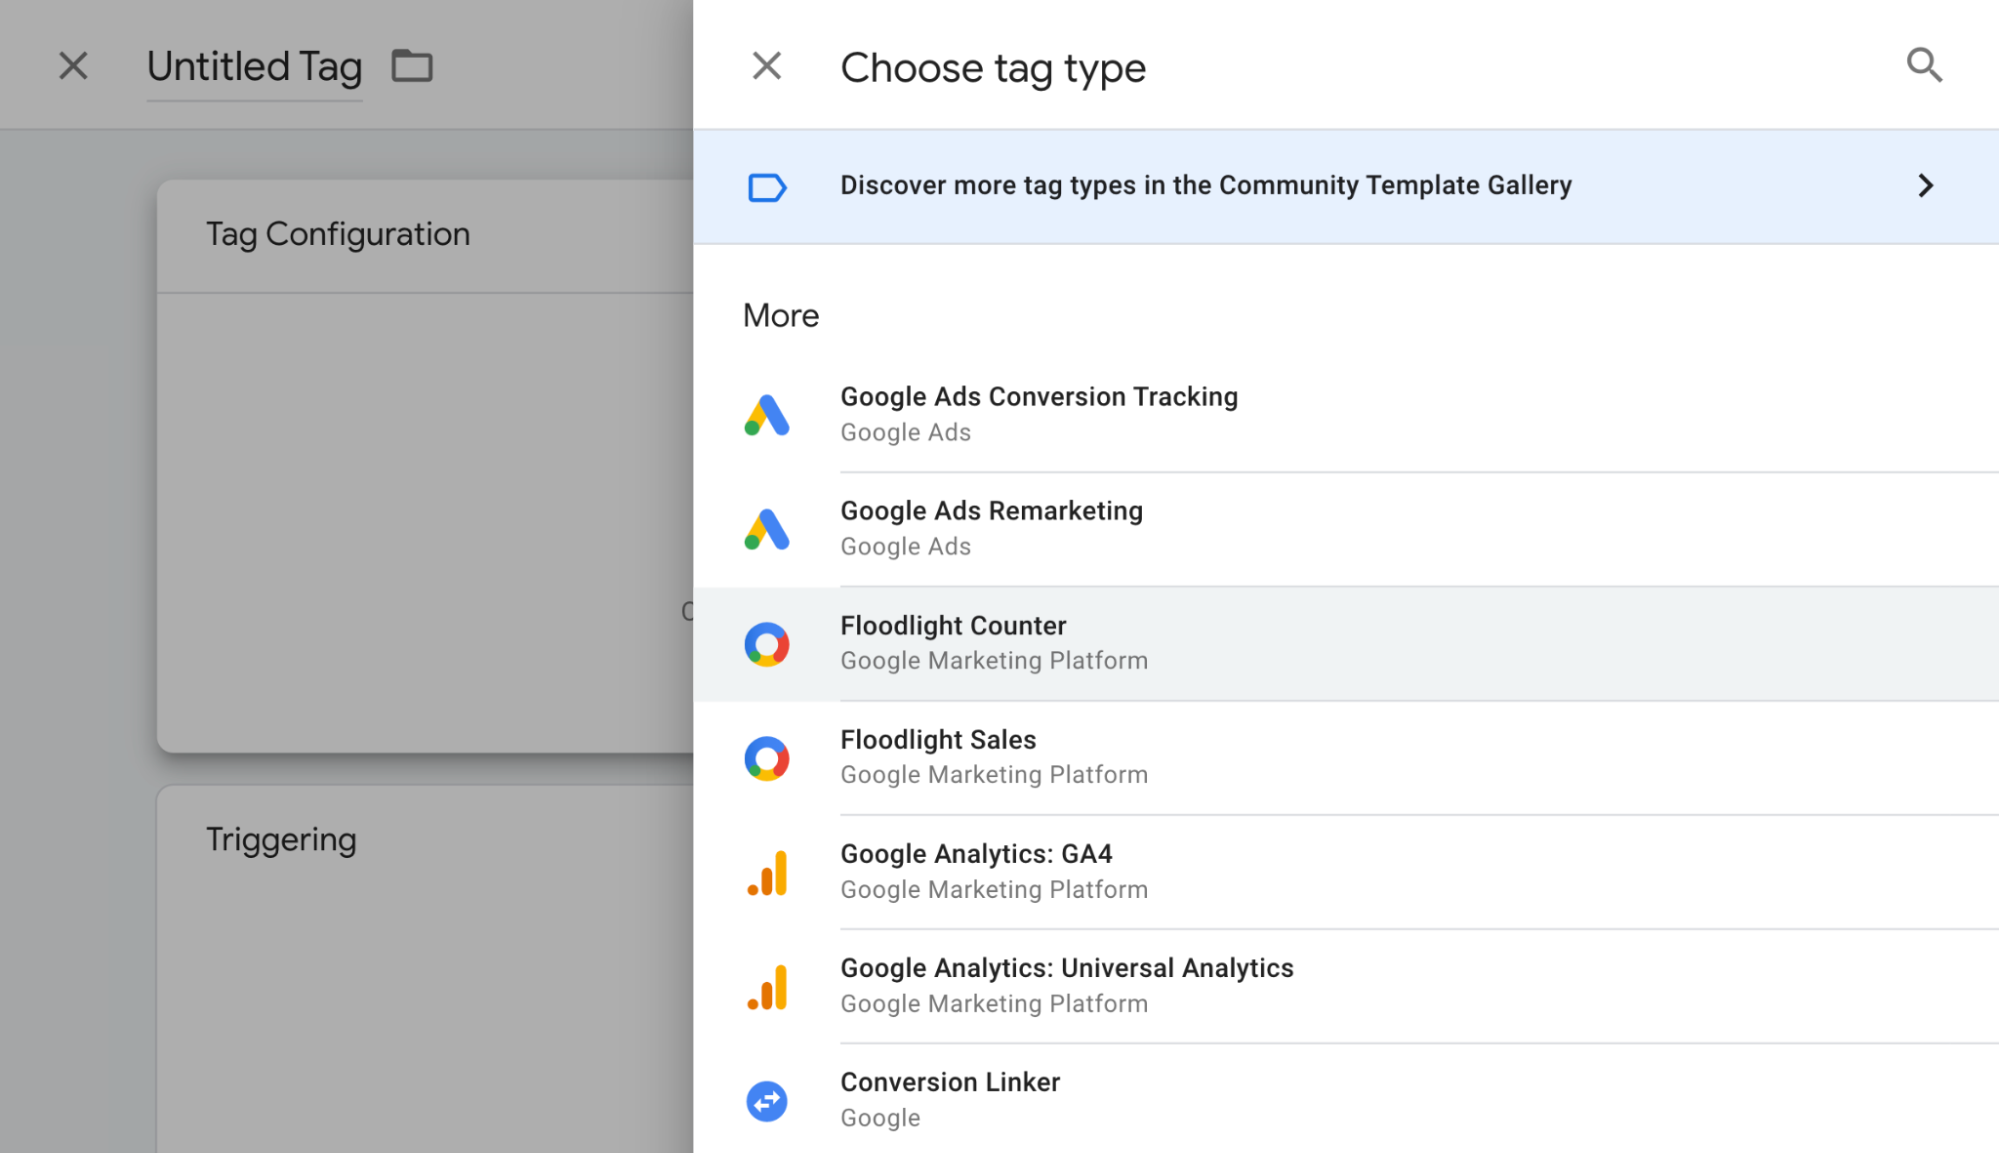
若要设置 Floodlight 计数器代码,请执行以下操作:
- 在您的服务器容器工作区中,选择页面左侧的代码菜单。
- 点击新建以添加新的代码。
选择 Floodlight 计数器代码类型。
若要收集代码配置所需的值,请再打开一个浏览器窗口,然后登录 Campaign Manager 360。点击广告客户,然后点击相应广告客户的名称。在新的跟踪代码管理器 Floodlight 计数器代码中,输入以下值:
- 广告客户 ID:广告客户 ID 显示在广告客户详情页面上广告客户名称的正下方。该值也是生成的 Floodlight 代码段中
src=的值。 - 组代码字符串:在“活动”表格中,找出所需活动,并找到右侧列中所列的组代码字符串。它也是生成的 Floodlight 代码段中
type=的值。 - 活动代码字符串:在“活动”表格中,找出所需活动,并找到右侧列中所列的活动代码字符串。它也是生成的 Floodlight 代码段中
cat=的值。
- 广告客户 ID:广告客户 ID 显示在广告客户详情页面上广告客户名称的正下方。该值也是生成的 Floodlight 代码段中
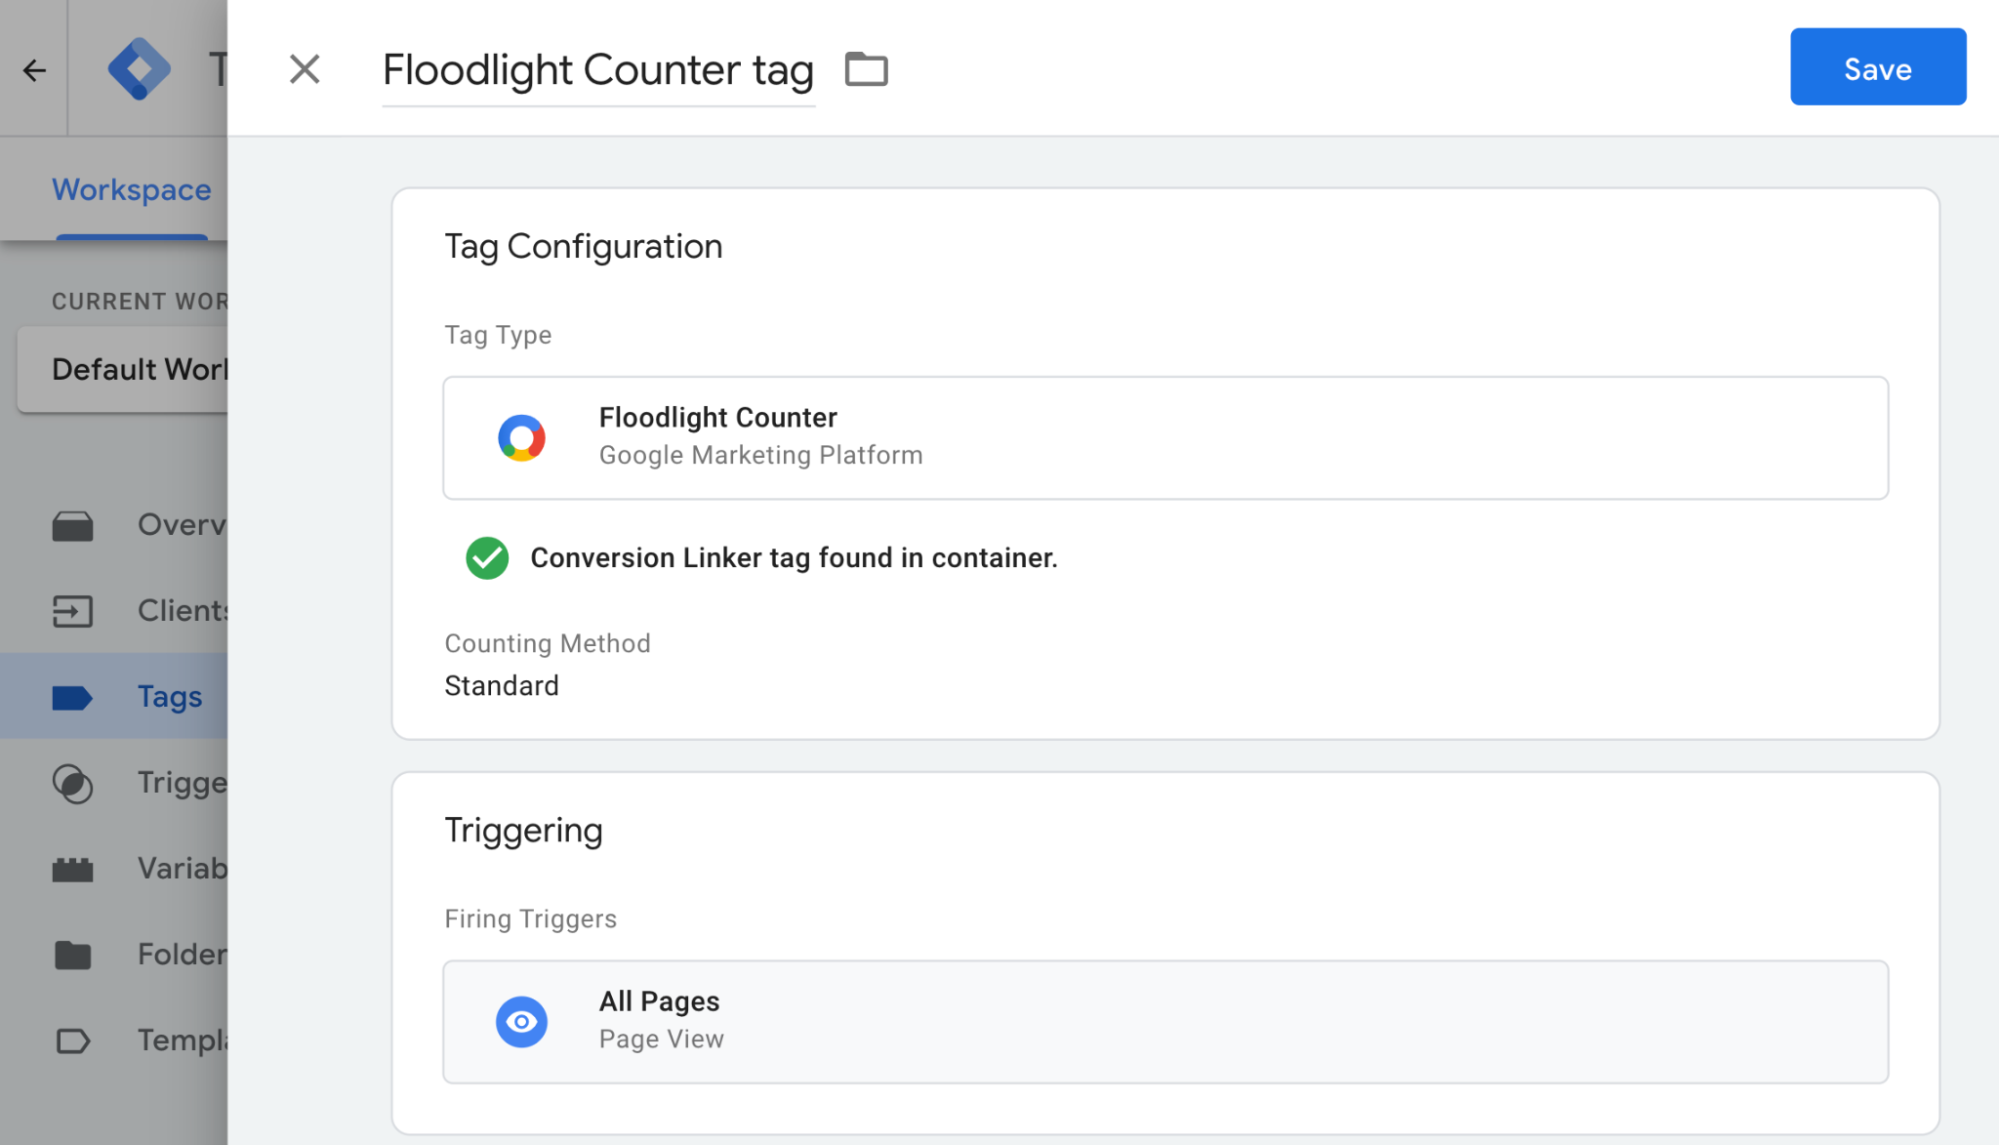
设置所需的统计方法:
- 标准:统计每次转化。
- 唯一:计算每个唯一身份用户在每 24 小时(美国东部时间午夜至次日午夜)内的首次转化。
- 每次会话:将每位用户的每次会话计为一次转化。会话时长取决于部署 Floodlight 代码的网站。
打开选择触发器窗口。
在触发器配置菜单中,选择一个触发器。在大多数情况下,所有网页是最佳选项。

输入代码名称,然后点击保存。
Floodlight 销售
若要设置 Floodlight 销售代码,请执行以下操作:
- 在您的服务器容器工作区中,选择页面左侧的代码菜单。
- 点击新建以添加新的代码。
选择 Floodlight 销售代码类型。注意:Floodlight 销售代码会自动从相应的电子商务字段中收集以下值:
*   Order ID (Transaction ID)
*   Revenue (Value)
若要收集代码配置所需的值,请再打开一个浏览器窗口,然后登录 Campaign Manager 360。点击广告客户,然后点击相应广告客户的名称。在新的跟踪代码管理器 Floodlight 计数器代码中,输入以下值:
- 广告客户 ID:广告客户 ID 显示在广告客户详情页面上广告客户名称的正下方。该值也是生成的 Floodlight 代码段中
src=的值。 - 组代码字符串:在“活动”表格中,找出所需活动,并找到右侧列中所列的组代码字符串。它也是生成的 Floodlight 代码段中
type=的值。 - 活动代码字符串:在“活动”表格中,找出所需活动,并找到右侧列中所列的活动代码字符串。它也是生成的 Floodlight 代码段中
cat=的值。
- 广告客户 ID:广告客户 ID 显示在广告客户详情页面上广告客户名称的正下方。该值也是生成的 Floodlight 代码段中
设置所需的统计方法:
- 标准:统计每次转化。
- 唯一:计算每个唯一身份用户在每 24 小时(美国东部时间午夜至次日午夜)内的首次转化。
- 每次会话:将每位用户的每次会话计为一次转化。会话时长取决于部署 Floodlight 代码的网站。
打开选择触发器窗口。
在触发器配置菜单中,选择一个触发器。在大多数情况下,所有网页是最佳选项。
输入代码名称,然后点击保存。
可选:设置增强型转化
如果您未使用增强型转化,请直接跳到验证您的设置部分。
若要配置增强型转化,请按以下步骤操作。
设置用户提供的数据变量
在跟踪代码管理器中,您可以通过 3 种方式实现增强型转化功能。您只需选择其中一种方式,即可收集用户提供的数据。
| 自动收集 | 手动配置 | 代码配置 | |
|---|---|---|---|
| 收集方法 | 根据您网站的代码自动收集用户提供的数据。 如果您需要控制收集输入数据的位置,请选择手动或代码设置。 |
指定精选的 CSS 属性或 JavaScript 变量,以收集用户提供的数据。 如果您需要控制数据的格式设置和哈希处理,请选择代码配置。 |
在您的网站上添加代码段,用于发送经过哈希处理的客户数据进行匹配。 利用这种方法,您可以在每次触发转化跟踪代码时发送格式一致的数据,从而最大限度地提高增强型转化衡量的准确性。 |
| 复杂性 | 简单 | 中等 | 复杂 |
| 技能 | 无需任何特殊技能 | HTML 和 CSS | Web 开发 |
自动收集
- 在您的网络容器中,打开变量菜单。
- 新建一个类型为用户提供的数据的用户定义的变量。
- 将类型设置为自动收集。
- 为变量命名,例如
My user-defined data。 - 点击保存。
手动配置
- 在您的网络容器中,打开变量菜单。
- 新建一个类型为用户提供的数据的用户定义的变量。
- 将类型设置为手动配置。
对于您希望通过增强型转化提供的相关用户数据字段,请添加新的或现有的变量。
若要指定 DOM 中的某个元素,请依次选择新建变量 > 变量配置 > DOM 元素进行创建。
在选择方法下,您可以使用 CSS 选择器或 ID。提示:如果您的 CSS 变量经常更改,请在网站上添加一个 HTML ID,并使用该 ID 变量。
输入 CSS 选择器或 ID 名称。您可以将“属性名称”字段留空。
为 DOM 元素变量命名并保存。然后,您的屏幕会返回用户提供的数据设置。
为用户提供的数据变量命名,例如
My user-defined data。点击保存。
代码配置
第 1 步:确认并指定增强型转化变量
您可以发送未经过哈希处理的数据(Google 会在数据到达服务器之前对其进行哈希处理),也可以发送预先经过哈希处理的数据。如果您决定发送预先经过哈希处理的数据,请使用十六进制编码 SHA256 对数据进行编码。无论您做何选择,都请至少提供以下其中一个字段:email 或 phone_number。
如需将未经哈希处理的数据推送到数据层,请执行以下操作:
在您的网站上,以键值对的形式将用户提供的数据存储在 JavaScript 变量中。例如:
var leadsUserData = {
  'email': 'name@example.com',
  'phone_number': '+11234567890',
  'address': {
    first_name: 'John',
    last_name: 'Doe',
    street: '123 Lemon',
    city: 'Some city',
    region: 'CA',
    country: 'US',
    postal_code: '12345',
  },
};
使用 dataLayer.push() 随事件一起发送用户数据。例如:
<script>
  dataLayer.push({
    'event': 'formSubmitted',
    'leadsUserData': {
      'email': 'name@example.com',
      'phone_number': '+11234567890',
      'address': {
         first_name: 'John',
         last_name: 'Doe',
         street: '123 Lemon',
         city: 'Some city',
         region: 'CA',
         country: 'US',
        postal_code: '12345',
       },
     },
  });
<script>
变量 leadsUserData 现在可在 Google 跟踪代码管理器中使用。
如需将预先经过哈希处理的数据推送到数据层,请执行以下操作:
在您的网站上,使用十六进制编码 SHA256 对用户提供的数据进行哈希处理。编码后的数据的键必须以
sha256_开头。例如:{'sha256_email_address':await hashEmail(email.trim()), }使用
dataLayer.push()随事件一起发送用户数据。以下示例展示了如何实现数据层,其中假设您自己编写了一个异步运行的哈希函数。<script> dataLayer.push({ 'event': 'formSubmitted', 'leadsUserData': { 'sha256_email_address': await hashEmail(email.trim()), 'sha256_phone_number': await hashPhoneNumber(phoneNumber), 'address': { sha265_first_name: await hashString(firstname), sha256_last_name: await hashString(lastname), sha256_street: await hashString(streetAddress), postal_code: '12345', }, }, }); <script>
变量 leadsUserData 现在可在 Google 跟踪代码管理器中使用。
第 2 步:创建用户提供的数据变量
- 在您的网络容器中,打开变量菜单。
- 新建一个类型为用户提供的数据的用户定义的变量。
- 将类型设置为代码。
- 对于您要提供的相关用户数据字段,请点击下拉菜单,然后选择新建变量。
- 在选择变量类型下,选择数据层变量。
- 在数据层变量中,引用存储的用户数据。例如
leadsUserData。 - 为数据层变量命名并保存。然后,您的屏幕会返回用户提供的数据设置。
- 为用户提供的数据变量命名,例如
My user-defined data。 - 点击保存。
为 Google 代码分配变量
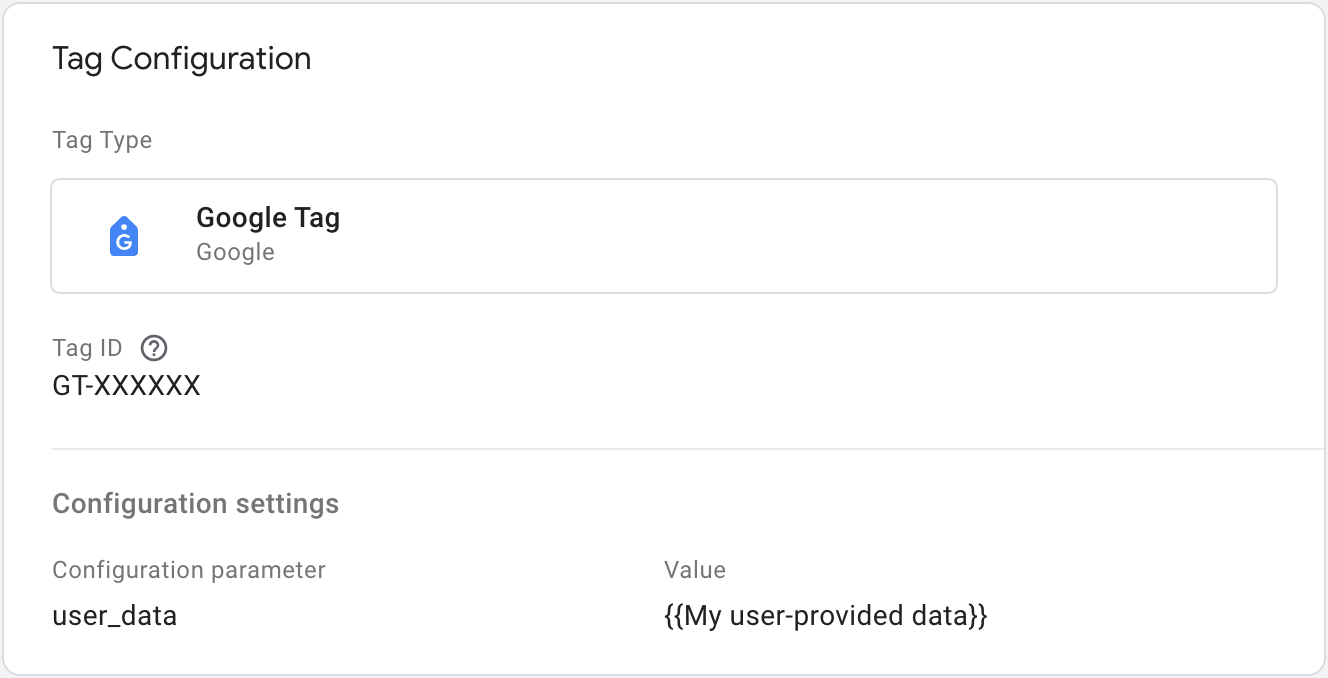
- 在您的网络容器中,打开代码菜单。
- 修改您用于将数据发送到代码植入服务器的 Google 代码。
- 在配置设置下,添加名为
user_data的新配置参数。将值设置为用户提供的数据变量,例如{{My user-provided data}}。 保存您所做的更改。您的代码应如下所示:
配置服务器端 Floodlight 代码
在服务器容器中,在 Floodlight 销售代码或 Floodlight 计数器代码中启用增强型转化。
- 选中包括用户提供的数据复选框。

- 按保存以保存您所做的更改。
可选:收入值
Floodlight 销售代码会将事件的 value 参数用作默认金额,以此计算收入。如需指定用于计算收入值的其他依据,您需要设置一个变量,以从数据库中提取数据并将其分配给您的 Floodlight 销售代码。
若要创建新变量,请执行以下操作:
- 在服务器容器中,打开变量菜单。
- 为数据输入创建一个用户定义的新变量。例如,如果您要使用 Firestore 数据库中的值,请创建一个 {{Firestore Lookup}} 变量。
- 为变量指定数据源。
- 为变量命名,例如“Profit lookup”,然后保存。
要在 Floodlight 销售代码中使用该变量,请执行以下操作:
- 在服务器容器中,打开代码菜单。
- 修改 Floodlight 销售代码。
在唯一参数部分执行以下操作:
- 对于数据源,选择自定义配置。
- 对于收入,选择您之前创建的变量。
- 对于订单 ID,输入 ID 或使用变量动态填充订单 ID。
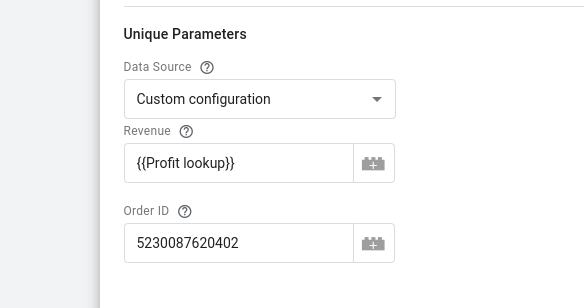
保存代码。
可选:自定义参数
您可以将自定义字段(例如 match_id)从您的网页传递到 Google Marketing Platform。
Google 跟踪代码管理器
若要针对 Floodlight 配置自定义字段,请将 x-dc- 附加到参数名称的前面:
- 在您的网络容器中,打开代码菜单。
- 修改 GA4 事件代码或创建新的事件代码。
在事件参数中,添加参数名称。为了指明参数会传递到 Floodlight,请在其名称前面附加
x-dc-。例如,如果您通常发送的是match_id,请将其更改为x-dc-match_id。
保存代码。
gtag.js
若要针对 Floodlight 配置自定义字段,请将 x-dc- 附加到事件参数名称的前面:
  gtag('event', 'purchase', {
      'x-dc-match_id': [MATCH_ID],
      ...
  })
第 3 步:验证设置
开始使用服务器容器发送数据后,您可以按照以下步骤查看再营销是否正常运作:
- 打开您的网站。
- 在您的 Google 跟踪代码管理器服务器容器中,选择预览。Tag Assistant 将会启动并加载您的服务器容器。
- 代码标签页上会显示触发的所有代码。请务必检查您配置的代码是否成功触发。
- 控制台标签页上会显示数据传输到服务器容器期间发生的所有错误。检查是否存在错误并修正这些错误。
如需获取调试跟踪代码管理器容器方面的帮助,请参阅“预览和调试”帮助。
后续步骤
当您的 Floodlight 代码按预期运行后,您就可以移除网络容器中任何相同的 Floodlight 代码,以避免数据重复。