
เอกสารนี้อธิบายวิธีใช้ตัวแฮนเดิลการเรียกกลับการให้สิทธิ์ OAuth 2.0 โดยใช้ Java Servlet ผ่านเว็บแอปพลิเคชันตัวอย่างที่แสดง งานของผู้ใช้โดยใช้ Google Tasks API แอปพลิเคชันตัวอย่างจะขอสิทธิ์เข้าถึง Google Tasks ของผู้ใช้ก่อน แล้วจึงแสดงงานของผู้ใช้ในรายการงานเริ่มต้น
กลุ่มเป้าหมาย
เอกสารนี้จัดทำขึ้นสำหรับผู้ที่คุ้นเคยกับสถาปัตยกรรมเว็บแอปพลิเคชัน Java และ J2EE ขอแนะนำให้มีความรู้เกี่ยวกับขั้นตอนการให้สิทธิ์ OAuth 2.0
เนื้อหา
หากต้องการให้ตัวอย่างทำงานได้อย่างสมบูรณ์ คุณต้องทำตามขั้นตอนต่อไปนี้
- ประกาศการแมปเซอร์วิลิตในไฟล์ web.xml
- ตรวจสอบสิทธิ์ผู้ใช้ในระบบและขอ สิทธิ์เข้าถึง Tasks ของผู้ใช้
- ฟังรหัสการให้สิทธิ์จากปลายทางการให้สิทธิ์ของ Google
- แลกรหัสการให้สิทธิ์กับโทเค็นเพื่อการรีเฟรชและ โทเค็นเพื่อการเข้าถึง
- อ่านงานของผู้ใช้และแสดงงาน
ประกาศการแมปเซอร์วิลิตในไฟล์ web.xml
แอปพลิเคชันนี้ใช้เซอร์วิลิต 2 รายการต่อไปนี้
- PrintTasksTitlesServlet (แมปกับ
/): จุดแรกเข้าของแอปพลิเคชันที่จะจัดการ การตรวจสอบสิทธิ์ของผู้ใช้ และจะแสดงงานของผู้ใช้ - OAuthCodeCallbackHandlerServlet (แมปกับ
/oauth2callback): การเรียกกลับของ OAuth 2.0 ซึ่งจัดการ การตอบกลับจากปลายทางการให้สิทธิ์ OAuth
ไฟล์ web.xml ต่อไปนี้จะแมป 2 เซอร์วิลิตนี้กับ URL ในแอปพลิเคชัน ของเรา
<?xml version="1.0" encoding="UTF-8"?>
<web-app version="2.5" xmlns="http://java.sun.com/xml/ns/javaee"
    xmlns:xsi="http://www.w3.org/2001/XMLSchema-instance"
    xsi:schemaLocation="http://java.sun.com/xml/ns/javaee http://java.sun.com/xml/ns/javaee/web-app_2_5.xsd">

 <servlet>
   <servlet-name>PrintTasksTitles</servlet-name>
   <servlet-class>com.google.oauthsample.PrintTasksTitlesServlet</servlet-class>
 </servlet>

 <servlet-mapping>
   <servlet-name>PrintTasksTitles</servlet-name>
   <url-pattern>/</url-pattern>
 </servlet-mapping>

 <servlet>
   <servlet-name>OAuthCodeCallbackHandlerServlet</servlet-name>
   <servlet-class>com.google.oauthsample.OAuthCodeCallbackHandlerServlet</servlet-class>
 </servlet>

 <servlet-mapping>
   <servlet-name>OAuthCodeCallbackHandlerServlet</servlet-name>
   <url-pattern>/oauth2callback</url-pattern>
 </servlet-mapping>

</web-app>ตรวจสอบสิทธิ์ผู้ใช้ในระบบและขอสิทธิ์ เพื่อเข้าถึงงานของผู้ใช้
ผู้ใช้เข้าสู่แอปพลิเคชันผ่าน URL รูท "/" ที่แมปกับPrintTaskListsTitlesServlet เซอร์วิเล็ต ในเซอร์วิเล็ตนั้น
จะมีการดำเนินการต่อไปนี้
- ตรวจสอบว่าผู้ใช้ได้รับการตรวจสอบสิทธิ์ในระบบหรือไม่
- หากผู้ใช้ไม่ได้รับการตรวจสอบสิทธิ์ ระบบจะเปลี่ยนเส้นทางผู้ใช้ไปยัง หน้าการตรวจสอบสิทธิ์
- หากผู้ใช้ได้รับการตรวจสอบสิทธิ์ ระบบจะตรวจสอบโทเค็นการรีเฟรช
ที่อยู่ในที่เก็บข้อมูลแล้ว ซึ่งจัดการโดย
OAuthTokenDaoด้านล่าง หากไม่มีโทเค็นใน ที่เก็บข้อมูลสำหรับผู้ใช้ แสดงว่าผู้ใช้ยังไม่ได้ให้สิทธิ์แอปพลิเคชัน ในการเข้าถึงงานของตน จากนั้นระบบจะเปลี่ยนเส้นทางผู้ใช้ไปยังปลายทางการให้สิทธิ์ OAuth 2.0 ของ Google
ต่อไปนี้เป็นวิธีติดตั้งใช้งาน
package com.google.oauthsample;

import ...

/**
 * Simple sample Servlet which will display the tasks in the default task list of the user.
 */
@SuppressWarnings("serial")
public class PrintTasksTitlesServlet extends HttpServlet {

  /**
   * The OAuth Token DAO implementation, used to persist the OAuth refresh token.
   * Consider injecting it instead of using a static initialization. Additionally, a
   * simple memory implementation is used as a mock. Change the implementation to
   * using the user's own user/login implementation.
   */
  public static OAuthTokenDao oauthTokenDao = new OAuthTokenDaoMemoryImpl();

  public void doGet(HttpServletRequest req, HttpServletResponse resp) throws IOException {
    // Getting the current user
    // This is using App Engine's User Service but you should replace this to
    // your own user/login implementation
    UserService userService = UserServiceFactory.getUserService();
    User user = userService.getCurrentUser();

    // If the user is not logged-in it is redirected to the login service, then back to this page
    if (user == null) {
      resp.sendRedirect(userService.createLoginURL(getFullRequestUrl(req)));
      return;
    }

    // Checking if we already have tokens for this user in store
    AccessTokenResponse accessTokenResponse = oauthTokenDao.getKeys(user.getEmail());

    // If tokens are not available for this user
    if (accessTokenResponse == null) {
      OAuthProperties oauthProperties = new OAuthProperties();
      // Redirects to the Google OAuth 2.0 authorization endpoint
      resp.sendRedirect(new GoogleAuthorizationRequestUrl(oauthProperties.getClientId(),
          OAuthCodeCallbackHandlerServlet.getOAuthCodeCallbackHandlerUrl(req), oauthProperties
              .getScopesAsString()).build());
      return;
    }
  }

  /**
   * Construct the request's URL without the parameter part.
   *
   * @param req the HttpRequest object
   * @return The constructed request's URL
   */
  public static String getFullRequestUrl(HttpServletRequest req) {
    String scheme = req.getScheme() + "://";
    String serverName = req.getServerName();
    String serverPort = (req.getServerPort() == 80) ? "" : ":" + req.getServerPort();
    String contextPath = req.getContextPath();
    String servletPath = req.getServletPath();
    String pathInfo = (req.getPathInfo() == null) ? "" : req.getPathInfo();
    String queryString = (req.getQueryString() == null) ? "" : "?" + req.getQueryString();
    return scheme + serverName + serverPort + contextPath + servletPath + pathInfo + queryString;
  }
}
หมายเหตุ: การติดตั้งใช้งานก่อนหน้านี้ใช้ไลบรารี App Engine บางรายการ เราใช้คำเหล่านี้
เพื่อความสะดวกในการอธิบาย หากคุณกำลังพัฒนาแอปสำหรับแพลตฟอร์มอื่น
ให้ติดตั้งใช้งานอินเทอร์เฟซ UserService
อีกครั้งซึ่งจะจัดการการตรวจสอบสิทธิ์ผู้ใช้
แอปพลิเคชันใช้ DAO เพื่อจัดเก็บและเข้าถึงโทเค็นการให้สิทธิ์ของผู้ใช้
OAuthTokenDaoอินเทอร์เฟซและการติดตั้งใช้งานจำลอง (ในหน่วยความจำ)
- OAuthTokenDaoMemoryImpl - ที่ใช้ในตัวอย่างนี้
แสดงอยู่ในตัวอย่างต่อไปนี้
package com.google.oauthsample;

import com.google.api.client.auth.oauth2.draft10.AccessTokenResponse;

/**
 * Allows easy storage and access of authorization tokens.
 */
public interface OAuthTokenDao {

  /**
   * Stores the given AccessTokenResponse using the {@code username}, the OAuth
   * {@code clientID} and the tokens scopes as keys.
   *
   * @param tokens The AccessTokenResponse to store
   * @param userName The userName associated wit the token
   */
  public void saveKeys(AccessTokenResponse tokens, String userName);

  /**
   * Returns the AccessTokenResponse stored for the given username, clientId and
   * scopes. Returns {@code null} if there is no AccessTokenResponse for this
   * user and scopes.
   *
   * @param userName The username of which to get the stored AccessTokenResponse
   * @return The AccessTokenResponse of the given username
   */
  public AccessTokenResponse getKeys(String userName);
}
package com.google.oauthsample;

import com.google.api.client.auth.oauth2.draft10.AccessTokenResponse;
...

/**
 * Quick and Dirty memory implementation of {@link OAuthTokenDao} based on
 * HashMaps.
 */
public class OAuthTokenDaoMemoryImpl implements OAuthTokenDao {

  /** Object where all the Tokens will be stored */
  private static Map<String, AccessTokenResponse> tokenPersistance = new HashMap<String, AccessTokenResponse>();

  public void saveKeys(AccessTokenResponse tokens, String userName) {
    tokenPersistance.put(userName, tokens);
  }

  public AccessTokenResponse getKeys(String userName) {
    return tokenPersistance.get(userName);
  }
}
ระบบจะจัดเก็บข้อมูลเข้าสู่ระบบ OAuth 2.0 สำหรับแอปพลิเคชันไว้ในไฟล์พร็อพเพอร์ตี้
หรือจะจัดเก็บเป็นค่าคงที่ไว้ที่ใดที่หนึ่งในคลาส Java ก็ได้
ต่อไปนี้คือคลาส OAuthProperties และไฟล์ oauth.properties
ที่ใช้ในตัวอย่าง
package com.google.oauthsample;

import ...

/**
 * Object representation of an OAuth properties file.
 */
public class OAuthProperties {

  public static final String DEFAULT_OAUTH_PROPERTIES_FILE_NAME = "oauth.properties";

  /** The OAuth 2.0 Client ID */
  private String clientId;

  /** The OAuth 2.0 Client Secret */
  private String clientSecret;

  /** The Google APIs scopes to access */
  private String scopes;

  /**
   * Instantiates a new OauthProperties object reading its values from the
   * {@code OAUTH_PROPERTIES_FILE_NAME} properties file.
   *
   * @throws IOException IF there is an issue reading the {@code propertiesFile}
   * @throws OauthPropertiesFormatException If the given {@code propertiesFile}
   *           is not of the right format (does not contains the keys {@code
   *           clientId}, {@code clientSecret} and {@code scopes})
   */
  public OAuthProperties() throws IOException {
    this(OAuthProperties.class.getResourceAsStream(DEFAULT_OAUTH_PROPERTIES_FILE_NAME));
  }

  /**
   * Instantiates a new OAuthProperties object, reading its values from the given
   * properties file.
   *
   * @param propertiesFile the InputStream to read an OAuth Properties file. The
   *          file should contain the keys {@code clientId}, {@code
   *          clientSecret} and {@code scopes}
   * @throws IOException if there is an issue reading the {@code propertiesFile}
   * @throws OAuthPropertiesFormatException If the given {@code propertiesFile}
   *           is not in the correct format (does not contain the keys {@code
   *           clientId}, {@code clientSecret} and {@code scopes})
   */
  public OAuthProperties(InputStream propertiesFile) throws IOException {
    Properties oauthProperties = new Properties();
    oauthProperties.load(propertiesFile);
    clientId = oauthProperties.getProperty("clientId");
    clientSecret = oauthProperties.getProperty("clientSecret");
    scopes = oauthProperties.getProperty("scopes");
    if ((clientId == null) || (clientSecret == null) || (scopes == null)) {
      throw new OAuthPropertiesFormatException();
    }
  }

  /**
   * @return the clientId
   */
  public String getClientId() {
    return clientId;
  }

  /**
   * @return the clientSecret
   */
  public String getClientSecret() {
    return clientSecret;
  }

  /**
   * @return the scopes
   */
  public String getScopesAsString() {
    return scopes;
  }

  /**
   * Thrown when the OAuth properties file was not at the right format, i.e not
   * having the right properties names.
   */
  @SuppressWarnings("serial")
  public class OAuthPropertiesFormatException extends RuntimeException {
  }
}
ไฟล์ oauth.properties ซึ่งมีข้อมูลเข้าสู่ระบบ OAuth 2.0 สำหรับแอปพลิเคชันของคุณจะแสดงในตัวอย่างต่อไปนี้
คุณต้องเปลี่ยนค่าในไฟล์นี้
# Client ID and secret. They can be found in the APIs console.
clientId=1234567890.apps.googleusercontent.com
clientSecret=aBcDeFgHiJkLmNoPqRsTuVwXyZ
# API scopes. Space separated.
scopes=https://www.googleapis.com/auth/tasks
รหัสไคลเอ็นต์และรหัสลับไคลเอ็นต์ OAuth 2.0 จะระบุแอปพลิเคชันและอนุญาตให้ Tasks API ใช้ตัวกรองและกฎโควต้าที่กำหนดไว้สำหรับแอปพลิเคชัน คุณจะดูรหัสไคลเอ็นต์และรหัสลับได้ในคอนโซล Google APIs เมื่อเข้าสู่คอนโซลแล้ว ผู้ใช้ต้องทำดังนี้
- สร้างหรือเลือกโปรเจ็กต์
- เปิดใช้ Tasks API โดยตั้งค่าสถานะ Tasks API เป็นเปิดในรายการบริการ
- ในส่วนการเข้าถึง API ให้สร้าง Client ID ของ OAuth 2.0 หากยังไม่ได้สร้าง
- ตรวจสอบว่า URL ตัวแฮนเดิลการเรียกกลับของโค้ด OAuth 2.0 ของโปรเจ็กต์
ได้รับการลงทะเบียน/อยู่ในรายการที่อนุญาตใน URI การเปลี่ยนเส้นทาง ตัวอย่างเช่น ในโปรเจ็กต์ตัวอย่างนี้ ผู้ใช้จะต้องลงทะเบียน
https://www.example.com/oauth2callbackหากเว็บแอปพลิเคชันแสดงจากโดเมนhttps://www.example.com

จัดการรหัสการให้สิทธิ์จากปลายทางการให้สิทธิ์ของ Google
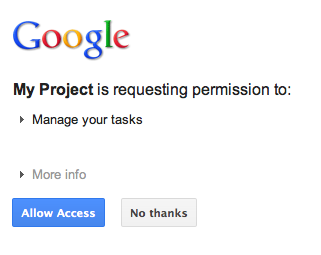
ในกรณีที่ผู้ใช้ยังไม่ได้ให้สิทธิ์แอปพลิเคชันเข้าถึงงานของตน และระบบจึงเปลี่ยนเส้นทางผู้ใช้ไปยังปลายทางการให้สิทธิ์ OAuth 2.0 ของ Google ผู้ใช้จะเห็นกล่องโต้ตอบการให้สิทธิ์จาก Google ซึ่งแจ้งให้ผู้ใช้ให้สิทธิ์แอปพลิเคชันเข้าถึงงานของตน
หลังจากให้หรือปฏิเสธการเข้าถึง ระบบจะเปลี่ยนเส้นทางผู้ใช้กลับไปยังตัวแฮนเดิลการเรียกกลับของโค้ด OAuth 2.0 ที่ระบุเป็นตัวเปลี่ยนเส้นทาง/การเรียกกลับเมื่อ สร้าง URL การให้สิทธิ์ของ Google
new GoogleAuthorizationRequestUrl(oauthProperties.getClientId(),
      OAuthCodeCallbackHandlerServlet.getOAuthCodeCallbackHandlerUrl(req), oauthProperties
          .getScopesAsString()).build()
ตัวแฮนเดิลการเรียกกลับของโค้ด OAuth 2.0 - OAuthCodeCallbackHandlerServlet - จัดการการเปลี่ยนเส้นทางจากปลายทาง Google OAuth 2.0 มี 2 กรณีที่ต้องจัดการ ได้แก่
- ผู้ใช้ได้ให้สิทธิ์เข้าถึงแล้ว ระบบจะแยกวิเคราะห์คำขอเพื่อรับรหัส OAuth 2.0 จากพารามิเตอร์ URL
- ผู้ใช้ปฏิเสธการเข้าถึง: ระบบจะแสดงข้อความต่อผู้ใช้
package com.google.oauthsample;

import ...

/**
 * Servlet handling the OAuth callback from the authentication service. We are
 * retrieving the OAuth code, then exchanging it for a refresh and an access
 * token and saving it.
 */
@SuppressWarnings("serial")
public class OAuthCodeCallbackHandlerServlet extends HttpServlet {

  /** The name of the Oauth code URL parameter */
  public static final String CODE_URL_PARAM_NAME = "code";

  /** The name of the OAuth error URL parameter */
  public static final String ERROR_URL_PARAM_NAME = "error";

  /** The URL suffix of the servlet */
  public static final String URL_MAPPING = "/oauth2callback";

  public void doGet(HttpServletRequest req, HttpServletResponse resp) throws IOException {
    // Getting the "error" URL parameter
    String[] error = req.getParameterValues(ERROR_URL_PARAM_NAME);

    // Checking if there was an error such as the user denied access
    if (error != null && error.length > 0) {
      resp.sendError(HttpServletResponse.SC_NOT_ACCEPTABLE, "There was an error: \""+error[0]+"\".");
      return;
    }
    // Getting the "code" URL parameter
    String[] code = req.getParameterValues(CODE_URL_PARAM_NAME);

    // Checking conditions on the "code" URL parameter
    if (code == null || code.length == 0) {
      resp.sendError(HttpServletResponse.SC_BAD_REQUEST, "The \"code\" URL parameter is missing");
      return;
    }
  }

  /**
   * Construct the OAuth code callback handler URL.
   *
   * @param req the HttpRequest object
   * @return The constructed request's URL
   */
  public static String getOAuthCodeCallbackHandlerUrl(HttpServletRequest req) {
    String scheme = req.getScheme() + "://";
    String serverName = req.getServerName();
    String serverPort = (req.getServerPort() == 80) ? "" : ":" + req.getServerPort();
    String contextPath = req.getContextPath();
    String servletPath = URL_MAPPING;
    String pathInfo = (req.getPathInfo() == null) ? "" : req.getPathInfo();
    return scheme + serverName + serverPort + contextPath + servletPath + pathInfo;
  }
}
แลกรหัสการให้สิทธิ์กับโทเค็นสำหรับรีเฟรชและโทเค็นเพื่อการเข้าถึง
จากนั้น OAuthCodeCallbackHandlerServlet จะแลกรหัส Auth 2.0
เป็นโทเค็นการรีเฟรชและโทเค็นการเข้าถึง จัดเก็บไว้ใน Datastore และเปลี่ยนเส้นทางผู้ใช้กลับไปยัง URL ของ PrintTaskListsTitlesServlet
ระบบจะไฮไลต์โค้ดที่เพิ่มลงในไฟล์
package com.google.oauthsample;

import ...

/**
 * Servlet handling the OAuth callback from the authentication service. We are
 * retrieving the OAuth code, then exchanging it for a refresh and an access
 * token and saving it.
 */
@SuppressWarnings("serial")
public class OAuthCodeCallbackHandlerServlet extends HttpServlet {

  /** The name of the Oauth code URL parameter */
  public static final String CODE_URL_PARAM_NAME = "code";

  /** The name of the OAuth error URL parameter */
  public static final String ERROR_URL_PARAM_NAME = "error";

  /** The URL suffix of the servlet */
  public static final String URL_MAPPING = "/oauth2callback";
  /** The URL to redirect the user to after handling the callback. Consider
   * saving this in a cookie before redirecting users to the Google
   * authorization URL if you have multiple possible URL to redirect people to. */
  public static final String REDIRECT_URL = "/";

  /** The OAuth Token DAO implementation. Consider injecting it instead of using
   * a static initialization. Also we are using a simple memory implementation
   * as a mock. Change the implementation to using your database system. */
  public static OAuthTokenDao oauthTokenDao = new OAuthTokenDaoMemoryImpl();

  public void doGet(HttpServletRequest req, HttpServletResponse resp) throws IOException {
    // Getting the "error" URL parameter
    String[] error = req.getParameterValues(ERROR_URL_PARAM_NAME);

    // Checking if there was an error such as the user denied access
    if (error != null && error.length > 0) {
      resp.sendError(HttpServletResponse.SC_NOT_ACCEPTABLE, "There was an error: \""+error[0]+"\".");
      return;
    }

    // Getting the "code" URL parameter
    String[] code = req.getParameterValues(CODE_URL_PARAM_NAME);

    // Checking conditions on the "code" URL parameter
    if (code == null || code.length == 0) {
      resp.sendError(HttpServletResponse.SC_BAD_REQUEST, "The \"code\" URL parameter is missing");
      return;
    }
    // Construct incoming request URL
    String requestUrl = getOAuthCodeCallbackHandlerUrl(req);

    // Exchange the code for OAuth tokens
    AccessTokenResponse accessTokenResponse = exchangeCodeForAccessAndRefreshTokens(code[0],
        requestUrl);

    // Getting the current user
    // This is using App Engine's User Service, but the user should replace this
    // with their own user/login implementation
    UserService userService = UserServiceFactory.getUserService();
    String email = userService.getCurrentUser().getEmail();

    // Save the tokens
    oauthTokenDao.saveKeys(accessTokenResponse, email);

    resp.sendRedirect(REDIRECT_URL);
  }

  /**
   * Construct the OAuth code callback handler URL.
   *
   * @param req the HttpRequest object
   * @return The constructed request's URL
   */
  public static String getOAuthCodeCallbackHandlerUrl(HttpServletRequest req) {
    String scheme = req.getScheme() + "://";
    String serverName = req.getServerName();
    String serverPort = (req.getServerPort() == 80) ? "" : ":" + req.getServerPort();
    String contextPath = req.getContextPath();
    String servletPath = URL_MAPPING;
    String pathInfo = (req.getPathInfo() == null) ? "" : req.getPathInfo();
    return scheme + serverName + serverPort + contextPath + servletPath + pathInfo;
  }
  /**
   * Exchanges the given code for an exchange and a refresh token.
   *
   * @param code The code gotten back from the authorization service
   * @param currentUrl The URL of the callback
   * @param oauthProperties The object containing the OAuth configuration
   * @return The object containing both an access and refresh token
   * @throws IOException
   */
  public AccessTokenResponse exchangeCodeForAccessAndRefreshTokens(String code, String currentUrl)
      throws IOException {

    HttpTransport httpTransport = new NetHttpTransport();
    JacksonFactory jsonFactory = new JacksonFactory();

    // Loading the oauth config file
    OAuthProperties oauthProperties = new OAuthProperties();

    return new GoogleAuthorizationCodeGrant(httpTransport, jsonFactory, oauthProperties
        .getClientId(), oauthProperties.getClientSecret(), code, currentUrl).execute();
  }
}
หมายเหตุ: การใช้งานข้างต้นใช้ไลบรารี App Engine บางรายการ ซึ่งใช้เพื่อ
ความสะดวกในการใช้งาน หากคุณกำลังพัฒนาสำหรับแพลตฟอร์มอื่น ให้ติดตั้งใช้งานอินเทอร์เฟซ UserService ที่จัดการการตรวจสอบสิทธิ์ผู้ใช้ซ้ำ
อ่านงานของผู้ใช้และแสดงงาน
ผู้ใช้ได้ให้สิทธิ์แอปพลิเคชันเข้าถึงงานของตน แอปพลิเคชันมีโทเค็นการรีเฟรช
ที่บันทึกไว้ใน Datastore ซึ่งเข้าถึงได้ผ่าน OAuthTokenDao ตอนนี้ PrintTaskListsTitlesServlet เซอร์วิเล็ตสามารถใช้โทเค็นเหล่านี้เพื่อเข้าถึง
งานของผู้ใช้และแสดงงานเหล่านั้นได้แล้ว
ระบบจะไฮไลต์โค้ดที่เพิ่มลงในไฟล์
package com.google.oauthsample;

import ...

/**
 * Simple sample Servlet which will display the tasks in the default task list of the user.
 */
@SuppressWarnings("serial")
public class PrintTasksTitlesServlet extends HttpServlet {

  /**
   * The OAuth Token DAO implementation, used to persist the OAuth refresh token.
   * Consider injecting it instead of using a static initialization. Additionally, a
   * simple memory implementation is used as a mock. Change the implementation to
   * use your own database system.
   */
  public static OAuthTokenDao oauthTokenDao = new OAuthTokenDaoMemoryImpl();

  public void doGet(HttpServletRequest req, HttpServletResponse resp) throws IOException {
    // Getting the current user
    // This is using App Engine's User Service but you should replace this to
    // your own user/login implementation
    UserService userService = UserServiceFactory.getUserService();
    User user = userService.getCurrentUser();

    // If the user is not logged-in it is redirected to the login service, then back to this page
    if (user == null) {
      resp.sendRedirect(userService.createLoginURL(getFullRequestUrl(req)));
      return;
    }

    // Checking if we already have tokens for this user in store
    AccessTokenResponse accessTokenResponse = oauthTokenDao.getKeys(user.getEmail());

    // If we don't have tokens for this user
    if (accessTokenResponse == null) {
      OAuthProperties oauthProperties = new OAuthProperties();
      // Redirect to the Google OAuth 2.0 authorization endpoint
      resp.sendRedirect(new GoogleAuthorizationRequestUrl(oauthProperties.getClientId(),
          OAuthCodeCallbackHandlerServlet.getOAuthCodeCallbackHandlerUrl(req), oauthProperties
              .getScopesAsString()).build());
      return;
    }
// Prints the user's task list titles in the response
    resp.setContentType("text/plain");
    resp.getWriter().append("Task Lists titles for user " + user.getEmail() + ":\n\n");
    printTasksTitles(accessTokenResponse, resp.getWriter());
  }

  /**
   * Construct the request's URL without the parameter part.
   *
   * @param req the HttpRequest object
   * @return The constructed request's URL
   */
  public static String getFullRequestUrl(HttpServletRequest req) {
    String scheme = req.getScheme() + "://";
    String serverName = req.getServerName();
    String serverPort = (req.getServerPort() == 80) ? "" : ":" + req.getServerPort();
    String contextPath = req.getContextPath();
    String servletPath = req.getServletPath();
    String pathInfo = (req.getPathInfo() == null) ? "" : req.getPathInfo();
    String queryString = (req.getQueryString() == null) ? "" : "?" + req.getQueryString();
    return scheme + serverName + serverPort + contextPath + servletPath + pathInfo + queryString;
  }
  /**
   * Uses the Google Tasks API to retrieve a list of the user's tasks in the default
   * tasks list.
   *
   * @param accessTokenResponse The OAuth 2.0 AccessTokenResponse object
   *          containing the access token and a refresh token.
   * @param output The output stream writer to write the task list titles to.
   * @return A list of the user's task titles in the default task list.
   * @throws IOException
   */
  public void printTasksTitles(AccessTokenResponse accessTokenResponse, Writer output) throws IOException {

    // Initializing the Tasks service
    HttpTransport transport = new NetHttpTransport();
    JsonFactory jsonFactory = new JacksonFactory();
    OAuthProperties oauthProperties = new OAuthProperties();

    GoogleAccessProtectedResource accessProtectedResource = new GoogleAccessProtectedResource(
        accessTokenResponse.accessToken, transport, jsonFactory, oauthProperties.getClientId(),
        oauthProperties.getClientSecret(), accessTokenResponse.refreshToken);

    Tasks service = new Tasks(transport, accessProtectedResource, jsonFactory);

    // Using the initialized Tasks API service to query the list of tasks lists
    com.google.api.services.tasks.model.Tasks tasks = service.tasks.list("@default").execute();

    for (Task task : tasks.items) {
      output.append(task.title + "\n");
    }
  }
}
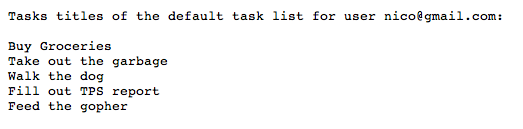
ระบบจะแสดงงานของผู้ใช้ดังนี้
แอปพลิเคชันตัวอย่าง
คุณสามารถดาวน์โหลดโค้ดสำหรับแอปพลิเคชันตัวอย่างนี้ได้