在 Google 簡報中顯示進度列

程式設計層級:中級
時間長度:15 分鐘
專案類型:編輯器外掛程式

目標

  • 瞭解解決方案的功能。
  • 瞭解 Apps Script 服務在 解決方案
  • 設定指令碼。
  • 執行指令碼。

認識這項解決方案

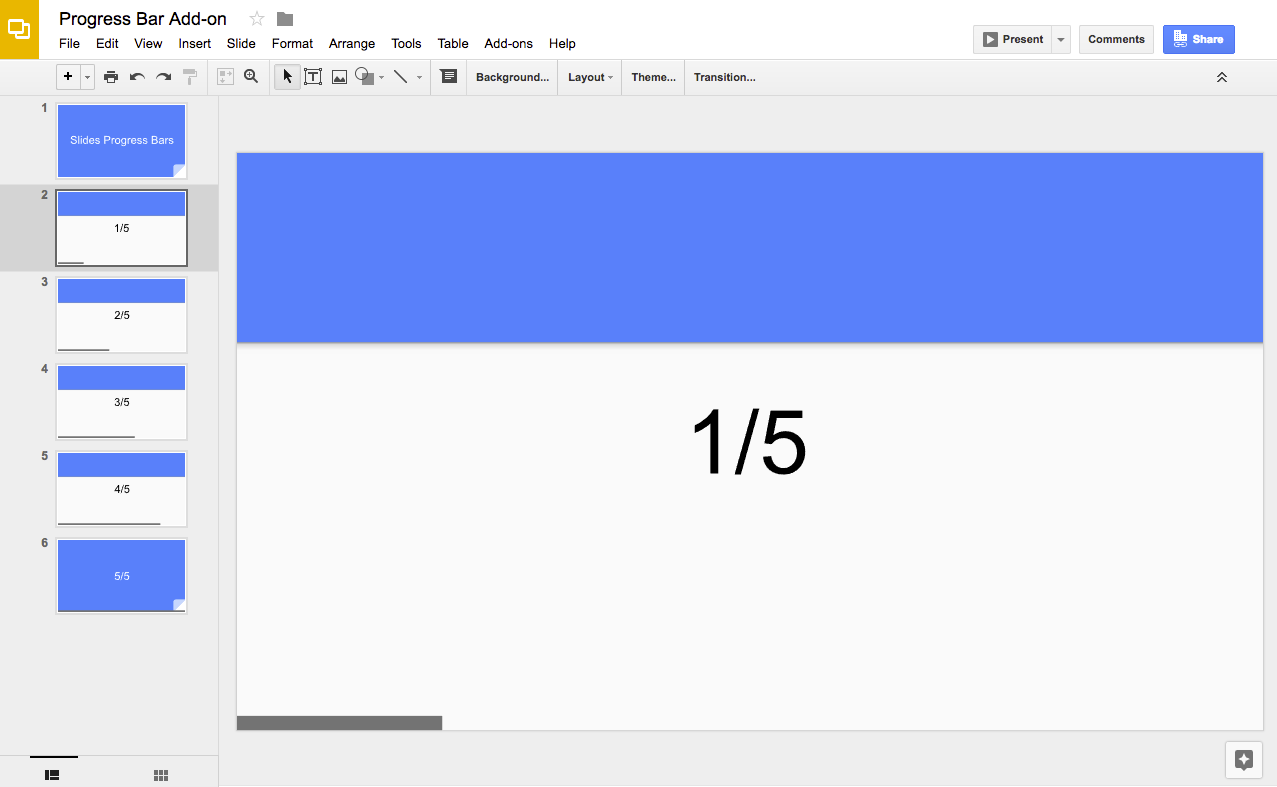
這項解決方案會在投影片底部新增進度列 簡報

進度列簡報編輯器外掛程式的螢幕截圖

運作方式

指令碼會計算簡報中的投影片數,並加上 直立的矩形圖片指令碼會增加 顯示投影片中的進度

Apps Script 服務

這項解決方案使用下列服務:

  • 簡報服務:取得 簡報的投影片,並在每份投影片中加入矩形形狀。

必要條件

如要使用這個範例,您必須具備下列先決條件:

  • Google 帳戶 (Google Workspace 帳戶可能會 需要管理員核准)。
  • 可存取網際網路的網路瀏覽器。

設定指令碼

  1. 點選下方按鈕即可建立進度列簡報副本 簡報適用於下列應用程式的 Apps Script 專案: 請參閱簡報中附加的解決方案
    建立副本
  2. 按一下簡報中的「擴充功能」 > 進度列 > 顯示進度列
  3. 出現提示時,請授權指令碼。 如果 OAuth 同意畫面顯示「這個應用程式未經驗證」警告, 如要繼續,請選取「進階」圖示 > 前往 {Project Name} (不安全)

  4. 再次點選「擴充功能」圖示 > 進度列 >「顯示進度列」

  5. 如要移除進度列,請按一下「擴充功能」> 進度列 >「隱藏進度列」

查看程式碼

如要查看這個解決方案的 Apps Script 程式碼,請按一下 查看原始碼如下:

查看原始碼

簡報/進度/進度.gs
/**
 * @OnlyCurrentDoc Adds progress bars to a presentation.
 */
const BAR_ID = 'PROGRESS_BAR_ID';
const BAR_HEIGHT = 10; // px

/**
 * Runs when the add-on is installed.
 * @param {object} e The event parameter for a simple onInstall trigger. To
 *     determine which authorization mode (ScriptApp.AuthMode) the trigger is
 *     running in, inspect e.authMode. (In practice, onInstall triggers always
 *     run in AuthMode.FULL, but onOpen triggers may be AuthMode.LIMITED or
 *     AuthMode.NONE.)
 */
function onInstall(e) {
  onOpen();
}

/**
 * Trigger for opening a presentation.
 * @param {object} e The onOpen event.
 */
function onOpen(e) {
  SlidesApp.getUi().createAddonMenu()
      .addItem('Show progress bar', 'createBars')
      .addItem('Hide progress bar', 'deleteBars')
      .addToUi();
}

/**
 * Create a rectangle on every slide with different bar widths.
 */
function createBars() {
  deleteBars(); // Delete any existing progress bars
  const presentation = SlidesApp.getActivePresentation();
  const slides = presentation.getSlides();
  for (let i = 0; i < slides.length; ++i) {
    const ratioComplete = (i / (slides.length - 1));
    const x = 0;
    const y = presentation.getPageHeight() - BAR_HEIGHT;
    const barWidth = presentation.getPageWidth() * ratioComplete;
    if (barWidth > 0) {
      const bar = slides[i].insertShape(SlidesApp.ShapeType.RECTANGLE, x, y,
          barWidth, BAR_HEIGHT);
      bar.getBorder().setTransparent();
      bar.setLinkUrl(BAR_ID);
    }
  }
}

/**
 * Deletes all progress bar rectangles.
 */
function deleteBars() {
  const presentation = SlidesApp.getActivePresentation();
  const slides = presentation.getSlides();
  for (let i = 0; i < slides.length; ++i) {
    const elements = slides[i].getPageElements();
    for (const el of elements) {
      if (el.getPageElementType() === SlidesApp.PageElementType.SHAPE &&
        el.asShape().getLink() &&
        el.asShape().getLink().getUrl() === BAR_ID) {
        el.remove();
      }
    }
  }
}

貢獻者

這個範例是由 Google 在 Google Developers 專家的協助下維護。

後續步驟