Настройка (диалоговый поток)
Оптимизируйте свои подборки
Сохраняйте и классифицируйте контент в соответствии со своими настройками.
На этой странице рассказывается о создании проекта Actions и настройке агента Dialogflow.
Настройте Firebase
Вы можете разместить как логику веб-перехватчика, так и веб-приложение для действия Interactive Canvas с помощью одного инструмента: Firebase CLI. Прежде чем создавать проект Actions и агент Dialogflow, следуйте инструкциям в разделе «Начало работы с хостингом Firebase» , чтобы установить и настроить Firebase.
Создать проект
- Перейдите в консоль действий .
- Нажмите Новый проект .
- Введите имя своего проекта и нажмите «Создать проект» .
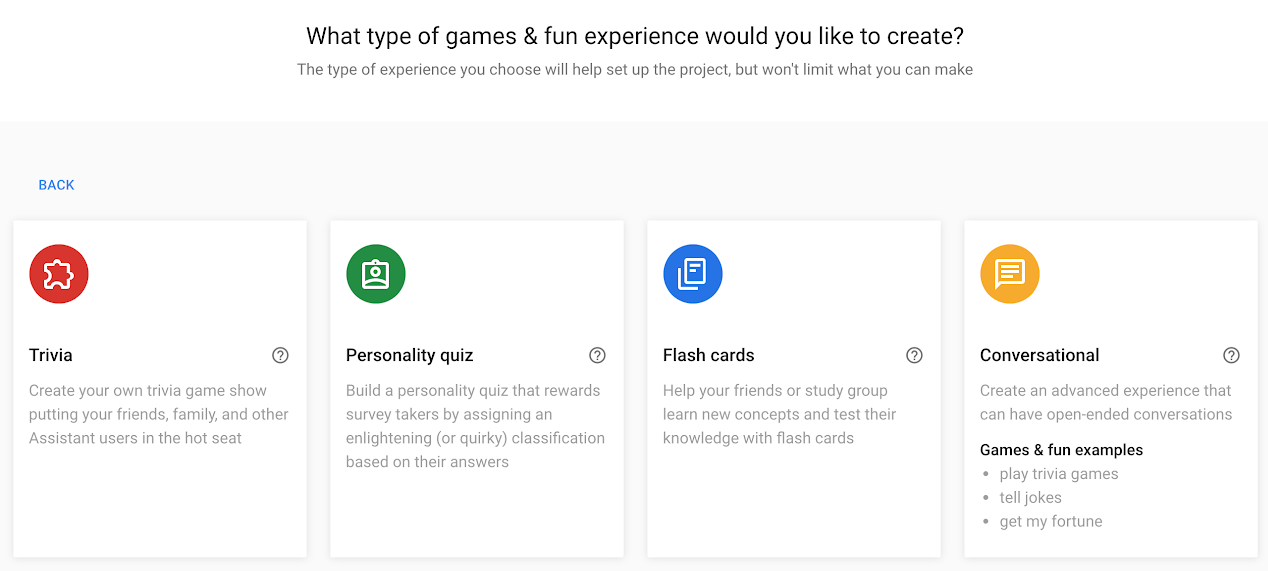
- Нажмите на карточку «Игры и развлечения» .
Нажмите карточку «Разговор» .

Нажмите «Развернуть» в верхнем меню. Затем нажмите «Информация о каталоге» .
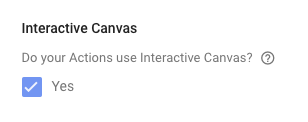
Внизу страницы установите флажок «Интерактивный холст» .

Нажмите «Обзор» в верхнем меню.
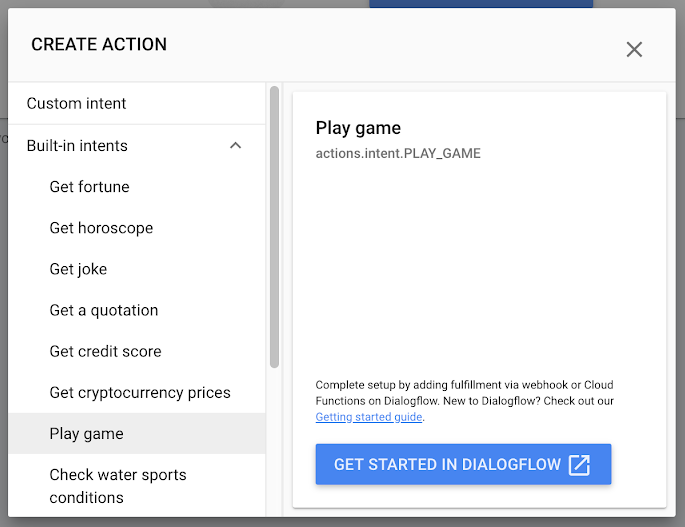
Нажмите «Создать свое действие» , затем «Добавить действия» .

Нажмите «Добавить первое действие» .
В разделе «Встроенные намерения» выберите «Играть в игру» и нажмите «Начать» в Dialogflow .

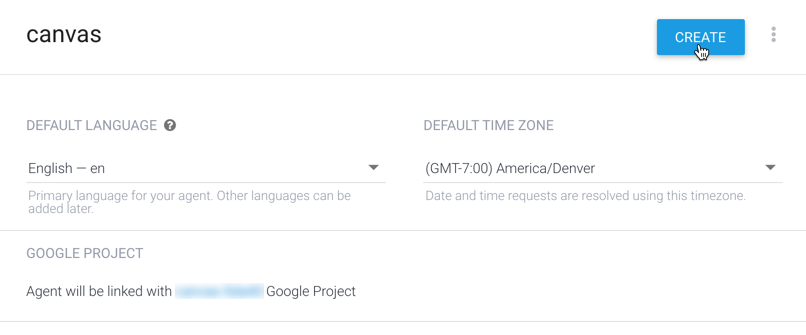
На странице создания агента подтвердите язык по умолчанию, часовой пояс и имя агента и нажмите СОЗДАТЬ .

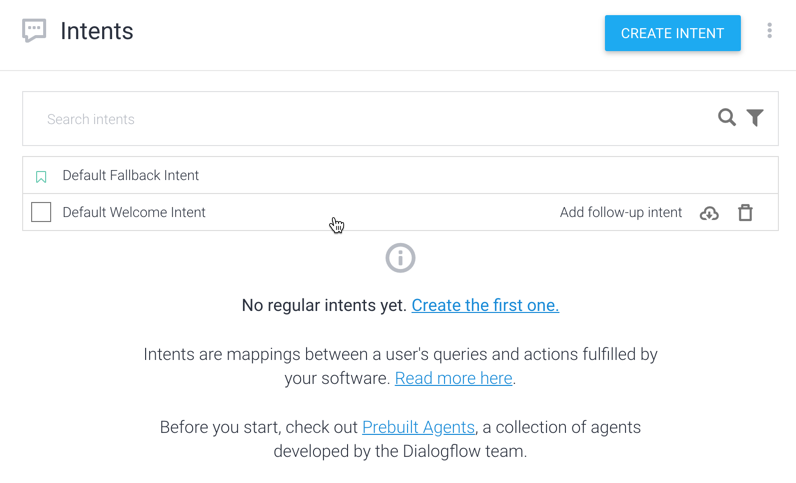
На странице «Намерения» нажмите «Намерение приветствия по умолчанию» .

В нижней части страницы нажмите «Выполнение» , чтобы развернуть раздел.
Для этого нажмите Включить вызов веб-перехватчика .
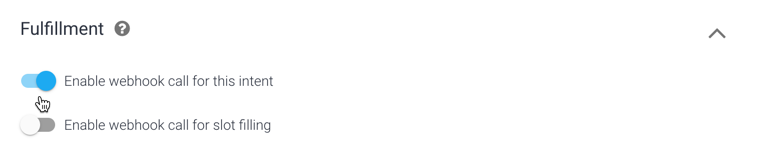
Нажмите СОХРАНИТЬ .
Если не указано иное, контент на этой странице предоставляется по лицензии Creative Commons "С указанием авторства 4.0", а примеры кода – по лицензии Apache 2.0. Подробнее об этом написано в правилах сайта. Java – это зарегистрированный товарный знак корпорации Oracle и ее аффилированных лиц.
Последнее обновление: 2025-07-24 UTC.
[null,null,["Последнее обновление: 2025-07-24 UTC."],[[["\u003cp\u003eThis guide details setting up an Actions project and configuring its corresponding Dialogflow agent for Interactive Canvas integration.\u003c/p\u003e\n"],["\u003cp\u003eFirebase CLI is recommended for hosting both the webhook logic and web app for your Action, requiring prior setup following Firebase's guidelines.\u003c/p\u003e\n"],["\u003cp\u003eProject creation involves steps within the Actions console, guiding you through selecting project type and enabling Interactive Canvas features.\u003c/p\u003e\n"],["\u003cp\u003eDialogflow agent configuration focuses on enabling webhook calls for the Default Welcome Intent to facilitate communication with your Action's backend.\u003c/p\u003e\n"],["\u003cp\u003eUsers should familiarize themselves with Firebase hosting setup and the Actions console workflow to successfully create and configure their projects.\u003c/p\u003e\n"]]],[],null,["# Setup (Dialogflow)\n\nThis page goes over creating your Actions project and configuring a Dialogflow\nagent.\n\nSet up Firebase\n---------------\n\nYou can host both your webhook logic and web app for your Interactive Canvas\nAction with one tool: the Firebase CLI. Before creating your Actions project\nand Dialogflow agent, follow the instructions on [Get started with Firebase\nhosting](https://firebase.google.com/docs/hosting/quickstart)\nto install and set up Firebase.\n\nCreate a project\n----------------\n\n1. Go to the [Actions console](//console.actions.google.com).\n2. Click **New project**.\n3. Enter a name for your project and click **Create project**.\n4. Click the **Games \\& fun** card.\n5. Click the **Conversational** card.\n\n6. Click **Deploy** in the top menu. Then, click **Directory information**.\n\n7. At the bottom of the page, check the option under **Interactive Canvas**.\n\n8. Click **Overview** in the top menu.\n\n9. Click **Build your Action** then **Add Action(s)**.\n\n10. Click **Add your first action**.\n\n11. Under **Built-in intents** , select **Play game** and click\n **Get started in Dialogflow**.\n\nConfigure the Dialogflow agent\n------------------------------\n\n1. On the agent creation page, confirm the default language, time zone, and\n name for the agent and click **CREATE**.\n\n2. On the **Intents** page, click on **Default Welcome Intent**.\n\n3. At the bottom of the page, click **Fulfillment** to expand the section.\n\n4. Click **Enable webhook call for this intent**.\n\n5. Click **SAVE**."]]