1. Обзор
Эта лаборатория научит вас, как изменить существующее видеоприложение iOS для трансляции контента на устройство с поддержкой Google Cast .
Что такое Google Cast?
Google Cast позволяет пользователям транслировать контент с мобильного устройства на телевизор. Затем пользователи могут использовать свое мобильное устройство в качестве пульта дистанционного управления для воспроизведения мультимедиа на телевизоре.
Google Cast SDK позволяет расширить возможности вашего приложения для управления устройствами с поддержкой Google Cast (такими как телевизор или аудиосистема). Cast SDK позволяет добавлять необходимые компоненты пользовательского интерфейса на основе контрольного списка Google Cast Design .
Контрольный список Google Cast Design предназначен для того, чтобы сделать использование Cast простым и предсказуемым на всех поддерживаемых платформах.
Что мы собираемся строить?
После завершения этой лабораторной работы у вас будет видеоприложение для iOS, которое сможет транслировать видео на устройство Google Cast.
Что вы узнаете
- Как добавить Google Cast SDK в пример приложения для видео.
- Как добавить кнопку Cast для выбора устройства Google Cast.
- Как подключиться к устройству Cast и запустить медиа-ресивер.
- Как скинуть видео.
- Как добавить мини-контроллер Cast в ваше приложение.
- Как добавить расширенный контроллер.
- Как обеспечить вводное наложение.
- Как настроить виджеты Cast.
- Как интегрировать Cast Connect
Что вам понадобится
- Последняя версия Xcode .
- Одно мобильное устройство с iOS 9 или новее (или Xcode Simulator).
- USB-кабель для передачи данных для подключения мобильного устройства к компьютеру разработки (при использовании устройства).
- Устройство Google Cast, например Chromecast или Android TV, с доступом в Интернет.
- Телевизор или монитор с входом HDMI.
- Chromecast с Google TV требуется для проверки интеграции Cast Connect, но не является обязательным для остальной части Codelab. Если у вас его нет, можете пропустить шаг «Добавить поддержку Cast Connect» в конце этого руководства.
Опыт
- Вам потребуются предыдущие знания в области разработки iOS.
- Вам также потребуются предварительные знания о просмотре телевизора :)
Как вы будете использовать этот урок?
Как бы вы оценили свой опыт создания приложений для iOS?
Как бы вы оценили свои впечатления от просмотра телевидения?
2. Получите пример кода
Вы можете загрузить весь пример кода на свой компьютер...
и распакуйте загруженный zip-файл.
3. Запустите пример приложения.

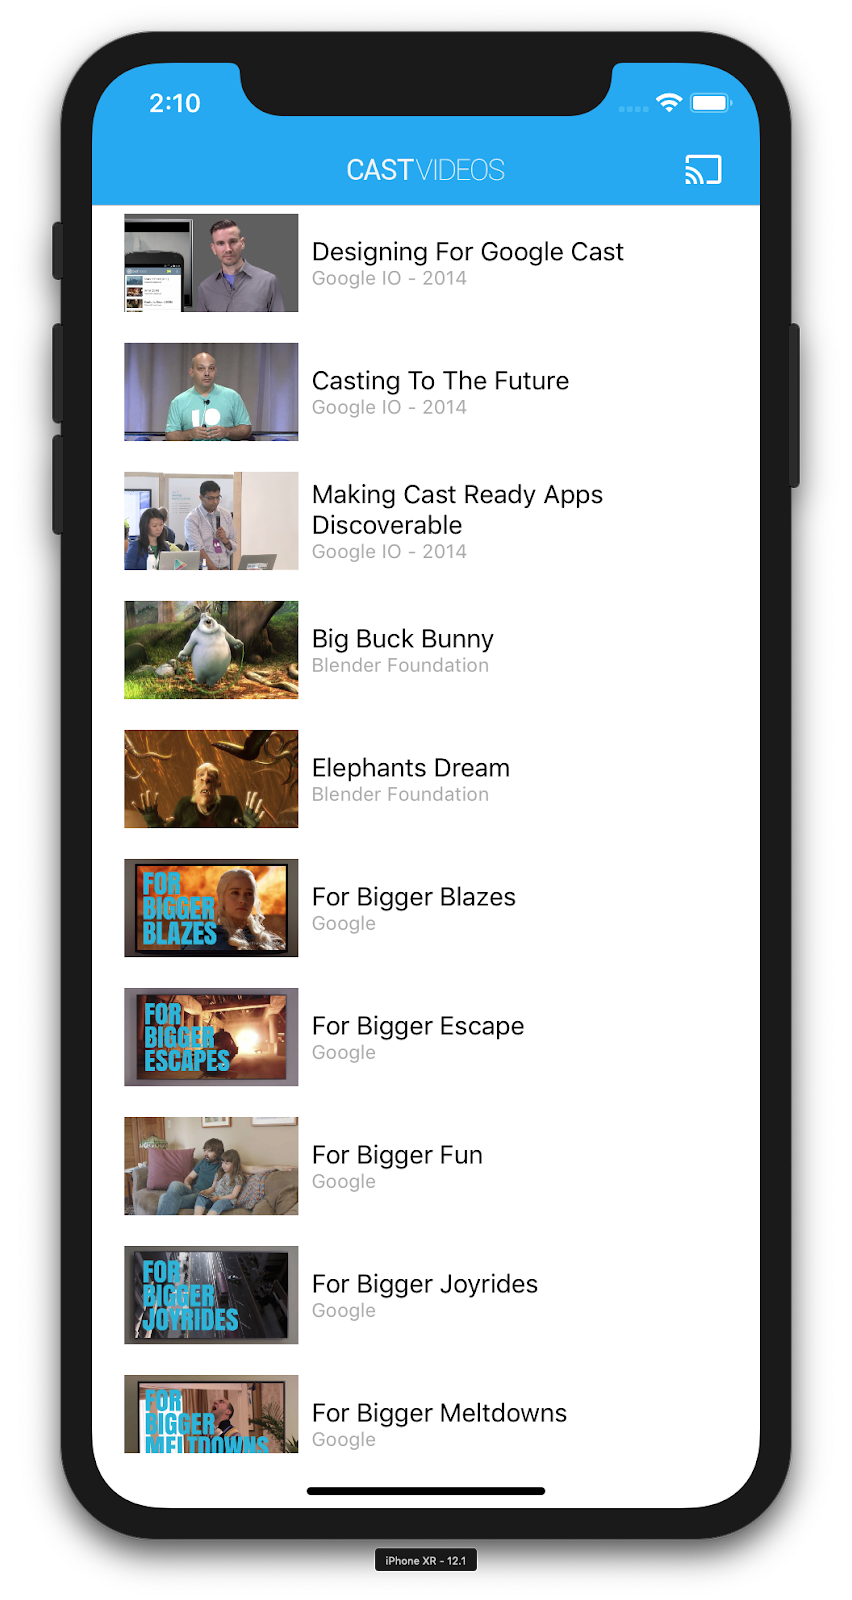
Сначала давайте посмотрим, как выглядит готовый пример приложения. Приложение представляет собой базовый видеоплеер. Пользователь может выбрать видео из списка, а затем воспроизвести его локально на устройстве или транслировать его на устройство Google Cast.
После загрузки кода следующие инструкции описывают, как открыть и запустить готовый пример приложения в Xcode:
Часто задаваемые вопросы
Настройка CocoaPods
Чтобы настроить CocoaPods, перейдите на консоль и установите его, используя Ruby по умолчанию, доступный в macOS:
sudo gem install cocoapods
Если у вас возникли проблемы, обратитесь к официальной документации, чтобы загрузить и установить менеджер зависимостей.
Настройка проекта
- Перейдите в свой терминал и перейдите в каталог codelab.
- Установите зависимости из подфайла.
cd app-done
pod update
pod install
- Откройте Xcode и выберите «Открыть другой проект…».
- Выберите файл
CastVideos-ios.xcworkspaceиз
app-doneв папке примера кода.
Запустите приложение
Выберите цель и симулятор, а затем запустите приложение:

Через несколько секунд вы должны увидеть, как видеоприложение появится.
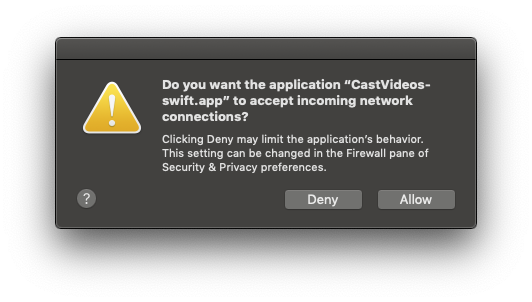
Обязательно нажмите «Разрешить», когда появится уведомление о принятии входящих сетевых подключений. Значок трансляции не появится, если этот параметр не принят.
Нажмите кнопку Cast и выберите свое устройство Google Cast.
Выберите видео, нажмите кнопку воспроизведения.
Видео начнет воспроизводиться на вашем устройстве Google Cast.
Отобразится расширенный контроллер. Вы можете использовать кнопку воспроизведения/паузы для управления воспроизведением.
Вернитесь к списку видео.
Мини-контроллер теперь виден в нижней части экрана.
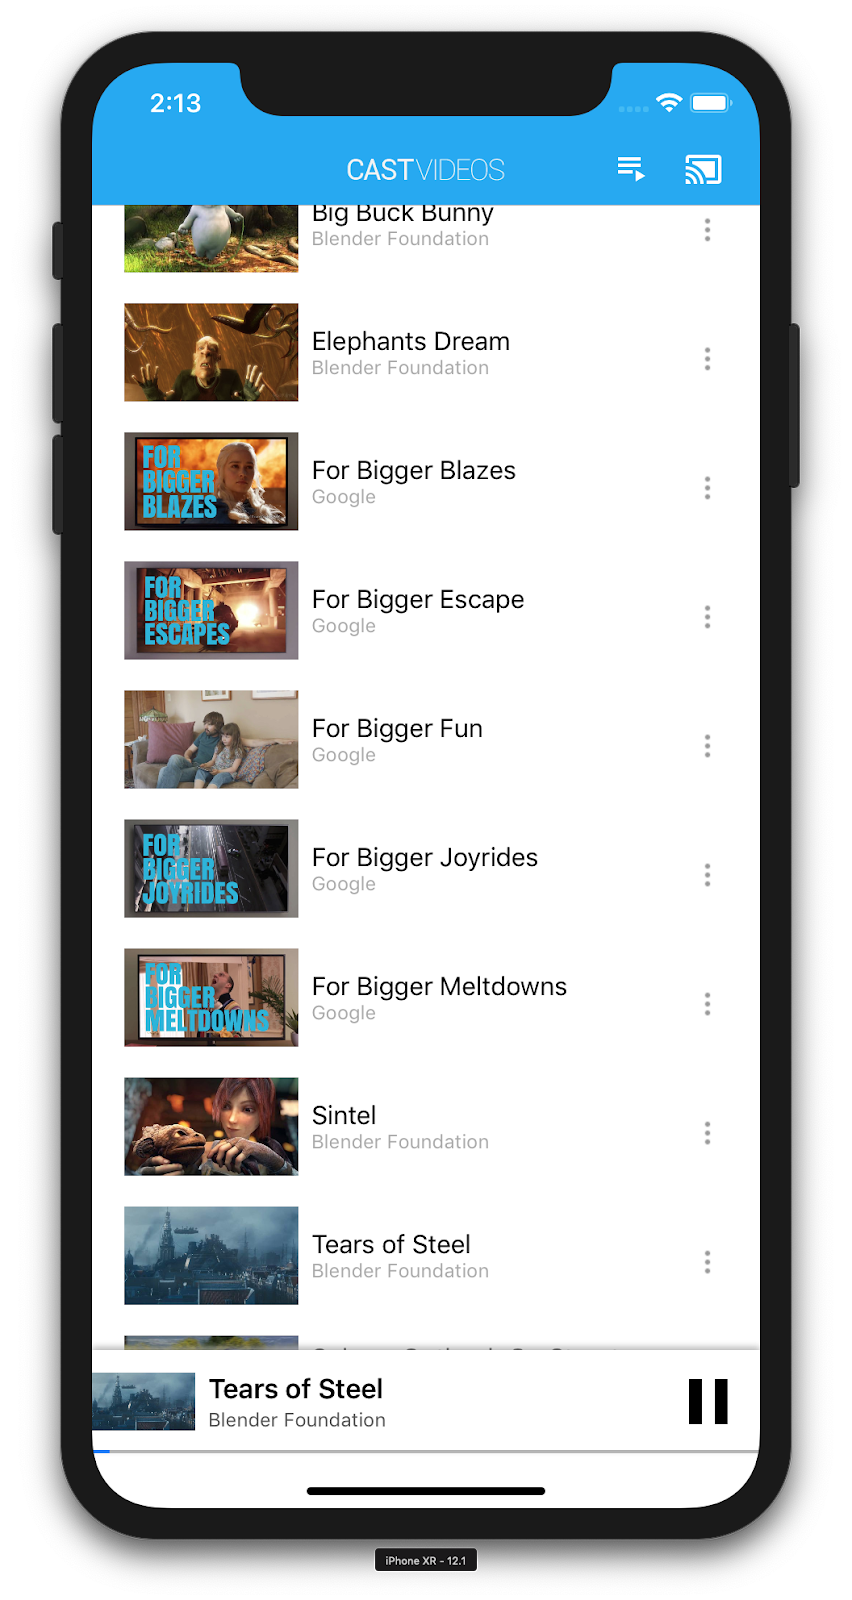
Нажмите кнопку паузы на мини-контроллере, чтобы приостановить видео на ресивере. Нажмите кнопку воспроизведения на мини-контроллере, чтобы продолжить воспроизведение видео еще раз.
Нажмите кнопку Cast, чтобы остановить трансляцию на устройство Google Cast.
4. Подготовьте стартовый проект
Нам нужно добавить поддержку Google Cast в загруженное вами стартовое приложение. Вот некоторая терминология Google Cast, которую мы будем использовать в этой лаборатории кода:
- приложение- отправитель работает на мобильном устройстве или ноутбуке,
- приложение- приемник работает на устройстве Google Cast.
Настройка проекта
Теперь вы готовы к созданию поверх стартового проекта с использованием Xcode:
- Перейдите в свой терминал и перейдите в каталог codelab.
- Установите зависимости из подфайла.
cd app-start
pod update
pod install
- Откройте Xcode и выберите «Открыть другой проект…».
- Выберите файл
CastVideos-ios.xcworkspaceиз каталог app-startв папке примера кода.
Дизайн приложения
Приложение получает список видео с удаленного веб-сервера и предоставляет пользователю список для просмотра. Пользователи могут выбрать видео, чтобы просмотреть подробности, или воспроизвести его локально на мобильном устройстве.
Приложение состоит из двух основных контроллеров представления: MediaTableViewController и MediaViewController.
Медиатаблевиевконтроллер
Этот UITableViewController отображает список видео из экземпляра MediaListModel . Список видео и связанные с ним метаданные размещаются на удаленном сервере в виде файла JSON . MediaListModel извлекает этот JSON и обрабатывает его для создания списка объектов MediaItem .
Объект MediaItem моделирует видео и связанные с ним метаданные, такие как заголовок, описание, URL-адрес изображения и URL-адрес потока.
MediaTableViewController создает экземпляр MediaListModel , а затем регистрируется как MediaListModelDelegate чтобы получать информацию о загрузке метаданных мультимедиа, чтобы он мог загрузить табличное представление.
Пользователю предоставляется список миниатюр видео с кратким описанием каждого видео. Когда элемент выбран, соответствующий MediaItem передается в MediaViewController .
Медиавиевконтроллер
Этот контроллер представления отображает метаданные о конкретном видео и позволяет пользователю воспроизводить видео локально на мобильном устройстве.
Контроллер представления содержит LocalPlayerView , некоторые элементы управления мультимедиа и текстовую область для отображения описания выбранного видео. Плеер закрывает верхнюю часть экрана, оставляя место для подробного описания видео под ним. Пользователь может воспроизводить/приостанавливать воспроизведение или искать локальное воспроизведение видео.
Часто задаваемые вопросы
5. Добавление кнопки трансляции

Приложение с поддержкой Cast отображает кнопку Cast в каждом из своих контроллеров представления. При нажатии на кнопку Cast отображается список устройств Cast, которые пользователь может выбрать. Если пользователь воспроизводил контент локально на устройстве-отправителе, выбор устройства Cast запускает или возобновляет воспроизведение на этом устройстве Cast. В любой момент во время сеанса Cast пользователь может нажать кнопку Cast и прекратить трансляцию вашего приложения на устройство Cast. Пользователь должен иметь возможность подключаться к устройству Cast или отключаться от него, находясь на любом экране вашего приложения, как описано в контрольном списке Google Cast Design .
Конфигурация
Для стартового проекта требуются те же зависимости и настройки Xcode, что и для завершенного примера приложения. Вернитесь в этот раздел и выполните те же действия, чтобы добавить GoogleCast.framework в проект начального приложения.
Инициализация
Платформа Cast имеет глобальный одноэлементный объект GCKCastContext , который координирует все действия платформы. Этот объект должен быть инициализирован на ранней стадии жизненного цикла приложения, обычно в методе application(_:didFinishLaunchingWithOptions:) делегата приложения, чтобы автоматическое возобновление сеанса при перезапуске приложения-отправителя могло правильно сработать и начать сканирование устройств.
Объект GCKCastOptions должен быть предоставлен при инициализации GCKCastContext . Этот класс содержит параметры, влияющие на поведение платформы. Наиболее важным из них является идентификатор приложения-приемника, который используется для фильтрации результатов обнаружения устройств Cast и для запуска приложения-приемника при запуске сеанса Cast.
Метод application(_:didFinishLaunchingWithOptions:) также является хорошим местом для настройки делегата ведения журнала для получения сообщений журнала из платформы Cast. Они могут быть полезны для отладки и устранения неполадок.
Когда вы разрабатываете собственное приложение с поддержкой Cast, вам необходимо зарегистрироваться в качестве разработчика Cast, а затем получить идентификатор приложения для своего приложения. Для этой лаборатории кода мы будем использовать пример идентификатора приложения.
Добавьте следующий код в AppDelegate.swift , чтобы инициализировать GCKCastContext с идентификатором приложения из пользовательских настроек по умолчанию, и добавьте средство ведения журнала для платформы Google Cast:
import GoogleCast

@UIApplicationMain
class AppDelegate: UIResponder, UIApplicationDelegate {
  fileprivate var enableSDKLogging = true

  ...

  func application(_: UIApplication,
                   didFinishLaunchingWithOptions _: [UIApplication.LaunchOptionsKey: Any]?) -> Bool {

    ...
    let options = GCKCastOptions(discoveryCriteria: GCKDiscoveryCriteria(applicationID: kReceiverAppID))
    options.physicalVolumeButtonsWillControlDeviceVolume = true
    GCKCastContext.setSharedInstanceWith(options)

    window?.clipsToBounds = true
    setupCastLogging()
    ...
  }
  ...
  func setupCastLogging() {
    let logFilter = GCKLoggerFilter()
    let classesToLog = ["GCKDeviceScanner", "GCKDeviceProvider", "GCKDiscoveryManager", "GCKCastChannel",
                        "GCKMediaControlChannel", "GCKUICastButton", "GCKUIMediaController", "NSMutableDictionary"]
    logFilter.setLoggingLevel(.verbose, forClasses: classesToLog)
    GCKLogger.sharedInstance().filter = logFilter
    GCKLogger.sharedInstance().delegate = self
  }
}

...

// MARK: - GCKLoggerDelegate

extension AppDelegate: GCKLoggerDelegate {
  func logMessage(_ message: String,
                  at _: GCKLoggerLevel,
                  fromFunction function: String,
                  location: String) {
    if enableSDKLogging {
      // Send SDK's log messages directly to the console.
      print("\(location): \(function) - \(message)")
    }
  }
}
Кнопка трансляции
Теперь, когда GCKCastContext инициализирован, нам нужно добавить кнопку Cast, чтобы позволить пользователю выбрать устройство Cast. Cast SDK предоставляет компонент кнопки Cast под названием GCKUICastButton в качестве подкласса UIButton . Его можно добавить в строку заголовка приложения, обернув его в UIBarButtonItem . Нам нужно добавить кнопку Cast как в MediaTableViewController , так и MediaViewController .
Добавьте следующий код в MediaTableViewController.swift и MediaViewController.swift :
import GoogleCast

@objc(MediaTableViewController)
class MediaTableViewController: UITableViewController, GCKSessionManagerListener,
  MediaListModelDelegate, GCKRequestDelegate {
  private var castButton: GCKUICastButton!
  ...
  override func viewDidLoad() {
    print("MediaTableViewController - viewDidLoad")
    super.viewDidLoad()

    ...
    castButton = GCKUICastButton(frame: CGRect(x: CGFloat(0), y: CGFloat(0),
                                               width: CGFloat(24), height: CGFloat(24)))
    // Overwrite the UIAppearance theme in the AppDelegate.
    castButton.tintColor = UIColor.white
    navigationItem.rightBarButtonItem = UIBarButtonItem(customView: castButton)

    ...
  }
  ...
}
Затем добавьте следующий код в свой MediaViewController.swift :
import GoogleCast

@objc(MediaViewController)
class MediaViewController: UIViewController, GCKSessionManagerListener, GCKRemoteMediaClientListener,
  LocalPlayerViewDelegate, GCKRequestDelegate {
  private var castButton: GCKUICastButton!
  ...
  override func viewDidLoad() {
    super.viewDidLoad()
    print("in MediaViewController viewDidLoad")
    ...
    castButton = GCKUICastButton(frame: CGRect(x: CGFloat(0), y: CGFloat(0),
                                               width: CGFloat(24), height: CGFloat(24)))
    // Overwrite the UIAppearance theme in the AppDelegate.
    castButton.tintColor = UIColor.white
    navigationItem.rightBarButtonItem = UIBarButtonItem(customView: castButton)

    ...
  }
  ...
}
Теперь запустите приложение. Вы должны увидеть кнопку Cast на панели навигации приложения, и когда вы нажмете на нее, она отобразит список устройств Cast в вашей локальной сети. Обнаружение устройства управляется автоматически с помощью GCKCastContext . Выберите устройство Cast, и образец приложения-приемника загрузится на устройство Cast. Вы можете переключаться между действиями просмотра и действиями локального игрока, а состояние кнопки трансляции синхронизируется.
Мы не подключили поддержку воспроизведения мультимедиа, поэтому вы пока не можете воспроизводить видео на устройстве Cast. Нажмите кнопку Cast, чтобы остановить трансляцию.
6. Кастинг видеоконтента

Мы расширим пример приложения, чтобы он также мог удаленно воспроизводить видео на устройстве Cast. Для этого нам нужно прослушивать различные события, генерируемые средой Cast.
Кастинг СМИ
На высоком уровне, если вы хотите воспроизвести медиафайл на устройстве Cast, необходимо выполнить следующее:
- Создайте объект
GCKMediaInformationиз Cast SDK, который моделирует элемент мультимедиа. - Пользователь подключается к устройству Cast, чтобы запустить приложение-приемник.
- Загрузите объект
GCKMediaInformationв приемник и воспроизведите содержимое. - Отслеживайте статус СМИ.
- Отправляйте команды воспроизведения на приемник на основе взаимодействия с пользователем.
Шаг 1 представляет собой сопоставление одного объекта с другим; GCKMediaInformation — это то, что понимает Cast SDK, а MediaItem — это инкапсуляция нашего приложения для элемента мультимедиа; мы можем легко сопоставить MediaItem с GCKMediaInformation . Мы уже выполнили Шаг 2 в предыдущем разделе. Шаг 3 легко выполнить с помощью Cast SDK.
Пример приложения MediaViewController уже различает локальное и удаленное воспроизведение, используя это перечисление:
enum PlaybackMode: Int {
  case none = 0
  case local
  case remote
}

private var playbackMode = PlaybackMode.none
В этой кодовой лаборатории вам не важно точно понимать, как работает вся логика примера проигрывателя. Важно понимать, что медиаплеер вашего приложения необходимо будет изменить, чтобы он одинаково распознавал два места воспроизведения.
На данный момент локальный проигрыватель всегда находится в состоянии локального воспроизведения, поскольку он еще ничего не знает о состояниях кастинга. Нам нужно обновить пользовательский интерфейс на основе переходов состояний, которые происходят в среде Cast. Например, если мы начнем трансляцию, нам нужно остановить локальное воспроизведение и отключить некоторые элементы управления. Аналогично, если мы прекратим трансляцию, находясь в этом контроллере представления, нам нужно будет перейти к локальному воспроизведению. Чтобы справиться с этим, нам нужно прослушивать различные события, генерируемые средой Cast.
Управление сеансами трансляции
Для платформы Cast сеанс Cast объединяет этапы подключения к устройству, запуска (или присоединения), подключения к приложению-получателю и инициализации канала управления мультимедиа, если это необходимо. Канал управления мультимедиа — это то, как платформа Cast отправляет и получает сообщения от медиаплеера-получателя.
Сеанс трансляции запускается автоматически, когда пользователь выбирает устройство с помощью кнопки трансляции, и автоматически останавливается, когда пользователь отключается. Повторное подключение к сеансу получателя из-за проблем с сетью также автоматически обрабатывается платформой Cast.
Сеансы трансляции управляются GCKSessionManager , доступ к которому можно получить через GCKCastContext.sharedInstance().sessionManager . Обратные вызовы GCKSessionManagerListener можно использовать для мониторинга событий сеанса, таких как создание, приостановка, возобновление и завершение.
Сначала нам нужно зарегистрировать прослушиватель сеанса и инициализировать некоторые переменные:
class MediaViewController: UIViewController, GCKSessionManagerListener,
  GCKRemoteMediaClientListener, LocalPlayerViewDelegate, GCKRequestDelegate {

  ...
  private var sessionManager: GCKSessionManager!
  ...

  required init?(coder: NSCoder) {
    super.init(coder: coder)

    sessionManager = GCKCastContext.sharedInstance().sessionManager

    ...
  }

  override func viewWillAppear(_ animated: Bool) {
    ...

    let hasConnectedSession: Bool = (sessionManager.hasConnectedSession())
    if hasConnectedSession, (playbackMode != .remote) {
      populateMediaInfo(false, playPosition: 0)
      switchToRemotePlayback()
    } else if sessionManager.currentSession == nil, (playbackMode != .local) {
      switchToLocalPlayback()
    }

    sessionManager.add(self)

    ...
  }

  override func viewWillDisappear(_ animated: Bool) {
    ...

    sessionManager.remove(self)
    sessionManager.currentCastSession?.remoteMediaClient?.remove(self)
    ...
    super.viewWillDisappear(animated)
  }

  func switchToLocalPlayback() {
    ...

    sessionManager.currentCastSession?.remoteMediaClient?.remove(self)

    ...
  }

  func switchToRemotePlayback() {
    ...

    sessionManager.currentCastSession?.remoteMediaClient?.add(self)

    ...
  }


  // MARK: - GCKSessionManagerListener

  func sessionManager(_: GCKSessionManager, didStart session: GCKSession) {
    print("MediaViewController: sessionManager didStartSession \(session)")
    setQueueButtonVisible(true)
    switchToRemotePlayback()
  }

  func sessionManager(_: GCKSessionManager, didResumeSession session: GCKSession) {
    print("MediaViewController: sessionManager didResumeSession \(session)")
    setQueueButtonVisible(true)
    switchToRemotePlayback()
  }

  func sessionManager(_: GCKSessionManager, didEnd _: GCKSession, withError error: Error?) {
    print("session ended with error: \(String(describing: error))")
    let message = "The Casting session has ended.\n\(String(describing: error))"
    if let window = appDelegate?.window {
      Toast.displayMessage(message, for: 3, in: window)
    }
    setQueueButtonVisible(false)
    switchToLocalPlayback()
  }

  func sessionManager(_: GCKSessionManager, didFailToStartSessionWithError error: Error?) {
    if let error = error {
      showAlert(withTitle: "Failed to start a session", message: error.localizedDescription)
    }
    setQueueButtonVisible(false)
  }

  func sessionManager(_: GCKSessionManager,
                      didFailToResumeSession _: GCKSession, withError _: Error?) {
    if let window = UIApplication.shared.delegate?.window {
      Toast.displayMessage("The Casting session could not be resumed.",
                           for: 3, in: window)
    }
    setQueueButtonVisible(false)
    switchToLocalPlayback()
  }

  ...
}
В MediaViewController мы хотим получать информацию, когда мы подключаемся или отключаемся от устройства Cast, чтобы мы могли переключиться на локальный проигрыватель или обратно. Обратите внимание, что соединение может быть нарушено не только из-за запуска экземпляра вашего приложения на вашем мобильном устройстве, но также из-за другого экземпляра вашего (или другого) приложения, запущенного на другом мобильном устройстве.
Текущий активный сеанс доступен как GCKCastContext.sharedInstance().sessionManager.currentCastSession . Сеансы создаются и закрываются автоматически в ответ на жесты пользователя в диалоговых окнах трансляции.
Загрузка мультимедиа
В Cast SDK GCKRemoteMediaClient предоставляет набор удобных API для управления удаленным воспроизведением мультимедиа на приемнике. Для GCKCastSession , поддерживающего воспроизведение мультимедиа, SDK автоматически создаст экземпляр GCKRemoteMediaClient . Доступ к нему можно получить как свойство remoteMediaClient экземпляра GCKCastSession .
Добавьте следующий код в MediaViewController.swift , чтобы загрузить выбранное в данный момент видео на приемник:
@objc(MediaViewController)
class MediaViewController: UIViewController, GCKSessionManagerListener,
  GCKRemoteMediaClientListener, LocalPlayerViewDelegate, GCKRequestDelegate {
  ...

  @objc func playSelectedItemRemotely() {
    loadSelectedItem(byAppending: false)
  }

  /**
   * Loads the currently selected item in the current cast media session.
   * @param appending If YES, the item is appended to the current queue if there
   * is one. If NO, or if
   * there is no queue, a new queue containing only the selected item is created.
   */
  func loadSelectedItem(byAppending appending: Bool) {
    print("enqueue item \(String(describing: mediaInfo))")
    if let remoteMediaClient = sessionManager.currentCastSession?.remoteMediaClient {
      let mediaQueueItemBuilder = GCKMediaQueueItemBuilder()
      mediaQueueItemBuilder.mediaInformation = mediaInfo
      mediaQueueItemBuilder.autoplay = true
      mediaQueueItemBuilder.preloadTime = TimeInterval(UserDefaults.standard.integer(forKey: kPrefPreloadTime))
      let mediaQueueItem = mediaQueueItemBuilder.build()
      if appending {
        let request = remoteMediaClient.queueInsert(mediaQueueItem, beforeItemWithID: kGCKMediaQueueInvalidItemID)
        request.delegate = self
      } else {
        let queueDataBuilder = GCKMediaQueueDataBuilder(queueType: .generic)
        queueDataBuilder.items = [mediaQueueItem]
        queueDataBuilder.repeatMode = remoteMediaClient.mediaStatus?.queueRepeatMode ?? .off

        let mediaLoadRequestDataBuilder = GCKMediaLoadRequestDataBuilder()
        mediaLoadRequestDataBuilder.mediaInformation = mediaInfo
        mediaLoadRequestDataBuilder.queueData = queueDataBuilder.build()

        let request = remoteMediaClient.loadMedia(with: mediaLoadRequestDataBuilder.build())
        request.delegate = self
      }
    }
  }
  ...
}
Теперь обновите различные существующие методы, чтобы использовать логику сеанса трансляции для поддержки удаленного воспроизведения:
required init?(coder: NSCoder) {
  super.init(coder: coder)
  ...
  castMediaController = GCKUIMediaController()
  ...
}

func switchToLocalPlayback() {
  print("switchToLocalPlayback")
  if playbackMode == .local {
    return
  }
  setQueueButtonVisible(false)
  var playPosition: TimeInterval = 0
  var paused: Bool = false
  var ended: Bool = false
  if playbackMode == .remote {
    playPosition = castMediaController.lastKnownStreamPosition
    paused = (castMediaController.lastKnownPlayerState == .paused)
    ended = (castMediaController.lastKnownPlayerState == .idle)
    print("last player state: \(castMediaController.lastKnownPlayerState), ended: \(ended)")
  }
  populateMediaInfo((!paused && !ended), playPosition: playPosition)
  sessionManager.currentCastSession?.remoteMediaClient?.remove(self)
  playbackMode = .local
}

func switchToRemotePlayback() {
  print("switchToRemotePlayback; mediaInfo is \(String(describing: mediaInfo))")
  if playbackMode == .remote {
    return
  }
  // If we were playing locally, load the local media on the remote player
  if playbackMode == .local, (_localPlayerView.playerState != .stopped), (mediaInfo != nil) {
    print("loading media: \(String(describing: mediaInfo))")
    let paused: Bool = (_localPlayerView.playerState == .paused)
    let mediaQueueItemBuilder = GCKMediaQueueItemBuilder()
    mediaQueueItemBuilder.mediaInformation = mediaInfo
    mediaQueueItemBuilder.autoplay = !paused
    mediaQueueItemBuilder.preloadTime = TimeInterval(UserDefaults.standard.integer(forKey: kPrefPreloadTime))
    mediaQueueItemBuilder.startTime = _localPlayerView.streamPosition ?? 0
    let mediaQueueItem = mediaQueueItemBuilder.build()

    let queueDataBuilder = GCKMediaQueueDataBuilder(queueType: .generic)
    queueDataBuilder.items = [mediaQueueItem]
    queueDataBuilder.repeatMode = .off

    let mediaLoadRequestDataBuilder = GCKMediaLoadRequestDataBuilder()
    mediaLoadRequestDataBuilder.queueData = queueDataBuilder.build()

    let request = sessionManager.currentCastSession?.remoteMediaClient?.loadMedia(with: mediaLoadRequestDataBuilder.build())
    request?.delegate = self
  }
  _localPlayerView.stop()
  _localPlayerView.showSplashScreen()
  setQueueButtonVisible(true)
  sessionManager.currentCastSession?.remoteMediaClient?.add(self)
  playbackMode = .remote
}

/* Play has been pressed in the LocalPlayerView. */
func continueAfterPlayButtonClicked() -> Bool {
  let hasConnectedCastSession = sessionManager.hasConnectedCastSession
  if mediaInfo != nil, hasConnectedCastSession() {
    // Display an alert box to allow the user to add to queue or play
    // immediately.
    if actionSheet == nil {
      actionSheet = ActionSheet(title: "Play Item", message: "Select an action", cancelButtonText: "Cancel")
      actionSheet?.addAction(withTitle: "Play Now", target: self,
                             selector: #selector(playSelectedItemRemotely))
    }
    actionSheet?.present(in: self, sourceView: _localPlayerView)
    return false
  }
  return true
}
Теперь запустите приложение на своем мобильном устройстве. Подключитесь к устройству Cast и начните воспроизведение видео. Вы должны увидеть видео, воспроизводимое на ресивере.
7. Мини-контроллер
Контрольный список проектирования Cast требует, чтобы все приложения Cast предоставляли мини-контроллер , который появлялся, когда пользователь уходит с текущей страницы контента. Мини-контроллер обеспечивает мгновенный доступ и видимое напоминание о текущем сеансе трансляции.

Cast SDK предоставляет панель управления GCKUIMiniMediaControlsViewController , которую можно добавить в сцены, в которых вы хотите отображать постоянные элементы управления.
Для примера приложения мы собираемся использовать GCKUICastContainerViewController , который обертывает другой контроллер представления и добавляет GCKUIMiniMediaControlsViewController внизу.
Измените файл AppDelegate.swift и добавьте следующий код для условия if useCastContainerViewController в следующем методе:
func application(_: UIApplication,
                 didFinishLaunchingWithOptions _: [UIApplication.LaunchOptionsKey: Any]?) -> Bool {
  ...
  let appStoryboard = UIStoryboard(name: "Main", bundle: nil)
  guard let navigationController = appStoryboard.instantiateViewController(withIdentifier: "MainNavigation")
    as? UINavigationController else { return false }
  let castContainerVC = GCKCastContext.sharedInstance().createCastContainerController(for: navigationController)
    as GCKUICastContainerViewController
  castContainerVC.miniMediaControlsItemEnabled = true
  window = UIWindow(frame: UIScreen.main.bounds)
  window?.rootViewController = castContainerVC
  window?.makeKeyAndVisible()
  ...
}
Добавьте это свойство и метод установки/получателя для управления видимостью мини-контроллера (мы будем использовать их в следующем разделе):
var isCastControlBarsEnabled: Bool {
    get {
      if useCastContainerViewController {
        let castContainerVC = (window?.rootViewController as? GCKUICastContainerViewController)
        return castContainerVC!.miniMediaControlsItemEnabled
      } else {
        let rootContainerVC = (window?.rootViewController as? RootContainerViewController)
        return rootContainerVC!.miniMediaControlsViewEnabled
      }
    }
    set(notificationsEnabled) {
      if useCastContainerViewController {
        var castContainerVC: GCKUICastContainerViewController?
        castContainerVC = (window?.rootViewController as? GCKUICastContainerViewController)
        castContainerVC?.miniMediaControlsItemEnabled = notificationsEnabled
      } else {
        var rootContainerVC: RootContainerViewController?
        rootContainerVC = (window?.rootViewController as? RootContainerViewController)
        rootContainerVC?.miniMediaControlsViewEnabled = notificationsEnabled
      }
    }
  }
Запустите приложение и транслируйте видео. Когда на ресивере начнется воспроизведение, вы должны увидеть появление мини-контроллера в нижней части каждой сцены. Управлять дистанционным воспроизведением можно с помощью мини-контроллера. Если вы перемещаетесь между активностью просмотра и активностью локального проигрывателя, состояние мини-контроллера должно оставаться синхронизированным с состоянием воспроизведения мультимедиа-приемника.
8. Вводное наложение
Контрольный список дизайна Google Cast требует, чтобы приложение-отправитель представило кнопку Cast существующим пользователям, чтобы сообщить им, что приложение-отправитель теперь поддерживает трансляцию, а также помогает пользователям, впервые использующим Google Cast.

Класс GCKCastContext имеет метод presentCastInstructionsViewControllerOnce , который можно использовать для выделения кнопки трансляции, когда она впервые отображается пользователям. Добавьте следующий код в MediaViewController.swift и MediaTableViewController.swift :
override func viewDidLoad() {
  ...

  NotificationCenter.default.addObserver(self, selector: #selector(castDeviceDidChange),
                                         name: NSNotification.Name.gckCastStateDidChange,
                                         object: GCKCastContext.sharedInstance())
}

@objc func castDeviceDidChange(_: Notification) {
  if GCKCastContext.sharedInstance().castState != .noDevicesAvailable {
    // You can present the instructions on how to use Google Cast on
    // the first time the user uses you app
    GCKCastContext.sharedInstance().presentCastInstructionsViewControllerOnce(with: castButton)
  }
}
Запустите приложение на своем мобильном устройстве, и вы должны увидеть вводное наложение.
9. Расширенный контроллер
Контрольный список проектирования Google Cast требует, чтобы приложение-отправитель предоставляло расширенный контроллер для транслируемого мультимедиа. Расширенный контроллер представляет собой полноэкранную версию мини-контроллера.
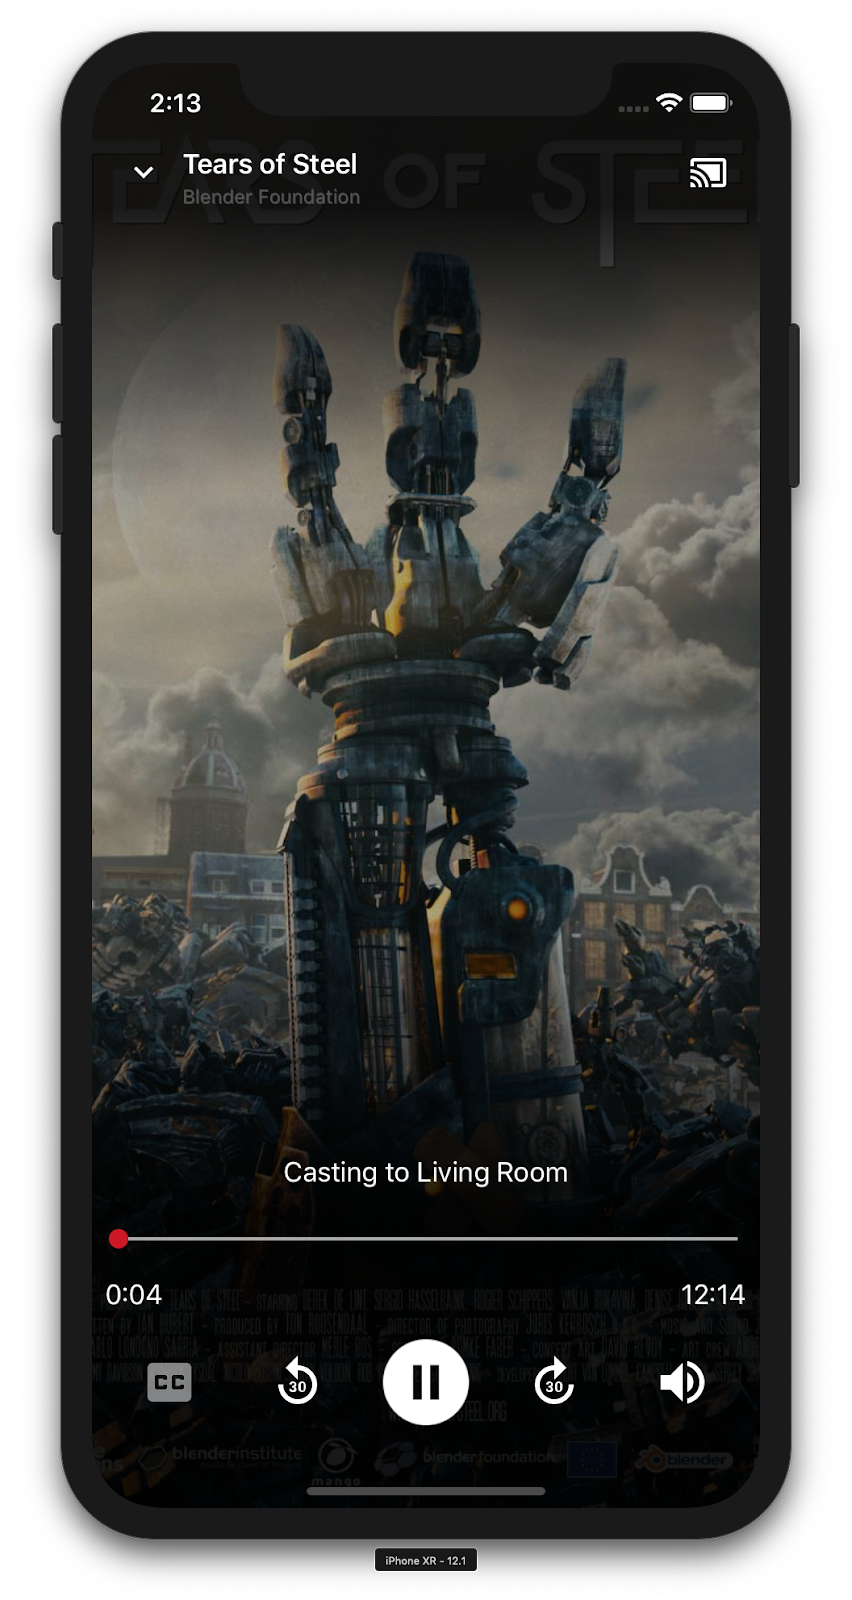
Расширенный контроллер представляет собой полноэкранный режим, который обеспечивает полный контроль над удаленным воспроизведением мультимедиа. Это представление должно позволять приложению для трансляции управлять всеми управляемыми аспектами сеанса трансляции, за исключением регулировки громкости приемника и жизненного цикла сеанса (подключение/остановка трансляции). Он также предоставляет всю информацию о состоянии медиа-сеанса (иллюстрацию, заголовок, подзаголовок и т. д.).
Функциональность этого представления реализована классом GCKUIExpandedMediaControlsViewController .
Первое, что вам нужно сделать, это включить расширенный контроллер по умолчанию в контексте приведения. Измените AppDelegate.swift , чтобы включить расширенный контроллер по умолчанию:
import GoogleCast

@UIApplicationMain
class AppDelegate: UIResponder, UIApplicationDelegate {
  ...

  func application(_: UIApplication,
                   didFinishLaunchingWithOptions _: [UIApplication.LaunchOptionsKey: Any]?) -> Bool {
    ...
    // Add after the setShareInstanceWith(options) is set.
    GCKCastContext.sharedInstance().useDefaultExpandedMediaControls = true
    ...
  }
  ...
}
Добавьте следующий код в MediaViewController.swift , чтобы загружать расширенный контроллер, когда пользователь начинает транслировать видео:
@objc func playSelectedItemRemotely() {
  ...
  appDelegate?.isCastControlBarsEnabled = false
  GCKCastContext.sharedInstance().presentDefaultExpandedMediaControls()
}
Расширенный контроллер также будет запускаться автоматически, когда пользователь касается мини-контроллера.
Запустите приложение и транслируйте видео. Вы должны увидеть расширенный контроллер. Вернитесь к списку видео, и когда вы нажмете на мини-контроллер, расширенный контроллер загрузится снова.
10. Добавьте поддержку Cast Connect.
Библиотека Cast Connect позволяет существующим приложениям-отправителям взаимодействовать с приложениями Android TV через протокол Cast. Cast Connect построен на основе инфраструктуры Cast, а ваше приложение Android TV выступает в качестве приемника.
Зависимости
Убедитесь, что в вашем Podfile google-cast-sdk указан на 4.4.8 или выше, как указано ниже. Если вы внесли изменения в файл, запустите pod update с консоли, чтобы синхронизировать изменения с вашим проектом.
pod 'google-cast-sdk', '>=4.4.8'
GCKLaunchOptions
Чтобы запустить приложение Android TV, также называемое Android-приемником, нам нужно установить для флага androidReceiverCompatible значение true в объекте GCKLaunchOptions . Этот объект GCKLaunchOptions определяет, как запускается приемник, и передается GCKCastOptions , которые установлены в общем экземпляре с помощью GCKCastContext.setSharedInstanceWith .
Добавьте следующие строки в свой AppDelegate.swift :
let options = GCKCastOptions(discoveryCriteria:
                          GCKDiscoveryCriteria(applicationID: kReceiverAppID))
...
/** Following code enables CastConnect */
let launchOptions = GCKLaunchOptions()
launchOptions.androidReceiverCompatible = true
options.launchOptions = launchOptions

GCKCastContext.setSharedInstanceWith(options)
Установить учетные данные для запуска
На стороне отправителя вы можете указать GCKCredentialsData , чтобы указать, кто присоединяется к сеансу. credentials — это строка, которую можно определить пользователем, если ваше приложение ATV ее понимает. GCKCredentialsData передается в ваше приложение Android TV только во время запуска или присоединения. Если вы установите его снова, когда вы подключены, он не будет передан в ваше приложение Android TV.
Чтобы установить учетные данные запуска, необходимо определить GCKCredentialsData в любое время после установки GCKLaunchOptions . Чтобы продемонстрировать это, давайте добавим логику для кнопки Creds , чтобы установить учетные данные, которые будут передаваться при установлении сеанса. Добавьте следующий код в свой MediaTableViewController.swift :
class MediaTableViewController: UITableViewController, GCKSessionManagerListener, MediaListModelDelegate, GCKRequestDelegate {
  ...
  private var credentials: String? = nil
  ...
  override func viewDidLoad() {
    ...
    navigationItem.leftBarButtonItem = UIBarButtonItem(title: "Creds", style: .plain,
                                                       target: self, action: #selector(toggleLaunchCreds))
    ...
    setLaunchCreds()
  }
  ...
  @objc func toggleLaunchCreds(_: Any){
    if (credentials == nil) {
        credentials = "{\"userId\":\"id123\"}"
    } else {
        credentials = nil
    }
    Toast.displayMessage("Launch Credentials: "+(credentials ?? "Null"), for: 3, in: appDelegate?.window)
    print("Credentials set: "+(credentials ?? "Null"))
    setLaunchCreds()
  }
  ...
  func setLaunchCreds() {
    GCKCastContext.sharedInstance()
        .setLaunch(GCKCredentialsData(credentials: credentials))
  }
}
Установите учетные данные при запросе загрузки
Чтобы обрабатывать credentials как в веб-приложениях, так и в приложениях Android TV Receiver, добавьте следующий код в свой класс MediaTableViewController.swift в функции loadSelectedItem :
let mediaLoadRequestDataBuilder = GCKMediaLoadRequestDataBuilder()
...
mediaLoadRequestDataBuilder.credentials = credentials
...
В зависимости от приложения-получателя, к которому осуществляет трансляцию отправитель, SDK автоматически применит указанные выше учетные данные к текущему сеансу.
Тестирование Cast Connect
Действия по установке APK-файла Android TV на Chromecast с Google TV
- Найдите IP-адрес вашего устройства Android TV. Обычно он доступен в разделе «Настройки» > «Сеть и Интернет» > (имя сети, к которой подключено ваше устройство) . Справа будут показаны подробности и IP-адрес вашего устройства в сети.
- Используйте IP-адрес вашего устройства для подключения к нему через ADB с помощью терминала:
$ adb connect <device_ip_address>:5555
- В окне терминала перейдите в папку верхнего уровня для образцов кодовой лаборатории, которые вы загрузили в начале этой кодовой лаборатории. Например:
$ cd Desktop/ios_codelab_src
- Установите файл .apk из этой папки на свой Android TV, выполнив:
$ adb -s <device_ip_address>:5555 install android-tv-app.apk
- Теперь вы сможете увидеть приложение под названием Cast Videos в меню «Ваши приложения» на своем устройстве Android TV.
- После этого создайте и запустите приложение на эмуляторе или мобильном устройстве. После установления сеанса трансляции с вашим устройством Android TV должно запуститься приложение Android Receiver на вашем Android TV. Воспроизведение видео с мобильного отправителя iOS должно запустить видео в Android-приемнике и позволить вам управлять воспроизведением с помощью пульта дистанционного управления вашего устройства Android TV.
11. Настройте виджеты Cast
Инициализация
Начните с папки App-Done. Добавьте следующее в метод applicationDidFinishLaunchingWithOptions в файле AppDelegate.swift .
func application(_: UIApplication,
                 didFinishLaunchingWithOptions _: [UIApplication.LaunchOptionsKey: Any]?) -> Bool {
  ...
  let styler = GCKUIStyle.sharedInstance()
  ...
}
Как только вы закончите применять одну или несколько настроек, как указано в остальной части этой лаборатории кода, зафиксируйте стили, вызвав приведенный ниже код.
styler.apply()
Настройка представлений трансляции
Вы можете настроить все представления, которыми управляет платформа Cast Application Framework, используя рекомендации по стилю по умолчанию для всех представлений. В качестве примера давайте изменим цвет оттенка значка.
styler.castViews.iconTintColor = .lightGray
При необходимости вы можете переопределить настройки по умолчанию для каждого экрана. Например, чтобы переопределить LightGrayColor для цвета оттенка значка только для расширенного медиа-контроллера.
styler.castViews.mediaControl.expandedController.iconTintColor = .green
Изменение цвета
Вы можете настроить цвет фона для всех представлений (или индивидуально для каждого представления). Следующий код устанавливает синий цвет фона для всех представлений, предоставленных вашей Cast Application Framework.
styler.castViews.backgroundColor = .blue
styler.castViews.mediaControl.miniController.backgroundColor = .yellow
Изменение шрифтов
Вы можете настроить шрифты для различных меток, отображаемых в представлениях трансляции. Для наглядности давайте установим для всех шрифтов значение «Courier-Oblique».
styler.castViews.headingTextFont = UIFont.init(name: "Courier-Oblique", size: 16) ?? UIFont.systemFont(ofSize: 16)
styler.castViews.mediaControl.headingTextFont = UIFont.init(name: "Courier-Oblique", size: 6) ?? UIFont.systemFont(ofSize: 6)
Изменение изображений кнопок по умолчанию
Добавьте в проект свои собственные изображения и назначьте изображения кнопкам, чтобы стилизовать их.
let muteOnImage = UIImage.init(named: "yourImage.png")
if let muteOnImage = muteOnImage {
  styler.castViews.muteOnImage = muteOnImage
}
Изменение темы кнопки трансляции
Вы также можете оформить виджеты Cast с помощью протокола UIAppearance. Следующий код определяет тему GCKUICastButton во всех отображаемых представлениях:
GCKUICastButton.appearance().tintColor = UIColor.gray
12. Поздравления
Теперь вы знаете, как включить Cast в видеоприложении с помощью виджетов Cast SDK в iOS.
Дополнительные сведения см. в руководстве разработчика iOS Sender .
1. Обзор
Эта лаборатория научит вас, как изменить существующее видеоприложение iOS для трансляции контента на устройство с поддержкой Google Cast .
Что такое Google Cast?
Google Cast позволяет пользователям транслировать контент с мобильного устройства на телевизор. Затем пользователи могут использовать свое мобильное устройство в качестве пульта дистанционного управления для воспроизведения мультимедиа на телевизоре.
Google Cast SDK позволяет расширить возможности вашего приложения для управления устройствами с поддержкой Google Cast (такими как телевизор или аудиосистема). Cast SDK позволяет добавлять необходимые компоненты пользовательского интерфейса на основе контрольного списка Google Cast Design .
Контрольный список Google Cast Design предназначен для того, чтобы сделать использование Cast простым и предсказуемым на всех поддерживаемых платформах.
Что мы собираемся строить?
После завершения этой лабораторной работы у вас будет видеоприложение для iOS, которое сможет транслировать видео на устройство Google Cast.
Что вы узнаете
- Как добавить Google Cast SDK в пример приложения для видео.
- Как добавить кнопку Cast для выбора устройства Google Cast.
- Как подключиться к устройству Cast и запустить медиа-ресивер.
- Как скинуть видео.
- Как добавить мини-контроллер Cast в ваше приложение.
- Как добавить расширенный контроллер.
- Как обеспечить вводное наложение.
- Как настроить виджеты Cast.
- Как интегрировать Cast Connect
Что вам понадобится
- Последняя версия Xcode .
- Одно мобильное устройство с iOS 9 или новее (или Xcode Simulator).
- USB-кабель для передачи данных для подключения мобильного устройства к компьютеру разработки (при использовании устройства).
- Устройство Google Cast, например Chromecast или Android TV, с доступом в Интернет.
- Телевизор или монитор с входом HDMI.
- Chromecast с Google TV требуется для проверки интеграции Cast Connect, но не является обязательным для остальной части Codelab. Если у вас его нет, можете пропустить шаг «Добавить поддержку Cast Connect» в конце этого руководства.
Опыт
- Вам потребуются предыдущие знания в области разработки iOS.
- Вам также потребуются предварительные знания о просмотре телевизора :)
Как вы будете использовать этот урок?
Как бы вы оценили свой опыт создания приложений для iOS?
Как бы вы оценили свои впечатления от просмотра телевидения?
2. Получите пример кода
Вы можете загрузить весь пример кода на свой компьютер...
и распакуйте загруженный zip-файл.
3. Запустите пример приложения.
Сначала давайте посмотрим, как выглядит готовый пример приложения. Приложение представляет собой базовый видеоплеер. Пользователь может выбрать видео из списка, а затем воспроизвести его локально на устройстве или транслировать его на устройство Google Cast.
После загрузки кода следующие инструкции описывают, как открыть и запустить готовый пример приложения в Xcode:
Часто задаваемые вопросы
Настройка CocoaPods
Чтобы настроить CocoaPods, перейдите на консоль и установите его, используя Ruby по умолчанию, доступный в macOS:
sudo gem install cocoapods
Если у вас возникли проблемы, обратитесь к официальной документации, чтобы загрузить и установить менеджер зависимостей.
Настройка проекта
- Перейдите в свой терминал и перейдите в каталог codelab.
- Установите зависимости из подфайла.
cd app-done
pod update
pod install
- Откройте Xcode и выберите «Открыть другой проект…».
- Выберите файл
CastVideos-ios.xcworkspaceиз app-doneв папке примера кода.
Запустите приложение
Выберите цель и симулятор, а затем запустите приложение:
Через несколько секунд вы должны увидеть, как видеоприложение появится.
Обязательно нажмите «Разрешить», когда появится уведомление о принятии входящих сетевых подключений. Значок трансляции не появится, если этот параметр не принят.
Нажмите кнопку Cast и выберите свое устройство Google Cast.
Выберите видео, нажмите кнопку воспроизведения.
Видео начнет воспроизводиться на вашем устройстве Google Cast.
Отобразится расширенный контроллер. Вы можете использовать кнопку воспроизведения/паузы для управления воспроизведением.
Вернитесь к списку видео.
Мини-контроллер теперь виден в нижней части экрана.
Нажмите кнопку паузы на мини-контроллере, чтобы приостановить видео на ресивере. Нажмите кнопку воспроизведения на мини-контроллере, чтобы продолжить воспроизведение видео еще раз.
Нажмите кнопку Cast, чтобы остановить трансляцию на устройство Google Cast.
4. Подготовьте стартовый проект
Нам нужно добавить поддержку Google Cast в загруженное вами стартовое приложение. Вот некоторая терминология Google Cast, которую мы будем использовать в этой лаборатории кода:
- приложение- отправитель работает на мобильном устройстве или ноутбуке,
- приложение- приемник работает на устройстве Google Cast.
Настройка проекта
Теперь вы готовы к созданию поверх стартового проекта с использованием Xcode:
- Перейдите в свой терминал и перейдите в каталог codelab.
- Установите зависимости из подфайла.
cd app-start
pod update
pod install
- Откройте Xcode и выберите «Открыть другой проект…».
- Выберите файл
CastVideos-ios.xcworkspaceиз каталог app-startв папке примера кода.
Дизайн приложения
Приложение получает список видео с удаленного веб-сервера и предоставляет пользователю список для просмотра. Пользователи могут выбрать видео, чтобы просмотреть подробности, или воспроизвести его локально на мобильном устройстве.
Приложение состоит из двух основных контроллеров представления: MediaTableViewController и MediaViewController.
Медиатаблевиевконтроллер
Этот UITableViewController отображает список видео из экземпляра MediaListModel . Список видео и связанные с ним метаданные размещаются на удаленном сервере в виде файла JSON . MediaListModel извлекает этот JSON и обрабатывает его для создания списка объектов MediaItem .
Объект MediaItem моделирует видео и связанные с ним метаданные, такие как заголовок, описание, URL-адрес изображения и URL-адрес потока.
MediaTableViewController создает экземпляр MediaListModel , а затем регистрируется как MediaListModelDelegate чтобы получать информацию о загрузке метаданных мультимедиа, чтобы он мог загрузить табличное представление.
Пользователю предоставляется список миниатюр видео с кратким описанием каждого видео. Когда элемент выбран, соответствующий MediaItem передается в MediaViewController .
Медиавиевконтроллер
Этот контроллер представления отображает метаданные о конкретном видео и позволяет пользователю воспроизводить видео локально на мобильном устройстве.
Контроллер представления содержит LocalPlayerView , некоторые элементы управления мультимедиа и текстовую область для отображения описания выбранного видео. Плеер закрывает верхнюю часть экрана, оставляя место для подробного описания видео под ним. Пользователь может воспроизводить/приостанавливать воспроизведение или искать локальное воспроизведение видео.
Часто задаваемые вопросы
5. Добавление кнопки трансляции
Приложение с поддержкой Cast отображает кнопку Cast в каждом из своих контроллеров представления. При нажатии на кнопку Cast отображается список устройств Cast, которые пользователь может выбрать. Если пользователь воспроизводил контент локально на устройстве-отправителе, выбор устройства Cast запускает или возобновляет воспроизведение на этом устройстве Cast. В любой момент во время сеанса Cast пользователь может нажать кнопку Cast и прекратить трансляцию вашего приложения на устройство Cast. Пользователь должен иметь возможность подключаться к устройству Cast или отключаться от него, находясь на любом экране вашего приложения, как описано в контрольном списке Google Cast Design .
Конфигурация
Для стартового проекта требуются те же зависимости и настройки Xcode, что и для завершенного примера приложения. Вернитесь в этот раздел и выполните те же действия, чтобы добавить GoogleCast.framework в проект начального приложения.
Инициализация
Платформа Cast имеет глобальный одноэлементный объект GCKCastContext , который координирует все действия платформы. Этот объект должен быть инициализирован на ранней стадии жизненного цикла приложения, обычно в методе application(_:didFinishLaunchingWithOptions:) делегата приложения, чтобы автоматическое возобновление сеанса при перезапуске приложения-отправителя могло правильно сработать и начать сканирование устройств.
Объект GCKCastOptions должен быть предоставлен при инициализации GCKCastContext . Этот класс содержит параметры, влияющие на поведение платформы. Наиболее важным из них является идентификатор приложения-приемника, который используется для фильтрации результатов обнаружения устройств Cast и для запуска приложения-приемника при запуске сеанса Cast.
Метод application(_:didFinishLaunchingWithOptions:) также является хорошим местом для настройки делегата ведения журнала для получения сообщений журнала из платформы Cast. Они могут быть полезны для отладки и устранения неполадок.
Когда вы разрабатываете собственное приложение с поддержкой Cast, вам необходимо зарегистрироваться в качестве разработчика Cast, а затем получить идентификатор приложения для своего приложения. Для этой лаборатории кода мы будем использовать пример идентификатора приложения.
Добавьте следующий код в AppDelegate.swift , чтобы инициализировать GCKCastContext с идентификатором приложения из пользовательских настроек по умолчанию, и добавьте средство ведения журнала для платформы Google Cast:
import GoogleCast

@UIApplicationMain
class AppDelegate: UIResponder, UIApplicationDelegate {
  fileprivate var enableSDKLogging = true

  ...

  func application(_: UIApplication,
                   didFinishLaunchingWithOptions _: [UIApplication.LaunchOptionsKey: Any]?) -> Bool {

    ...
    let options = GCKCastOptions(discoveryCriteria: GCKDiscoveryCriteria(applicationID: kReceiverAppID))
    options.physicalVolumeButtonsWillControlDeviceVolume = true
    GCKCastContext.setSharedInstanceWith(options)

    window?.clipsToBounds = true
    setupCastLogging()
    ...
  }
  ...
  func setupCastLogging() {
    let logFilter = GCKLoggerFilter()
    let classesToLog = ["GCKDeviceScanner", "GCKDeviceProvider", "GCKDiscoveryManager", "GCKCastChannel",
                        "GCKMediaControlChannel", "GCKUICastButton", "GCKUIMediaController", "NSMutableDictionary"]
    logFilter.setLoggingLevel(.verbose, forClasses: classesToLog)
    GCKLogger.sharedInstance().filter = logFilter
    GCKLogger.sharedInstance().delegate = self
  }
}

...

// MARK: - GCKLoggerDelegate

extension AppDelegate: GCKLoggerDelegate {
  func logMessage(_ message: String,
                  at _: GCKLoggerLevel,
                  fromFunction function: String,
                  location: String) {
    if enableSDKLogging {
      // Send SDK's log messages directly to the console.
      print("\(location): \(function) - \(message)")
    }
  }
}
Кнопка трансляции
Теперь, когда GCKCastContext инициализирован, нам нужно добавить кнопку Cast, чтобы позволить пользователю выбрать устройство Cast. Cast SDK предоставляет компонент кнопки Cast под названием GCKUICastButton в качестве подкласса UIButton . Его можно добавить в строку заголовка приложения, обернув его в UIBarButtonItem . Нам нужно добавить кнопку Cast как в MediaTableViewController , так и MediaViewController .
Добавьте следующий код в MediaTableViewController.swift и MediaViewController.swift :
import GoogleCast

@objc(MediaTableViewController)
class MediaTableViewController: UITableViewController, GCKSessionManagerListener,
  MediaListModelDelegate, GCKRequestDelegate {
  private var castButton: GCKUICastButton!
  ...
  override func viewDidLoad() {
    print("MediaTableViewController - viewDidLoad")
    super.viewDidLoad()

    ...
    castButton = GCKUICastButton(frame: CGRect(x: CGFloat(0), y: CGFloat(0),
                                               width: CGFloat(24), height: CGFloat(24)))
    // Overwrite the UIAppearance theme in the AppDelegate.
    castButton.tintColor = UIColor.white
    navigationItem.rightBarButtonItem = UIBarButtonItem(customView: castButton)

    ...
  }
  ...
}
Затем добавьте следующий код в свой MediaViewController.swift :
import GoogleCast

@objc(MediaViewController)
class MediaViewController: UIViewController, GCKSessionManagerListener, GCKRemoteMediaClientListener,
  LocalPlayerViewDelegate, GCKRequestDelegate {
  private var castButton: GCKUICastButton!
  ...
  override func viewDidLoad() {
    super.viewDidLoad()
    print("in MediaViewController viewDidLoad")
    ...
    castButton = GCKUICastButton(frame: CGRect(x: CGFloat(0), y: CGFloat(0),
                                               width: CGFloat(24), height: CGFloat(24)))
    // Overwrite the UIAppearance theme in the AppDelegate.
    castButton.tintColor = UIColor.white
    navigationItem.rightBarButtonItem = UIBarButtonItem(customView: castButton)

    ...
  }
  ...
}
Теперь запустите приложение. Вы должны увидеть кнопку Cast на панели навигации приложения, и когда вы нажмете на нее, она отобразит список устройств Cast в вашей локальной сети. Обнаружение устройства управляется автоматически с помощью GCKCastContext . Выберите устройство Cast, и образец приложения-приемника загрузится на устройство Cast. Вы можете переключаться между действиями просмотра и действиями локального игрока, а состояние кнопки трансляции синхронизируется.
Мы не подключили поддержку воспроизведения мультимедиа, поэтому вы пока не можете воспроизводить видео на устройстве Cast. Нажмите кнопку Cast, чтобы остановить трансляцию.
6. Кастинг видеоконтента
Мы расширим пример приложения, чтобы он также мог удаленно воспроизводить видео на устройстве Cast. Для этого нам нужно прослушивать различные события, генерируемые средой Cast.
Кастинг СМИ
На высоком уровне, если вы хотите воспроизвести медиафайл на устройстве Cast, необходимо выполнить следующее:
- Создайте объект
GCKMediaInformationиз Cast SDK, который моделирует элемент мультимедиа. - Пользователь подключается к устройству Cast, чтобы запустить приложение-приемник.
- Загрузите объект
GCKMediaInformationв приемник и воспроизведите содержимое. - Отслеживайте статус СМИ.
- Отправляйте команды воспроизведения на приемник на основе взаимодействия с пользователем.
Шаг 1 представляет собой сопоставление одного объекта с другим; GCKMediaInformation — это то, что понимает Cast SDK, а MediaItem — это инкапсуляция нашего приложения для элемента мультимедиа; мы можем легко сопоставить MediaItem с GCKMediaInformation . Мы уже выполнили Шаг 2 в предыдущем разделе. Шаг 3 легко выполнить с помощью Cast SDK.
Пример приложения MediaViewController уже различает локальное и удаленное воспроизведение, используя это перечисление:
enum PlaybackMode: Int {
  case none = 0
  case local
  case remote
}

private var playbackMode = PlaybackMode.none
В этой кодовой лаборатории вам не важно точно понимать, как работает вся логика примера проигрывателя. Важно понимать, что медиаплеер вашего приложения необходимо будет изменить, чтобы он одинаково распознавал два места воспроизведения.
На данный момент локальный проигрыватель всегда находится в состоянии локального воспроизведения, поскольку он еще ничего не знает о состояниях кастинга. Нам нужно обновить пользовательский интерфейс на основе переходов состояний, которые происходят в среде Cast. Например, если мы начнем трансляцию, нам нужно остановить локальное воспроизведение и отключить некоторые элементы управления. Аналогично, если мы прекратим трансляцию, находясь в этом контроллере представления, нам нужно будет перейти к локальному воспроизведению. Чтобы справиться с этим, нам нужно прослушивать различные события, генерируемые средой Cast.
Управление сеансами трансляции
Для платформы Cast сеанс Cast объединяет этапы подключения к устройству, запуска (или присоединения), подключения к приложению-получателю и инициализации канала управления мультимедиа, если это необходимо. Канал управления мультимедиа — это то, как платформа Cast отправляет и получает сообщения от медиаплеера-получателя.
Сеанс трансляции запускается автоматически, когда пользователь выбирает устройство с помощью кнопки трансляции, и автоматически останавливается, когда пользователь отключается. Повторное подключение к сеансу получателя из-за проблем с сетью также автоматически обрабатывается платформой Cast.
Сеансы трансляции управляются GCKSessionManager , доступ к которому можно получить через GCKCastContext.sharedInstance().sessionManager . Обратные вызовы GCKSessionManagerListener можно использовать для мониторинга событий сеанса, таких как создание, приостановка, возобновление и завершение.
Сначала нам нужно зарегистрировать прослушиватель сеанса и инициализировать некоторые переменные:
class MediaViewController: UIViewController, GCKSessionManagerListener,
  GCKRemoteMediaClientListener, LocalPlayerViewDelegate, GCKRequestDelegate {

  ...
  private var sessionManager: GCKSessionManager!
  ...

  required init?(coder: NSCoder) {
    super.init(coder: coder)

    sessionManager = GCKCastContext.sharedInstance().sessionManager

    ...
  }

  override func viewWillAppear(_ animated: Bool) {
    ...

    let hasConnectedSession: Bool = (sessionManager.hasConnectedSession())
    if hasConnectedSession, (playbackMode != .remote) {
      populateMediaInfo(false, playPosition: 0)
      switchToRemotePlayback()
    } else if sessionManager.currentSession == nil, (playbackMode != .local) {
      switchToLocalPlayback()
    }

    sessionManager.add(self)

    ...
  }

  override func viewWillDisappear(_ animated: Bool) {
    ...

    sessionManager.remove(self)
    sessionManager.currentCastSession?.remoteMediaClient?.remove(self)
    ...
    super.viewWillDisappear(animated)
  }

  func switchToLocalPlayback() {
    ...

    sessionManager.currentCastSession?.remoteMediaClient?.remove(self)

    ...
  }

  func switchToRemotePlayback() {
    ...

    sessionManager.currentCastSession?.remoteMediaClient?.add(self)

    ...
  }


  // MARK: - GCKSessionManagerListener

  func sessionManager(_: GCKSessionManager, didStart session: GCKSession) {
    print("MediaViewController: sessionManager didStartSession \(session)")
    setQueueButtonVisible(true)
    switchToRemotePlayback()
  }

  func sessionManager(_: GCKSessionManager, didResumeSession session: GCKSession) {
    print("MediaViewController: sessionManager didResumeSession \(session)")
    setQueueButtonVisible(true)
    switchToRemotePlayback()
  }

  func sessionManager(_: GCKSessionManager, didEnd _: GCKSession, withError error: Error?) {
    print("session ended with error: \(String(describing: error))")
    let message = "The Casting session has ended.\n\(String(describing: error))"
    if let window = appDelegate?.window {
      Toast.displayMessage(message, for: 3, in: window)
    }
    setQueueButtonVisible(false)
    switchToLocalPlayback()
  }

  func sessionManager(_: GCKSessionManager, didFailToStartSessionWithError error: Error?) {
    if let error = error {
      showAlert(withTitle: "Failed to start a session", message: error.localizedDescription)
    }
    setQueueButtonVisible(false)
  }

  func sessionManager(_: GCKSessionManager,
                      didFailToResumeSession _: GCKSession, withError _: Error?) {
    if let window = UIApplication.shared.delegate?.window {
      Toast.displayMessage("The Casting session could not be resumed.",
                           for: 3, in: window)
    }
    setQueueButtonVisible(false)
    switchToLocalPlayback()
  }

  ...
}
В MediaViewController мы хотим получать информацию, когда мы подключаемся или отключаемся от устройства Cast, чтобы мы могли переключиться на локальный проигрыватель или обратно. Обратите внимание, что соединение может быть нарушено не только из-за запуска экземпляра вашего приложения на вашем мобильном устройстве, но также из-за другого экземпляра вашего (или другого) приложения, запущенного на другом мобильном устройстве.
Текущий активный сеанс доступен как GCKCastContext.sharedInstance().sessionManager.currentCastSession . Сеансы создаются и закрываются автоматически в ответ на жесты пользователя в диалоговых окнах трансляции.
Загрузка мультимедиа
В Cast SDK GCKRemoteMediaClient предоставляет набор удобных API для управления удаленным воспроизведением мультимедиа на приемнике. Для GCKCastSession , поддерживающего воспроизведение мультимедиа, SDK автоматически создаст экземпляр GCKRemoteMediaClient . Доступ к нему можно получить как свойство remoteMediaClient экземпляра GCKCastSession .
Добавьте следующий код в MediaViewController.swift , чтобы загрузить выбранное в данный момент видео на приемник:
@objc(MediaViewController)
class MediaViewController: UIViewController, GCKSessionManagerListener,
  GCKRemoteMediaClientListener, LocalPlayerViewDelegate, GCKRequestDelegate {
  ...

  @objc func playSelectedItemRemotely() {
    loadSelectedItem(byAppending: false)
  }

  /**
   * Loads the currently selected item in the current cast media session.
   * @param appending If YES, the item is appended to the current queue if there
   * is one. If NO, or if
   * there is no queue, a new queue containing only the selected item is created.
   */
  func loadSelectedItem(byAppending appending: Bool) {
    print("enqueue item \(String(describing: mediaInfo))")
    if let remoteMediaClient = sessionManager.currentCastSession?.remoteMediaClient {
      let mediaQueueItemBuilder = GCKMediaQueueItemBuilder()
      mediaQueueItemBuilder.mediaInformation = mediaInfo
      mediaQueueItemBuilder.autoplay = true
      mediaQueueItemBuilder.preloadTime = TimeInterval(UserDefaults.standard.integer(forKey: kPrefPreloadTime))
      let mediaQueueItem = mediaQueueItemBuilder.build()
      if appending {
        let request = remoteMediaClient.queueInsert(mediaQueueItem, beforeItemWithID: kGCKMediaQueueInvalidItemID)
        request.delegate = self
      } else {
        let queueDataBuilder = GCKMediaQueueDataBuilder(queueType: .generic)
        queueDataBuilder.items = [mediaQueueItem]
        queueDataBuilder.repeatMode = remoteMediaClient.mediaStatus?.queueRepeatMode ?? .off

        let mediaLoadRequestDataBuilder = GCKMediaLoadRequestDataBuilder()
        mediaLoadRequestDataBuilder.mediaInformation = mediaInfo
        mediaLoadRequestDataBuilder.queueData = queueDataBuilder.build()

        let request = remoteMediaClient.loadMedia(with: mediaLoadRequestDataBuilder.build())
        request.delegate = self
      }
    }
  }
  ...
}
Теперь обновите различные существующие методы, чтобы использовать логику сеанса трансляции для поддержки удаленного воспроизведения:
required init?(coder: NSCoder) {
  super.init(coder: coder)
  ...
  castMediaController = GCKUIMediaController()
  ...
}

func switchToLocalPlayback() {
  print("switchToLocalPlayback")
  if playbackMode == .local {
    return
  }
  setQueueButtonVisible(false)
  var playPosition: TimeInterval = 0
  var paused: Bool = false
  var ended: Bool = false
  if playbackMode == .remote {
    playPosition = castMediaController.lastKnownStreamPosition
    paused = (castMediaController.lastKnownPlayerState == .paused)
    ended = (castMediaController.lastKnownPlayerState == .idle)
    print("last player state: \(castMediaController.lastKnownPlayerState), ended: \(ended)")
  }
  populateMediaInfo((!paused && !ended), playPosition: playPosition)
  sessionManager.currentCastSession?.remoteMediaClient?.remove(self)
  playbackMode = .local
}

func switchToRemotePlayback() {
  print("switchToRemotePlayback; mediaInfo is \(String(describing: mediaInfo))")
  if playbackMode == .remote {
    return
  }
  // If we were playing locally, load the local media on the remote player
  if playbackMode == .local, (_localPlayerView.playerState != .stopped), (mediaInfo != nil) {
    print("loading media: \(String(describing: mediaInfo))")
    let paused: Bool = (_localPlayerView.playerState == .paused)
    let mediaQueueItemBuilder = GCKMediaQueueItemBuilder()
    mediaQueueItemBuilder.mediaInformation = mediaInfo
    mediaQueueItemBuilder.autoplay = !paused
    mediaQueueItemBuilder.preloadTime = TimeInterval(UserDefaults.standard.integer(forKey: kPrefPreloadTime))
    mediaQueueItemBuilder.startTime = _localPlayerView.streamPosition ?? 0
    let mediaQueueItem = mediaQueueItemBuilder.build()

    let queueDataBuilder = GCKMediaQueueDataBuilder(queueType: .generic)
    queueDataBuilder.items = [mediaQueueItem]
    queueDataBuilder.repeatMode = .off

    let mediaLoadRequestDataBuilder = GCKMediaLoadRequestDataBuilder()
    mediaLoadRequestDataBuilder.queueData = queueDataBuilder.build()

    let request = sessionManager.currentCastSession?.remoteMediaClient?.loadMedia(with: mediaLoadRequestDataBuilder.build())
    request?.delegate = self
  }
  _localPlayerView.stop()
  _localPlayerView.showSplashScreen()
  setQueueButtonVisible(true)
  sessionManager.currentCastSession?.remoteMediaClient?.add(self)
  playbackMode = .remote
}

/* Play has been pressed in the LocalPlayerView. */
func continueAfterPlayButtonClicked() -> Bool {
  let hasConnectedCastSession = sessionManager.hasConnectedCastSession
  if mediaInfo != nil, hasConnectedCastSession() {
    // Display an alert box to allow the user to add to queue or play
    // immediately.
    if actionSheet == nil {
      actionSheet = ActionSheet(title: "Play Item", message: "Select an action", cancelButtonText: "Cancel")
      actionSheet?.addAction(withTitle: "Play Now", target: self,
                             selector: #selector(playSelectedItemRemotely))
    }
    actionSheet?.present(in: self, sourceView: _localPlayerView)
    return false
  }
  return true
}
Теперь запустите приложение на своем мобильном устройстве. Подключитесь к устройству Cast и начните воспроизведение видео. Вы должны увидеть видео, воспроизводимое на ресивере.
7. Мини-контроллер
Контрольный список проектирования Cast требует, чтобы все приложения Cast предоставляли мини-контроллер , который появлялся, когда пользователь уходит с текущей страницы контента. Мини-контроллер обеспечивает мгновенный доступ и видимое напоминание о текущем сеансе трансляции.
Cast SDK предоставляет панель управления GCKUIMiniMediaControlsViewController , которую можно добавить в сцены, в которых вы хотите отображать постоянные элементы управления.
Для примера приложения мы собираемся использовать GCKUICastContainerViewController , который обертывает другой контроллер представления и добавляет GCKUIMiniMediaControlsViewController внизу.
Измените файл AppDelegate.swift и добавьте следующий код для условия if useCastContainerViewController в следующем методе:
func application(_: UIApplication,
                 didFinishLaunchingWithOptions _: [UIApplication.LaunchOptionsKey: Any]?) -> Bool {
  ...
  let appStoryboard = UIStoryboard(name: "Main", bundle: nil)
  guard let navigationController = appStoryboard.instantiateViewController(withIdentifier: "MainNavigation")
    as? UINavigationController else { return false }
  let castContainerVC = GCKCastContext.sharedInstance().createCastContainerController(for: navigationController)
    as GCKUICastContainerViewController
  castContainerVC.miniMediaControlsItemEnabled = true
  window = UIWindow(frame: UIScreen.main.bounds)
  window?.rootViewController = castContainerVC
  window?.makeKeyAndVisible()
  ...
}
Добавьте это свойство и метод установки/получателя для управления видимостью мини-контроллера (мы будем использовать их в следующем разделе):
var isCastControlBarsEnabled: Bool {
    get {
      if useCastContainerViewController {
        let castContainerVC = (window?.rootViewController as? GCKUICastContainerViewController)
        return castContainerVC!.miniMediaControlsItemEnabled
      } else {
        let rootContainerVC = (window?.rootViewController as? RootContainerViewController)
        return rootContainerVC!.miniMediaControlsViewEnabled
      }
    }
    set(notificationsEnabled) {
      if useCastContainerViewController {
        var castContainerVC: GCKUICastContainerViewController?
        castContainerVC = (window?.rootViewController as? GCKUICastContainerViewController)
        castContainerVC?.miniMediaControlsItemEnabled = notificationsEnabled
      } else {
        var rootContainerVC: RootContainerViewController?
        rootContainerVC = (window?.rootViewController as? RootContainerViewController)
        rootContainerVC?.miniMediaControlsViewEnabled = notificationsEnabled
      }
    }
  }
Запустите приложение и транслируйте видео. Когда на ресивере начнется воспроизведение, вы должны увидеть появление мини-контроллера в нижней части каждой сцены. Управлять дистанционным воспроизведением можно с помощью мини-контроллера. Если вы перемещаетесь между активностью просмотра и активностью локального проигрывателя, состояние мини-контроллера должно оставаться синхронизированным с состоянием воспроизведения мультимедиа-приемника.
8. Вводное наложение
Контрольный список дизайна Google Cast требует, чтобы приложение-отправитель представило кнопку Cast существующим пользователям, чтобы сообщить им, что приложение-отправитель теперь поддерживает трансляцию, а также помогает пользователям, впервые использующим Google Cast.
Класс GCKCastContext имеет метод presentCastInstructionsViewControllerOnce , который можно использовать для выделения кнопки трансляции, когда она впервые отображается пользователям. Добавьте следующий код в MediaViewController.swift и MediaTableViewController.swift :
override func viewDidLoad() {
  ...

  NotificationCenter.default.addObserver(self, selector: #selector(castDeviceDidChange),
                                         name: NSNotification.Name.gckCastStateDidChange,
                                         object: GCKCastContext.sharedInstance())
}

@objc func castDeviceDidChange(_: Notification) {
  if GCKCastContext.sharedInstance().castState != .noDevicesAvailable {
    // You can present the instructions on how to use Google Cast on
    // the first time the user uses you app
    GCKCastContext.sharedInstance().presentCastInstructionsViewControllerOnce(with: castButton)
  }
}
Запустите приложение на своем мобильном устройстве, и вы должны увидеть вводное наложение.
9. Расширенный контроллер
Контрольный список проектирования Google Cast требует, чтобы приложение-отправитель предоставляло расширенный контроллер для транслируемого мультимедиа. Расширенный контроллер представляет собой полноэкранную версию мини-контроллера.
Расширенный контроллер представляет собой полноэкранный режим, который обеспечивает полный контроль над удаленным воспроизведением мультимедиа. Это представление должно позволять приложению для трансляции управлять всеми управляемыми аспектами сеанса трансляции, за исключением регулировки громкости приемника и жизненного цикла сеанса (подключение/остановка трансляции). Он также предоставляет всю информацию о состоянии медиа-сеанса (иллюстрацию, заголовок, подзаголовок и т. д.).
Функциональность этого представления реализована классом GCKUIExpandedMediaControlsViewController .
Первое, что вам нужно сделать, это включить расширенный контроллер по умолчанию в контексте приведения. Измените AppDelegate.swift , чтобы включить расширенный контроллер по умолчанию:
import GoogleCast

@UIApplicationMain
class AppDelegate: UIResponder, UIApplicationDelegate {
  ...

  func application(_: UIApplication,
                   didFinishLaunchingWithOptions _: [UIApplication.LaunchOptionsKey: Any]?) -> Bool {
    ...
    // Add after the setShareInstanceWith(options) is set.
    GCKCastContext.sharedInstance().useDefaultExpandedMediaControls = true
    ...
  }
  ...
}
Добавьте следующий код в MediaViewController.swift , чтобы загружать расширенный контроллер, когда пользователь начинает транслировать видео:
@objc func playSelectedItemRemotely() {
  ...
  appDelegate?.isCastControlBarsEnabled = false
  GCKCastContext.sharedInstance().presentDefaultExpandedMediaControls()
}
Расширенный контроллер также будет запускаться автоматически, когда пользователь касается мини-контроллера.
Запустите приложение и транслируйте видео. Вы должны увидеть расширенный контроллер. Вернитесь к списку видео, и когда вы нажмете на мини-контроллер, расширенный контроллер загрузится снова.
10. Добавьте поддержку Cast Connect.
Библиотека Cast Connect позволяет существующим приложениям-отправителям взаимодействовать с приложениями Android TV через протокол Cast. Cast Connect построен на основе инфраструктуры Cast, а ваше приложение Android TV выступает в качестве приемника.
Зависимости
Убедитесь, что в вашем Podfile google-cast-sdk указан на 4.4.8 или выше, как указано ниже. Если вы внесли изменения в файл, запустите pod update с консоли, чтобы синхронизировать изменения с вашим проектом.
pod 'google-cast-sdk', '>=4.4.8'
GCKLaunchOptions
Чтобы запустить приложение Android TV, также называемое Android-приемником, нам нужно установить для флага androidReceiverCompatible значение true в объекте GCKLaunchOptions . Этот объект GCKLaunchOptions определяет, как запускается приемник, и передается GCKCastOptions , которые установлены в общем экземпляре с помощью GCKCastContext.setSharedInstanceWith .
Добавьте следующие строки в свой AppDelegate.swift :
let options = GCKCastOptions(discoveryCriteria:
                          GCKDiscoveryCriteria(applicationID: kReceiverAppID))
...
/** Following code enables CastConnect */
let launchOptions = GCKLaunchOptions()
launchOptions.androidReceiverCompatible = true
options.launchOptions = launchOptions

GCKCastContext.setSharedInstanceWith(options)
Установить учетные данные для запуска
На стороне отправителя вы можете указать GCKCredentialsData , чтобы указать, кто присоединяется к сеансу. credentials — это строка, которую можно определить пользователем, если ваше приложение ATV ее понимает. GCKCredentialsData передается в ваше приложение Android TV только во время запуска или присоединения. Если вы установите его снова, когда вы подключены, он не будет передан в ваше приложение Android TV.
Чтобы установить учетные данные запуска, необходимо определить GCKCredentialsData в любое время после установки GCKLaunchOptions . Чтобы продемонстрировать это, давайте добавим логику для кнопки Creds , чтобы установить учетные данные, которые будут передаваться при установлении сеанса. Добавьте следующий код в свой MediaTableViewController.swift :
class MediaTableViewController: UITableViewController, GCKSessionManagerListener, MediaListModelDelegate, GCKRequestDelegate {
  ...
  private var credentials: String? = nil
  ...
  override func viewDidLoad() {
    ...
    navigationItem.leftBarButtonItem = UIBarButtonItem(title: "Creds", style: .plain,
                                                       target: self, action: #selector(toggleLaunchCreds))
    ...
    setLaunchCreds()
  }
  ...
  @objc func toggleLaunchCreds(_: Any){
    if (credentials == nil) {
        credentials = "{\"userId\":\"id123\"}"
    } else {
        credentials = nil
    }
    Toast.displayMessage("Launch Credentials: "+(credentials ?? "Null"), for: 3, in: appDelegate?.window)
    print("Credentials set: "+(credentials ?? "Null"))
    setLaunchCreds()
  }
  ...
  func setLaunchCreds() {
    GCKCastContext.sharedInstance()
        .setLaunch(GCKCredentialsData(credentials: credentials))
  }
}
Установите учетные данные при запросе загрузки
Чтобы обрабатывать credentials как в веб-приложениях, так и в приложениях Android TV Receiver, добавьте следующий код в свой класс MediaTableViewController.swift в функции loadSelectedItem :
let mediaLoadRequestDataBuilder = GCKMediaLoadRequestDataBuilder()
...
mediaLoadRequestDataBuilder.credentials = credentials
...
В зависимости от приложения-получателя, к которому осуществляет трансляцию отправитель, SDK автоматически применит указанные выше учетные данные к текущему сеансу.
Тестирование Cast Connect
Действия по установке APK-файла Android TV на Chromecast с Google TV
- Найдите IP-адрес вашего устройства Android TV. Обычно он доступен в разделе «Настройки» > «Сеть и Интернет» > (имя сети, к которой подключено ваше устройство) . Справа будут показаны подробности и IP-адрес вашего устройства в сети.
- Используйте IP-адрес вашего устройства для подключения к нему через ADB с помощью терминала:
$ adb connect <device_ip_address>:5555
- В окне терминала перейдите в папку верхнего уровня для образцов кодовой лаборатории, которые вы загрузили в начале этой кодовой лаборатории. Например:
$ cd Desktop/ios_codelab_src
- Установите файл .apk из этой папки на свой Android TV, выполнив:
$ adb -s <device_ip_address>:5555 install android-tv-app.apk
- Теперь вы сможете увидеть приложение под названием Cast Videos в меню «Ваши приложения» на своем устройстве Android TV.
- После этого создайте и запустите приложение на эмуляторе или мобильном устройстве. После установления сеанса трансляции с вашим устройством Android TV должно запуститься приложение Android Receiver на вашем Android TV. Воспроизведение видео с мобильного отправителя iOS должно запустить видео в Android-приемнике и позволить вам управлять воспроизведением с помощью пульта дистанционного управления вашего устройства Android TV.
11. Настройте виджеты Cast
Инициализация
Начните с папки App-Done. Добавьте следующее в метод applicationDidFinishLaunchingWithOptions в файле AppDelegate.swift .
func application(_: UIApplication,
                 didFinishLaunchingWithOptions _: [UIApplication.LaunchOptionsKey: Any]?) -> Bool {
  ...
  let styler = GCKUIStyle.sharedInstance()
  ...
}
Как только вы закончите применять одну или несколько настроек, как указано в остальной части этой лаборатории кода, зафиксируйте стили, вызвав приведенный ниже код.
styler.apply()
Настройка представлений трансляции
Вы можете настроить все представления, которыми управляет платформа Cast Application Framework, используя рекомендации по стилю по умолчанию для всех представлений. В качестве примера давайте изменим цвет оттенка значка.
styler.castViews.iconTintColor = .lightGray
При необходимости вы можете переопределить настройки по умолчанию для каждого экрана. Например, чтобы переопределить LightGrayColor для цвета оттенка значка только для расширенного медиа-контроллера.
styler.castViews.mediaControl.expandedController.iconTintColor = .green
Изменение цвета
Вы можете настроить цвет фона для всех представлений (или индивидуально для каждого представления). Следующий код устанавливает синий цвет фона для всех представлений, предоставленных вашей Cast Application Framework.
styler.castViews.backgroundColor = .blue
styler.castViews.mediaControl.miniController.backgroundColor = .yellow
Изменение шрифтов
Вы можете настроить шрифты для различных меток, отображаемых в представлениях трансляции. Для наглядности давайте установим для всех шрифтов значение «Courier-Oblique».
styler.castViews.headingTextFont = UIFont.init(name: "Courier-Oblique", size: 16) ?? UIFont.systemFont(ofSize: 16)
styler.castViews.mediaControl.headingTextFont = UIFont.init(name: "Courier-Oblique", size: 6) ?? UIFont.systemFont(ofSize: 6)
Изменение изображений кнопок по умолчанию
Добавьте в проект свои собственные изображения и назначьте изображения кнопкам, чтобы стилизовать их.
let muteOnImage = UIImage.init(named: "yourImage.png")
if let muteOnImage = muteOnImage {
  styler.castViews.muteOnImage = muteOnImage
}
Изменение темы кнопки трансляции
Вы также можете оформить виджеты Cast с помощью протокола UIAppearance. Следующий код определяет тему GCKUICastButton во всех отображаемых представлениях:
GCKUICastButton.appearance().tintColor = UIColor.gray
12. Поздравления
Теперь вы знаете, как включить Cast в видеоприложении с помощью виджетов Cast SDK в iOS.
Дополнительные сведения см. в руководстве разработчика iOS Sender .