
Spring Integration は、MessageChannels を介して Messages を交換するためのメッセージ メカニズムを提供します。チャネル アダプタを使用して外部システムと通信します。
この演習では、Spring Cloud GCP が提供する Spring 統合チャネル アダプタを使用して通信する 2 つのアプリを作成します。これらのアダプタにより、Spring 統合はメッセージ交換バックエンドとして Google Cloud Pub/Sub を使用します。
Cloud Shell と Cloud SDK の gcloud コマンドを使用する方法について学習します。
このチュートリアルでは、Spring Boot スタートガイドのサンプルコードを使用します。
学習内容
- Spring Integration と Spring Cloud GCP を使用して Google Cloud Pub/Sub でアプリ間でメッセージを交換する方法
必要なもの
- Google Cloud Platform プロジェクト
- Chrome や Firefox などのブラウザ
- Linux の標準的なテキスト エディタ(vim、emacs、nano など)を使い慣れていること
このチュートリアルをどのように使用されますか?
HTML/CSS ウェブアプリの作成経験についてお答えください。
Google Cloud Platform サービスのご利用経験についてどのように評価されますか?
セルフペース型の環境設定
Google アカウント(Gmail または Google Apps)をお持ちでない場合は、1 つ作成する必要があります。Google Cloud Platform のコンソール(console.cloud.google.com)にログインし、新しいプロジェクトを作成します。


プロジェクト ID を忘れないようにしてください。プロジェクト ID はすべての Google Cloud プロジェクトを通じて一意の名前にする必要があります(上記の名前はすでに使用されているので使用できません)。以降、このコードラボでは PROJECT_ID と呼びます。
次に、Google Cloud リソースを使用するために、Cloud Console で課金を有効にする必要があります。
この Codelab の操作をすべて行っても、費用は数ドル程度です。ただし、その他のリソースを使いたい場合や、実行したままにしておきたいステップがある場合は、追加コストがかかる可能性があります(このドキュメントの最後にある「クリーンアップ」セクションをご覧ください)。
Google Cloud Platform の新規ユーザーは、300 ドル分の無料トライアルをご利用いただけます。
Google Cloud Shell
Google Cloud はノートパソコンからリモートで操作できますが、この Codelab では Google Cloud Shell(Cloud 上で動作するコマンドライン環境)を使用します。
Google Cloud Shell の有効化
GCP Console で右上のツールバーにある Cloud Shell アイコンをクリックします。

[Cloud Shell の起動] をクリックします。

プロビジョニングと環境への接続にはそれほど時間はかかりません。

この仮想マシンには、必要な開発ツールがすべて準備されています。5 GB の永続ホーム ディレクトリが用意されており、Google Cloud で稼働するため、ネットワーク パフォーマンスが充実しており認証もスムーズです。このラボでの作業のほとんどは、ブラウザまたは Google Chromebook から実行できます。
Cloud Shell に接続すると、すでに認証は完了しており、プロジェクトに各自の PROJECT_ID が設定されています。
Cloud Shell で次のコマンドを実行して、認証されたことを確認します。
gcloud auth list
コマンド出力
Credentialed accounts:
 - <myaccount>@<mydomain>.com (active)
gcloud config list project
コマンド出力
[core]
project = <PROJECT_ID>
上記のようになっていない場合は、次のコマンドで設定できます。
gcloud config set project <PROJECT_ID>
コマンド出力
Updated property [core/project].
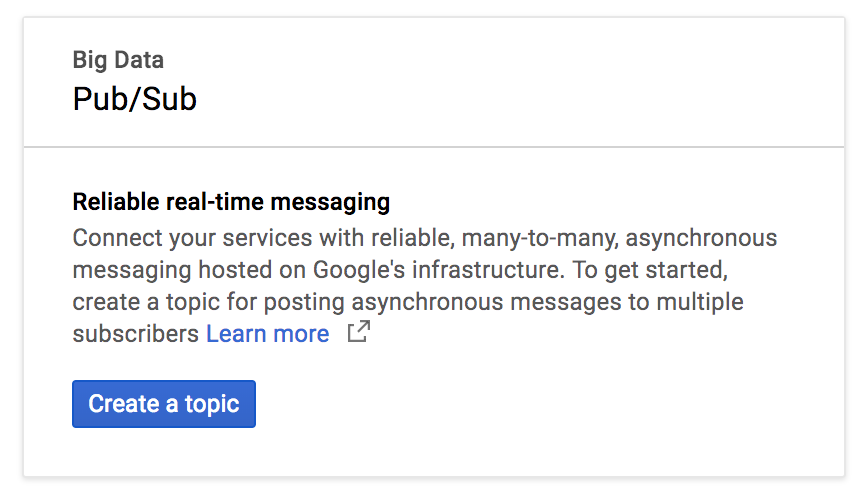
Google Cloud Pub/Sub の [トピック] ページに移動し、API を有効にします。

[トピックを作成] をクリックします。
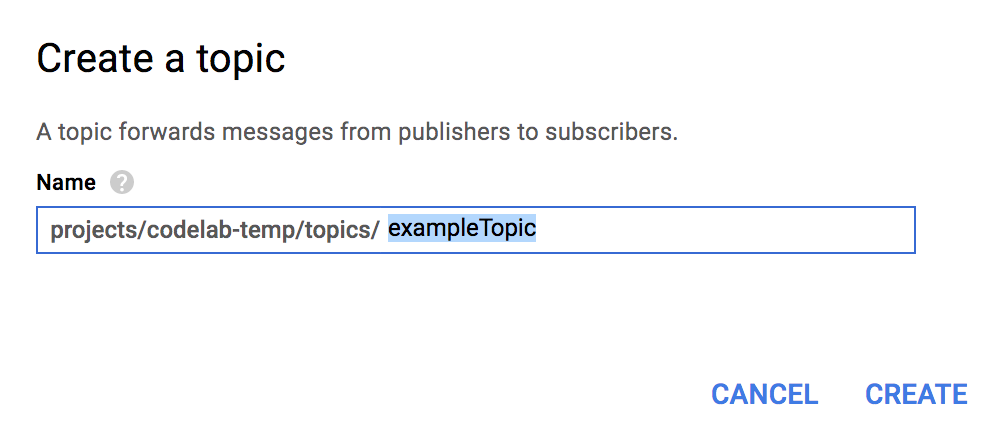
トピックの名前として「exampleTopic」と入力し、[作成] をクリックします。
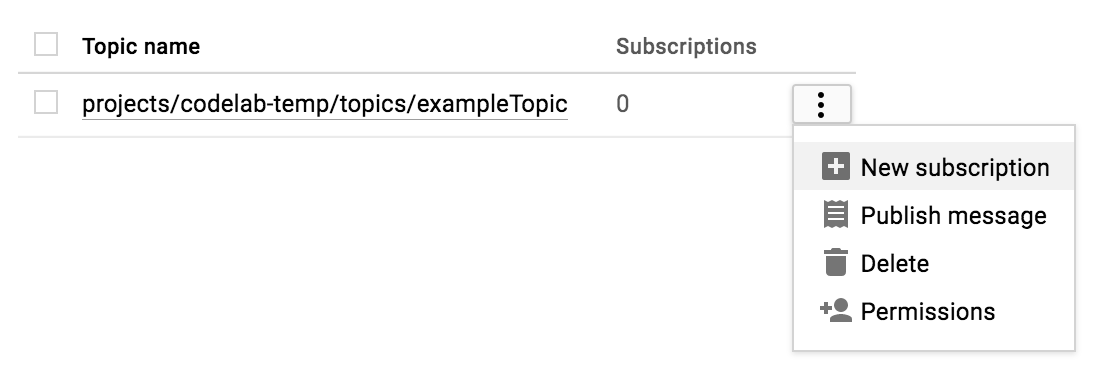
トピックを作成したら、[トピック] ページにとどまります。作成したトピックを探し、行の末尾にあるその他アイコンをクリックして、[新しいサブスクリプション] をクリックします。
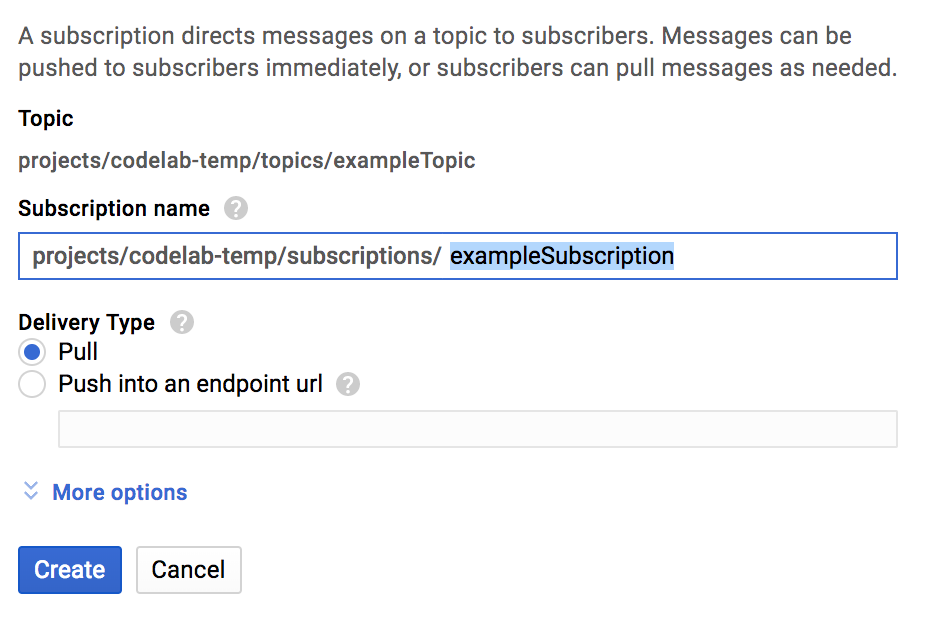
サブスクリプション名のテキスト ボックスに「exampleSubscription」と入力し、[作成] をクリックします。
Cloud Shell の起動後に以下のコマンドラインを使用すると、Spring Initializr を使用して 2 つの新しい Spring Boot アプリケーションを生成できます。
$ curl https://start.spring.io/starter.tgz \
  -d bootVersion=2.0.6.RELEASE \
  -d dependencies=web \
  -d baseDir=spring-integration-sender | tar -xzvf -
$ curl https://start.spring.io/starter.tgz \
  -d bootVersion=2.0.6.RELEASE \
  -d baseDir=spring-integration-receiver | tar -xzvf -
次に、メッセージ送信アプリを作成します。送信アプリのディレクトリに移動します。
$ cd spring-integration-senderアプリがチャンネルにメッセージを書き込めるようにします。メッセージがチャネルに入ると、送信チャネル アダプタによって取得され、汎用 Spring メッセージから Google Cloud Pub/Sub メッセージに変換されて、Google Cloud Pub/Sub トピックにパブリッシュされます。
アプリがチャネルに書き込むには、Spring 統合メッセージング ゲートウェイを使用します。vim、emacs、nano のテキスト エディタを使用して、DemoApplication クラス内に PubsubOutboundGateway インターフェースを宣言します。
src/main/java/com/example/demo/DemoApplication.java
...
import org.springframework.integration.annotation.MessagingGateway;

@SpringBootApplication
public class DemoApplication {

        ...

        @MessagingGateway(defaultRequestChannel = "pubsubOutputChannel")
        public interface PubsubOutboundGateway {

                void sendToPubsub(String text);
        }
}
これで、メッセージをチャネルに送信するメカニズムができました。しかし、チャネルに送信されたメッセージはどこに届くのでしょうか?
チャネル内の新しいメッセージを消費して Google Cloud Pub/Sub トピックにパブリッシュするには、送信チャネル アダプタが必要です。
src/main/java/com/example/demo/DemoApplication.java
...
import org.springframework.cloud.gcp.pubsub.core.PubSubTemplate;
import org.springframework.context.annotation.Bean;
import org.springframework.integration.annotation.ServiceActivator;
import org.springframework.cloud.gcp.pubsub.integration.outbound.PubSubMessageHandler;
import org.springframework.messaging.MessageHandler;

@SpringBootApplication
public class DemoApplication {

        ...

        @Bean
        @ServiceActivator(inputChannel = "pubsubOutputChannel")
        public MessageHandler messageSender(PubSubTemplate pubsubTemplate) {
                return new PubSubMessageHandler(pubsubTemplate, "exampleTopic");
        }
}
@ServiceActivator アノテーションにより、この MessageHandler が inputChannel の新しいメッセージに適用されます。この例では、送信チャネル アダプタ PubSubMessageHandler を呼び出して、Google Cloud Pub/Sub の exampleTopic トピックにメッセージをパブリッシュしています。
チャネル アダプタを配置したので、PubsubOutboundGateway オブジェクトを自動的にワイヤリングして、チャネルにメッセージを書き込むために使用できるようになりました。
src/main/java/com/example/demo/DemoApplication.java
...
import org.springframework.beans.factory.annotation.Autowired;
import org.springframework.web.bind.annotation.PostMapping;
import org.springframework.web.bind.annotation.RequestParam;
import org.springframework.web.servlet.view.RedirectView;

@SpringBootApplication
public class DemoApplication {

...

        @Autowired
        private PubsubOutboundGateway messagingGateway;

        @PostMapping("/postMessage")
        public RedirectView postMessage(@RequestParam("message") String message) {
                this.messagingGateway.sendToPubsub(message);
                return new RedirectView("/");
        }
}
@PostMapping アノテーションにより、HTTP POST リクエストをリッスンするエンドポイントが作成されました。ただし、DemoApplication クラスに @RestController アノテーションを追加して REST コントローラとしてマークする必要もあります。
src/main/java/com/example/demo/DemoApplication.java
import org.springframework.web.bind.annotation.RestController;

@SpringBootApplication
@RestController
public class DemoApplication {
  ...
}
アプリを実行するには、必要な依存関係を追加するだけです。
pom.xml
<project>
  ...
  <!-- Add Spring Cloud GCP Dependency BOM -->
  <dependencyManagement>
        <dependencies>
                <dependency>
                        <groupId>org.springframework.cloud</groupId>
                        <artifactId>spring-cloud-gcp-dependencies</artifactId>
                        <version>1.0.0.RELEASE</version>
                        <type>pom</type>
                        <scope>import</scope>
                </dependency>
        </dependencies>
  </dependencyManagement>

  <dependencies>
        ...
        <!-- Add Pub/Sub Starter -->
        <dependency>
                <groupId>org.springframework.cloud</groupId>
                <artifactId>spring-cloud-gcp-starter-pubsub</artifactId>
        </dependency>

        <!-- Add Spring Integration -->
        <dependency>
                <groupId>org.springframework.integration</groupId>
                <artifactId>spring-integration-core</artifactId>
        </dependency>

  </dependencies>

</project>
送信側アプリを実行します。
# Set the Project ID in environmental variable
$ export GOOGLE_CLOUD_PROJECT=`gcloud config list \
  --format 'value(core.project)'`
$ ./mvnw spring-boot:run
このアプリは、ポート 8080 とエンドポイント /postMessage でメッセージを含む POST リクエストをリッスンしています。これについては後で説明します。
Google Cloud Pub/Sub を介してメッセージを送信するアプリを作成しました。次に、これらのメッセージを受信して処理する別のアプリを作成します。
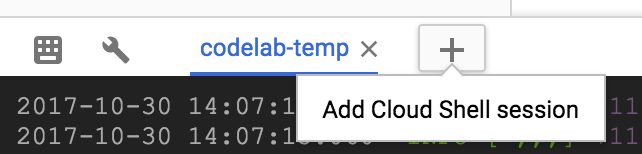
[+] をクリックして、新しい Cloud Shell セッションを開きます。
次に、新しい Cloud Shell セッションで、ディレクトリを受信側アプリのディレクトリに変更します。
$ cd spring-integration-receiver前のアプリでは、メッセージング ゲートウェイの宣言によってアウトバウンド チャネルが作成されました。メッセージを受信するためにメッセージング ゲートウェイを使用しないため、受信メッセージの宛先となる独自の MessageChannel を宣言する必要があります。
src/main/java/com/example/demo/DemoApplication.java
...
import org.springframework.context.annotation.Bean;
import org.springframework.integration.channel.DirectChannel;
import org.springframework.messaging.MessageChannel;

@SpringBootApplication
public class DemoApplication {

        ...

        @Bean
        public MessageChannel pubsubInputChannel() {
                return new DirectChannel();
        }
}
Google Cloud Pub/Sub からメッセージを受信して pubsubInputChannel にリレーするには、インバウンド チャネル アダプタが必要です。
src/main/java/com/example/demo/DemoApplication.java
...
import org.springframework.beans.factory.annotation.Qualifier;
import org.springframework.cloud.gcp.pubsub.core.PubSubTemplate;
import org.springframework.cloud.gcp.pubsub.integration.inbound.PubSubInboundChannelAdapter;

@SpringBootApplication
public class DemoApplication {
        ...

        @Bean
        public PubSubInboundChannelAdapter messageChannelAdapter(
                        @Qualifier("pubsubInputChannel") MessageChannel inputChannel,
                        PubSubTemplate pubSubTemplate) {
                PubSubInboundChannelAdapter adapter =
                                new PubSubInboundChannelAdapter(pubSubTemplate, "exampleSubscription");
                adapter.setOutputChannel(inputChannel);

                return adapter;
        }
}
このアダプターは pubsubInputChannel にバインドされ、Google Cloud Pub/Sub exampleSubscription サブスクリプションからの新しいメッセージをリッスンします。
受信メッセージが投稿されるチャネルはありますが、これらのメッセージをどうすればよいでしょうか?
pubsubInputChannel に新しいメッセージが届いたときにトリガーされる @ServiceActivator で処理しましょう。
src/main/java/com/example/demo/DemoApplication.java
...
import org.apache.commons.logging.Log;
import org.apache.commons.logging.LogFactory;
import org.springframework.integration.annotation.ServiceActivator;

@SpringBootApplication
public class DemoApplication {

        ...

        private static final Log LOGGER = LogFactory.getLog(DemoApplication.class);

        @ServiceActivator(inputChannel = "pubsubInputChannel")
        public void messageReceiver(String payload) {
                LOGGER.info("Message arrived! Payload: " + payload);
        }
}
この場合、メッセージ ペイロードをログに記録するだけです。
必要な依存関係を追加する必要があります。
pom.xml
<project>
  ...
  <!-- Add Spring Cloud GCP Dependency BOM -->
  <dependencyManagement>
        <dependencies>
                <dependency>
                        <groupId>org.springframework.cloud</groupId>
                        <artifactId>spring-cloud-gcp-dependencies</artifactId>
                        <version>1.0.0.RELEASE</version>
                        <type>pom</type>
                        <scope>import</scope>
                </dependency>
        </dependencies>
  </dependencyManagement>

  <dependencies>
        ...
        <!-- Add Pub/Sub Starter -->
        <dependency>
                <groupId>org.springframework.cloud</groupId>
                <artifactId>spring-cloud-gcp-starter-pubsub</artifactId>
        </dependency>

        <!-- Add Spring Integration -->
        <dependency>
                <groupId>org.springframework.integration</groupId>
                <artifactId>spring-integration-core</artifactId>
        </dependency>

  </dependencies>

</project>
レシーバー アプリを実行します。
$ ./mvnw spring-boot:runこれで、送信側アプリに送信したメッセージは受信側アプリに記録されます。これをテストするには、新しい Cloud Shell セッションを開き、送信側アプリに HTTP POST リクエストを行います。
$ curl --data "message=Hello world!" localhost:8080/postMessage次に、受信側アプリが送信したメッセージをログに記録したことを確認します。
INFO: Message arrived! Payload: Hello world!この演習で作成したサブスクリプションとトピックを削除します。
$ gcloud beta pubsub subscriptions delete exampleSubscription
$ gcloud beta pubsub topics delete exampleTopic
Google Cloud Pub/Sub 用 Spring 統合チャネル アダプタを使用する 2 つの Spring Boot アプリを設定します。これらの関数は、Google Cloud Pub/Sub API とやり取りすることなく、相互にメッセージを交換します。
Google Cloud Pub/Sub 用の Spring 統合チャネル アダプタの使用方法を学習しました。
詳細
- Google Cloud Pub/Sub: https://cloud.google.com/pubsub/
- GCP プロジェクトの Spring: http://cloud.spring.io/spring-cloud-gcp/
- Spring on GCP GitHub リポジトリ: https://github.com/spring-cloud/spring-cloud-gcp
- Google Cloud Platform での Java: https://cloud.google.com/java/
ライセンス
この作業はクリエイティブ・コモンズの表示 2.0 汎用ライセンスにより使用許諾されています。