Khởi động nhanh bằng Java
Sử dụng bộ sưu tập để sắp xếp ngăn nắp các trang
Lưu và phân loại nội dung dựa trên lựa chọn ưu tiên của bạn.
Dự án này cho bạn biết cách triển khai
Đồ thuỷ tinh minh hoạ chức năng chính của Google Mirror API.
Để xem bản minh hoạ đầy đủ hoạt động của dự án bắt đầu nhanh, hãy truy cập
https://glass-python-starter-demo.appspot.com.
Nếu không, hãy đọc tiếp để xem cách triển khai phiên bản của riêng bạn.
Tải xuống trên GitHub
Điều kiện tiên quyết
Đảm bảo hệ thống của bạn đáp ứng các điều kiện tiên quyết sau đây để có thể bắt đầu nhanh dự án:
- Java 1.6
- Apache Maven – được dùng trong một phần trong quy trình xây dựng.
Tạo dự án Bảng điều khiển API của Google
Tiếp theo, hãy cấp quyền truy cập vào Google Mirror API:
- Chuyển đến bảng điều khiển API của Google và tạo một dự án API mới.
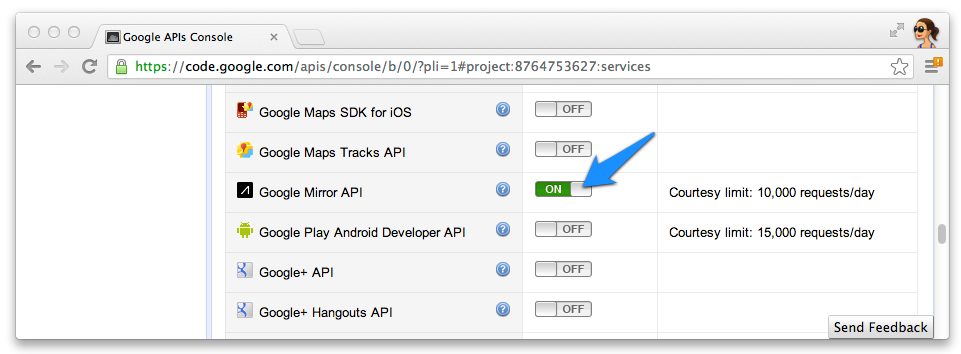
- Nhấp vào Dịch vụ rồi bật Google Mirror API cho dự án mới của bạn.
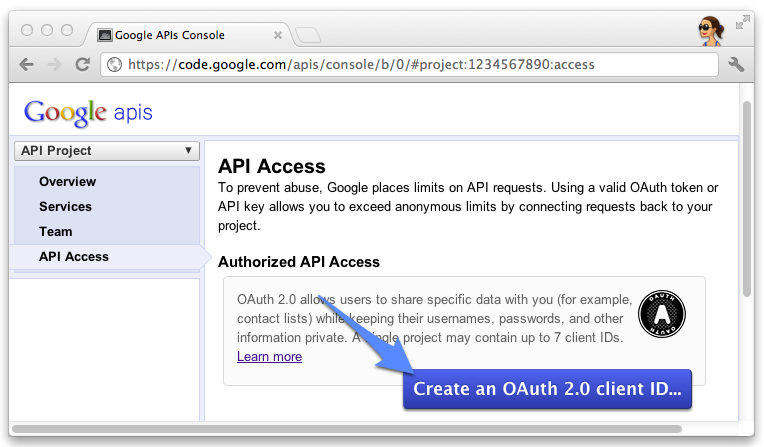
- Nhấp vào Quyền truy cập API rồi tạo mã ứng dụng khách OAuth 2.0 cho một ứng dụng web.
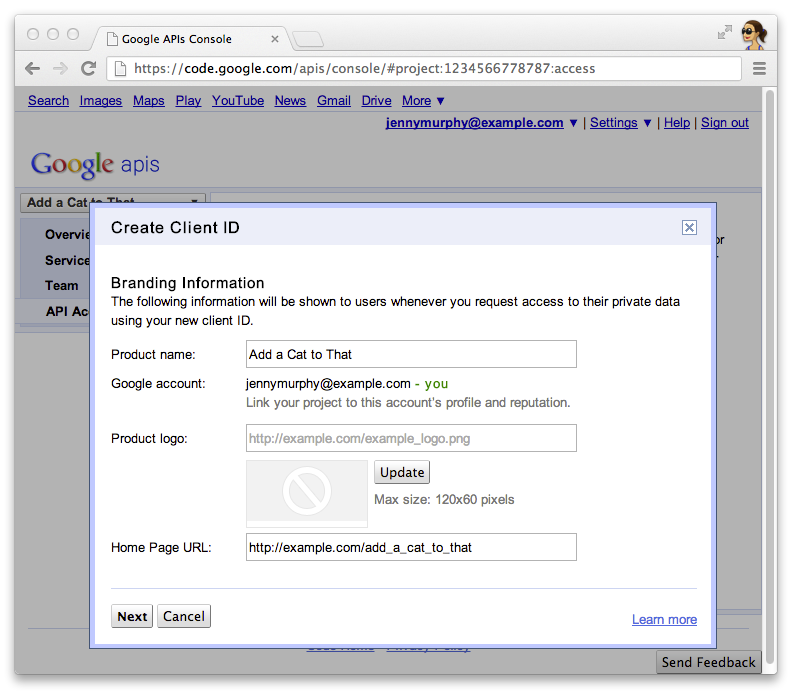
- Chỉ định tên và biểu tượng sản phẩm cho Đồ thuỷ tinh của bạn. Các trường này xuất hiện khi cấp quyền sử dụng OAuth
màn hình hiển thị cho người dùng.
- Chọn Web application (Ứng dụng web) rồi chỉ định giá trị bất kỳ cho tên máy chủ, chẳng hạn như
localhost
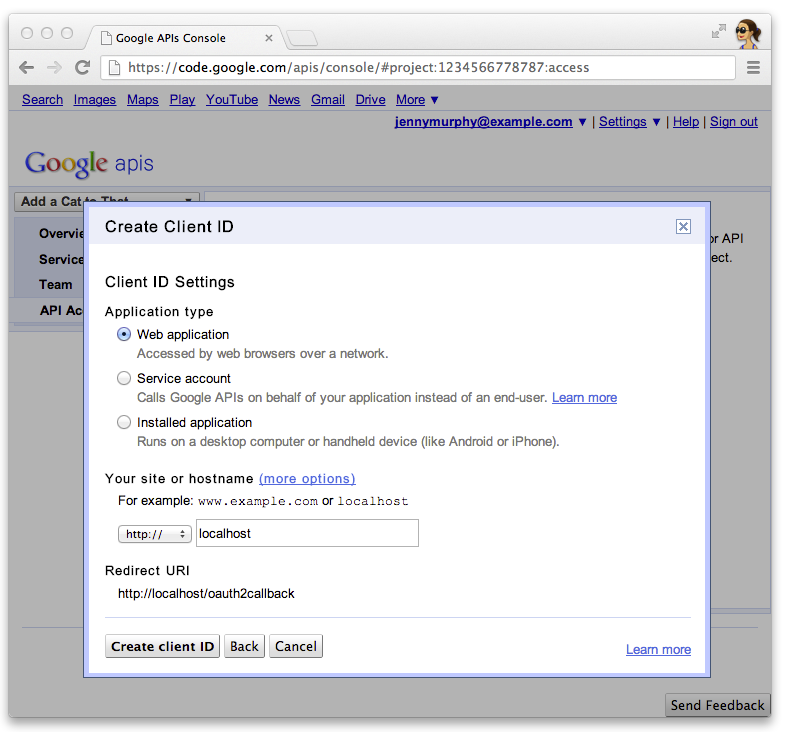
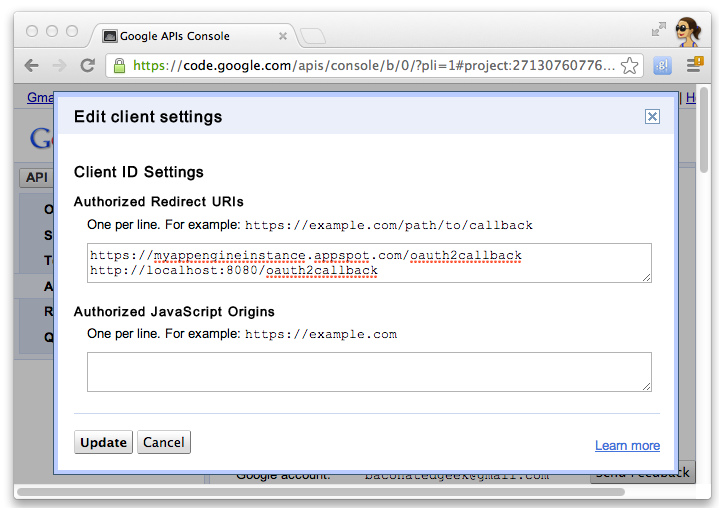
- Nhấp vào Edit settings... (Chỉnh sửa chế độ cài đặt...) cho Client-ID để chỉ định URI chuyển hướng. Chỉ định URL gọi lại
cho máy chủ web phát triển cục bộ của bạn, ví dụ:
http://localhost:8080/oauth2callback
và
cho máy chủ web mà bạn đã triển khai, ví dụ: https://example.com/oauth2callback
.

- Ghi lại mã ứng dụng khách và mã bí mật từ Bảng điều khiển API của Google. Bạn sẽ cần
để định cấu hình dự án bắt đầu nhanh.
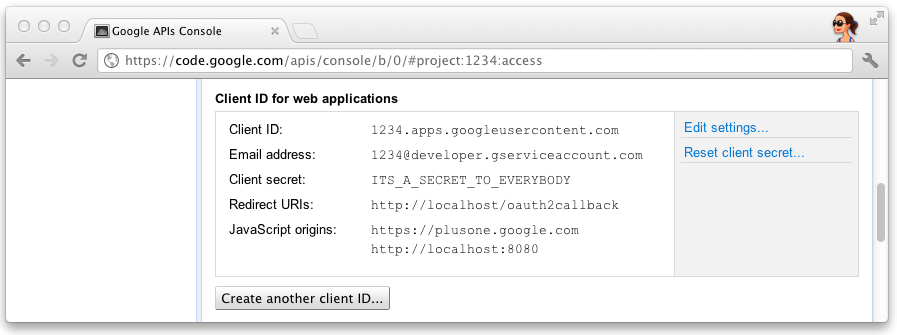
Định cấu hình dự án Bắt đầu nhanh để sử dụng thông tin ứng dụng API bằng cách nhập ID ứng dụng khách và
mã bí mật vào src/main/resources/oauth.properties
:
# Replace these with values for your project from the Google API Console:
# https://developers.google.com/console
client_id=3141592653589793238462643383279
client_secret=ITS_A_SECRET_TO_EVERYBODY
Đang nhập dự án
Các hướng dẫn sau đây hướng dẫn bạn cách nhập nguồn dự án Quick Start (Bắt đầu nhanh) vào IntelliJ và
Nhật thực.
IntelliJ
- Nhấp vào File > (Tệp >) Nhập dự án....
- Trỏ đến thư mục đã trích xuất.
- Chọn Nhập từ mô hình hiện có > Maven
Nhật thực
- Cài đặt trình bổ trợ
m2e
để cho phép nhập dữ liệu từ tệp maven pom.
- Nhấp vào File > (Tệp >) Nhập... > Maven > Dự án Maven hiện có.
- Trỏ đến thư mục đã trích xuất rồi nhập dự án.
Chạy máy chủ phát triển cục bộ
Bạn có thể chạy dự án Bắt đầu nhanh trên máy chủ phát triển cục bộ để kiểm thử:
$ mvn jetty:run
Triển khai dự án Bắt đầu nhanh
Bạn có thể tạo tệp chiến tranh cho dự án này bằng Maven:
$ mvn war:war
Trừ phi có lưu ý khác, nội dung của trang này được cấp phép theo Giấy phép ghi nhận tác giả 4.0 của Creative Commons và các mẫu mã lập trình được cấp phép theo Giấy phép Apache 2.0. Để biết thông tin chi tiết, vui lòng tham khảo Chính sách trang web của Google Developers. Java là nhãn hiệu đã đăng ký của Oracle và/hoặc các đơn vị liên kết với Oracle.
Cập nhật lần gần đây nhất: 2025-07-25 UTC.
[null,null,["Cập nhật lần gần đây nhất: 2025-07-25 UTC."],[[["\u003cp\u003eThis project provides a simple implementation of Glassware demonstrating core Google Mirror API functionality.\u003c/p\u003e\n"],["\u003cp\u003eIt requires Java 1.6, Apache Maven, and a Google APIs Console project with the Google Mirror API enabled and OAuth 2.0 client ID created.\u003c/p\u003e\n"],["\u003cp\u003eThe project can be configured using your API client information, imported into IntelliJ or Eclipse, and run on a local development server using Maven.\u003c/p\u003e\n"],["\u003cp\u003eA deployable WAR file can be built using Maven for production deployment.\u003c/p\u003e\n"],["\u003cp\u003eA fully-working demo is available at \u003ca href=\"https://glass-java-starter-demo.appspot.com\"\u003ehttps://glass-java-starter-demo.appspot.com\u003c/a\u003e.\u003c/p\u003e\n"]]],[],null,["# Java Quick Start\n\nThis project shows you how to implement a simple\npiece of Glassware that demos the major functionality of the Google Mirror API.\n\nTo see a fully-working demo of the quick start project, go to\n[https://glass-python-starter-demo.appspot.com](https://glass-java-starter-demo.appspot.com).\nOtherwise, read on to see how to deploy your own version.\n\n[Download on GitHub](https://github.com/googleglass/mirror-quickstart-java)\n\nPrerequisites\n-------------\n\nEnsure your system meets the following prerequisites for the quick start project:\n\n- Java 1.6\n- [Apache Maven](http://maven.apache.org/) - used for part of the build process.\n\nCreating a Google APIs Console project\n--------------------------------------\n\nNext, enable access to the Google Mirror API:\n\n1. Go to the [Google APIs console](https://code.google.com/apis/console/) and create a new API project.\n2. Click **Services** and enable the Google Mirror API for your new project.\n3. Click **API Access** and create an OAuth 2.0 client ID for a web application.\n4. Specify the product name and icon for your Glassware. These fields appear on the OAuth grant screen presented to your users.\n5. Select **Web application** and specify any value for the hostname, such as `localhost`\n6. Click **Edit settings...** for the client ID to specify redirect URIs. Specify the callback URLs for your local development web server, for example `http://localhost:8080/oauth2callback`, and for your deployed web server, for example `https://example.com/oauth2callback`.\n7. Make note of the client ID and secret from the Google APIs Console. You'll need it to configure the quick start project.\n\nConfiguring the Quick Start project\n-----------------------------------\n\nConfigure the Quick Start project to use your API client information by entering your client ID and\nsecret into `src/main/resources/oauth.properties`: \n\n # Replace these with values for your project from the Google API Console:\n # https://developers.google.com/console\n\n client_id=3141592653589793238462643383279\n client_secret=ITS_A_SECRET_TO_EVERYBODY\n\nImporting the project\n---------------------\n\nThe following instructions show you to import the Quick Start project source into IntelliJ and\nEclipse.\n\n### IntelliJ\n\n1. Click **File \\\u003e Import Project...**.\n2. Point to the extracted directory.\n3. Select **Import from existing model \\\u003e Maven**\n\n### Eclipse\n\n1. Install the [`m2e`](http://eclipse.org/m2e/) plugin to enable import from a maven pom file.\n2. Click **File \\\u003e Import... \\\u003e Maven \\\u003e Existing Maven Project**.\n3. Point to the extracted directory and import the project.\n\nRunning a local development server\n----------------------------------\n\nYou can run the Quick Start project on a local development server for testing: \n\n $ mvn jetty:run\n\nDeploying the Quick Start project\n---------------------------------\n\nYou can build a war file for this project using Maven: \n\n $ mvn war:war"]]