Un ID de carte est un identifiant unique qui représente les paramètres de style et de configuration de Google Maps stockés dans Google Cloud. Vous utilisez des ID de carte pour activer des fonctionnalités, ou pour gérer ou styliser des cartes sur vos sites Web et dans vos applications. Vous pouvez créer des ID de carte pour chaque plate-forme dont vous avez besoin (JavaScript, Android, iOS ou cartes statiques) dans votre projet de la console Google Cloud, sur la page Gestion des cartes.
Pour en savoir plus sur les ID de carte et les fonctionnalités qui les utilisent, consultez Présentation des ID de carte.
Autorisations requises
Pour créer ou gérer des ID de carte dans votre projet, vous devez utiliser un compte principal disposant des autorisations appropriées au niveau du rôle (Éditeur ou Propriétaire) sur la page IAM de la console Cloud pour le projet. Pour en savoir plus, consultez la documentation de référence sur les rôles IAM de base et prédéfinis.
Créer des ID de carte
Créez des ID de carte dans la console Cloud en suivant ces étapes :
Connectez-vous à un projet de la console Cloud et ouvrez-le avec les autorisations requises.
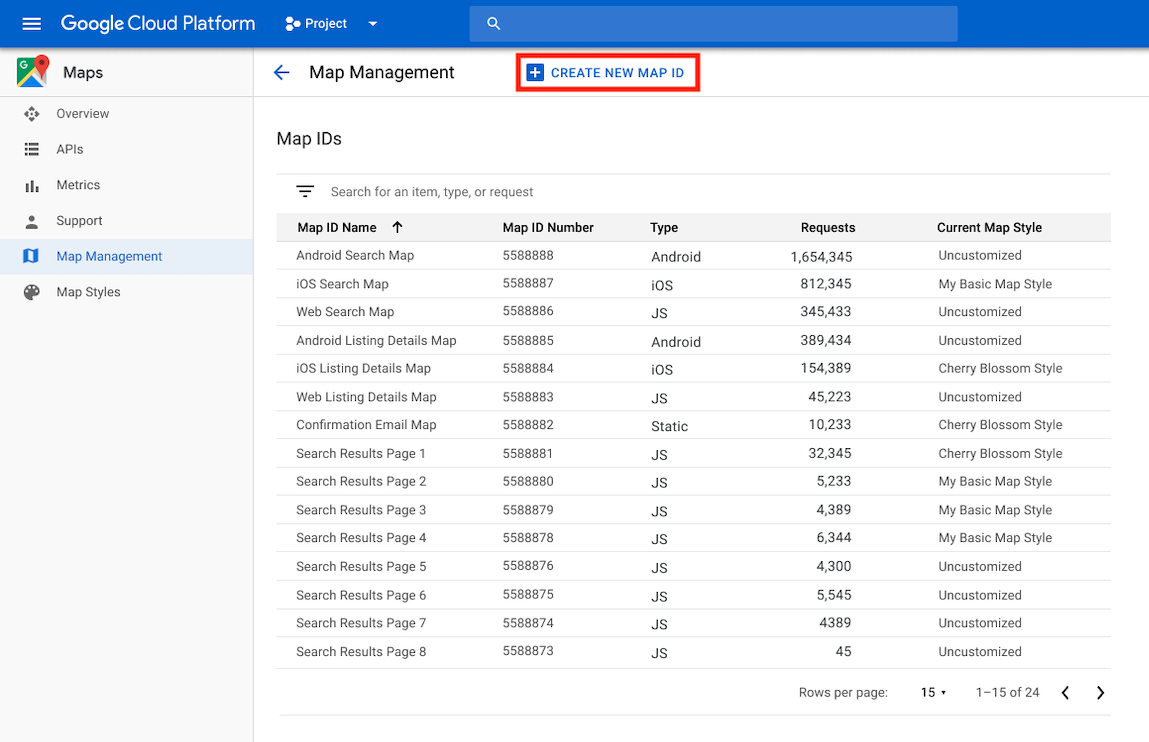
Dans la console Cloud, accédez à la page Gestion Maps.
Cliquez sur Créer un ID de carte.
Sur la page Créer un ID de carte, procédez comme suit :
Dans le champ Nom, attribuez un nom à l'ID de carte.
Facultatif : Dans le champ Description, décrivez l'utilisation de l'ID de carte.
Pour Type de carte, sélectionnez la plate-forme sur laquelle vous prévoyez d'utiliser l'ID de carte.
Si vous choisissez JavaScript, sélectionnez également un type de carte Raster (par défaut) ou Vector. Pour en savoir plus sur les cartes vectorielles, consultez Cartes vectorielles.
Cliquez sur Enregistrer pour afficher votre nouvel ID de carte.
Associer un ID de carte à un style de carte
Si vous utilisez les styles de cartes basés dans le cloud, vous associez un style de carte à votre ID de carte. Pour en savoir plus, consultez Associer votre style à un ID de carte.
Ajouter l'ID de carte à votre application
Android
Ajoutez votre ID de carte via un élément <fragment> dans le fichier de mise en page de l'activité, à l'aide de la classe MapView ou de manière programmatique avec la classe GoogleMapOptions.
Par exemple, supposons que vous ayez créé un ID de carte stocké sous la forme d'une valeur de chaîne nommée map_id dans res/values/strings.xml :
Pour les cartes ajoutées via un élément <fragment> dans le fichier de mise en page de l'activité, tous les fragments de carte censés être associés au style personnalisé doivent spécifier l'ID de carte dans l'attribut map:mapId :
Dans Android Studio, créez et exécutez votre application comme vous le faites d'habitude. Les styles personnalisés configurés à la première étape sont appliqués à toutes les cartes avec l'ID de carte spécifié.
iOS
Pour instancier une carte à l'aide d'un ID de carte, procédez comme suit :
Créez un GMSMapID avec la chaîne d'ID de carte de la console Cloud.
Créez un GMSMapView en spécifiant l'ID de carte que vous venez de créer.
Si vous utilisez votre propre ID de carte, vous pouvez définir un nouveau style dans la console Cloud à tout moment. Ce style sera automatiquement appliqué à votre vue de carte pour vous et vos utilisateurs dans un délai d'environ six heures.
Si vous souhaitez voir les modifications immédiatement, vous pouvez fermer et redémarrer votre application en la quittant, en la forçant à quitter la liste des applications récemment utilisées, puis en la rouvrant. Le plan mis à jour sera alors visible.
JavaScript
Pour créer une carte avec un ID de carte dans le code de votre application :
Si vous personnalisez déjà votre carte avec du code JSON intégré, supprimez la propriété styles de votre objet MapOptions. Sinon, ignorez cette étape.
Ajoutez un ID de carte à la carte à l'aide de la propriété mapId. Exemple :
Pour ajouter un ID de carte à une carte nouvelle ou existante qui utilise l'une de nos API de service Web, ajoutez le paramètre d'URL map_id et définissez-le sur votre ID de carte. Cet exemple montre comment ajouter un ID de carte à une carte à l'aide de l'API Maps Static.
Si votre URL Maps Static contient une signature numérique avant l'ajout de votre ID de carte, vous devrez créer et ajouter une nouvelle signature numérique après avoir ajouté votre ID de carte.
Lorsque vous générez votre nouvelle signature secrète d'URL, n'oubliez pas de supprimer votre signature numérique précédente de l'URL.
Sauf indication contraire, le contenu de cette page est régi par une licence Creative Commons Attribution 4.0, et les échantillons de code sont régis par une licence Apache 2.0. Pour en savoir plus, consultez les Règles du site Google Developers. Java est une marque déposée d'Oracle et/ou de ses sociétés affiliées.
Dernière mise à jour le 2025/08/31 (UTC).
[null,null,["Dernière mise à jour le 2025/08/31 (UTC)."],[[["\u003cp\u003eMap IDs are unique identifiers representing Google Map styling and configuration settings stored in Google Cloud, used to manage and style maps on websites and applications across multiple platforms.\u003c/p\u003e\n"],["\u003cp\u003eCreating a map ID requires appropriate role-level permissions (Editor or Owner) within the Cloud console project, and involves selecting the specific platform (JavaScript, Android, iOS, or Static maps) for the map's use.\u003c/p\u003e\n"],["\u003cp\u003eAssociating a map style with a map ID allows for cloud-based customization, enabling real-time updates to the map's appearance within about six hours, and this can be accelerated by restarting the app.\u003c/p\u003e\n"],["\u003cp\u003eMap IDs can be added to Android apps through \u003ccode\u003e<fragment>\u003c/code\u003e elements, the \u003ccode\u003eMapView\u003c/code\u003e class, or programmatically via the \u003ccode\u003eGoogleMapOptions\u003c/code\u003e class, while iOS utilizes \u003ccode\u003eGMSMapID\u003c/code\u003e and \u003ccode\u003eGMSMapView\u003c/code\u003e for implementation.\u003c/p\u003e\n"],["\u003cp\u003eIn JavaScript, map IDs are added via the \u003ccode\u003emapId\u003c/code\u003e property in the \u003ccode\u003eMapOptions\u003c/code\u003e object, and in Maps Static API, they are added as a \u003ccode\u003emap_id\u003c/code\u003e URL parameter, requiring a new digital signature if a previous one existed.\u003c/p\u003e\n"]]],[],null,["Select platform: [Android](/maps/documentation/android-sdk/map-ids/get-map-id \"View this page for the Android platform docs.\") [iOS](/maps/documentation/ios-sdk/map-ids/get-map-id \"View this page for the iOS platform docs.\") [JavaScript](/maps/documentation/javascript/map-ids/get-map-id \"View this page for the JavaScript platform docs.\") [Web Service](/maps/documentation/maps-static/map-ids/get-map-id \"View this page for the Web Service platform docs.\")\n\n\u003cbr /\u003e\n\n| **Paid feature:**\n| Features accessed by adding a [map ID](/maps/documentation/get-map-id) triggers a map\n| load charged against the Dynamic Maps SKU for Android and iOS. See\n| [Google Maps Billing](/maps/billing-and-pricing/sku-details#dynamic-maps-ess-sku) for more information.\n\nA map ID is a unique identifier that represents Google Map styling and configuration settings that are stored in Google Cloud. You use map IDs to enable features or manage or style maps on your websites and in your applications. You can create map IDs for each platform you need--JavaScript, Android, iOS, or Static maps--in your Google Cloud console project on the **Map Management** page.\n\nFor more details and features that use map IDs,\nsee [Map ID overview](/maps/documentation/android-sdk/map-ids/mapid-over).\n\nRequired permissions\n\nTo create or manage any map IDs in your project, you\nmust use a principal with the appropriate role-level permissions, Editor or\nOwner, on the Cloud console IAM page for the project. For\ndetails, see\n[IAM basic and predefined roles reference](https://cloud.google.com/iam/docs/understanding-roles#role_types).\n\nCreate map IDs\n\nCreate map IDs in the Cloud console following\nthese steps:\n\n1. Sign in to and open a Cloud console project with the\n [required permissions](#permissions).\n\n2. In the Cloud console, go to the\n [Maps Management page](https://console.cloud.google.com/google/maps-apis/studio/maps).\n\n3. Click **Create map ID**.\n\n4. On the **Create new map ID** page, do the following:\n\n 1. For **Name**, give the map ID a name.\n 2. *Optional* : For **Description**, describe what the map ID is used for.\n 3. For **Map type** , select the platform on which you plan to use the map ID. If you choose JavaScript, also choose a **Raster** (the default) or **Vector** map type. For more information on vector maps, see [Vector Maps](/maps/documentation/javascript/vector-map).\n 4. Click **Save** to show your new map ID.\n\nAssociate a map ID to a map style\n\nIf you are using cloud-based maps styling, you associate a map style with your\nmap ID. For details, see [Associate your style to a map ID](../cloud-customization/map-styles-leg#associate-style-with-map-id).\n\nAdd the map ID to your app \n\nAndroid\n\nAdd your map ID through a `\u003cfragment\u003e` element in the\nactivity's layout file, by using the `MapView` class, or programmatically\nusing the `GoogleMapOptions` class.\n\nFor example, assume you created a map ID that is stored as a\nstring value named `map_id` in `res/values/strings.xml`: \n\n \u003c?xml version=\"1.0\" encoding=\"utf-8\"?\u003e\n \u003cresources\u003e\n \u003cstring name=\"map_id\"\u003e\u003cvar label=\"map_id\" translate=\"no\"\u003eMAP_ID\u003c/var\u003e\u003c/string\u003e\n \u003c/resources\u003e\n\nFor maps added through a `\u003cfragment\u003e` element in the activity's layout file,\nall map fragments that should have the custom style must specify the\nmap ID in the `map:mapId` attribute: \n\n \u003cfragment xmlns:map=\"http://schemas.android.com/apk/res-auto\"\n map:name=\"com.google.android.gms.maps.SupportMapFragment\"\n ...\n map:mapId=\"@string/map_id\" /\u003e\n\nYou can also use the `map:mapId` attribute of the `MapView` class to specify\na map ID: \n\n \u003ccom.google.android.gms.maps.MapView\n xmlns:map=\"http://schemas.android.com/apk/res-auto\"\n ....\n map:mapId=\"@string/map_id\" /\u003e\n\nTo specify a map ID programmatically, pass it to a\n`MapFragment` instance using the `GoogleMapOptions` class: \n\nJava \n\n MapFragment mapFragment = MapFragment.newInstance(\n new GoogleMapOptions()\n .mapId(getResources().getString(R.string.map_id)));\n\nKotlin \n\n val mapFragment = MapFragment.newInstance(\n GoogleMapOptions()\n .mapId(resources.getString(R.string.map_id))\n )\n\nIn Android Studio, build and run your app as you normally would. Custom\nstyles configured in the first step are applied to all maps with\nthe specified map ID.\n\niOS\n\nTo instantiate a map using a map ID, do the following:\n\n1. Create a `GMSMapID` with the map ID string from Cloud console.\n2. Create a `GMSMapView` specifying the map ID you just created.\n\nSwift \n\n let camera = GMSCameraPosition(latitude: 47.0169, longitude: -122.336471, zoom: 12)\n let mapID = GMSMapID(identifier: \"\u003cvar label=\"map_id\" translate=\"no\"\u003eMAP_ID\u003c/var\u003e\")\n let mapView = GMSMapView(frame: .zero, mapID: mapID, camera: camera)\n self.view = mapView\n\nObjective-C \n\n GMSCameraPosition *camera = [GMSCameraPosition cameraWithLatitude:47.0169\n longitude:-122.336471\n zoom:12];\n GMSMapID *mapID = [GMSMapID mapIDWithIdentifier:@\"\u003cvar label=\"map_id\" translate=\"no\"\u003eMAP_ID\u003c/var\u003e\"];\n GMSMapView *mapView = [GMSMapView mapWithFrame:CGRectZero mapID:mapID camera:camera];\n self.view = mapView;\n\nIf you are using your own map ID, you can set your\nmap ID in the Cloud console to have a new style\nat any time, and that style will be reflected on your map view automatically\nfor you and users within about six hours.\n\nIf you want to see the changes immediately, you can close out and restart\nyour app by exiting the app, forcing a quit of the app from the recently-used\napps list, and then reopening it. The updated map will then be visible.\n\nJavaScript\n\nTo create a map with a map ID in your application code:\n\n1. If you are already customizing your map with embedded JSON code, remove\n the\n [`styles` property](/maps/documentation/javascript/reference/map#MapOptions.styles)\n from your `MapOptions` object; otherwise, skip this step.\n\n2. Add a map ID to the map using the `mapId` property. For example:\n\n```javascript\nmap = new google.maps.Map(document.getElementById('map'), {\ncenter: {lat: -34.397, lng: 150.644},\nzoom: 8,\nmapId: '\u003cvar translate=\"no\"\u003eMAP_ID\u003c/var\u003e'\n});\n```\n\nMaps Static\n\nTo add a map ID to a new or existing map that uses one of our\nweb-service APIs, append the `map_id` URL parameter and set it to your\nmap ID. This example shows adding a map ID to\na map using Maps Static API. \n\n \u003cimg src=\"https://maps.googleapis.com/maps/api/staticmap?center=Brooklyn+Bridge,New+York,NY&zoom=13&size=600x300&maptype=roadmap&markers=color:blue%7Clabel:S%7C40.702147,-74.015794&markers=color:green%7Clabel:G%7C40.711614,-74.012318&markers=color:red%7Clabel:C%7C40.718217,-73.998284&key=YOUR_API_KEY&map_id=\u003cvar label=\"map_id\" translate=\"no\"\u003eMAP_ID\u003c/var\u003e&signature=YOUR_SIGNATURE\" /\u003e\n\nIf you have a digital signature in your Maps Static URL before adding your map ID, you will need to [create\nand add a new digital signature](/maps/documentation/maps-static/digital-signature) after adding your map ID. When generating your new URL signing secret, remember to remove your previous digital signature from the URL."]]