Page Summary
-
This tutorial provides a step-by-step guide on integrating a Google map with a marker into your Flutter application.
-
You will learn how to import the necessary package, add the Google Map widget, and position a marker using latitude and longitude coordinates.
-
The tutorial covers troubleshooting common issues like API key setup, connectivity problems, and debugging techniques.
-
It also includes a detailed explanation of the code, breaking down the process of initializing the map, adding markers, and displaying information windows.
-
You can find the complete source code on GitHub for easy reference and implementation in your projects.
Introduction

This tutorial shows you how to add a Google map to your Flutter app. The map includes a marker, also called a pin, to indicate a specific location.
Getting the code
Clone or download the Flutter samples
repository. The sample
code can be found in
the google_maps directory.
Setting up your development project
Be sure you've completed the steps outlined in the Set up a Flutter project guide before continuing with this topic.
1. Import the Google Maps for Flutter package
- Open your
main.dartfile in your preferred IDE. - Verify that following import statement has been added to the file:
import 'package:google_maps_flutter/google_maps_flutter.dart';
2. Add Google Maps to your Flutter app
Within the Scaffold widget, add a GoogleMap widget as
the body.
GoogleMap(
   initialCameraPosition: CameraPosition(
      target: _center,
      zoom: 11.0,
   ),
   markers: {
      const Marker(
         markerId: MarkerId('Sydney'),
         position: LatLng(-33.86, 151.20),
      )
   },
)
- The
markerIdoption labels your marker. - The
positionoption sets where the marker appears on your map.
3. Building and running your app
Start the Flutter app using one of the following options:
- From your IDE, click the
Runbutton - From the command line, run
flutter run.
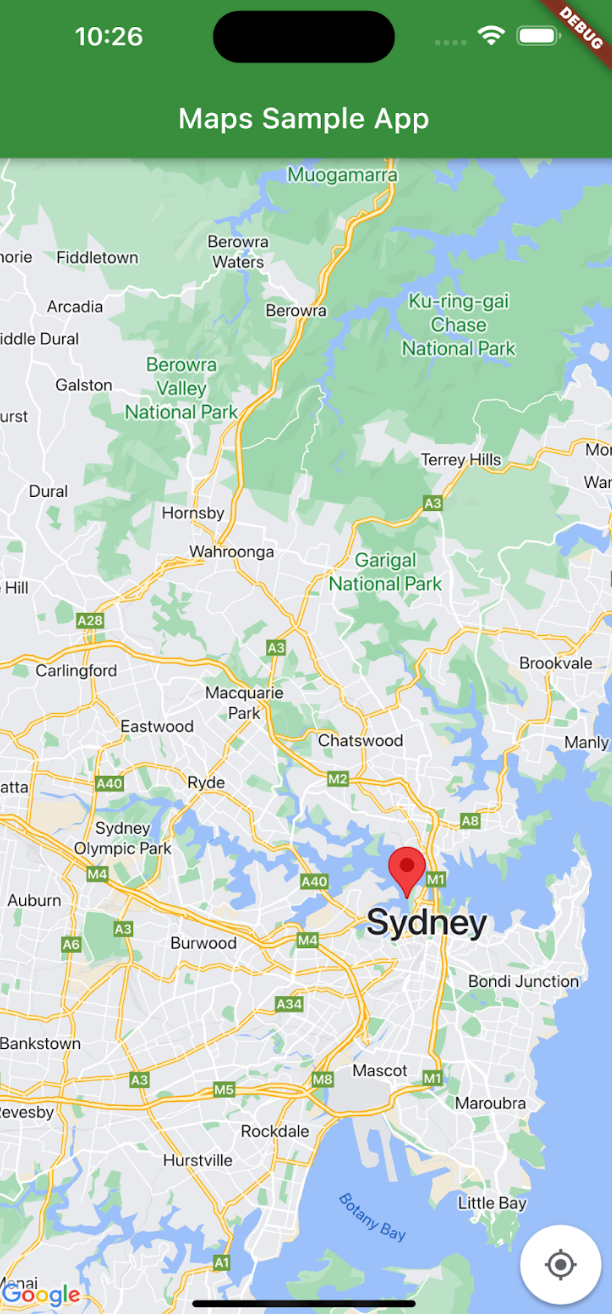
You should see a map with a marker centered on Sydney on the east coast of Australia, similar to the image on this page.
Troubleshooting
- If you don't see a map, check that you've obtained an API key and added it to the app.
- If you used the iOS bundle identifier to restrict the API key, edit the key to add the bundle identifier for the app:
com.google.examples.map-with-marker. - Ensure that you have a good WiFi or GPS connection.
- Use the Flutter DevTools to view logs and debug the app.
- You can learn more about Running a Flutter app.
4. Understanding the code
This code can be found on GitHub.
- Import the necessary packages and initialize the app.
   import 'package:flutter/material.dart';
   import 'package:google_maps_flutter/google_maps_flutter.dart';

   void main() => runApp(const MyApp());

   class MyApp extends StatefulWidget {
   const MyApp({super.key});

   @override
      State<MyApp> createState() => _MyAppState();
   }
- Create a map centered on Sydney, Australia.
class _MyAppState extends State<MyApp> {

   late GoogleMapController mapController;

   final LatLng _center = const LatLng(-33.86, 151.20);

   void _onMapCreated(GoogleMapController controller) {
      mapController = controller;
   }
- Add the widgets needed to display a Map in an app.
@override
Widget build(BuildContext context) {
    return MaterialApp(
      home: Scaffold(
        appBar: AppBar(
          title: const Text('Maps Sample App'),
          backgroundColor: Colors.green[700],
        ),
        body: GoogleMap(
            onMapCreated: _onMapCreated,
            initialCameraPosition: CameraPosition(
              target: _center,
              zoom: 11.0,
            ), // CameraPosition
        ), // GoogleMap
      ), // Scaffold
    ); // MaterialApp
  }
}
- Add the markers widgets to add the widget to your app.
   body: GoogleMap(
      onMapCreated: _onMapCreated,
      initialCameraPosition: CameraPosition(
         target: _center,
         zoom: 11.0,
      ),
      markers: {
         const Marker(
               markerId: const MarkerId("Sydney"),
               position: LatLng(-33.86, 151.20),
            ), // Marker
      }, // markers
   ), // GoogleMap
   ...
- Add an info window to the marker.
      const Marker(
            markerId: const MarkerId("Sydney"),
            position: LatLng(-33.86, 151.20),
            infoWindow: InfoWindow(
               title: "Sydney",
               snippet: "Capital of New South Wales",
            ), // InfoWindow
      ), //Marker
      ...
Congratulations! You've built an Flutter app that displays a Google map with a marker to indicate a particular location and provide additional information in an info window. You've also learned how to use the Google Maps for Flutter package.
