تنظيم صفحاتك في مجموعات
يمكنك حفظ المحتوى وتصنيفه حسب إعداداتك المفضّلة.
الخطوة 6: الحملة على "إعلانات Google"
المقدمة وتأثير النشاط التجاري
ولعرض "إعلانات للمنتجات داخل المتجر"، عليك ربط حسابك على "إعلانات Google". من
قائمة "معلومات النشاط التجاري والحسابات" في "الإعلانات للمنتجات داخل المتجر"، يتوفّر عنوان URL
وربط حسابك. يمكنك استرداد حسابك أو إنشاء حساب بالانتقال إلى
إعلانات Google: وهي مدرجة في الزاوية العلوية اليمنى من الشاشة بجوار
الملف الشخصي لحسابك. نسخ هذا الرقم ولصقه في "ربط حساب إعلانات Google"
نموذج الحساب، ثم اختَر إرسال طلب الربط.
لطلبات البيانات من واجهة برمجة التطبيقات، يجب إضافة النطاق التالي:
https://www.googleapis.com/auth/adwords
ربط حساب "إعلانات Google" في Merchant Center
يمكنك ربط حساب على "إعلانات Google" أو إنشاؤه من خلال Merchant Center.
يتوفّر مزيد من التفاصيل في دليل مساعدة Merchant Center.
ربط حسابك على "إعلانات Google"
سجِّل الدخول إلى إعلانات Google باستخدام الحساب الذي يحتوي على حسابك على "إعلانات Google".
الحملات:
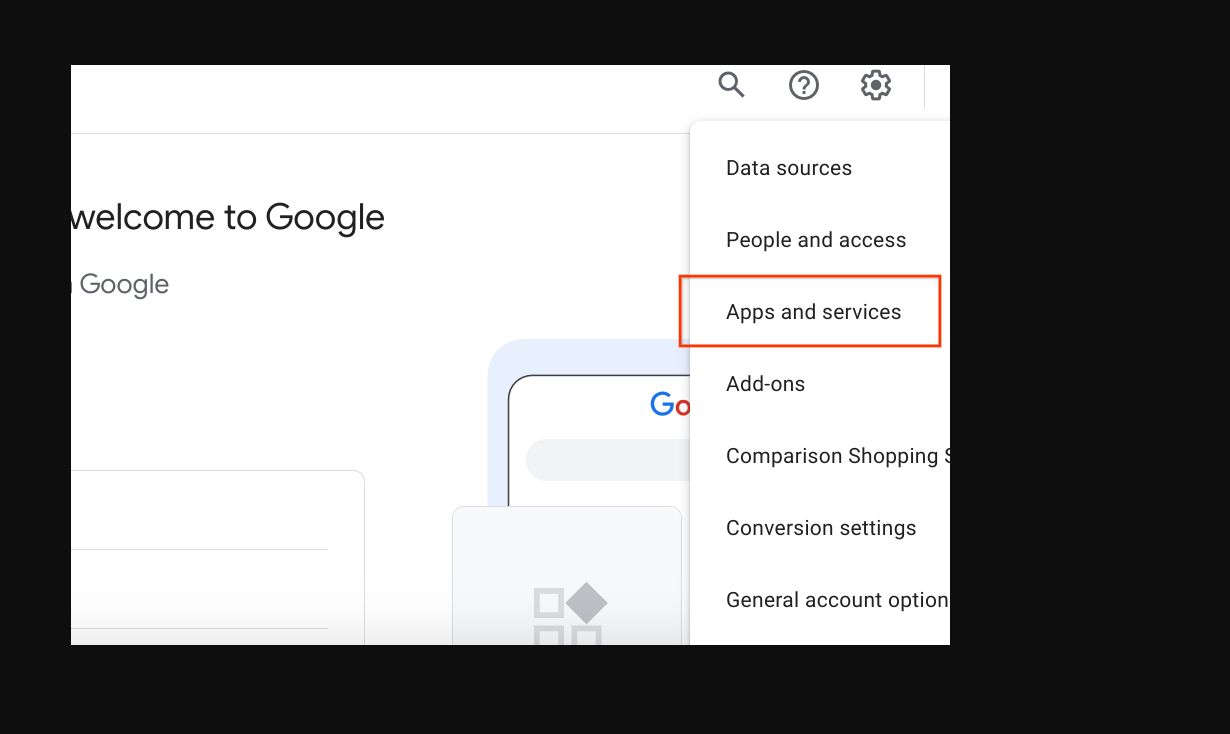
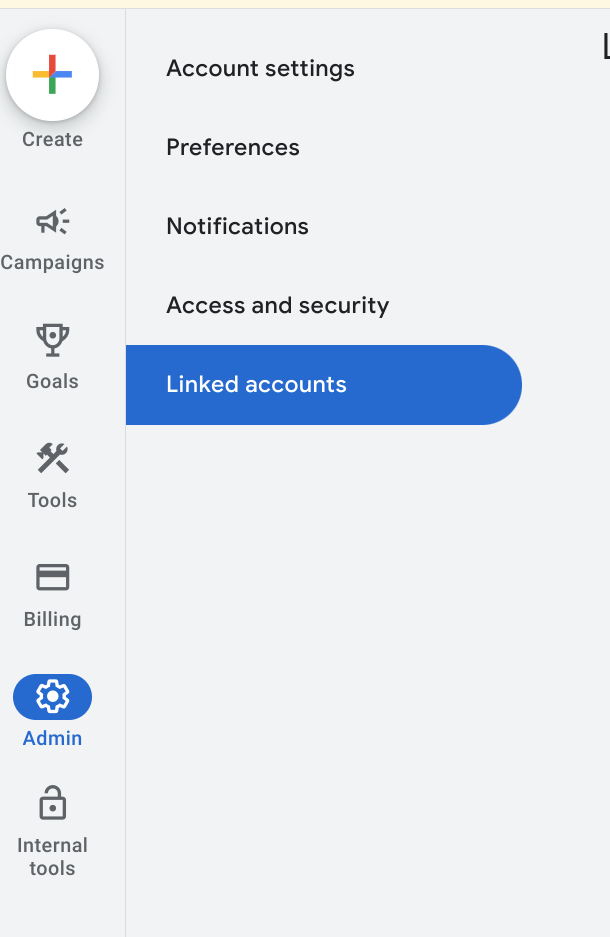
انقر على "المشرف" الإعدادات، ثم انقر على الحسابات المرتبطة.
تظهر قائمة بالتطبيقات التي يمكنك الربط بها. إذا قمت بربط
هوية الحساب أثناء تفعيل "الإعلانات للمنتجات داخل المتجر" في Google Merchant Center
في الأعلى، مع إدارة رابط. تتوفّر خدمة Google Merchant Center في
قائمة عامة، تحتوي على "التفاصيل" فربما تكون قد ربطت الحساب الخاطئ
تسجيل الدخول إلى حساب إعلانات Google غير الصحيح، أو عدم ربط الحساب في
الكل. انتقِل إلى قسم تفعيل بيانات المنتجات داخل المتجر المجانية من أجل:
لإكمال هذه الخطوة. حدد "إدارة "الرابط".
مرتبطة
غير مرتبط
في نافذة "طلبات ربط الحسابات"، انقر على عرض الطلب.
تظهر نافذة توفر لك معلومات عن الحساب
يطلبون الرابط. اختَر موافقة.
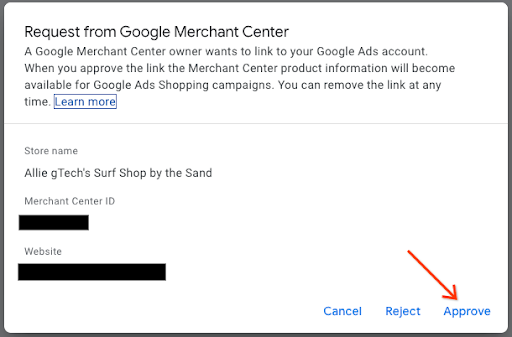
عند الربط، تُظهر طريقة العرض الجديدة الحساب المرتبط بحالة
"مرتبط".
طريقة عرض "إعلانات Google"
عرض في Merchant Center
إنشاء حملة على "إعلانات Shopping" وتفعيل المنتجات المحلية
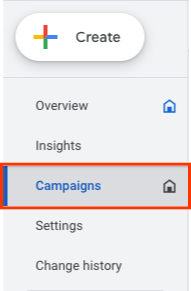
على يمين الشاشة، اختر "الحملات"، ثمّ في
نوافذ الحملات، اختر "إنشاء". في حال ظهور نافذة، اختَر
"+ حملة جديدة".
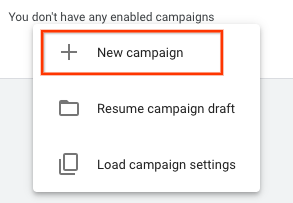
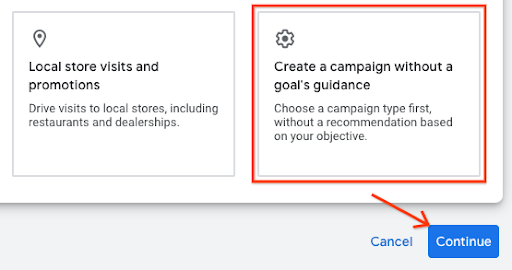
عند ظهور شاشة اختيار الحملة، اختَر
"إنشاء حملة بدون تحديد هدف معيّن". بعد ذلك، انقر على متابعة.
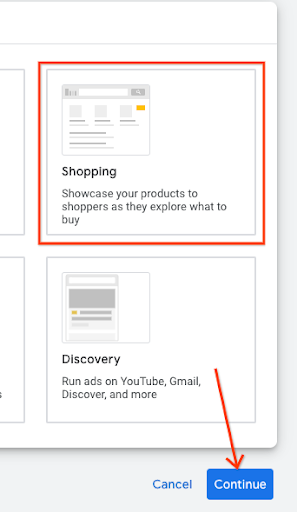
في مجموعة الخيارات التالية، اختَر التسوّق. قِلَّة
ثم انقر على "متابعة".
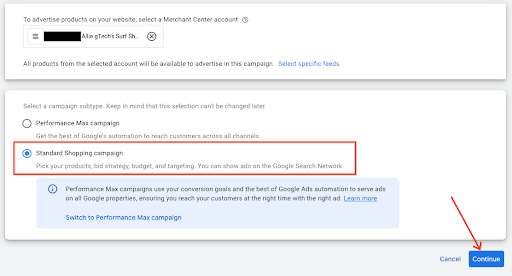
وفي الأسفل تمامًا، تظهر عدة خيارات جديدة. أولاً، تأكَّد من أنّ التاجر
هو الحساب المدرج في حقل النص. بعد ذلك، اختَر
"حملة Shopping عادية" بدلاً من "حملة الأداء الأفضل"
اختَر "متابعة".
تظهر القائمة التالية ضمن "الإعدادات العامة". أدخِل اسمًا للحملة
ثم ضمن المنتجات المحلية، انقر على شارة الرتبة لتوسيع القائمة. ضَع علامة في المربّع.
"تفعيل الإعلانات للمنتجات التي تُباع في المتاجر المحلّية"
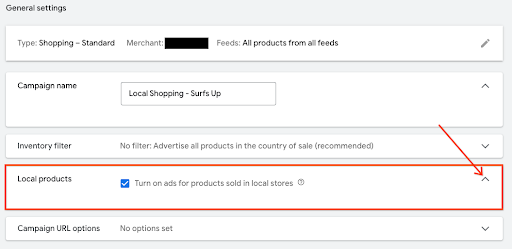
انتقِل إلى أسفل الصفحة واختَر إنشاء حملة. عند الحفظ
ستظهر الحملة المنشأة حديثًا على شاشة الحملة
إرشادات تجربة المستخدم
يمكنك المساعدة في ربط الحملة في وقت مبكر من خلال ربطها كجزء من حساب التاجر
عملية جمع البيانات.
الإرشادات الفنية
بالنسبة إلى "إعلانات Google"، إذا كنت تريد استخدام واجهة برمجة التطبيقات، تأكّد من أنك أضفت
النطاق التالي:
https://www.googleapis.com/auth/adwords.
بالنسبة إلى ربط الحسابات، تستهلك الطلب التالي:
CustomerClientLinkService. هذا يأخذ
MutateCustomerClientLinkRequest، الذي يقبل customer_id.
تاريخ التعديل الأخير: 2025-07-25 (حسب التوقيت العالمي المتفَّق عليه)
[null,null,["تاريخ التعديل الأخير: 2025-07-25 (حسب التوقيت العالمي المتفَّق عليه)"],[[["\u003cp\u003eTo run local inventory ads, link your Google Ads account to your Merchant Center account, ensuring the correct account is selected for a seamless connection.\u003c/p\u003e\n"],["\u003cp\u003eCreate a Standard Shopping campaign in Google Ads and enable local products to display ads for items sold in your physical stores.\u003c/p\u003e\n"],["\u003cp\u003eFor API access, include the \u003ccode\u003ehttps://www.googleapis.com/auth/adwords\u003c/code\u003e scope to manage your Google Ads campaigns programmatically.\u003c/p\u003e\n"],["\u003cp\u003eMerchants can link an advertising account managed by a third party if they don't directly handle their own Google Ads campaigns.\u003c/p\u003e\n"]]],["To utilize local inventory ads, link your Google Ads account in Merchant Center by finding your account number on Google Ads and sending a link request. In Google Ads, navigate to \"Linked Accounts\" under the \"Admin\" settings and \"Approve\" the Merchant Center link request. To create a Shopping Ads campaign, select \"Campaigns\" then \"+New Campaign,\" choose \"Shopping,\" and \"Standard Shopping Campaign\". Finally, enable \"Turn on ads for products sold in local stores\" and create your campaign. For API access, add the `https://www.googleapis.com/auth/adwords` scope.\n"],null,["Step 6: Google Ads Campaign\n---------------------------\n\n### Introduction and Business Impact\n\n*** ** * ** ***\n\nFor local inventory ads, you need to link your Google Ads Account. From the\nBusiness Information and Accounts menu for Local Inventory Ads, there's a URL to\nlink your account. You can retrieve your account or create one by going to\n[Google Ads](https://ads.google.com). It's listed in the top-right corner of the screen next to\nyour account profile. Copy and paste this number in the Link a Google Ads\nAccount modal, then select, \"**Send Link Request**\".\n\nFor API requests, you need to add the following scope: \n\n https://www.googleapis.com/auth/adwords\n\n### Link the Ads Account in Merchant Center\n\nYou can link or create a Google Ads account through Merchant Center.\nMore details are available in the [Merchant Center Help guide](https://support.google.com/google-ads/answer/12499498).\n\n#### Link your Google Ads Account\n\n1. Login to [Google Ads](https://ads.google.com) with the account that contains your Google Ads\n Campaigns.\n\n2. Click the \"Admin\" settings wheel, then select \"**Linked Accounts**\".\n\n3. A list of applications appears that you can link to. If you linked the\n account identity while enabling Local Inventory Ads, Google Merchant Center\n should be at the top, with Manage \\& Link. Google Merchant Center is in the\n general list, with \"Details\" you may have either linked the wrong account,\n logged into the incorrect Google Ads account, or have not linked the account at\n all. Visit the [*Enabling Free Local Inventory Ads Listing*](https://developers.google.com/merchant/storebuilder/local/sections/4_0_enabling_and_configure_lia_pos#enabling_free_local_product_listings) section to\n complete this step. Select \"**Manage \\& Link**\".\n\n *Linked*\n\n *Unlinked*\n\n4. In the Link Requests window, select \"**View Request**\"\n\n5. A modal appears providing you information about the account that is\n requesting the link. Select \"**Approve**\"\n\n6. When linked, the new view shows the account that is linked with the status of\n \"**Linked**\".\n\n *Google Ads View*\n\n *Merchant Center View*\n\n#### Create Shopping Ads Campaign and Enable Local Products\n\n1. Login to [Google Ads](https://ads.google.com)\n\n2. Along the left hand side of the screen, select \"**Campaigns** \", then in the\n Campaigns windows, select \"**Create** .\" If a window appears, select\n \"+ **New Campaign**.\"\n\n3. When the campaign selection screen appears, select\n \"**Create a campaign without a goal's guidance** .\" Then, select \"**Continue**\".\n\n4. On the next set of options, select the \"**Shopping** \" tile,\n then select \"**Continue**.\"\n\n5. Just below, several new options appears. First, make sure your merchant\n account is the one that is listed in the text field. Then, select\n \"**Standard Shopping Campaign** \" instead of the Performance Max Campaign,\n select \"**Continue**.\"\n\n6. The next menu appears under General Settings. Provide a Campaign name,\n then under local products, click the chevron to expand the menu. Check the box,\n \"**Turn on ads for products sold in local stores**.\"\n\n7. Go to the bottom, and select \"**Create Campaign**.\" When saved,\n the newly created campaign appears on the campaign screen.\n\n### UX Guidance\n\n*** ** * ** ***\n\nYou can help link the campaign earlier by linking it as part of the merchant\ncollection process.\n\n### Tech Guidance\n\n*** ** * ** ***\n\n- For Google Ads, if you want to use the API, ensure that you've added the following scope:\n\n https://www.googleapis.com/auth/adwords.\n\n- For account linking, you consume the following request:\n CustomerClientLinkService. This takes the\n [MutateCustomerClientLinkRequest](https://developers.google.com/google-ads/api/reference/rpc/v13/MutateCustomerClientLinkRequest), which accepts a *customer_id*.\n\n- You can create a new campaign programmatically by consuming\n the [CampaignService](https://developers.google.com/google-ads/api/reference/rpc/v13/CampaignService).\n\n- For more information about how to use the Google Ads API, visit the following\n [Client Libraries and Example](https://developers.google.com/google-ads/api/docs/client-libs) page.\n\n| **Tip:** The merchant doesn't need to use their own Ads account. If the merchant's ad business is managed by a different account other than their own, they can use the same link method to link their account."]]