장면 양식의 증강 얼굴 개발자 가이드
컬렉션을 사용해 정리하기
내 환경설정을 기준으로 콘텐츠를 저장하고 분류하세요.
앱에서 증강 얼굴 기능을 사용하는 방법을 알아보세요.
샘플 앱 빌드 및 실행
AugmentedFaces 자바 앱을 빌드하고 실행하려면 다음 안내를 따르세요.
Android 스튜디오 버전 3.1 이상을 엽니다. 증강 얼굴로 작업하려면 Android Emulator가 아닌 실제 기기를 사용하는 것이 좋습니다.
기기는 USB를 통해 개발 머신에 연결되어야 합니다. 자세한 단계는 Android 빠른 시작을 참조하세요.
AugmentedFaces 자바 샘플을 프로젝트로 가져옵니다.
Android 스튜디오에서 Run
을 클릭합니다. 그런 다음 기기를 배포 대상으로 선택하고 OK를 클릭하여 기기에서 샘플 앱을 실행합니다.
승인을 클릭하여 카메라에 샘플 앱에 대한 액세스 권한을 부여합니다.
앱에서 전면 카메라를 열고 카메라 피드에서 즉시 얼굴을
추적해야 합니다. 여우 귀의 이미지를 이마 양쪽에 배치하고 여우 코를 내 코 위에 배치합니다.
장면으로 애셋 가져오기
ARCore 세션 구성
감지된 얼굴에 액세스하기
감지된 얼굴에 효과 렌더링
애셋을 장면 모드로 가져오기
증강 얼굴에 사용하는 애셋의 크기 및 위치가 올바른지 확인합니다. 도움말과 증세는 증강 얼굴 애셋 만들기를 참고하세요.
장면의 증강된 얼굴 메시에 텍스처 및 3D 모델과 같은 애셋을 적용하려면 먼저 애셋을 가져옵니다.
런타임 시 ModelRenderable.Builder
를 사용하여 *.sfb
모델을 로드하고 Texture.Builder
를 사용하여 얼굴의 텍스처를 로드합니다.
// To ensure that the asset doesn't cast or receive shadows in the scene,
// ensure that setShadowCaster and setShadowReceiver are both set to false.
ModelRenderable.builder()
.setSource(this, R.raw.fox_face)
.build()
.thenAccept(
modelRenderable -> {
faceRegionsRenderable = modelRenderable;
modelRenderable.setShadowCaster(false);
modelRenderable.setShadowReceiver(false);
});
// Load the face mesh texture.
Texture.builder()
.setSource(this, R.drawable.fox_face_mesh_texture)
.build()
.thenAccept(texture -> faceMeshTexture = texture);
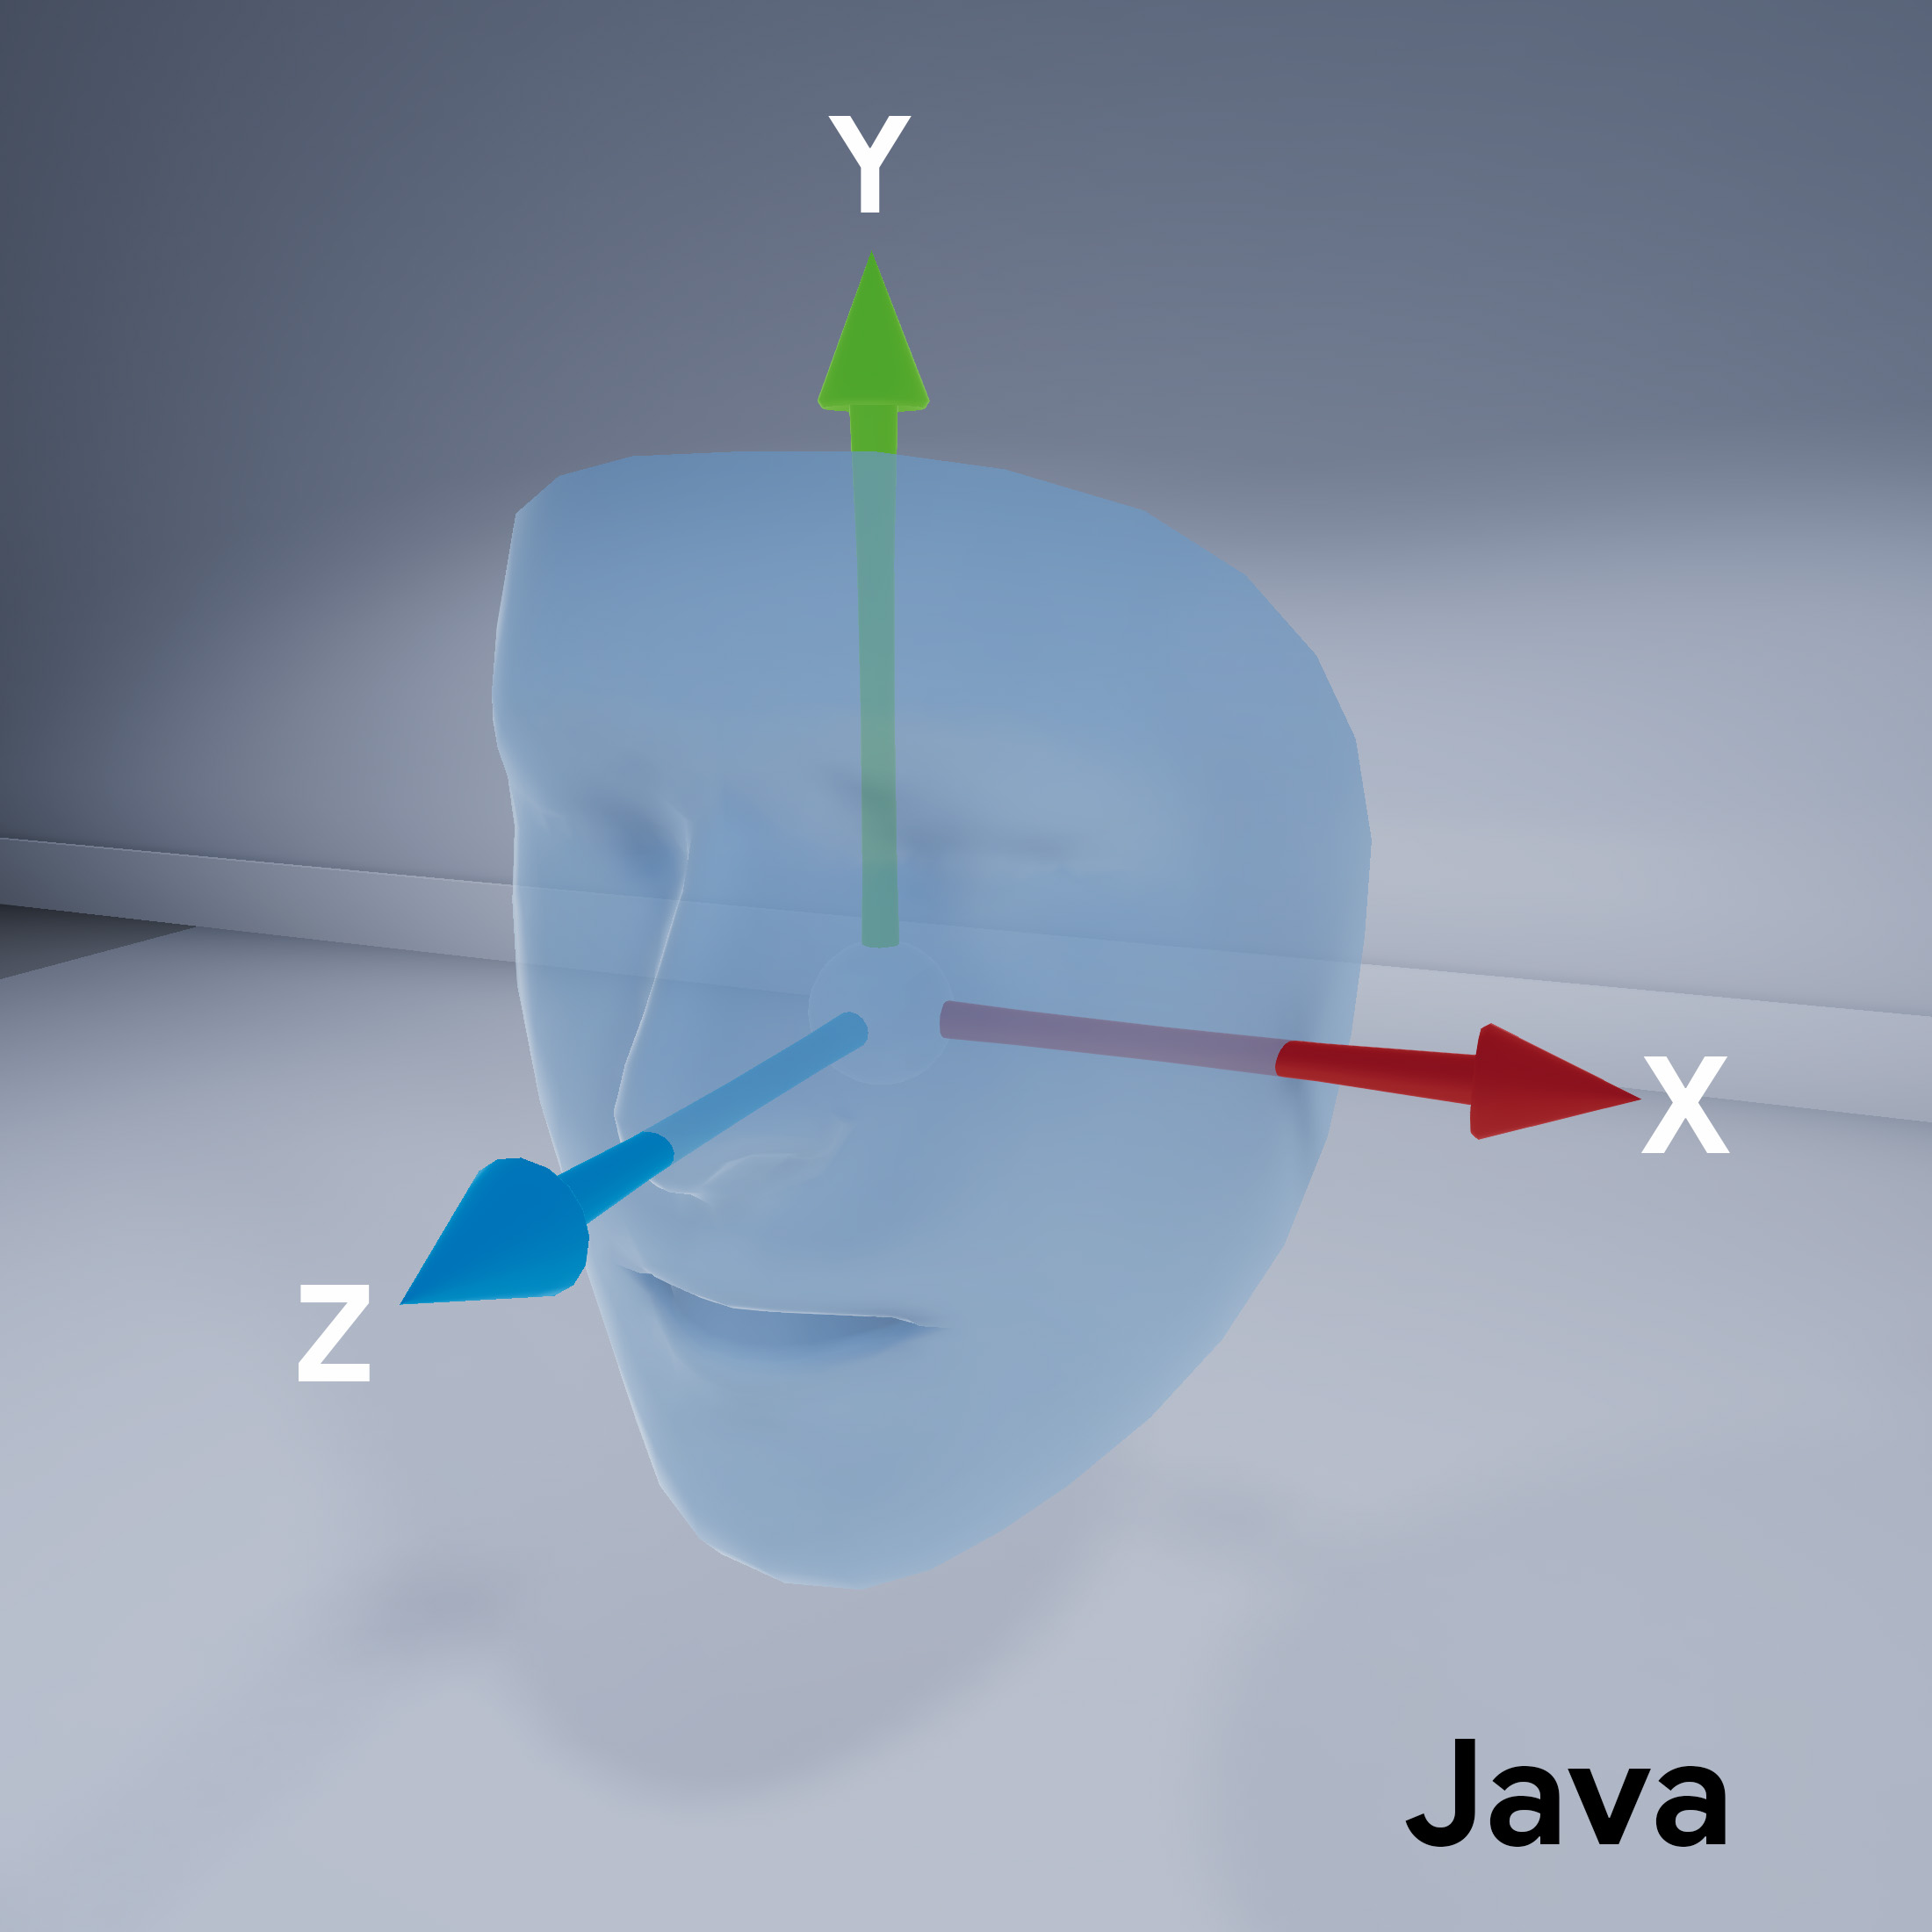
얼굴 메시 방향
장면 양식의 얼굴 메시 방향을 확인합니다.
![]()
증강된 얼굴의 경우 전면 (셀카) 카메라를 사용하고 얼굴 메시 지원을 사용하도록 ARCore 세션을 구성해야 합니다. sceneform에서 이렇게 하려면 ARfragment 클래스를 확장하고 구성을 재정의합니다.
@Override
protected Set<Session.Feature> getSessionFeatures() {
return EnumSet.of(Session.Feature.FRONT_CAMERA);
}
@Override
protected Config getSessionConfiguration(Session session) {
Config config = new Config(session);
config.setAugmentedFaceMode(AugmentedFaceMode.MESH3D);
return config;
}
활동 레이아웃에서 서브클래스화된 ArFragment
클래스를 참조하세요.
인식된 얼굴에 액세스
AugmentedFace
클래스는 Trackable
클래스를 확장합니다. 앱 활동에서 AugmentedFace
를 사용하여 감지된 얼굴에 액세스하려면 addOnUpdateListener()
메서드에서 호출합니다.
// Get list of detected faces.
Collection<AugmentedFace> faceList = session.getAllTrackables(AugmentedFace.class);
얼굴 효과 렌더링
효과를 렌더링하려면 다음 단계를 따르세요.
for (AugmentedFace face : faceList) {
// Create a face node and add it to the scene.
AugmentedFaceNode faceNode = new AugmentedFaceNode(face);
faceNode.setParent(scene);
// Overlay the 3D assets on the face.
faceNode.setFaceRegionsRenderable(faceRegionsRenderable);
// Overlay a texture on the face.
faceNode.setFaceMeshTexture(faceMeshTexture);
…
}
달리 명시되지 않는 한 이 페이지의 콘텐츠에는 Creative Commons Attribution 4.0 라이선스에 따라 라이선스가 부여되며, 코드 샘플에는 Apache 2.0 라이선스에 따라 라이선스가 부여됩니다. 자세한 내용은 Google Developers 사이트 정책을 참조하세요. 자바는 Oracle 및/또는 Oracle 계열사의 등록 상표입니다.
최종 업데이트: 2022-09-26(UTC)
[null,null,["최종 업데이트: 2022-09-26(UTC)"],[[["\u003cp\u003eThis guide explains how to utilize the Augmented Faces feature in your Android applications to overlay assets and textures onto detected faces in real-time using Sceneform and ARCore.\u003c/p\u003e\n"],["\u003cp\u003eIt involves importing relevant assets, configuring the ARCore session for front-facing camera and face mesh support, accessing the detected face data, and rendering the desired effects by attaching nodes to the face.\u003c/p\u003e\n"],["\u003cp\u003eThe guide provides code samples for key steps like asset loading, session configuration, and rendering, emphasizing correct asset scaling and positioning for optimal results.\u003c/p\u003e\n"],["\u003cp\u003eIt highlights the importance of understanding the face mesh orientation within Sceneform and using the \u003ccode\u003eAugmentedFace\u003c/code\u003e class to access and manipulate the detected face data.\u003c/p\u003e\n"],["\u003cp\u003eDevelopers can build and run a provided sample app showcasing the Augmented Faces functionality with a fox-themed overlay before integrating the feature into their own projects.\u003c/p\u003e\n"]]],["To use Augmented Faces, first, build and run the sample app by importing it into Android Studio, running it on a physical device, and granting camera access. Then, import assets, ensuring they are correctly scaled and positioned. Configure the ARCore session to use the front camera and enable 3D face mesh support. Access detected faces using the `AugmentedFace` class within the `addOnUpdateListener` method. Finally, render the effect by creating an `AugmentedFaceNode`, setting its parent to the scene, overlaying 3D assets and a texture onto the face.\n"],null,["# Augmented Faces developer guide for Sceneform\n\nLearn how to use the Augmented Faces feature in your own apps.\n\nBuild and run the sample app\n----------------------------\n\nTo build and run the **AugmentedFaces Java** app:\n\n1. Open Android Studio version 3.1 or greater. It is recommended to use a\n physical device (and not the Android Emulator) to work with Augmented Faces.\n The device should be connected to the development machine via USB. See the\n [Android quickstart](/sceneform/develop/android-quickstart) for detailed steps.\n\n2. Import the [AugmentedFaces Java sample](//github.com/google-ar/sceneform-android-sdk/tree/v1.15.0/samples/augmentedfaces)\n into your project.\n\n3. In Android Studio, click **Run** . Then,\n choose your device as the deployment target and click **OK** to launch the\n sample app on your device.\n\n4. Click **Approve** to give the camera access to the sample app.\n\n The app should open the front camera and immediately track your face in the\n camera feed. It should place images of fox ears over both sides of your\n forehead, and place a fox nose over your own nose.\n\nUsing Augmented Faces in Sceneform\n----------------------------------\n\n1. [Import assets into Sceneform](#import-assets)\n\n2. [Configure the ARCore session](#configure-session)\n\n3. [Get access to the detected face](#get-access)\n\n4. [Render the effect on the detected face](#render-effect)\n\n### Import assets into Sceneform\n\nMake sure that assets you use for Augmented Faces are scaled and positioned\ncorrectly. For tips and practices, refer to [Creating Assets for Augmented Faces](/sceneform/develop/augmented-faces/creating-assets).\n\nTo apply assets such as textures and 3D models to an augmented face mesh in Sceneform,\nfirst import the assets.\n\nAt runtime, use [`ModelRenderable.Builder`](/sceneform/reference/com/google/ar/sceneform/rendering/ModelRenderable.Builder)\nto load the `*.sfb` models, and use the [`Texture.Builder`](/sceneform/reference/com/google/ar/sceneform/rendering/Texture.Builder)\nto load a texture for the face. \n\n // To ensure that the asset doesn't cast or receive shadows in the scene,\n // ensure that setShadowCaster and setShadowReceiver are both set to false.\n ModelRenderable.builder()\n .setSource(this, R.raw.fox_face)\n .build()\n .thenAccept(\n modelRenderable -\u003e {\n faceRegionsRenderable = modelRenderable;\n modelRenderable.setShadowCaster(false);\n modelRenderable.setShadowReceiver(false);\n });\n\n // Load the face mesh texture.\n Texture.builder()\n .setSource(this, R.drawable.fox_face_mesh_texture)\n .build()\n .thenAccept(texture -\u003e faceMeshTexture = texture);\n\n### Face mesh orientation\n\nNote the orientation of the face mesh for Sceneform:\n\n### Configure the ARCore session\n\nAugmented Faces requires the ARCore session to be configured to use the\nfront-facing (selfie) camera and enable face mesh support. To do this in\nSceneform, extend the [ARfragment](/sceneform/reference/com/google/ar/sceneform/ux/ArFragment)\nclass, and override the configuration: \n\n @Override\n protected Set\u003cSession.Feature\u003e getSessionFeatures() {\n return EnumSet.of(Session.Feature.FRONT_CAMERA);\n }\n\n @Override\n protected Config getSessionConfiguration(Session session) {\n Config config = new Config(session);\n config.setAugmentedFaceMode(AugmentedFaceMode.MESH3D);\n return config;\n }\n\nRefer to this subclassed `ArFragment` class in your activity layout.\n\n### Get access to the detected face\n\nThe `AugmentedFace` class extends the `Trackable` class. In your app's activity,\nuse `AugmentedFace` to get access to the detected face by calling it from the [`addOnUpdateListener()`](/sceneform/reference/com/google/ar/sceneform/Scene#public-void-addonupdatelistener-scene.onupdatelistener-onupdatelistener)\nmethod. \n\n // Get list of detected faces.\n Collection\u003cAugmentedFace\u003e faceList = session.getAllTrackables(AugmentedFace.class);\n\n### Render the effect for the face\n\nRendering the effect involves these steps: \n\n for (AugmentedFace face : faceList) {\n // Create a face node and add it to the scene.\n AugmentedFaceNode faceNode = new AugmentedFaceNode(face);\n faceNode.setParent(scene);\n\n // Overlay the 3D assets on the face.\n faceNode.setFaceRegionsRenderable(faceRegionsRenderable);\n\n // Overlay a texture on the face.\n faceNode.setFaceMeshTexture(faceMeshTexture);\n\n ...\n }"]]