Page Summary
-
Corporate Badges are provisioned by linking an external user account to a Google Wallet account through an authentication and association flow.
-
Users can add Corporate Badges to Google Wallet from Android apps, Wearables (initiated from a phone), and websites.
-
The provisioning process involves accepting terms of service, account creation (if needed), and background service configuration.
-
Service Providers might have specific requirements and limitations regarding Wearable provisioning and access to Google Play services APIs for integration.
-
Websites initiating Corporate Badge provisioning should integrate "Sign in with Google" and leverage a loading screen during the redirect to Google Wallet.
To provision a new Corporate Badge, the user must complete an authentication and association flow on their device. This links their external user account to a Google Wallet account. This document describes that process at a high level across different surfaces.
Add to Google Wallet from an Android app
In this section, we describe the flow to save a card to Google Wallet from a Service Provider's Android app.
User flow
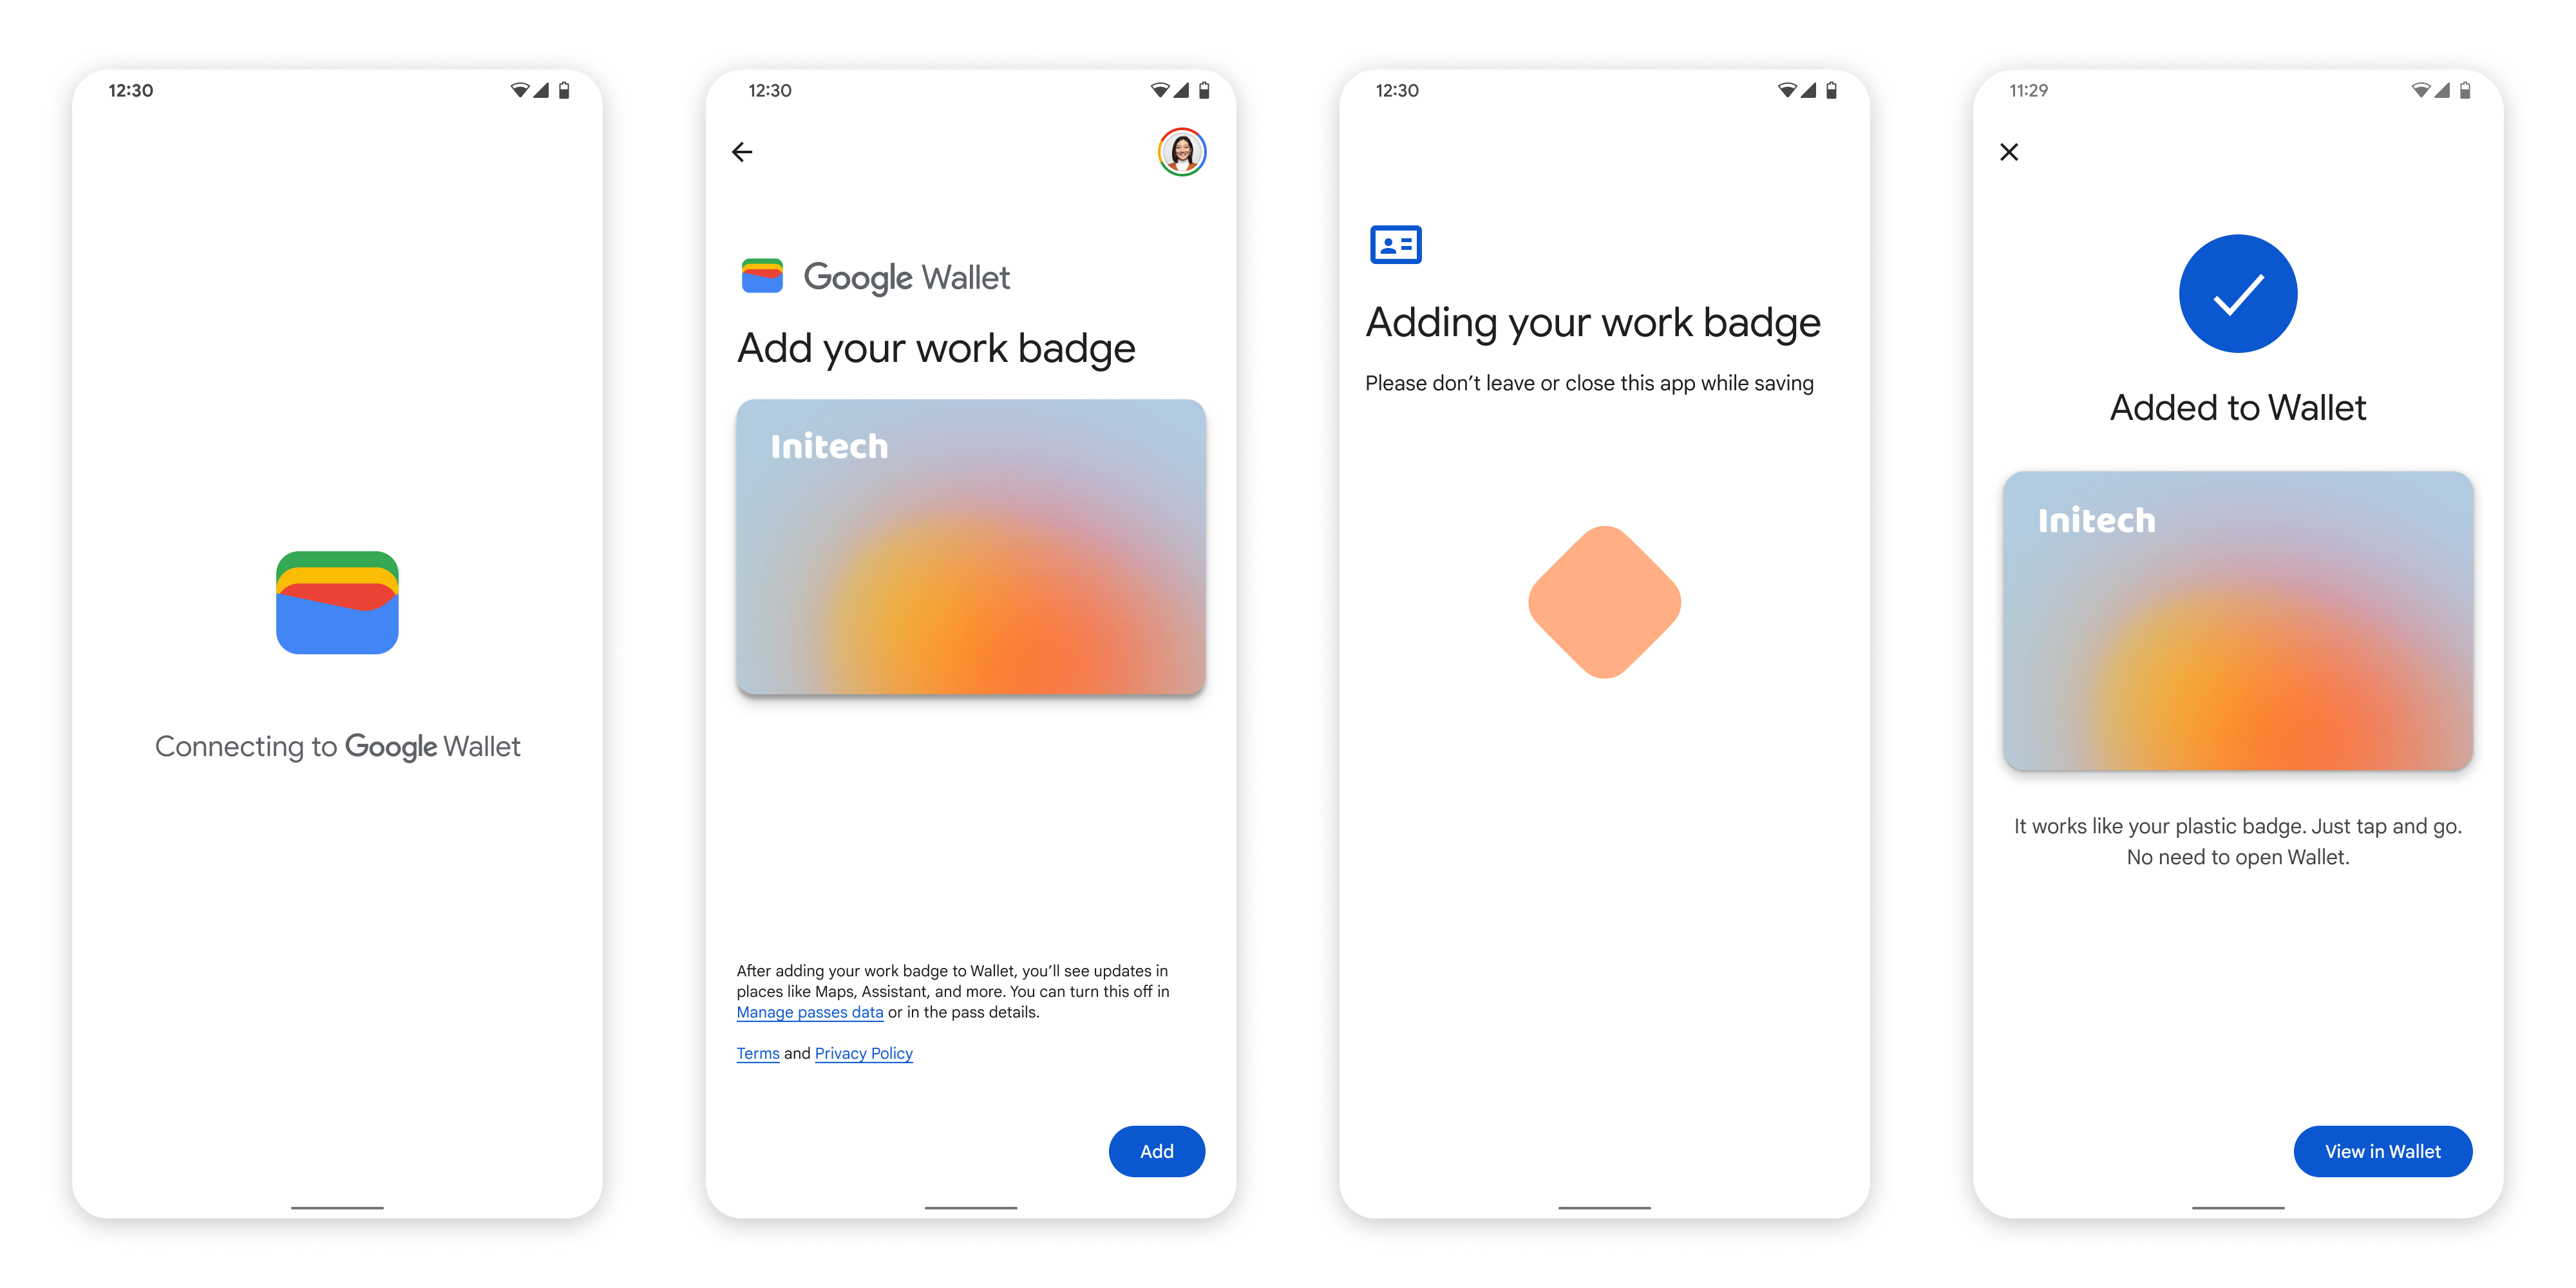
These figures illustrate the user flow to provision a Corporate Badge from a Google Wallet perspective.
- A spinning connection animation is shown to the user while network connectivity and initial services configure.
- After this completes, the user accepts the Terms of Service and continues with the flow.
- A spinning save animation is shown to the user while background services provision the account on the device.
- After the services complete, a success screen appears.
- The user might be prompted in subsequent screens to download the Google Wallet app, if it doesn't already exist on their device.
Key points
- If the card is already saved to the selected Google Account, the user is instead shown a link to open the card in the Google Wallet app, where they can view card details.
- If the card is saved to a Google Account other than the one the user is logged into, the user receives a message that indicates another Google Account has already saved that card.
- If the user attempts to add a card and doesn't have a Google Account, a prompt to create an account appears. After creation of the Google Account, the flow continues normally.
- Apps that support Corporate Badge flows need to integrate with Google Play services APIs. However, the method calls from the Service Provider app to Google Play services aren't available in the publicly distributed version of Google Play services. The Service Provider app developer must add and get access to custom modules to call certain methods. Check with your Service Provider for more information.
Add to Google Wallet on a Wearable from an Android app
Users can provision to their Wearables by initiating the provisioning flow on their phone and selecting a single Wearable, as seen in this figure:

Key points
- Provisioning to a Wearable requires a phone capable of provisioning a card; therefore, both need to be paired.
- Users can provision to their phone and Wearable in a single flow, or they can restart the flow to add it to a Wearable after the first provisioning to their phone is complete.
- Users should be limited by the Service Provider to provisioning only a single Wearable.
- If a Wearable is unpaired from the phone, the digital card remains on the device, but the user won't be able to provision a card to a 2nd Wearable without deleting the 1st.
- Inquire with your Service Provider about the availability of Wearable provisioning.
- Apps that support Corporate Badge flows need to integrate with Google Play services APIs. However, the method calls from the Service Provider app to Google Play services aren't available in the publicly distributed version of Google Play services. The Service Provider app developer must add and get access to custom modules to call certain methods. Check with your Service Provider for more information.
Add to Google Wallet from a Website
This section describes the flow to save a card to Google Wallet from an issuer's website.
Step 1: Sign in to Website
The first step in the flow is to sign in to the issuer's website and select the Add to Google Wallet button.
Step 2: Sign in with Google
The user completes Sign in with Google and then sees a loading screen on the issuer's website before being redirected to Google Wallet in the next step.
Step 3: Complete Provisioning
The user completes the provisioning flow within Google Wallet.
Add to Google Wallet from an app in work profile
If a user has the Service Provider's app installed in their Android Work Profile, they can still add the Corporate Badge to Google Wallet, which runs in their personal profile. When the user taps the Add to Google Wallet button from an app in a work profile, Google Wallet lands the user to the Google Wallet app in personal profile where user can continue to add their card. The rest of the card management is consistent with how card management is done when card is directly saved from personal profile.